Sunday, December 31, 2017

Vintage Candy on the Wood Cookstove: Divinity

December 23rd was devoted to Christmas cooking at our house.  Nancy and I made the second batch of Christmas Crack (aptly named for its entirely too addictive traits) and several vegetable/cracker dips.  Then, niece Josie came over again, and we made caramels and penuche, baked three dozen Danishes of various fruit flavors and a batch of mountain-top cookies, assembled an egg casserole, and made divinity.

I don't care for divinity.  Let me just say that right up front.  If it were the last candy on earth, I'm sure that my terrible sugar addiction would cause me to eat it by the handful, but since we are not in such dire straits, I could never taste it again and not feel deprived of anything.  However, it is one of the candies that my aunt Meme always made at Christmas.  She first taught me how to make it in December of 1985, and we made it together every year until she left her own home in 1992 at the age of 97.  I've made it alone many times since then, but it is a candy that I much prefer to have help with--I'll explain why in a minute.  

There was only one year that I didn't make divinity for Christmas; that was in 2009.  It always seemed to me that not very many people in our family liked it, so I decided to skip it that year.  My cousin Cory asked where it was at our family get together, and I explained that I had decided to forego it since I didn't think very many of us ate it.  He was so disappointed because he confessed that night that the divinity was his favorite of all the homemade candies.  I felt terrible since he was in the service at that time, and all of the comforts of home were doubly important to him that Christmas.

I assured him that I would make it again the next Christmas.  However, he was killed in a car accident in the fall of 2010 just after he had been discharged.  Now, I always feel like making the divinity is not just a Christmas tribute to Meme but also to Cory as well.

Divinity is a very old-fashioned, fat-free candy that apparently many other people besides my family associate with Christmas.  I saw it for sale in our local Super Saver this season, and one always sees it in the Christmas issues of the Vermont Country Store Catalog.  Meme used to tell me that she and her sister Pearl were in charge of making the candy in her home when she was young, and I often imagine what it would have looked like when the two of them would be cooking fudge, divinity, and penuche on the old Monarch range in the enormous farmhouse which used to stand where my first cousin and his family now live.

To make divinity, the first three things that you have to do are to put the teakettle on the fire, spread about 2 1/2 feet of waxed paper on a table or counter, and prepare whatever decoration you would like to put on top of each piece of candy.  I usually see some kind of nut like a pecan or a walnut on divinity when I see it for sale in a store.  Meme always poked a maraschino cherry half on the top of each piece of divinity, so that is what I do.  Before even beginning to make the candy, I cut however many maraschino cherry halves as I feel like I will need. This year, my niece Josie completed that task.
Josie cutting maraschino cherries in half.
Lay the maraschino cherry halves on a paper-towel covered plate while you complete the rest of the steps for the divinity.  You want them to be as dry as possible when you eventually use them.

Into a heavy-bottomed, two- or three-quart saucepan, place 2 1/2 cups white sugar, 1/2 c. hot water, 2/3 c. light corn syrup, and 1/4 tsp. salt (I always omit the salt).  Stir to get everything combined; then, place this directly over the firebox so that it comes to a boil quickly.  

The sugar, corn syrup, and hot water mixture
coming to a boil directly over the firebox.
The same mixture at a full boil.
When this comes to a full boil, you can move it away from the fire if you want, but it must continue to boil until it reaches the hard ball stage.  I always test this by using the cold water method where you drop a little of the sugar syrup into a coffee cup of cold water and then touch it with your finger to see how hard it is.  Test this frequently and start doing it early because this part of the process does not take very long at all, and you don't want to leave the syrup on the fire a moment longer than necessary. I'm convinced that this is where I erred in the two batches that have failed me in the last 32 years.

While the syrup is cooking, beat two egg whites until soft peaks form.

Beating the egg whites was Josie's responsibility, too.
Once the sugar syrup has cooked, pour the boiling syrup over the beaten egg whites very slowly, beating the mixture the whole time.  This is the first place where it is very helpful to have two people.  One can pour, and one can beat.

Now comes the hard part.  You must beat this egg white and hot syrup mixture until it begins to thicken.  I've seen this take about a half hour, but usually takes quite a bit less than that.  Either way, your arm will get tired. When it begins to thicken, add a half tsp. of vanilla flavoring.

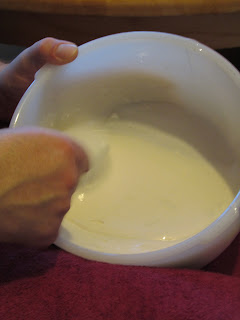
Beating the divinity candy.
Now comes the tricky part.  When this begins to get thick and the glossy look has left it, you know you are now done with beating the candy. However, don't think you can sit back and rest and enjoy looking at it.  This is the point where you have to work like lightening.

VERY QUICKLY, drop the candy by heaping teaspoons full onto the waxed paper you had spread out earlier.  (Even with two of us doing this, the last pieces of divinity to be dropped looked considerably different than the first ones.)  As soon as you are done dropping the candy, poke whatever you are going to dress up the candies with into the tops.

Let the candies dry for a while before handling them, then put them in whatever container you will store them in.  These will become extremely soft and sticky if you leave them in an airtight container, so we always leave the lid of their tins slightly ajar in order to prevent that.


Two tins of divinity candy.
Here is the recipe in the original form I had copied it:

2 1/2 c. sugar
2/3 c. light corn syrup
1/2 c. hot water
1/4 tsp. salt
2 egg whites
vanilla

Pour hot water over sugar, corn syrup, and salt.
Stir until sugar is dissolved.
Cook until hard.  
Pour over stiffly beaten egg whites.
Beat until thick.  Drop on waxed paper.

I hope you've all had a joyous time celebrating Jesus' birth.  Things have been very busy and extremely cold here (right now the outdoor thermometer says -24 degrees, but I think it is not quite that cold out), and I'm looking forward to things calming down a bit and being able to enjoy some home time.

Friday, December 22, 2017

Cheating with Your Cookstove: Using the Warming Oven to Make Rice

I have always liked rice.  I can remember it being one of my favorite foods when I was very little, perhaps because Mom started feeding it to me shortly after I was weaned from rice baby cereal.  On Mom's side of the family, both my grandma and Aunt Meme made it.  It was always served as a starch in place of the usual potato, and it was sprinkled with sugar and cinnamon.  At school it was served the same way, only they put raisins in it too.  I wonder if this is a regional thing because I remember talking to a lady from Southern California when I was in college, and she thought I was crazy when I told her about putting sugar and cinnamon on rice.  She said that she grew up eating it with salt on it.  Maybe you readers can clear that mystery up for me.

Anyway, with my new schedule permitting me to be home more often for noon dinner, I have sometimes resorted to using instant rice as my staple.  The way I always used to make instant rice was by bringing the designated amount of water to a boil in a saucepan that has a tight-fitting lid.  Then, I would add an equal amount of instant rice, cover the saucepan tightly, remove it from the fire (or slide it as far away from the firebox as possible), and let it stand five minutes.

However, I'm really pleased with my new method.  It takes advantage of both the warming oven and the ever-present teakettle.  The first thing to do is put the teakettle directly over the fire so that the water is boiling.  Then, half fill a clean pint jar with instant rice.

The teakettle boiling directly over the fire with
the instant rice ready in the pint jar in the
warming oven.  A hamburger steak is frying to
the right of the teakettle.
Pour a cup of boiling water over the rice in the pint jar.  Make sure to stir the mixture a little so that all of the rice has been exposed to the water.  Then lay a canning lid over the mouth of the jar, put it into the warming oven and close the door.  (I keep a stash of clean, used canning lids on hand.)

The instant rice and water mixture just after being put in the
warming oven.
Of course, all that is to be done now is to let the rice stand in the warming oven for five minutes.

The finished rice ready to be served.
This method of preparing instant rice has a some advantages:

a) A little time is saved by not having to bring water to a boil in a saucepan (although, if your teakettle is hot, you could save time by pouring boiling water into the saucepan).

b) If your cooktop is small and cluttered with other cooking vessels, your rice at least won't be taking up any precious cooking space.

c) If you don't eat all of the rice, the leftovers are already in a container that can conveniently go in the refrigerator.

d) I think the canning jar is easier to wash than a saucepan.

If you have a warming oven and have occasion to prepare instant rice, give this method a try and let me know how it works for you.  I've classified this as a "cheating with your cookstove" post because instant rice is definitely "cheating" in my book.  Sometime I'll have to share Nancy's and my favorite way to prepare rice.  It is definitely not instant, and the result is much tastier than this, but this does in a pinch.  We all get into cooking pinches due to time constraints sometimes, and I just want to show that a wood cookstove can be the cook's best friend even in one of those pinches.

The pictures you see are from the preparation of my noon dinner today.  Marjorie was very busy since the day was largely spent making different things for Christmas.  My niece Josie came over and we made our traditional recipe for fudge and then tried a vintage recipe for orange fudge, which didn't turn out too well.  I was also boiling cider to make a pork loin for Nancy's family's Christmas. 

In an idle moment, Josie snapped a picture through the kitchen window of my brother's cattle, and she was dead set on me sharing it with you in this post.  Hope you enjoy it.


Saturday, December 16, 2017

Using Corn Cobs as Fuel in a Woodburning Cookstove

Harvest is finished here in the Corn Belt, and it seems like this would be a very appropriate time to talk about using corn cobs as fuel in a woodburning cookstove.  Cobs were an extremely popular cooking and heating fuel in the Midwest for a long period of time, but despite the fact that in this day and age more cobs are produced annually than at any other time in history, using them as fuel has become obsolete.

Some Basic Information about Corn Cobs--

First, let me explain what a corn cob is for those who are not familiar with the corn plant--especially since this blog has international readership. What we Americans call corn is really more properly known as maize.  It is considered the most domesticated crop in the world.  Technically classified as a grass, the seeds of the plant grow on something called an "ear."  An ear of corn grows inside of tightly connected leaves called "husks."  The next layer inside the husk is several hairlike strands called the "silk."  The silk is what catches the corn pollen and transports it to the corncob, where the kernel of corn is formed.

An ear of ripe corn complete with husk and silk.

Originally, corn was harvested by picking each ear by hand.  By about 1940, most farmers had gone to mechanical corn pickers that still picked the entire ear.  Corn could either be fed as whole ears to cattle and hogs, or the corn would be "shelled" (removing of the corn kernels from the cob) later and fed to livestock whole or ground, or sold as a cash crop.

In our area, it was around 1970 when most farmers switched from harvesting corn by picking the whole ear to using machines called "combines."  A combine is so named because it combines the processes of picking the ear and shelling the corn all as it travels through the field.  The empty corn cobs are sent out the back end of the combine along with bits of stalk, husk, and leaves to fall roughly where they grew, becoming a part of the "crop residue" that is left in the field to return nutrients to the soil and prevent erosion.  However, compared to the leaves, husks, and stalks of the corn plant, the cob is of little value as crop residue.

The corn cob is rough in texture and lightweight.  It feels a little like a tube of tightly rolled paper.  Because the cob is also fibrous, moisture affects it easily.  Cobs dry quickly, but they also are very absorbent and can quickly become wet even when simply exposed to high humidity.

Because of this light, fibrous structure and rough texture which creates an abundance of surface area, dry corn cobs ignite quickly.  They burn very hot and very fast, leaving only short-lived embers behind.

Historical Use of Corn Cobs as Fuel--

As American settlers moved westward into the plains states, trees were fewer and farther apart, so pioneers began to turn to other fuels besides wood in order to do their heating and cooking.  We've all heard stories of them using "prairie coal," which was a fancy name for buffalo chips or cow chips.  The word "chips" itself is a euphemism for the dried dung of these animals.  I've actually burned some cow chips in my cookstove, and they don't work too badly, but I'd have to admit that the smoke does not have a very pleasant odor.

Settlers would also use dried grass (hay) as fuel by twisting it into bundles called "cats."  Special cooking stoves were even designed in order to facilitate burning hay more efficiently and conveniently.

However, as more and more acres came under corn production, the corn cob became the prairie fuel of choice.  Abundant, cheap, relatively clean to handle, and easy to ignite, the corn cob enjoyed wide use as fuel across the Great Plains for many decades.  This article shows how largely the cookstove and the corn cob affected life here in earlier days.  It is also important to note that before the advent of the chain saw, harvesting firewood was a much more arduous task than it is today, making the corn cob even more desirable fuel because once the corn has been shelled, the cob is ready to be burned.

Historical accounts of life on the Great Plains are replete with stories about burning corn cobs for heating and cooking.  In some research that I did about the Schoolchildren's Blizzard of 1888, many of the memoirs mentioned corn cobs being the only fuel that was used in the farm homes of rural Nebraska.  Some also talked about the fact that their schoolhouses were heated with cobs which the different families in the district took turns furnishing.

This is a Library of Congress photo of a Mrs. Emma
Bettenhausen pouring corn cobs in her kitchen range
 in Nov. 1940.  She lived in McIntosh County,
 North Dakota.


Burning corn cobs in cookstoves became such a common thread in the fabric of rural life that last summer when I met veteran Southwest Iowa radio homemaker Evelyn Birkby, who is still broadcasting on KMA in Shenandoah at the age of 98, the first thing she said upon finding out that I cook on a woodburning range was "Then you know exactly how many corn cobs it takes to bake an angel food cake."

This made me think of my aunt Ellen's mother Dorothy.  As a young girl, it was Dorothy's job to stand by the open firebox door of her mother's wood cookstove and shove one cob into the fire at a time in succession in order to maintain even oven heat while her mother was baking.  (I don't doubt that this story is true, but it does seem to me like keeping the firebox door open constantly would have absolutely ruined the efficiency of the fire because of the spoiled draft.  Perhaps this was the only solution Dorothy's mother had found for a cantankerous stove.)

The fact that corn cobs were so widely used as cooking fuel was not lost on the retail establishments of the day, either.  My copies of vintage Sears catalogs show that as late as the 1920s, corn cobs were listed alongside wood, coal, coke, and rubbish as possible fuels for their ranges.  Some of the earlier catalogs even list "chips" among their fuels.

The architecture of farm buildings was even affected by the use of corn cobs for fuel.  Due to the fact that cobs can take on moisture so easily, it was important to keep cobs sheltered so that they would remain dry for burning.  On our farm, the combination wash house/garage (a wash house was a building separate from but near to the house where the weekly chore of clothes washing was completed) was outfitted so that its second story was used for cob storage.  I'm told that the cobs were delivered to the wash house side of the first floor via a chute that emptied into a bin somewhere near the laundry stove.

A similar setup was built at Nancy's grandparents' farm.  Their wash house was divided into two rooms.  The north room was for cob storage.  Cobs were shoveled into a small door at the top of the north wall.  They were accessed on the wash house side through a people-sized door which was to the right of the stove.  When they broke up housekeeping in 2010, I sifted through quite a few cobs which were still there in order to salvage the anthracite coal which was also stored in that room.

At the house where my maternal grandmother lives, a building called "the cob house" stood just inside the back gate between the driveway and the kitchen.  One side of it was used to store corn cobs, and the other side housed a Delco Light Plant.  The Delco generator was removed with the arrival of Rural Electrification in our area in the 1930s, but the corn cobs remained in use for cooking and water heating for at least another decade.

My paternal grandmother lived on a farm just over the hill from where Nancy and I live, and she told me that their cobs were stored in a lean-to which was attached to their wash house.  She said that somehow or other the corn cobs caught fire, and the whole building was quickly reduced to ashes.  She remembered that the fire was particularly hot because of the corn cobs.

My great-great aunt Meme (born in 1895 and mentioned in the About Me section to the left) never married and remained on the home farm with my great-great grandparents until they moved in order to make room for my newlywed grandparents in 1947.  At sometime during the mid-1920s, the large, beautiful farmhouse that they lived in was equipped with hot running water furnished by a Monarch range in the kitchen, but during hot days in the summer, they had a three burner kerosene stove that they cooked on. She frequently reminisced with me about her early life, and I remember her talking about the fact that after a hot summer's day of outdoor work, she would build a corn cob fire in the green and cream Kalamazoo cookstove in their summer kitchen, heat a teakettle of rainwater, and use that to take a bath in a washtub.  The corncob fire was perfect for this since it was quick to kindle but did not linger after it had served its purpose.

Meme also talked about how she and her brother and sister hated to gather corn cobs.  Of course, if the corn had been shelled to feed to poultry or to sell, those corn cobs were not difficult to collect.  However, ear corn was fed to hogs by just giving them the whole ear.  The hogs would chew the corn off the cob and leave the corn cobs lying about their pen.  It was the kids' job to get into the hog pen and retrieve the scattered cobs, which would often be quite dirty, not to mention the fact that hogs can be pretty ornery, too.

In order to maximize the capacity of a bushel basket (commonly called "cob baskets" when hauling this cargo was their primary function), it was the practice among some farm families to stand cobs vertically in a ring around the outer edge of the basket.

My cob basket filled and stacked in the old fashioned
way.  You'd be amazed at how long it took to pick up
this many cobs in the harvested field.

Cob baskets were often put on the floor next to the firebox side of the stove to make fueling easier.  Unfortunately, this could be a dangerous situation since cobs catch fire so easily.  In antique cookbooks, it is not uncommon to see warnings about keeping the cob basket a safe distance from the range.

I once had to interview my paternal grandparents about life during the Great Depression.  In the course of the conversation, Granny told me that the price for corn dropped so low that her parents began to burn not just corn cobs, but whole ears of corn.  (I don't know why they wouldn't have burned wood instead.)  Gramps agreed that many farmers did that and said that he remembered his folks tried it too, but they found it too depressing.  I can understand that since in those days so much of the work of corn production was done by hand.

How I Use Corn Cobs Today--

Corn cobs burn just as well today as they did in the past, and as I said, there are many more of them available per field than ever before. However, two things have changed which have made them less desirable as fuel for me.  The first is that they are no longer a common by-product of regular barnyard chores.  Thus, in order to collect enough of them to make any size fire, one has to spend a lot of time bent over picking them up off the ground.  The second change is the construction of wood cookstove fireboxes.  The traditional design of a wood cookstove included a firebox depth that was usually less than twelve inches.  This kept the fire very near the cooktop, making the use of corn cobs very efficient.  The depth of the Margin Gem's firebox makes it so that I would have to have a quite a lot of cobs burning in order to raise the temperature of the stovetop sufficiently to do any type of cooking.

Since it is a traditional cookstove, the firebox of the Riverside Bakewell in our summer kitchen is well suited to burning corn cobs.  You can see what a corn cob fire looks like in the Riverside Bakewell in the picture below.

A corn cob fire in the Riverside Bakewell cookstove.  I was
canning brown rice and cooking chicken when this photo was
snapped.
My favorite use for corn cobs now is for starting the fire.  The addition of a few dry corn cobs to the usual sticks of kindling when lighting a fire insures that the fire will start without any difficulty.  Until this year when she turned ninety, my maternal grandmother would collect all of the stray corn cobs that would find their way into her barnyard on farm machinery and send them to me in boxes, cat food sacks, or milk cartons that she would cut open.  I always appreciated getting them because it was sort of the same as receiving fire-starting insurance from her.

Somehow I doubt that we will ever see widespread use of the corn cob as household fuel again, but I did run across this article about using corn cobs in commercial coal-powered power plants that I thought was very interesting.  The article is almost ten years old, however, and I would like to try to find some follow-up information.  The article also talks about the corn cob harvesting implement that can be attached to the back of a combine in order to save the cobs as well as the grain.  Maybe I'll have to buy one for my brother for Christmas!  (Sorry, Kev.  Way out of our budget.)

Anyway, please use the comments section to share your memories about burning corn cobs in a kitchen range, or--especially if you live outside the Midwest--tell about whether corn cobs were ever used as fuel in your area of the world, or if you still burn cobs, talk about that too!


Wednesday, December 13, 2017

An Amazing Gift

Sometimes the generosity of others can be astounding, and last week I was completely stunned by an amazing gift given to me by a family friend.

For a couple of years now, I have voluntarily been the head cook at a supper in the church where my wife Nancy grew up.  It is a fun job because all of the ladies who help with the preparations are fabulous cooks themselves, so they are excellent help.  All they need me for is to be the chief.

As a thank you for that service, two of the ladies (a mother-daughter team) decided to give me a gift at the group's Christmas potluck supper last Wednesday evening.  After supper, they placed a very large gift bag in front of me, and when I finally got past all of the tissue paper, I was shocked.  It was a good kind of shock, of course, but it was shock nonetheless.

Inside all of that paper was an antique miniature cookstove.


Since my fascination with woodburning cookstoves originated with a similar stove, and since I know what these are worth, I was totally humbled by the generosity of these ladies.


The left side of the "Pet" cookstove.

With the firebox and oven doors open.  Notice the working
dump grate in the firebox.
 An interesting fact about this particular stove is that someone has built a fire in it at some point.  The inside of the firebox shows black creosote along the walls.


Another interesting feature is that it has a working oven damper.  The lever for the oven damper is best seen in the first picture.  It is located on the front of the stove between the oven door and the reservoir.  In the top picture you can see it in the open position, and in the bottom one it is closed.


A prolonged search of the internet has not yielded information about this particular model of miniature stove, but I suspect that it was made by either the Ideal or Kenton companies around 1900.  The husband/father of the pair of ladies bought it on an auction and was quite pleased with it.  An experienced wood burner himself, he was at our house for a couple of Christmas potlucks and thoroughly enjoyed the Margin Gem cookstove in our kitchen, and I feel quite honored to now have his cookstove as a part of my collection. 

Thank you so much, ladies!

Note on 12/27/17: Further research has uncovered the following link where a similar stove is discussed.

https://www.collectorsweekly.com/stories/59889-tiny-wood-burning-stove--toy-or-salesma

Thursday, November 30, 2017

A Word about Chain Saws

I'm sorry about the recent lack of posts.  I had been working for quite a while on a very long post about using corn cobs as fuel in a wood cookstove, but somehow during a botched attempt to download photographs to it, I managed to delete it, and it is taking me a long time to rewrite it.

In the meantime, I've been extremely busy with lots of different things. One of those things has been cutting wood.  Actually, it is the one thing that I really feel pressured about right now.  We have had extraordinarily beautiful, dry fall weather--prime woodcutting days, really--and I wish that I could be spending more time on putting fuel by.  However, the school is keeping me really busy substitute teaching, and I have discovered that I love it.  I'm feeling very blessed that each day is now full of a variety of work that I truly enjoy.

Anyway, while I was cutting wood on Tuesday evening, I was thinking about the fact that I've been intending to write a post about chain saws for quite a while now.  Though this is a blog about cooking on a woodburning cookstove, if the cookstove user is also the one in charge of procuring the fuel, it is most likely that a good chunk of his or her time is spent with a chain saw.  In the twenty years that I have been heating and cooking with wood, I have cut the vast majority of that fuel myself, and even though the intricacies of the internal combustion engine remain a mystery to me, I do have one bit of sage advice about chain saws: spend a little extra money and buy a good one.

For the first several years of cutting firewood, I felt like I could only afford to buy low-cost chain saws.  I won't share with you the brands that I purchased because this post isn't intended to be a bashing or an endorsement of any particular manufacturer.  The bottom line is that when I was buying cheap saws, I was spending a lot of time putting slipped chains back on, replacing chains, or getting chains sharpened, and getting the saws to start became more and more difficult as the they aged.  I was frequently taking saws to small engine shops to be repaired--and having to figure out how to get more wood cut in the meantime.  Further, none of the saws lasted very long.

Then, while about the fifth saw that I owned was in the shop for an extended period, I decided to go ahead and buy a more expensive one.  I purchased a Stihl saw from our local Bomgaars store.  I paid roughly twice the price that I had been paying per cheap saw, but it has been one of the best investments I have ever made.  I've lost track of how long I've had this saw now, but it has certainly needed fewer repairs than any of the previous saws, and it has actually saved me a large amount of money because it has lasted so much longer.

My much used Stihl chain saw.


Again, I'm sure there are other brands of saw that are quite good, and while I am extremely pleased with my Stihl, this is not an advertisement for them.  My point is that it is poor economy for an avid woodstove user to purchase low-cost chain saws.  In my opinion, they will take more of your money in the long run than a higher quality, more expensive chain saw.

Feel free to tell us which brand of chain saw you like the best in the comments section below.

Tuesday, November 7, 2017

Green Tomato Pie


A couple of weeks ago, we had our first hard freeze, so I spent the two days before that madly scurrying to get the last of the vegetables out of the garden.  Since then, I've been pickling beets, making cole slaw, and otherwise putting food into storage as I've had time.  I've still got dishpans and baskets full of apples, peppers, and green tomatoes to take care of.

The dishpan of bell peppers and tomatoes that I picked before the freeze.
Years ago, when I worked in our local bank (which was between full-time teaching stints), we had a customer named Fern.  I can't remember Fern's last name, but I remember that she was from Denison, Iowa, so she had about an hour's drive in order to get to our little town.  When she came to the bank, she almost always brought us some of her baked goods, and once she brought us a green tomato pie.  I was fascinated and asked for the recipe.  In the fifteen years that I've had Fern's recipe, I've never made it, but with this year's garden having been so bountiful right up until the end, I've now made three of these pies in the Margin Gem cookstove.  The Margin Gem does a beautiful job of baking pies--better than our gas oven, I think, because there is less humidity in the oven.

To make a green tomato pie, you want to have green tomatoes that are freshly picked and have not had any time to begin to ripen.  If the tomatoes have even the slightest tinge of orange or softness to them, the result will be much more like a ketchup pie than green tomato pie.  For this reason, the first green tomato pie I made this year was superior than the two that you see in these pictures.  If your tomatoes are firm and very green, you'll have a hard time distinguishing between this and an apple pie.

You will need the following ingredients:

      • Prepared pastry dough for a double-crust pie
      • Enough green tomatoes for a nine-inch pie (The original recipe says 4 or 5 tomatoes, but I used Romas, so it took more like ten.  I don't measure the fruit for pie filling.  I do like my grandma Marian taught me and use the green  2 1/2-quart bowl from my multi-colored vintage Pyrex set, and stop peeling/paring when I know I've reached the right amount by how it looks in the bowl.  Sorry!)
      • 1/4 cup flour
      • 1 cup white sugar
      • 1 TBLSP. white vinegar (The original recipe called for 2 TBLSP. of vinegar, but I've changed the second tablespoon to orange juice to help avoid the ketchupy taste.) 
      • 1 TBLSP. orange juice  
      • cinnamon to taste (You could use whatever spices you would ordinarily reach for to flavor your apple pie.)
Directions:

1. Build your fire so that you have a hot oven.  Because our cookstove is being fired constantly now, this process is a little different than it would be if I was starting the fire from scratch just to bake a pie.  Last night, for example, the fire was keeping the oven right around 300-325 degrees.  To get it as hot as I wanted it for when the pies first go into the oven, I put in several pieces of wood that I would ordinarily have used as kindling. These brought the oven up to the temperature that I wanted and kept it nice and hot for the full hour of baking time.

2. Cut the tomatoes into small chunks as you would with apples.


The right amount of green tomatoes in the green Pyrex bowl.
3. Add the flour, sugar, vinegar, orange juice, and cinnamon.

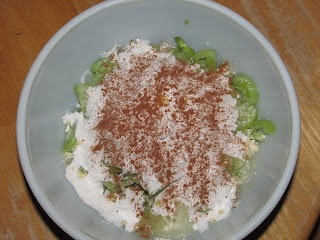
The green tomatoes with the flour, sugar, vinegar, orange juice
and cinnamon.
4. Stir all together.

The filling ingredients all stirred together.

5. Assemble your pie, being sure to vent the top crust.

6. Place in a hot oven (400-425 F) so that the crust cooks quickly.  After ten or fifteen minutes, let the fire cool down to moderate heat (350-375 F) to finish cooking the filling.  The pie should be in the oven for approximately an hour.
Two green tomato pies in the oven of the Margin Gem. I put tin
foil under them to make sure that they don't run over onto the
bottom of the oven.
7. Remove the pies from the oven to cool.


The finished product.

A slice of green tomato pie.
The first green tomato pie that I made was a huge hit with my family.  My sister-in-law, an excellent baker herself but not a tomato lover, liked it, and so did my brother.  My grandmother, who was a superior baker in her day, thought it was delicious too, but none of them would have guessed that it was made out of green tomatoes.

The second pies were made with tomatoes that were a little riper, so they had a slight tomato flavor.  People at school liked them, though, and you can't imagine what fun it is to have people guess what the pie is made of.  I think Fern would be proud!

Tuesday, October 17, 2017

A New Experience with Wood Heated Hot Water

On Sunday, something new happened with the water heating system that is attached to Marjorie the Margin Gem cookstove.

Wait.  Maybe I should rephrase that.  What happened really wasn't new, but how it affected me was new.

Are you confused already?  If not, you should be.

Let's see if I can explain this.

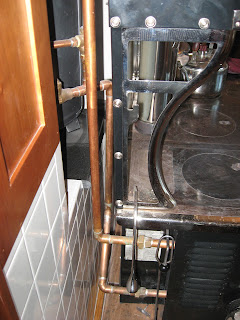
First, it is important to understand how the hot water system works.  Cold water enters the middle of the boiler on its north side.  Cold water exits the bottom half of the tank through the lower pipe on the south side and enters the waterfront (or water jacket) in the Margin Gem.  The waterfront is a hollow box on the left side of the firebox where fire brick would ordinarily be.

An old picture of the Vaughn range boiler before
it was connected to the Margin Gem.
A look inside the firebox of the Margin Gem.
The top of the picture is the back of the firebox.
You can see that firebrick lines the back, right side,
and lower half of the front under the door.  The
black left side is the waterfront.
Just like hot air, hot water rises, so when the water in the waterfront gets hot, it rises through the top pipe into the upper part of the range boiler.  It is displaced in the waterfront with cooler water from the bottom of the boiler. This circulation between the stove and the boiler eventually results in the whole tank being filled with hot water.  Since it is only natural convection that is moving the water and no pump, it is called a thermosiphon.

When a hot water faucet is opened somewhere in the house, the hot water exits the top of the boiler, passes through a mixing valve which cools it by adding cold water if necessary, and then travels to its point of use.  The mixing valve allows us to manually adjust the maximum temperature of the hot water delivered throughout the house.  We have always kept this at its highest setting, however.

We officially turned off our electric hot water heater for the winter season on Sept. 27th.  Since then, all hot water used in our house has been heated by wood.  Of course, at this time of year the temperature has not been cold enough to demand that a fire be burning in the range all the time.  Having a fire in the morning to make breakfast and at night to cook supper is pretty much sufficient to supply us with enough hot water for our household needs unless we are doing quite a bit of laundry.

Because of this cyclical fire schedule, we often have times when the water in the Vaughn range boiler is hot, but the fire in the stove has been reduced to relatively cool coals.

This means that the water in the tank can be hotter than the water in the waterfront inside the firebox of the range since the firebox is lower than the tank and hot water rises.

A picture showing the height of the tank relative
to the height of the waterfront in the firebox of
the Margin Gem.
Thus, when the fire is rekindled, it takes a while for the water in the waterfront to heat up.  When it finally gets hot enough to start the thermosiphon again, it often does so with an audible whoosh.  If both the boiler and the stove are cold, the thermosiphon starts so gradually that you don't hear a thing.

So what happened on Sunday?  Well, we were not home for noon dinner, so the breakfast fire was allowed to go out.  After getting dirty while working outside in the afternoon, I needed a shower before we left for evening Bible study.  There was plenty of hot water in the tank for my shower, but we were in a frost warning for Monday morning, so I knew we needed a fire to not only keep the house warm enough but also to heat the water for showers the next morning.

I re-lit the fire and then immediately jumped in the shower.  The water in the boiler was at a comfortable temperature for showering since the fire had been been basically out for over six hours at that point.  I didn't have any cold water turned on at all.

I could feel the water getting a little cooler throughout my short shower, but that is normal for both the electric and wood-fired water heating systems. Then toward the end of my shower, the water suddenly became quite hot. It took me a few seconds to realize that the water in the waterfront had finally become hot enough to restart the thermosiphon, and since I had only turned on the hot water valve in the shower, I was feeling the full effects.

The temperature change was not so extreme that I was burned or anything, and if we didn't have our mixing valve set so high, I probably wouldn't have even noticed it.  However, I wanted to share this experience here so that if any other people use a water heating system that operates like ours, they can be aware that an event like this is possible.

If you heat your domestic hot water with a waterfront in a woodstove of any kind and have had a similar experience, please tell about it in the comments section below.

Friday, October 6, 2017

Another Use for the Warming Oven: Softening Crystalized Honey

You'd think that after using a wood cookstove for almost twenty years that I wouldn't very often run across a new trick.  But no, I'm continually amazed by the versatility and usefulness of these ranges.

My latest new discovery is that the warming oven is a great place to soften honey which has crystalized.

Honey crystallization is a very natural process, and will happen to all honeys eventually.  However, it is inconvenient when you want to use honey in its liquid form.

The honey that you see in the picture below was purchased from Van Sickle Bees, a local honey producer.  It originally came in one of those plastic bear-shaped containers, but I put the honey in a mason jar because I was worried that the floor of the warming oven would get too hot and melt the plastic.


After a while in the warming oven, the honey returned to its liquid state. Once the honey has re-liquified, you want to let the honey cool to room temperature slowly so as not to encourage it to crystalize again.

Don't be tempted to leave the honey in the warming oven because continued exposure to high temperatures will break down the nutritive value of the honey.

Now we know another reason wood cookstoves are great appliances!

Saturday, September 30, 2017

Piccalilli: An End-of-the-Garden Relish

My grandparents' neighbor Fred used to talk about his family making a relish called "piccalilli."  He used to reminisce about it fondly, so I was excited when I ran across a recipe for it in my 1975 Kerr canning handbook. (Actually, I should say "Mom's" 1975 Kerr canning handbook.  I'm fairly certain that I found it amongst her cookbooks some 20 years ago and cabbaged onto it.)

Another reason I was pleased to see the recipe was because I had raised all of the vegetables it called for in our garden this year.  Here is the way the recipe reads:

Piccalilli

1 quart chopped cabbage
1 quart chopped green tomatoes
2 sweet red peppers, chopped
2 sweet green peppers, chopped
2 large onions
1/4 cup salt
1 1/2 cups vinegar (5% acidity)
1 1/2 cups water
2 cups firmly packed brown sugar
1 tsp. dry mustard
1 tsp. turmeric
1 tsp. celery seed
 
 
All the vegetables to use in piccalilli.  I'll confess that I decided to
use purchased onions.  I have onions from my garden, but I've
already used the big ones and the little ones that are left are best
for use as pearl onions.

 
Chop the cabbage, tomatoes, peppers, and onions.  
 
The chopped vegetables with the salt sprinkled on top.  This
antique crock belonged to my great-great aunt Meme who
taught me to cook and is partly responsible for my fascination
with wood cookstoves.
 
Mix with the salt and let stand overnight.

Vegetables and salt mixed together.  This is one of those pictures
where I wish we had smell-o-vision because the aroma of this mixture
was fantastic.

Next morning, drain and press to remove all liquid possible.

The chopped vegetables draining in a colander.

I used a plate to press as much liquid out of the vegetables as possible.

Boil vinegar, water, sugar, and spices five minutes. 
The sugar, vinegar, water, and spice mixture coming to a boil
directly over the firebox.

Add the chopped vegetable mixture. 


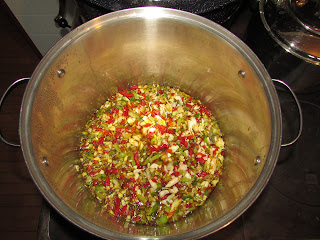
The vegetables coming to a boil after being added to the vinegar/sugar solution.
You can see the water bath canner right behind this kettle over the firebox.


Bring to a boil and pour into sterilized Kerr jars to within 1/2 inch of top.  Put on cap, screw band firmly tight.  Process in boiling water bath five minutes.  Yield: 6 pints.

Now, here are the things I did a little differently:

1. The green peppers that I wanted to use were a little small, so I used three instead of two.

2. I don't like messing with sterilizing jars, so I just had my jars hot by putting them on top of the reservoir.  Then once they were filled, I processed them for ten minutes in the boiling water bath.

3. Maybe my onions weren't large enough, but my batch yielded only four pints and a four ounce jar of piccalilli.

The finished piccalilli.


Since making this recipe of piccalilli, I've researched this stuff a little more and found out that piccalilli varies widely by geographic area.  This particular recipe may be a little more "northeastern United States" in nature because what I've read seams to indicate that Midwestern piccalilli tends to have cucumbers in it.  However, I consulted my 1926 West Pottawattamie County Farm Bureau Women's Cookbook, and the two recipes for piccalilli listed there are very similar to this one.  The major difference seems to be the spices.  Neither one calls for turmeric or celery seed, but both call for cloves.  Further, both call for white sugar instead of brown.  The method is exactly the same, though.
 
I talked to a friend who lived in Maine for a number of years, and she said that piccalilli was served as a relish on the side there.  I've read that others put it on hot dogs, sausage, or hamburgers.  I'm not sure how I'll eat mine, but I know I'm going to enjoy looking at it on the shelf in the fruit room for a while first.
 
Use the comments section below to tell me what piccalilli is like in your area of the world.
 
Note 10/2/2017: Had some of this on top of my BBQ beef sandwich tonight.  It was delicious and added an excellent crunch!
10/18/2017: Also excellent atop a pork burger (no bun) which I served with a mashed potato patty and corn.

Saturday, September 23, 2017

Cheating with Your Wood Cookstove: Creamed Chicken over Biscuits

I don't remember exactly when my mom started making creamed chicken over biscuits, but I remember that I was not a little kid anymore, that it was an instant hit, and that I wondered why she hadn't tried it on us earlier.  Of course, maybe it was all very strategic.  If she had served it to us too early, our palates wouldn't have been developed well enough to fully appreciate the pleasure of this stick-to-your ribs dish, and we might have summarily rejected it as we did with several more "grown up" foods that she tried on us.  She likes to tell people how long her list of recipes-to-try-again-when-the-kids-are-gone was when we were young.

At any rate, it was Mom who initially got me hooked on this entree.  My mother-in-law also has her family hooked on her version of Creamed Chicken over Biscuits, but her method for making it is entirely different.  Both recipes are delicious, but in this post I'm going to share my mom's version.  

You can see from the labels on this post, that this is a dish made from leftovers.  Therefore, prior to this meal, you need to have roasted a chicken (to read about one way to do that in a wood cookstove click here) and made gravy from the drippings.  We had several people in my family as guests for a Sunday dinner back in August and served a roasted chicken with all the trimmings.  After the meal, Nancy picked the leftover chicken off the bones, and we saved the leftover gravy too.  A few days later, we made Creamed Chicken over Biscuits.

The first thing to do is to build a really hot fire.  Biscuits bake best in a quick oven, and so I always use a lot of little sticks, or "biscuit wood," to accomplish this.

The hot fire built of "biscuit wood" in the Margin Gem wood
cookstove.
 
To make biscuits, I used to always cut the shortening into the flour, but I've taken to a different method of incorporating shortening that my friend Leah told me about.  Now, while the oven is heating, I melt my shortening on the stove.  Sometimes I use the warming oven, other times the lid of the reservoir--wherever I think the heat will be sufficient.  This time I used a very small saucepan on the top of the stove.  I melted perhaps a 1/3 cup of Crisco.


While the shortening is melting, sift two cups of flour into a mixing bowl and add around a tablespoon of baking powder to it.  At this point you might sprinkle a little salt in too if you wish.  Mix all the dry ingredients together.

Once the shortening has melted, pour it into a heat-proof measuring cup. Then add enough cold milk or buttermilk to make one cup altogether while stirring constantly.  The coldness of the liquid causes the shortening to congeal again, thus allowing it to be evenly incorporated into your flour. Brilliant!  (I hate washing the pastry blender.)


Pour the buttermilk/shortening mixture over the flour mixture and toss lightly to mix.  Don't work the dough too hard as that will make for tough biscuits later!


Turn the dough out onto a floured board.


Knead the dough a few times, then pat out until it is about an inch thick.


Cut the biscuits in the shape and size you desire.  For many years I cut biscuits with an old metal drinking glass that Gramps kept by the utility room sink when our house was still his home.  The problem was that cutting the biscuits resulted in compressing the air in the glass, and sometimes it would "burp," causing the biscuit to become misshapen.  Last year, one of the fundraisers at school had a set of biscuit cutters on it, and I'm very pleased with my four various sized biscuit cutters.

Six beautifully cut biscuits and one not so beautiful because
it is the trimmings patted together.

Let the biscuits rest for at least five minutes.  The baking powder will cause them to rise a little, and they will be nice and light.

The next step is to put together the creamed chicken.  Here is where this recipe really qualifies as what I would call "cheating."  To whatever leftover gravy you have from the roast chicken dinner, add a can of cream of chicken soup.  Add whatever leftover chicken you have to the gravy/soup mixture.


Pop the biscuits into the hot oven now.


Put the chicken/gravy/soup mixture on the stove to come to a boil.  You probably won't want to put this right over the firebox since your fire will be so hot for baking the biscuits.  You can see in the picture below that mine was closer to the reservoir than to the fire.

If the gravy was quite thick, you may need to add a little water or milk. Don't do this until you've had a chance to warm the gravy/soup mixture, though, because leftover gravy congeals in the refrigerator and may look deceptively thick until it is heated through.


The soup/gravy/chicken combination coming to a boil over
gentle heat.
Once the creamed chicken has come to a good boil, move it to a place where it can be kept hot while your biscuits finish baking.

The biscuits finishing up in the oven while the
creamed chicken is staying warm on a simmering
pad on the back of the range.
To serve, pour the creamed chicken over the biscuits and enjoy.  I like to drizzle a bit of honey over the top of it all.

The finished product.

Notes:
 
1. You could make your own white sauce instead of using the can of cream of chicken soup.  Then this recipe is no longer cheating.
 
2. My favorite side dish for this is peas, which I like to mix into the creamed chicken mixture.  Peas are not Nancy's favorite side dish, though, so you don't see them in the picture.
 
3. As with most chicken recipes, turkey can be substituted in this dish, and this is one of our family's favorite post-Thanksgiving meals.