This is a blog about cooking on a woodburning cookstove. Here you will find recipes, methods, other uses, and miscellaneous information about using a woodburning range. I've searched the net for any and all information about cooking on one of these amazing appliances, and I've found a lot of interesting things, but none of them have been what I've been looking for. Therefore, this is my attempt at creating what I've been in search of.
Sunday, October 27, 2013
The Stove that Started It All
Saturday, November 30, 2013
Big News! My Brother's New-to-His-Family Wood Cookstove
Kevin called me to see if I thought that the price was reasonable. He had inspected it thoroughly and found it sound, and I thought that the price was certainly reasonable, so he bought it and brought it home. After they got back, I couldn't wait to get over there to take a look at it. My nephew was more than happy to show it to me. Since it is just his size, he is under the impression that it is his. He removed all of the lids for me and gave me a tour.
| HD showing me "his" cookstove. |
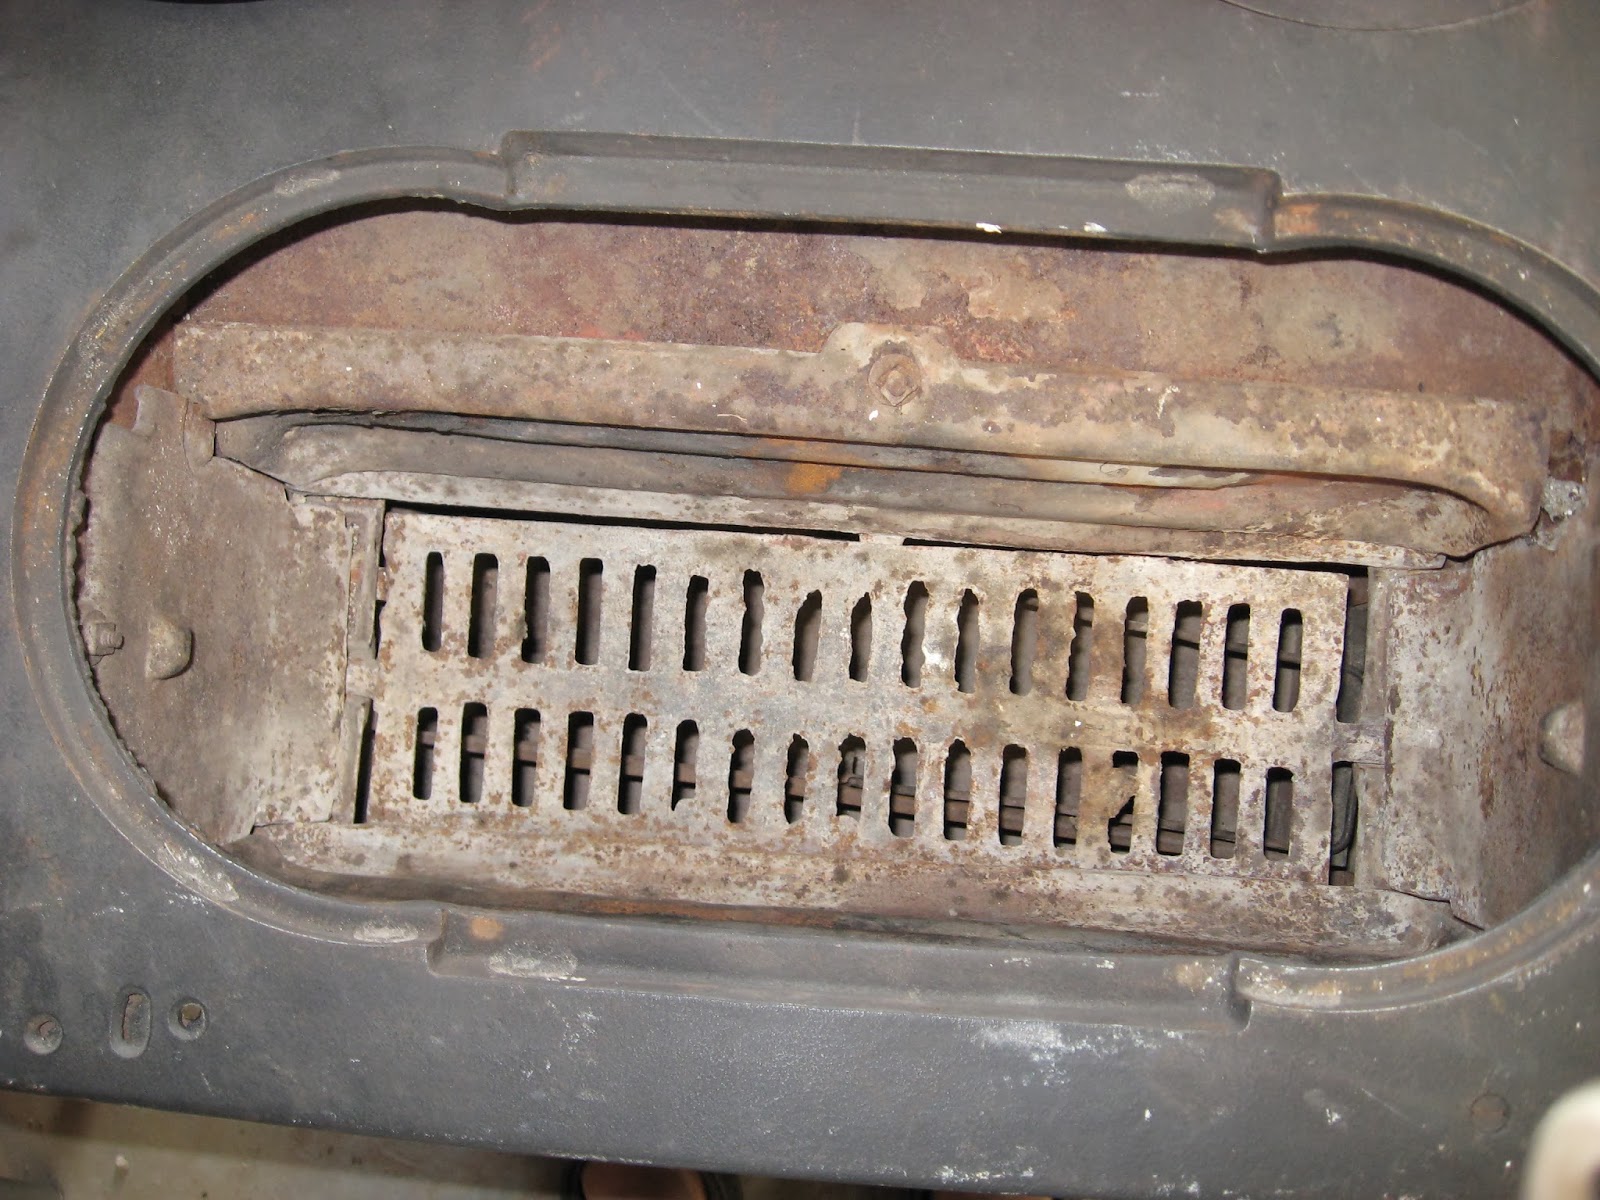
However, while I was completing my inspection, I decided to poke the camera into the oven clean out opening, and with the flash and camera screen discovered that the clean out door was simply reposing inside the oven flue. Thus, the stove is complete. (At this point, I would just like to sing the praises of the digital camera. When I was growing up and my parents took the occasional photograph, we would not know what the pictures looked like until the film was developed, and sometimes this would be months after the photo was snapped. I'm not usually one who gets very excited over the latest technological advancements, but I think that it is wonderful to be able to see the pictures that you've taken immediately so that you can delete the terrible ones and get a retake before your subject flies the coop.)
| The oven clean out door hiding in the flue beneath the oven. |
| A picture of the inside of the firebox and the dump grate at the bottom. |
| The clean out door is in position, and HD is busily replacing the lids in the cooktop for the umpteenth time. |
![]() |
| A scan of part of the page from the 1958 Montgomery Ward catalog where Kevin's stove appeared. |
Economy Cook Stove
Welded steel body, steel oven--17 3/4 x 13 1/2 x 9 1/2 in. high. Four 8-inch cooking lids. Easy-to-clean white porcelained panels. Cast-iron cooktop. Cast-iron firebox, 17 x 7 x 7 1/2 in., has flat dump grate; burns soft coal, 18-inch wood. Size overall: 26 x 21 in. deep, 25 in. high. Use 6-in. stovepipe--see Notice, Page 906. Pay Freight from Factory near St. Louis, Mo.--shipped promptly. Ship. wt. 120 lbs. 68 A 1518F-$2.50 Down; Cash $22.95
When all of the lids are removed from the cooktop, I can lift the stove by myself. I was surprised at how roomy the oven is. Had I known that the catalog didn't include the dimensions of the oven, I would have measured it and included them here. Suffice it to say that a 9 x 13 pan would easily fit with a little room to spare.
Now here is the part where all of you readers will discover just how weird I am:
I don't consider myself a prepper, but the fact that Kevin has this stove makes me feel a little bit more secure. You see, on the farm where he lives, there are three homes: Kevin's, my grandmother's, and my cousin's. Each of these homes is equipped with only electric stoves for cooking. I feel better because in some kind of drastic emergency, this little cookstove could be easily put into service. It wouldn't take a huge crew of men to transport it to my grandmother's basement where a furnace duct could be taken down and fashioned into a stovepipe that would be sufficient to attach it to one of the two old, but lined and safe chimneys which can be accessed down there. My grandmother would probably be able to remember a little about cooking on a wood cookstove, and my sister-in-law is a brilliant cook who could probably prepare a five-course, gourmet meal over a can of Sterno, so I know they will all be able to eat because she would easily be able to figure out how to cook on a cookstove.
As it is, I'm looking forward to the day when we can try out this little cutie, and of course, I'll write a post about how it works so that you'll all know too.
Saturday, June 2, 2012
Water Bath Canning on a Wood Cookstove
Both the syrup and the jelly are canned using a water bath, and so I decided to multi-task. Water bath canning is a very easy task on a wood cookstove, and I actually think that it is a job that is easier on a wood cookstove than on a gas or electric stove because the cooking surface of most wood burning ranges is so large. This blog post documents what I did and shows my method of water bath canning on a wood cookstove.
First, on the right side of the stove (the part that is farthest away from the fire in our stove), I placed a metal rack from some long-forgotten appliance. This rack is more sturdily constructed than your average cooling rack since it was designed for some kind of oven, so I use it on the top of the cookstove for various reasons. On this particular occasion, I didn't want to put the frozen pots right on the stove because the temperature difference would be extreme and could cause damage, but I wanted to hasten the thawing of the raspberries.
| Two pots of frozen, cooked black raspberries thawing on the cool section of the cookstove. The rack that they are resting on is about one inch tall. |
| The syrup is coming to a boil over the front of the firebox; the chicken is behind it. |
| Water bath canner now placed over the back of the firebox. The syrup was now boiling. |
| Testing the syrup for doneness. |
| A picture to show that the canner is sitting directly over the fire. |
| Putting the syrup into the jars and the jars into the canner. By this time, the frozen fruit had thawed enough to put the kettles directly on the stovetop. |
| Seven pints of pancake syrup boiling in the canner. |
First a word or two about making jelly on a wood cookstove:
Making jelly demands an intense heat under the jelly pot because you need a full rolling boil. In my experience, if it takes too long to reach this kind of a boil, the jelly can be ruined because too much steam escapes and changes the proportions of the mixture. In some instances, even though I've had a very hot fire underneath the jelly, it takes a long time to reach the full rolling boil that is needed. Thus, not only did I have less than perfect jelly, but it was also taking too much more time to make jelly over the cookstove than it did to make it over a gas or electric stove. I have solved this problem by removing the stove lid beneath the jelly pot. The pot is then directly over the fire, the cooking time is reduced, and the boil is much quicker.
As a side note, each of the stoves that I have used has had a traditional stove lid configuration on the cooktop. Therefore, removing the lid to cook directly over the fire is easily accomplished. There are several stoves on the market today (Kitchen Queen, Pioneer Maid, Ashland New Decade, Flameview--to name a few) which do not have the old-style, removable lids in their cooktops. If you, dear reader, happen to make jelly on one of these stoves, would you please leave a comment and tell me about your method--or whether this is an issue for you at all? I want this blog to be an information clearinghouse for all things cookstove, so your input would be helpful.
Some astute observers may notice that I don't have jars sterilizing in another pot of water. I've read that if you water bath anything for ten minutes or more, you don't have to worry about sterilizing jars, so that's what I do now. I haven't had any trouble with sealing or spoiling using that method, and the set of the jelly remains unaffected.
In some respects, I prefer using Certo for pectin when making jelly on a cookstove because the order is reversed. When you use Certo, you bring the sugar and juice to a full rolling boil and then add the pectin. Therefore, while it takes longer to get to the initial boil, getting to the second boil takes very little time.
| The jelly boiling after the sugar has been added. |
Monday, May 18, 2020
Glaze Creosote Confession: The Potentially High Cost of Ignorance
First, some history:
The first wood cookstove that I used was the Qualified Range. I bought it new in January of 1997 and had it installed in the little house with a pre-fabricated metal chimney. I would say that the distance from the stove collar to the top of the chimney was probably less than twelve feet. I never had any trouble with creosote accumulation in that setup. However, I only used it from January of 1997 to May of 1998 because then I moved to the "big house."
When I moved into the "big house" on the farm, I had to wait a winter before I was able to get a new stainless steel liner put in the original brick chimney, but by the fall of 1999, I was again using the Qualified on a daily basis for cooking and heating. The Qualified was in use in the "big house" from 1999-2011 when it was replaced by the Margin Gem. During those twelve years, I had one chimney fire, but it started in the stovepipe of the stove and spread to the chimney. It was easily extinguished by closing the drafts of the stove, and since it happened in the summer, it was not difficult to get on the roof and sweep the chimney clean again. Had I been more diligent about keeping the stovepipe clean, the fire wouldn't have happened at all.
With the Qualified Range, there was never a lot of creosote in the chimney. I would sweep it in the fall of the year before daily firing of the stove began, and what creosote was present was always light, flaky, and easy to remove. The creosote in the stovepipe was always the same, but would sometimes cling more stubbornly.
Now, the Qualified Range was not airtight. It had the old style sliding drafts on the left side of the firebox, and though they were made well, there were some gaps that were inherent with that sort of stove construction. Tiny gaps were also present in the top left corner of the firebox and where the outer front door latched to the cast iron of the firebox. Further, the standard of fit and finish for the cast iron stovetop was lower than that of the Margin Gem. If a bright fire was burning in the stove and all of the lights were put out at night, you could see tiny yellow flickers against the backsplash of the stove and on the kitchen ceiling. Obviously, there were plenty of places where air could gain entrance to the stove even when it was shut down tightly. Therefore, the Qualified could not hold a fire overnight or during the day when Nancy and I were gone to work and school.
The Margin Gem began its career in our kitchen in the spring of 2012 and has been in daily use from late September or early October until May ever since. Shortly after it was installed, I noticed that the creosote in the chimney was different. Some of the dry, flaky, familiar stuff was present, but there was a coating of black, tarry stuff that was very smooth. This, however, appeared to only be in the top three or four feet of the chimney, which is the part that sticks out above the roof line. It was a thin layer, as I said, and I didn't think a whole lot about it. I attributed it to the fact that the stove is airtight and also to the fact that because the Margin Gem has both a hyper-heat water reservoir and a waterfront for the range boiler, a lot of the heat from the fire was being absorbed before it had a chance to travel up the chimney.
I didn't think a whole lot about this new creosote. Usually, after a summer of only intermittent firing--usually using small sticks that burn hot and quick--the hard, shiny stuff would sweep out of the chimney with the fall sweeping that began the continual firing season.
Fast forward to this last winter. During the months when the Margin Gem is being fired daily, I sweep the chimney once per month as long as the roof is free of snow. During December and early January, we were burning some mulberry wood which had been dead for at least six years, but was more wet than I would have liked. When I went to sweep the chimney in early January, my chimney sweeping brush got stuck in the chimney. The shiny, hard creosote had become quite thick on the inside of the chimney, and it was no longer just in the top three or four feet of the flue. I had a really tough time getting my brush back out of the chimney, and I knew we had to do something.
My first thought was that we needed to have a professional chimney sweep come and clean the chimney. I did some phone calling and discovered that where we live, professional chimney sweeps are few and far between, and they are really busy. We would have had to wait a very long time before a professional chimney sweep would have been able to come to our house--in fact, I was basically told that we wouldn't be able to see a chimney sweep until after the heating season was over.
We couldn't wait that long. During the winter months, the Margin Gem heats our home and our hot water, and it cooks nearly all of our food. I was worried about the creosote situation and began doing some research. I learned that professional chimney sweeps use mechanized equipment to clean chimneys rather than just a steel brush on rods like I have. I discovered that our nearest Menards carries such equipment and promptly plopped down around $150.00 for a set of chimney cleaning equipment that attaches to a drill. (I didn't know that this kind of chimney cleaning equipment even existed, and I'll write a post about it sometime because it is worthy of a lengthy discussion by itself.)
I got my new purchase home and opened the package. Having never known anything about this sort of chimney cleaning device before, the first thing I did was open the instruction booklet. Among other disappointing information there (which I will discuss in a later post), the instruction booklet said that the chimney sweeping equipment was not for use on "GLAZE CREOSOTE." There it was: a name for the stuff I had seen lining the chimney!
After more research, I knew how dangerous glaze creosote in a chimney can be (if ignited, it burns at a higher temperature than light, flaky creosote does). That same research taught me that there is no mechanical way to remove it, so sweeping wasn't going to make any difference. Glaze creosote must be removed chemically. Even professional chimney sweeps must treat glaze creosote with a chemical first and then come back to sweep it later, and the powders and chimney sweeping logs commonly advertised and sold locally have no effect on this type of creosote. Internet reviews told me that two different products were highly recommended for use in glaze creosote removal: Cre-Away and Anti-Creo-Soot. These are environmentally safe products that convert the glaze creosote from a hard substance to flaky creosote which is easy to remove. Unfortunately, neither of these compounds are sold locally, so we had to order online and wait for delivery. For a few days, we limped along with a stove that was operational but obviously not breathing as well as she should. Then we began the glaze creosote mitigation process.
| The two chemicals we used to remove our glaze creosote. (Because I know someone will ask, the cookstove on the left is the ceramic base to a lamp that sits on the corner of our kitchen table.) |
The Process of Glaze Creosote Removal:
The sites I read told me that I should start by using the Cre-Away. Cre-Away is a fine white powder which comes in a plastic bottle with a hinged nozzle on the top. You apply the Cre-Away to the chimney by squeezing puffs of it up into the stovepipe and the bottom of the chimney. Because our chimney is so tall, the directions on the bottle also recommended sprinkling it down from the top of the chimney. As we had very little snow this winter, this was not a difficult process.
Once Cre-Away has been placed in the chimney, the next step is to build a hot fire in the stove to activate the chemical reaction. The flue temperature has to reach a minimum of 300ºF in order for each of the products to work, so I moved the flue thermometer that we have on our Jotul heating stove to the stovepipe of the Margin Gem.
Cre-Away was amazing! It wasn't long before I could hear chunks of creosote falling down the chimney. For three days in January, as soon as I got home from school, I would take the stovepipe down, remove the pile of creosote that had fallen down the chimney in the last 24 hours, and re-apply the Cre-Away.
The next step was to use the Anti-Creo-Soot. This is a liquid, and to apply it you spray it into a good hot fire. You can see in the picture above that the Anti-Creo-Soot which I purchased was in a gallon jug. You can purchase smaller spray bottles of this compound, but they are more expensive, so it was cheaper for me to buy the gallon jug and pour some into our own spray bottle. For the first application of Anti-Creo-Soot, the directions say to apply 60 (that's right, sixty!) squirts to the inside of the firebox or directly onto the fuel. In severe cases of glaze creosote, the directions recommend sixty squirts each day for seven days. Twelve squirts per day after that is what they advise for keeping your chimney clean thereafter. Again, flue temperatures must reach 300ºF, in order for this compound to be activated.
Anti-Creo-Soot was excellent too. It was very easy to apply, and chunks of creosote continually rattled down the chimney, especially when the fire was first stirred up in the morning or upon my return from school in the evening. I continued to regularly take the stovepipe down and clear away the piles of creosote left in the elbow at the bottom of the chimney.
Finally, a thorough sweeping is in order. I am happy to report that this sweeping was easy, and I've never seen so much creosote come out of the chimney at once. The Margin Gem was breathing freely again, and I could breath a sigh of relief!
I continue to squirt Anti-Creo-Soot into the firebox occasionally--especially when I know I'll be sweeping the chimney soon--and the effect that it has had is remarkable. I cannot say enough good things about both of these products!
Summary:
Here is an abbreviated list of the new things I know after having dealt with this situation:
1. Only burn dry fuel! I knew this but admit to not prioritizing our fuel supply as well as I should have. Also, I was under the impression that creosote only formed from wood that was wet because it hadn't been dead long enough. Not so! Wood that has been "seasoned" for adequate time but has been allowed to become wet again is just as susceptible to depositing creosote in a chimney.
2. There are different types of creosote, so you must pay attention to what is present in your chimney.
3. Glaze creosote can be removed by a do-it-yourselfer; you don't have to hire a chimney sweep if you are able to access your chimney yourself.
4. Glaze creosote can only be removed by using chemical compounds to loosen it before it can be swept away.
5. Cre-Away and Anti-Creo-Soot are awesome! They are very effective in glaze creosote removal and are easy to use.
I hope that embarrassing myself and letting you all in on my former ignorance proves helpful to someone and that I can save someone else the danger of a chimney fire or the expense of hiring out work that one can do oneself. Be safe!
Saturday, June 23, 2012
Purchasing a New Woodburning Cookstove
I took the following things into consideration when making my choices. They are not necessarily listed in order of importance.
a) Cost. Unfortunately, this is always a consideration. When you consider this, though, think about what kind of return your stove will potentially give you. We don't have to pay for our firewood. As my brother says, "Jim can't burn enough wood to keep up with the dead trees around here." Therefore, other than our time (which would be spent cleaning up the tree mess in some way in any event) and woodcutting supplies (chainsaws, chains, saw fuel, sledge hammer handles, etc.) it costs us nothing to operate our stoves once they are installed. Thus, our cookstove considerably cuts down on our use of propane for heating and cooking, and now that the Margin Gem heats our hot water, we have additional savings there.
I've never heated our house entirely on propane during a winter, but I think that a conservative estimate (given our high-efficiency furnace, the size of our house, and its draftiness) would be that we would burn a thousand gallons of propane during a normal winter if it was our sole source of heat. That means that it would cost us at least a thousand dollars to heat our house for one season if we used only propane. When you look at the cost of a stove and prorate what it will save you in heating expenses during its useful life, that can change the way you look at your initial investment quite significantly.
b) Location. You have to consider where you will be putting your stove quite carefully; then choose a cookstove that will fit there. However, you must also figure in the clearances! This is so important! The measurements of a stove are not a representation of its true footprint in your house. Clearances can be reduced with appropriate materials, but those materials will have measurements of their own. Measure, research, measure!
The clearances on woodburning cookstoves vary drastically because of the different designs that are out there. If you are planning on purchasing a true antique cookstove, you can pretty much plan that your home insurer is going to ask that 36" of space be between your cookstove and any combustible surface, and 18" of space will need to be between single-walled stovepipe and anything combustible.
c) Looks. This might be the least of many people's concerns, but for me this is an issue. I know that many of the new wood cookstoves that are on the market are designed to keep costs low for those who want a functional and efficient stove, but I also want one that is at least somewhat traditionally pretty to look at, too. Sorry. I can't help it.
I'm still reconciling myself to the more modern look of the left side of the Margin Gem. I prefer the antique look of the Oval's left side, but I still feel that the Margin Gem was the right choice for us.
d) Purpose of the Stove. What are you planning on doing with your woodburning cookstove? If you are only going to be using it during the occasional power outage or for weekend ambiance, your approach to choosing a stove can be quite different from what it would be if you are planning on using your stove as your main--or even sole--means of cooking.
Before we purchased the Margin Gem, I talked to an Amish man who owned a Gem Pac (slightly smaller and less ornate sister of the Margin Gem). The man whom I was talking to and his wife were planning on building a new house in the near future, and when I told him that we were thinking about replacing the Qualified, he offered some interesting insight. He said, "My wife would like a Margin Gem for the new house. She told me that she wants a cookstove, not a heating stove that you can cook on. My brother's stove has to be so hot to get the oven up to temperature that it will drive you out of the kitchen before you can bake anything." I'm glad that we don't have to be sweltering just to bake.
e) Oven size. To me, this was a top priority. I knew that there would be considerably less joy in using a wood cookstove regularly if I felt like the size of the oven was preventing me from using the baking utensils that I was accustomed to. Thus, as a twenty-one-year-old, I pored over the specifications for the ovens in the cookstoves which were available and affordable at that time. Then, with a yardstick, I drew lines in the pile of my living room carpet which represented the width and depth of the ovens. Next, I retrieved all of the biggest baking utensils that I had: my largest cookie sheet, the biggest jelly roll pan, and my largest enamelware roaster. I placed them on the floor to see whether they would fit in the oven. When I got to the roaster, I also put the lid on it and held my thumb on the yardstick to represent the height of the oven to make sure that I would still be able to use it with its lid.
The fact that the oven on the Qualified Range was the largest in the stoves that were in my price range had a great deal to do with my choosing it. I went through the same set of tests with the same cookware before deciding to purchase the Margin Gem, too (only I didn't draw in the carpet--I guess I'm growing up).
f) Ease of fueling. Perhaps this wouldn't be as much of a factor if I hadn't started out with the Qualified range. The Qualified has a coal feed hatch on the left side of the firebox, a door in the front of the firebox behind the white cabinet door, and removable lids, "T", and cast iron frame above the firebox. In other words, if you have a piece of firewood that is the right size, you have all kinds of options for getting it to the fire. The best thing about fueling the Qualified was that unless you had such a large piece of wood to add that you had to lift the "T" or the entire cooktop frame, it rarely let any smoke escape into the room.
Several of the new stoves on the market today do not have very many fueling options. Some can be fed only through the top. This seems impractical to me, especially when you are in the throes of canning. The last thing you will want to do is to move a large canner full of jars away from the firebox in order to refuel. The Margin Gem has a larger front door on its firebox than the Qualified, and I find that I feed through the front much more often now. I still tend to favor feeding through the front cooktop lid, however. I think this is because I don't have to bend down to see what I'm doing. For feeding large pieces of wood, the Margin Gem is equipped with a handle which raises the entire section of cooktop above the firebox. I imagine that we will use this more often in the winter, but we haven't used it much right now because a great deal of smoke hits you in the face when you open the stove this way.
| A pic of the Margin Gem that Nancy snapped on the night we were hooking it up. The pic shows the cooktop and front door open, comprising two of the ways to add fuel. |
g) Cooking flexibility. When we ordered the Margin Gem, the sales representative tried hard to convince me to opt for the Flameview. I think his words were that it was "the perfect stove." Indeed, it has features that I think we would have liked, but two things prevented me from choosing it. First, it has a greater heating capacity than the Gem. This would be great if we only used the stove in the winter time, but since we have an additional heating stove to help heat the house in cold weather, why put up with extra heat when we just want to cook in the warmer seasons? Second, the Flameview is only sold with a solid cooktop--no removable lids. I'm far too accustomed to being able to remove a lid or lids and grill directly over the fire or speed the cooking of something. Nancy can attest to my occasional inflexibility, and I didn't want to give up those options.
If you are a wood cookstove cook, please comment and share what things you considered before making your purchase. My hope with this post is that it will help wood cookstove shoppers with their considerations before making a purchase. No matter which range one chooses, it will become a major part of one's home, so careful consideration is a must.
Some readers may still be at a point in the process of choosing a stove where they are trying to convince themselves or others that a woodburning cookstove is a good idea. For information about why we chose a wood cookstove, visit this post.
Monday, June 8, 2020
Tonight's Supper: Shrimp Scampi on Capellini Pasta
"Shrimp something" would probably have been shrimp Alfredo, but I neglected to buy cream on my last grocery run, so I had to strike out on my own. The results were so good that I have to blog this before I forget what I did so that I can recreate this supper sometime in the future.
First, since I use this blog for personal record keeping, I need to report that as of last Friday (June 5) I have done all of our cooking out in the summer kitchen on my brother's Montgomery Ward Economy Cookstove that I blogged about back in 2013 in this post. Our last daily fire in the Margin Gem went out on the morning of June 1, which was when it began to get pretty warm around here. Obviously, that was also the day that I turned on the electric hot water heater, which we will run for the next four months. This was the latest in the season that we have ever waited to do that, beating our previous record of May 27th. Thus, the stats for the 2019-2020 heating season are that from October 11 to June 1, all hot water was heated by the Margin Gem, and it cooked all but four of the meals prepared at home during that time (two frozen pizzas, one crockpot roast, and one meal cooked entirely on the grill). Also, because of Covid-19, the Margin Gem cooked all but seven of the meals I ate between March 16 and May 31.
| My brother's Montgomery Ward Economy Cookstove temporarily installed in our summer kitchen. |
I worked the primary election on June 2, and I had cooked enough food ahead that the only cooking I did between the Margin Gem and this little stove was French toast on the gas stove (a ridiculously difficult task--so hard to get it to brown evenly over a gas flame) and baking four potatoes in the electric stove in the basement.
I am writing a whole post about cooking on this little cookstove of Kevin's, so all I'll say here is that it has worked surprisingly well--great really. I was so anxious to get cooking on it, you'll notice that I didn't get the floor of the summer kitchen scrubbed yet.
Anyway, back to supper tonight. I started by making the angel hair pasta. To roughly a cup of all-purpose flour, I added a sprinkling of baking powder and a dash of salt, then an egg. I worked additional flour into the pasta dough until I couldn't get it to take any more by hand. Then, I started running it through the rollers of my Atlas pasta machine. I got to level 7 on the rollers and then cut the pasta with the cutter labeled capellini (Italian for "little hairs," slightly larger than true angel hair). I kind of clumped the pasta into little loosely packed nests and set them aside on a plate to dry a bit while I did other things. These were probably the best pasta I've ever made.
| Making pasta is a messy proposition no matter how you look at it. |
I started the fire out in the summer kitchen then, and put a pot of salted water on to boil for the pasta. I also put on the base to the steamer with a little water in it. While they were heating, I headed to the gardens and picked some garlic chives and two onion leaves. I washed those and snipped them into a frying pan with a 1/2 stick of butter in it. Then, I took two tiny garlic bulbs harvested yesterday and put them through my Pampered Chef garlic press; they would have been the equivalent of two store-bought garlic cloves. The frying pan was carried out to the stove then, where the other two kettles had come to a boil.
While the butter was beginning to melt and cook the herbs from the garden, I put a large head of broccoli in the steamer and dropped the nests of pasta into the boiling water. By that time, the butter was simmering nicely, so I added about nine oz. of the cooked, frozen shrimp and a few parsley flakes. Since the shrimp was already cooked, it just needed to thaw and heat through.
Everything was finished cooking at the same time, so I carried it all back into the house. We used a slotted spoon to fish the pasta nests out of the water, draining them as we did so. Then, we scooped the cooked shrimp and its buttery juice over the pasta and sprinkled it with grated parmesan cheese. The steamed broccoli was seasoned with a quick sprinkle of garlic salt, and supper was served.
| Our supper. Next time we'll be sure to buy shrimp that doesn't have its tails on. |
Nancy said I had hit the nail on the head with what she had in mind for "shrimp stuff," and we agreed that our supper tasted like it had come from a fine Italian restaurant. It really was outstanding if I do say so myself. Making the pasta was the most difficult part of this meal, and if I were in a hurry and not in the middle of a pandemic, I would have bought angel hair nests in the grocery store and not thought twice about it. We are looking forward to having this meal again when our own broccoli is ready to eat.
Saturday, November 5, 2016
A Blog Reader's Cookstove - V
![]() |
| Jessie's Oval cookstove sitting on the new hearth that her husband built. |
1. What made you decide to purchase this particular make and model of cookstove?
"Three years ago, my husband and I visited a history museum that is still a working farmstead. We have a little homestead (very much a "hobby farm") of our own -- raise our own pork, chicken, and beef, plus garden -- and we love seeing how people used to live, if only to appreciate how easy we have it these days! There was a woman in the kitchen running a wood cook stove, and my husband said, "My wife would love one of those." He was correct. So we started looking.
"We found the Oval in a Craigslist ad. An older couple who had bought it from Lehman's in the 1980s were selling their farm and moving away. We bought it for $1,200. The man who cooked on it said they had used it as their sole cooking source for 15 years. He loved baking bread in it, and put a layer of firebrick in the bottom to help with heat distribution. It seems to work.
![]() |
| This picture shows the layer of firebrick in the bottom of the oven. |
"It took 3 years for my husband to get it up and running, and it wasn't cheap; we had to have a metal-asbestos chimney installed, for starters. But so far we are in love with it. I imagine there are much more efficient wood cook stoves out there but we love the look of this one and for our purposes for right now, we couldn't be happier."
2. What feature of your stove do you like the best?
"I know this is a bit shallow, but I love its looks. We live in an old farmhouse, and it just seems to fit. Also, the firebox is quite a bit larger than we expected. We got 15" split wood and have no problem getting it in there. The firebox is a bit beat up and will probably need replacing at some point, but so far it's OK. The oven looks small but is very deep, which is very nice. And the warming oven is currently drying our bean pods, so that's handy. The water reservoir seems to be adding moisture to the air; the extra surface area is nice to have as well."
3. What would you change about your stove if you could?
"I don't have enough experience with it yet to say. Maybe after the first winter I will. It's not airtight, although we did patch some holes at the seams. But maybe it would be nice to have a stove that would keep a fire going all night."
4. How much of your home heating does your stove do?
"Our intention was originally just to use it for supplemental heat in the morning and at dinner, and, of course, to cook on it. To our surprise, it puts out quite a bit of heat, even reaching to our bedroom upstairs at the far end of the house. (We live in a two-story, 2,500-square-foot farmhouse that still has a lot of old windows and doors.) We don't know how it will do when the weather gets really cold. But I do know that we are going to try to use it as much as possible to heat the house, even if we have to get up during the night to feed it. I am currently surprised at how warm the kitchen is in the morning even when we let the fire go out after bedtime. It was 43 out this morning and still 70 in the kitchen."
5. Is there anything else you would like to say about your stove?
"So many things. :-) The biggest surprise to me is how easy it is to cook on. In some ways it's easier than using the gas range. For instance, I was frying up potatoes/sausage/peppers/onions the other night, and I realized that the fire heats the entire bottom of the skillet, not just a ring. And there is an unlimited heat range, from super hot to low heat, to just barely warm. It's all in the placement.
"I went into this thinking I was some kind of throwback, just someone wanting to live in the past and make life difficult on myself just to prove that it could be done. Now I am seeing that a wood cook stove is actually a very practical dual-purpose object. Guests are already flocking to the warmth it puts out, and it has really made our house feel very homey.
"One more thing: I have noticed so far that the crust on my homemade bread and the pie crust on last night's pumpkin pie have a special texture to them that is maybe a result of the dry heat? Whatever it is, it's a good thing. It's early days yet, and maybe I'll find the burden of cleaning the stove greater than the pleasure of using it. But I doubt it."
Jessie also volunteered some information about how she manages the oven temperature. Since maintaining oven temperature is one of the most talked-about aspects of using a woodburning cookstove, I am glad to add this method to my blog archives:
"The two times I have baked, I have started with a well-established fire, which seems to keep the oven at about 275. I then opened up the damper and drafts, loaded up the firebox with smaller pieces of wood, let them get cooking and then shut everything down, which shoots the oven temp up to 350 in about 15 minutes. (I bought a thermometer to put in the oven; the door thermometer reads about 50 degrees lower.)"
Of course, no conversation about a wood cookstove would be complete without mentioning the efficiency of these dual-purpose appliances as well as the change in thinking that they can effect on their owners:
![]() |
| It looks to me like Jessie and her husband aren't the only ones who are enjoying their new wood cookstove. |
I would like to echo what Jessie says about the even heat on the surface of the cookstove. Each summer as we transition back to gas, I get frustrated with the ring of heat in the middle of frying pans especially. Also, I'm particularly excited to have contact with an Oval owner because I looked longingly at them for several years before purchasing the Margin Gem. I hope Jessie will feel free to comment often on the blog.
I can tell by Jessie’s e-mails that she has already perfected that most necessary trait of any woodburning cookstove cook: the art of being a reflective practitioner. In education we use that phrase to say that a teacher habitually reflects on his or her successes and failures in order to be constantly improving, but it really spills over into many facets of life, especially cooking over wood. To be consistently successful, you constantly evaluate your finished product, take note of what works well and what doesn’t, remain attuned to how your stove responds, and before you know it, cooking with wood is a joy.
Sunday, February 14, 2021
Vintage Recipe: Chocolate Drop Cookies
Valentine's Day was one of Meme's (pronounced with long "e" sounds) favorite holidays. I mention her in the biographical information on the left because she was largely responsible for my early fascination with woodburning cookstoves. Meme was a great-great-aunt on my mother's side, and as she had no children of her own, she was very close to our family. She and I spent a lot of time together--much of it baking--and she would continually reminisce about cooking on a woodburning cookstove.
The 1920s Monarch range which had been her family's second wood cookstove rested in the washhouse on the farm where my cousin makes his home now. Fortunately, it had been removed from the beautiful farmhouse in 1948 because the house burned to the ground in 1962. As that farmstead with the gaping basements used to be a favorite picnic spot for us, I would always go into the washhouse and take a look at that beautiful stove. I can remember one time when all of my mother's family, including Meme, had a cleanup day at the "other place," and my uncle convinced Meme to give us a little tutorial about how she used to cook on that great range.
On our farm a row of cedar trees used to separate the two houses, the southernmost four standing in a perfect square, and I can remember that when I was five, I drew plans in red crayon for a summer kitchen to be built using those four cedars as the corners. My idea was that the Monarch range could be moved to our place. I can remember pitching the idea to Granny, who listened with amusement but obviously had no intention of making these dreams a reality.
So, during those early years I had to be content just pretending to cook on a woodburning cookstove while playing with the toy cookstove that Meme had in the spare bedroom of her apartment. You can see an identical toy at this post: The Stove That Started It All. I suppose that I was in junior high or early high school when Meme began to realize that my desire to cook on a real woodburning cookstove was more than just a passing fancy. I remember that we were in her apartment kitchen watching a pot on the back burner of her Hotpoint electric stove when she started back-pedaling on her romanticism of the woodburning range.
"Oh, you don't really want an old cookstove," I recall her saying. I protested, and she said, "You have to haul all the fuel in and the ashes out, and then there are some days where maybe it rains and then you can't get the fire to go at all." (My grandfather later explained the set up of the kitchen chimney in the house that burned, and I'm not at all surprised that they had trouble getting a fire lit on rainy days. I've never had such a problem.) However, her years of waxing poetic about the woodburning cookstove had made their mark.
If Meme were alive today, she would shake her head and be a little embarrassed to think that she had anything to do with my affinity for wood cookstoves. But the reality is that her influence on me was and is far greater than just that. I won't take the time and space to talk further about all of that here, but I will say that one of the areas of influence Meme had was on my chocolate preferences. Meme was a chocolate aficionado, even though I'm sure she'd never heard the word. Meme loved chocolate. Her favorite gifts at Valentine's Day were roses and a box of Russell Stover candies. Among her meager belongings at the end of her life were further evidence of her love affair with chocolate. She had used large See's chocolate boxes for storage of various articles, and at the end of this post you will see a vintage Mrs. Steven's candy tin that she used as a cookie can for decades.
Meme was funny about her chocolate, though. While I never knew her to discriminate between dark or milk chocolate when it came to those many boxes of Russell Stover's, in her own cooking she halved the chocolate in her recipes. Perhaps this was from motives of economy, I don't know. Whatever the reason, after a steady diet of lightly chocolated sweets all through my youth, I'm not a fan of dark chocolate, and I prefer baked goods that have had their chocolate content reduced too. As I write this, it just now dawns on me that perhaps this is the reason I'm not a chocolate cake fan.
The recipe that I'll eventually get around to sharing with you in this post is one of those where Meme always reduced the chocolate. Sometime in the 1920s, Meme left the farm to attend Iowa State College (later renamed Iowa State University) in Ames, Iowa. She was nearly thirty years old at the time, and I imagine that after the great romance of her life had dissolved due to religious differences, she thought she ought to be prepared to support herself with a career. Meme spent only a year at Iowa State and then transferred to Grand Rapids, Michigan, where she completed her Bachelors in dietetics.
During my own time at ISU, I had an American history class in the auditorium in MacKay Hall, which is the headquarters of the College of Family and Consumer Sciences, and I often wondered which rooms Meme would have spent most of her time in seventy years before I got there. I could imagine her as one of the women in the historic pictures of cooking classes in that building, standing in stiffly starched aprons over ancient gas hotplates. I knew about her time at Iowa State because in her kitchen she still had two stacks of recipes that bore the Iowa State College labels. These stacks were bound by elastic bands from panty hose, but one of the recipes was never with the rest; it was the recipe for Chocolate Drop Cookies. I have Meme's box of recipes now, so you can see the card in the picture below. It is hard for me to believe that it is nearly 100 years old today. Don't try to read the recipe the way it's written because she never followed this, even though you can see that she looked at the recipe many times!
| The chocolate melting in Meme's old Mirro saucepan on the far right side of the Margin Gem. |
| The soft butter and the light brown sugar being creamed by Meme's 1950 Sunbeam Mixmaster. You can tell already that this recipe doesn't make a large number of cookies. |
4. Add the melted chocolate to the sugar and butter mixture.
| The measuring spoon you see here was also Meme's. |
7. Add the flour and the milk alternately.
| The two measuring cups and the plate in this picture belonged to Meme. The plate is part of a set of Homer Laughlin Eggshell Theme from the 1940s. |
8. Mix all just until well blended. The dough will feel much more like thick cake batter than cookie dough.
| This is Meme's cookie sheet. She'd be so embarrassed if she knew how "seasoned" I've let it become. |
| Photographing fire is so difficult! I wish you could really see what kind of a fire it takes to keep a moderate oven. |
10. Now, baking these is a little tricky because you can't tell by looking at a chocolate cookie just how brown it is becoming. Instead, you've got to poke these with your finger. They are done when they have spread out flat and feel like they have just begun to form a slight crust on the top. They are overbaked if they feel like they will be crispy. This should take anywhere from 8-12 minutes depending on how hot your oven is running. Remember that the end product here is more like a little flat cake than what we usually think of when we think of a chewy or crispy cookie.
| A little more cocoa than I wanted jumped out of the jar when I poured it in, so my frosting was a little darker than Meme's. Oh, and you guessed it: this is Meme's bowl too. |
13. Beat in sufficient powdered sugar to make a thick but spreadable frosting. Frost the top of each cookie, and don't be too stingy.
| This is the vintage Mrs. Stevens' Candies tin that Meme always put these cookies in. It was her widest tin, so the cookies didn't have to be stacked high, which would mash them. |
Grandma Marian told me once that Meme used to get the lightest brown sugar that she could, and these cookies would have a reddish cast when you bit into them. I didn't have very light brown sugar, but the batch that you see here did have a slight reddish cast inside them. If someone can explain that to me, I'd appreciate it.


w~~60_3.jpg)