Showing posts with label leftovers. Show all posts

Saturday, February 18, 2023

Meals out of a Ham

Since there are only two of us in our household, when we bake a ham, there is a lot of leftover meat.  Nancy doesn't like leftovers as a general rule, but she doesn't mind having leftover ham because we turn it into so many other very different dishes as we work to finish it.

The first thing she always asks for is a ham pot pie.  I've never heard of anyone else making one of these, so maybe they are a creation that is unique to us.  The process for making this pie is almost identical to what I do to make a chicken pot pie, which I have written about in this previous post.  I make gravy out of the drippings from the bottom of the roaster, adding some heavy cream and mixed vegetables.  Nancy cuts a few slices of ham into chunks, and everything goes into the meat pie pastry that I blogged in the other post.  The only real difference other than the type of meat and the color of the gravy is that we like to cover the top of the meat filling with Swiss cheese before adding the top crust.  Also, because of the salt that is already in the ham and the cheese, we add no additional seasoning to the gravy.

The Swiss cheese (two different kinds) on top of the
meat filling, waiting for the top crust to be added.

There is nothing quite like the feeling of taking a flaky
meat pie out of the oven of a woodburning cookstove. 
Loaves of golden brown bread and meat pies just make
a woodburning cookstove cook's heart sing.

The finished potpie removed from the oven to the
countertop for serving.

Ham pot pie.  Delectable!

The next meal might be something really fast.  One of the things I like is ham and sweet potatoes.  In the picture below, I had just used a can of sweet potatoes, some pecan syrup leftover from sweet rolls, and a couple of slices of ham placed on top.  I covered it and let it boil until all was hot. Some leftover green beans were warming in the small saucepan up next to the stovepipe.


Nancy's other usual request is ham and scalloped potatoes.  For years, I would occasionally attempt homemade ham and scalloped potatoes with no good results.  Then, a couple of years ago, I ran onto a video from Brenda Hall of the Youtube channel Appalachian Cooking with Brenda.  I now make scalloped potatoes and ham just the way she teaches in this video.    

If you've ever made scalloped potatoes, you know that they take a long time in the oven to get the potatoes cooked through.  Brenda starts her potatoes on the stovetop to shave some of that oven time.  This is a particularly efficient thing to do on a wood cookstove because while the oven is coming up to temperature, you can use the hot cooktop to get the meal jump started.

The pot of homegrown potatoes beginning to cook
in milk on top of the cookstove.  The secret here (as
Brenda continually reminds you in her video) is to 
keep them moving so they don't scorch.

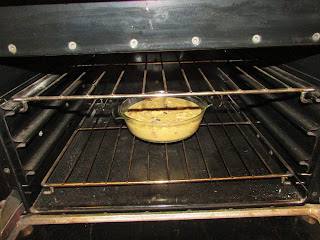
You can see that this boiled over in the oven.  This was the first
time that I've had a really smoky boil-over in the oven of a
wood cookstove.  I shouldn't have filled the dish so full!  After
I saw what was happening, I added the foil and the pie tin to
catch any further spills.

After cutting the ham for the scalloped potatoes, there was not much meat left on the bone, so the hambone and its remains went into the soup kettle that was about half full of water.  I brought it to a good quick boil while the scalloped potatoes were in the oven.  Then, I let it simmer and reduce on the back of the range overnight.  This resulted in about an inch or so of some intense ham broth that was perfect for ham and bean soup--the final dish that came out of this particular ham.

The hambone boiling on the back of the range with the scalloped potatoes
resting on the open door to the warming oven.

Now, I don't know about the rest of the world, but in my particular area of Iowa, ham and bean soup is made with ham broth, Navy or Great Northern Beans, a paltry little bit of onion, carrot, and celery, and a whatever morsels of ham were left on the bone.  I've made that soup before, and I'm told that mine was pretty good, but to me it tastes like dirty water.  By that I mean that it has a distinct lack of flavor and doesn't do justice to the ham, the beans, or the vegetables.

You can see from the photo below, that my version of ham and bean soup is totally different.  I used all of the traditional ingredients, but my beans came in the form of two cans of Van Camp's Pork and Beans, some ketchup, some potatoes (sometime I'm going to try adding pasta instead of the potatoes), and pearl barley. This, for me, is much more satisfying and delicious!  Again, the ham and its broth along with the canned beans and ketchup are salty enough that I added no further seasoning of any kind.

Now, there is one other dish that we love to make with leftover ham, and that is ham balls.  These are a favorite dish in the southern two tiers of counties in Iowa, but an "immigrant" from Mount Ayr brought these up to our area fifty years ago, and they remain a family favorite.  They really deserve their own blog post, though, so you'll have to look for that in the future.

In these days of high food costs, I think a ham is money well spent because of the number of different meals that can be made from it--even the bone was a source of joy to our dog after we had picked it clean of the meat that we could use.  Further, each of these dishes is extremely easy to make on a wood cookstove since no specific times and temperatures are needed for any of them.

Please use the comments section below to let me know what you do with leftover ham.

May your kitchen cookstove fire be burning brightly!

Sunday, January 30, 2022

Bread Pudding Baked in the Wood Cookstove

I try very hard to control food waste around here.  With a farm dog, a pile of barn cats, and a flock of chickens, there isn't much beyond a few vegetable scraps that doesn't get consumed by someone or something.  However, I think of feeding leftovers to our animals as wasting them, so I am always on the lookout for ways to turn leftovers into something different for their second appearance on our table.  Bread pudding is one of those wonderful comfort foods that I really enjoy, and it is a great way to convert stale bread or rolls into something new.

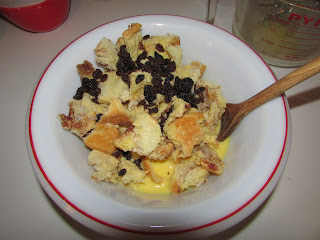
I like bread pudding best when it is made with old cinnamon rolls, and that is what you will see in the pictures below.  The best bread pudding is made with sticky rolls or rolls that had maple frosting on them. About six 3" x 3" cinnamon rolls torn into shreds are shown in the red and white bowl, two of them were sticky rolls.  Set them aside for a minute while you take care of the wet ingredients.


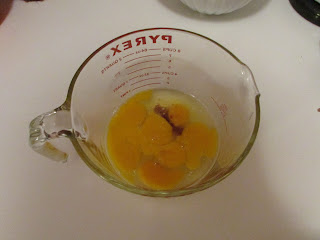
I always use seven eggs and start with about 3/4 cup milk and a splash of vanilla.


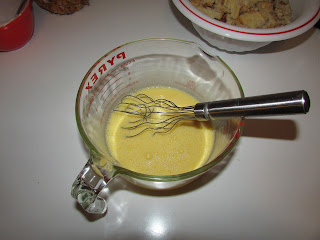
Beat the eggs and milk and vanilla together until well combined.


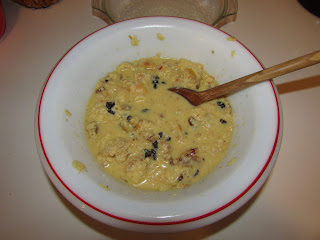
I pour the egg and milk mixture over the dry shredded rolls, add a couple handfuls of raisins and begin gently mixing it all together.


I add milk until the mixture is wet enough to be as soupy as what you see in the picture below.


Next, I transfer all of it to a greased baking dish.


Slide the dish into a moderately slow oven (about 300 to 325 degrees F).  Don't let your fire get too brisk.  My mother-in-law bakes her bread pudding in a bain-marie, and one could certainly do that for this pudding too. 


Bake until the middle of the pudding is set and a table knife inserted near the middle comes out clean.


You will note that except for the topping on the two sticky rolls, there was no sugar added to this pudding.  Therefore, when it was still warm from the oven, I poured a couple tablespoons of leftover frosting on the top, and then just before serving, a little leftover caramel rum sauce which had been using up valuable real estate in the refrigerator for months was drizzled on top.


In my opinion, this is a dessert that is fit for a king, and the main ingredient is something that could have just been thrown to the chickens.  Let me know in the comments how you make your bread pudding!


Sunday, February 28, 2021

Grandma Marian's Rice Pudding

Both Meme and Grandma Marian were of the school of thought that rice should be cooked forever in the top of a double boiler.  I know Meme's mother (my great-great-grandmother) cooked it in the same manner, and it was always served on Saturday night for supper.  Thus, I almost laughed aloud when I read the following bit from page 50 of my reprint of the 1933 Home Comfort Cookbook:

"Rice should not be put into a double boiler and cooked slowly into a pasty mass."

That is EXACTLY what they both did, and I ate it happily every time!

If I had to hazard a guess, I would say that Grandma only made rice once per month.  It was served instead of the ever-present potato with a sprinkling of sugar and a dash of cinnamon once it was on our plates.  Other than that, it was completely unseasoned.  (I had never even heard of salting rice until I was in college, and I had never had Chinese food either.)  If any rice was leftover, she would make it into rice pudding for dessert a day or two later.  Since she didn't ever know how much rice she would have (she was constantly cooking for large groups of family and hired men), there was never any recipe for her rice pudding.  Furthermore, sometimes it all fit into a small custard cup, and sometimes it needed an 8" x 10" Pyrex dish.  Obviously, this dish is very flexible.

Also, I should give fair warning that though Grandma always called this "rice pudding," it is really more of a baked custard with rice in it.  Thus, if you are looking for a rice pudding that is more similar to a cornstarch pudding, this isn't going to fit that bill.

To start with, you need leftover cooked rice, eggs, milk, sugar, and vanilla.  You can see in the picture below that I had two different containers of leftover rice, and I would estimate that they amounted to about 2 1/2 cups altogether.


To this amount of rice, I added three eggs and some milk, a splash of vanilla, and perhaps a quarter cup of sugar.  I could have put more sugar in--Grandma certainly would have--but I like this best served with ice cream, so I didn't want it to be all that sweet.


Three eggs didn't seem to be sufficient, so I added a fourth and a dab more milk.  That's the thing with this sort of "recipe": you have to carefully observe what things look like so that you know how to adjust your proportions.  In this case, you want there to be enough egg and milk mixture to cover the rice completely.  You can see that things looked better after I added these extras.


Finally, add whatever amount of raisins you would like.  I think I put in a heaping half cup into this batch.  

Lightly sprinkle cinnamon on the top of the pudding once you put it in whatever dish you are going to bake it in.


This is a particularly good recipe to bake in a wood cookstove because you don't have to have a certain oven temperature.  I imagine Grandma baked it at 325ºF, but you just have to have a slow to moderate oven.


Watch the pudding carefully, baking it until it is firm in the middle.  Depending on the size of your pudding, this can take quite a while.  Again, just watch it carefully and don't let your fire get too hot!


I like this rice pudding best when served warm.  Grandma always served it with Cool Whip, milk, half & half, or ice cream.  My favorite is ice cream.

We have some family friends who make a very similar dish that they just call "Baked Rice."  Theirs is less sweet, has a bit of salt added to it, and is served as a starchy side dish for the main meal rather than a dessert, but it is the same basic idea.  Both their family and Grandma's has a lot of German influence, so I wonder if this is a German dish.

Please fill up the comments with information about whether you or your family make something similar, and let us all know how your method differs.

Friday, October 16, 2020

Economizing with Your Wood Cookstove

In the autumn of 2019, we didn't turn off our electric water heater and make the annual switch to wood heated water and daily firing of the Margin Gem until October 11.   Well, the fall of 2020 has been much cooler here, and with the economic uncertainties of the world today, it seemed prudent to make this transition much earlier.  Thus, we turned off our electric hot water heater on August 30 of this year, and with the exception of running it again for an hour and a quarter on Labor Day, which happened to be hot, all of our water has been heated by the Margin Gem since then.  And because the Margin Gem has been fired daily, the vast majority of our cooking has been done on it too.  This is the earliest we've ever made that transition, and the monetary savings has already been borne out in our most recent electric bill.

This got me to thinking about wood cookstove economics.  If you don't have to pay for your fuel, the wood cookstove can be an enormous money saver.  Yes, buying and installing a woodburning range is quite an investment, but as long as you can harvest and work up your own fuel, you begin to save money starting with the first fire you use in your range.  In the face of dire economic circumstances, I think a woodburning cookstove can be a tremendous tool for making a household as cost-efficient as possible.  Below you will find a list of some ways to take advantage of the money-savings a woodburning cookstove can provide.  Links are provided to posts which go into more detail.

A). Use a Wood Cookstove to Heat Domestic Hot Water

Shutting off our electric hot water heater shaves a minimum of $20 from our electric bill each month.  I figure that by the end of this calendar year, having our water heated by the Margin Gem will have saved us at least $1300 over the life of the system so far.  This means that the extra cost of the range boiler, the water jacket, and the specialized plumbing has paid for itself, and there are many years of continued service left in them.  If your water system and local codes will allow the installation of a range boiler system on your woodburning cookstove, I highly recommend it.

However, even if hot running water from your cookstove is not an option, heating water with your cookstove can be accomplished in a number of other ways.  Most cookstoves have a water reservoir option for heating water that is manually drawn from the stove.  In my experience, water heated in the range's reservoir is much hotter than the temperature at which most people would set their automatic water heaters.  Thus, a water reservoir that only holds five gallons actually provides far more hot water than its capacity because the super-heated hot water will have to be tempered with additional cold water before it can be used.


In addition to a reservoir, water can be heated in vessels on top of the stove.  The most commonly found is the old-fashioned teakettle; its spout makes using the water from it quite convenient, too.  You'd be surprised how many dishes can be washed and rinsed in a mere gallon of boiling water that has been diluted with cold water to a usable temperature.  You may find it impossible to turn off your automatic water heater, but you can still save a little money by supplementing it with a little hot water here and there from your wood cookstove.


B. Take Advantage of the Home Heating Capacity of Your Woodburning Range

The woodburning cookstove can be a powerful heater.  In fact, new ranges even come complete with BTU ratings and information about the number of square feet that they can heat.  I'm kind of amused by that because when you look at old cookstove advertisements, the heating capacity of the range is never mentioned.  Instead, they were always about the quality of the stove's construction, its fuel efficiency, and ALWAYS about its superior baking capabilities--even though history is replete with stories about cookstoves being the sole source of heat for many homes.  Nowadays, advertisements tout the cookstove's heating capacity, but they don't say much about how well a stove can bake.  Oh, the pendulum swings we see in life!

To maximize the heating capabilities of your woodburning range, keep the cooktop as free from extra kettles and miscellaneous as possible in order to let the heat radiate into the room.  Open that oven door, too!  The greater the surface area that is exposed, the greater the heat sent into the room.

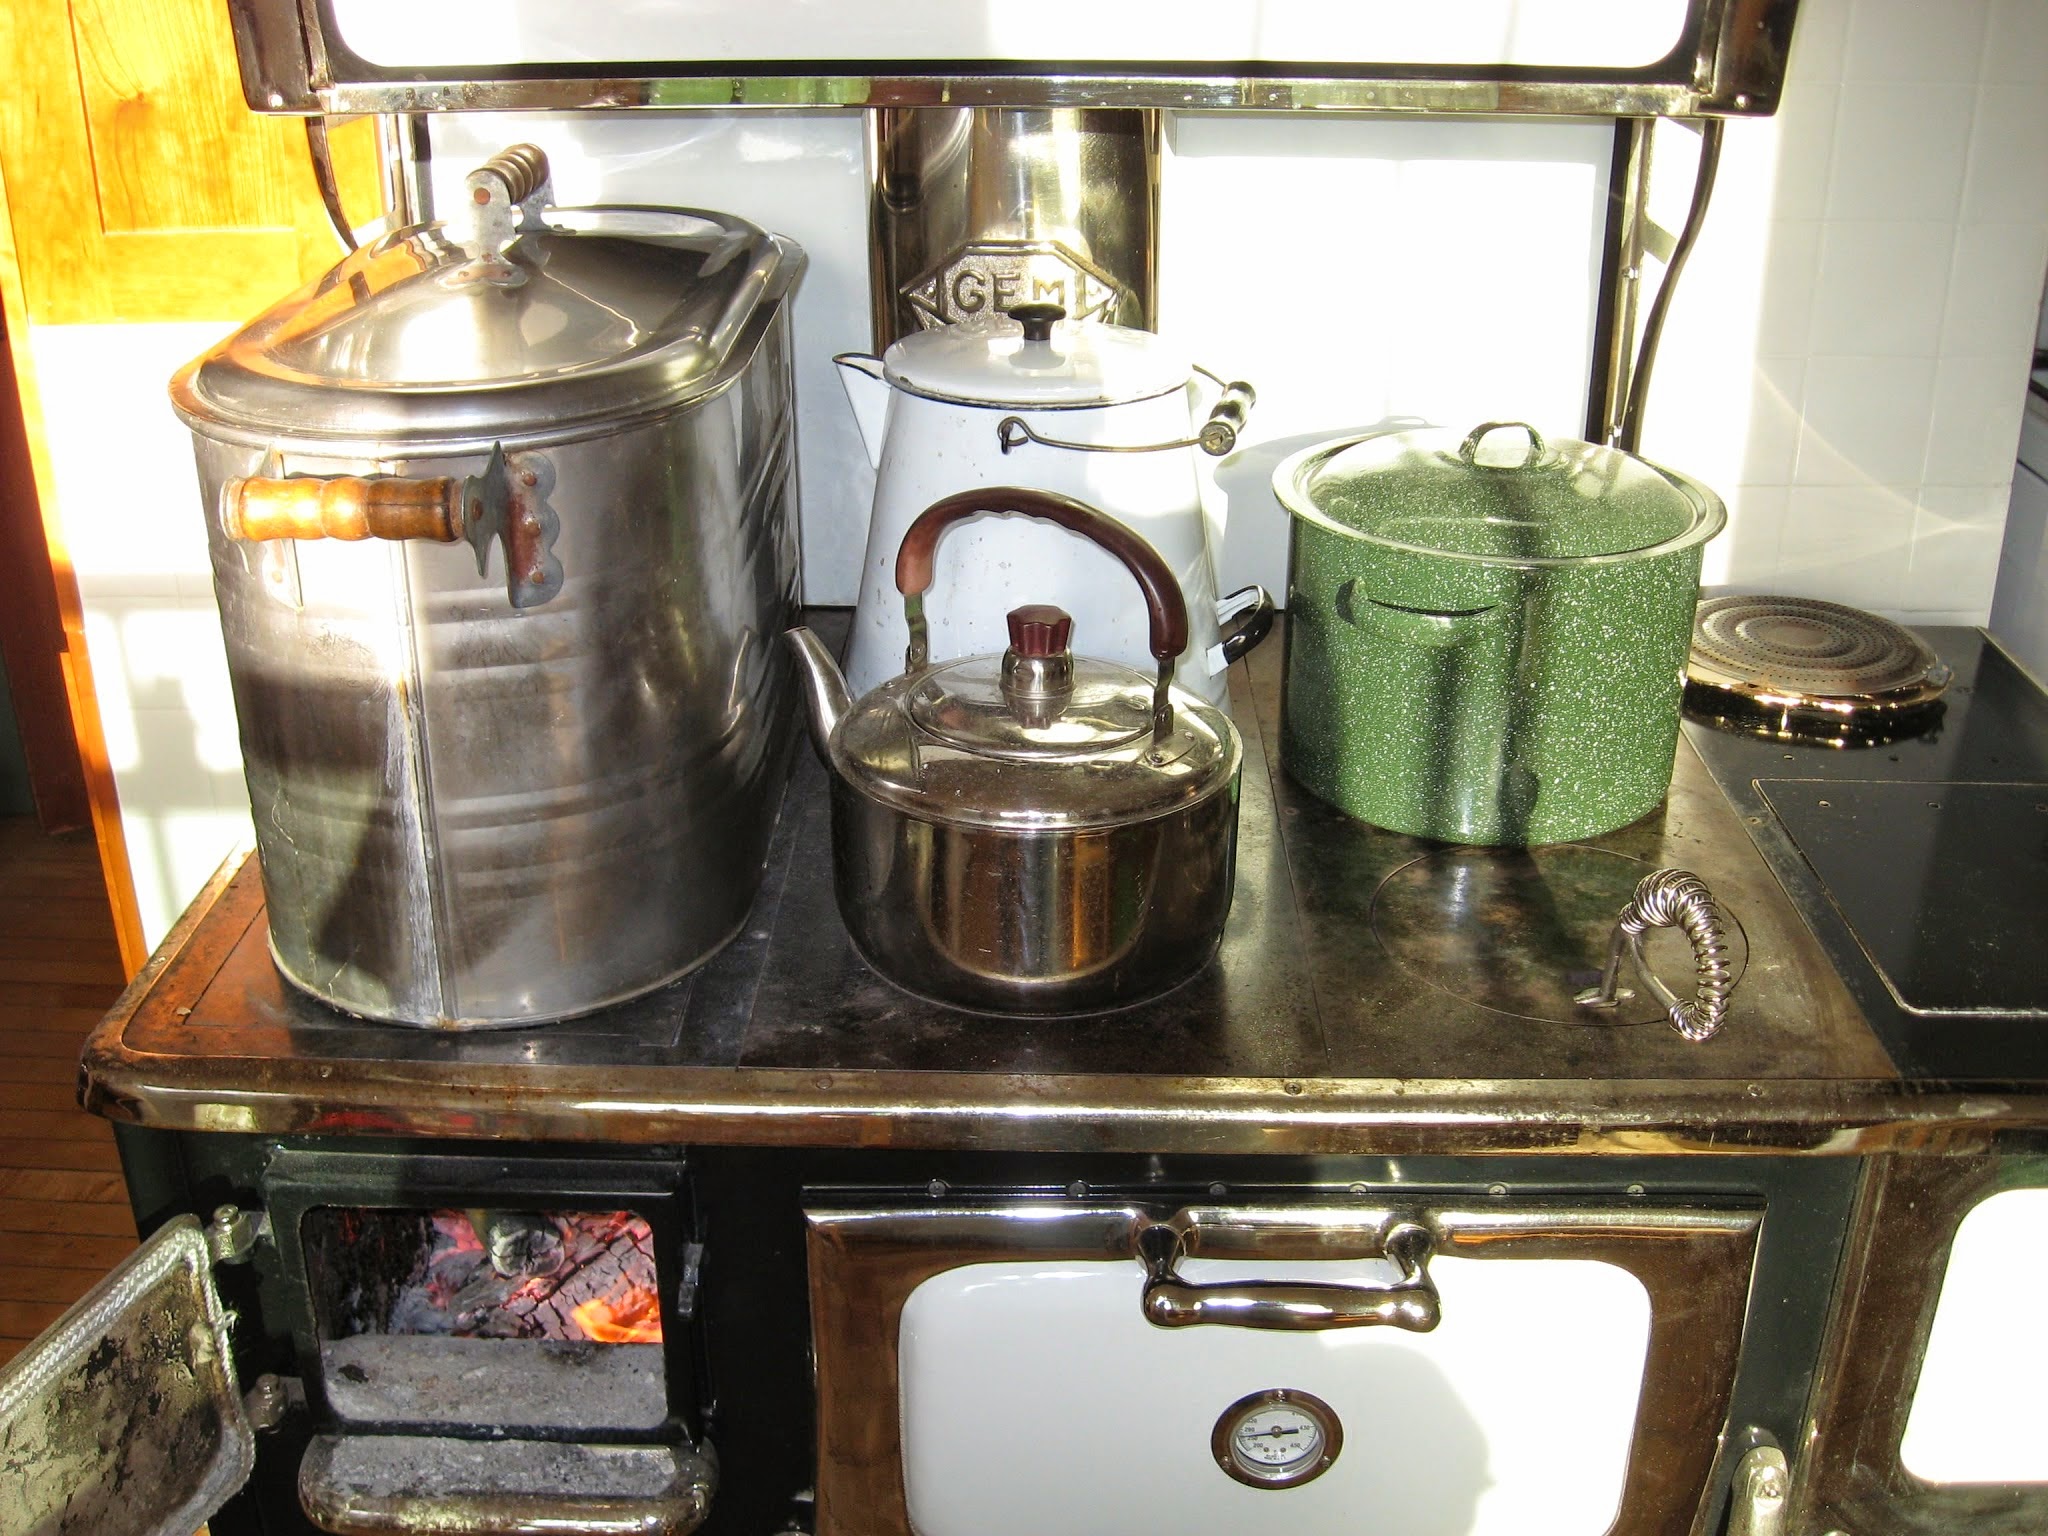
Also, a strategically placed fan can move the heat through your house better, making you feel warmer when you are not standing right next to the stove.  You can see our wood stove fan to the right on the Qualified Range below.  For more details about getting the most heat from your wood cookstove, visit this post. 


C) Use Your Woodburning Range Instead of Your Small Kitchen Appliances

Conventional kitchen wisdom is that electric countertop appliances use less energy than utilizing your kitchen stove to accomplish the same cooking task.  This is the complete opposite of what happens when your kitchen stove is a woodburning range.  Here is a list of small electrics that can stay in the cupboard when the cookstove is in use:

The Electric Skillet
French Toast cooking on the wood cookstove.

The Toaster

For a very lengthy post about the many ways you can toast bread on a wood cookstove, visit here and here.

The Microwave

In the pictures below, you can see me using the warming ovens on both the Riverside Bakewell and the Margin Gem to soften or melt butter and to defrost homemade applesauce.  Susan Fenoff, in her video about using wood cookstoves, calls the warming oven her "Amish microwave."


The Waffle Iron


Waffles are delicious, but waffles cooked on a wood cookstove are a step above in my opinion.


The Slow Cooker or Crock Pot

There are actually many ways that you can use your cookstove as a slow cooker/crock pot, but the method discussed in this post creates the most similar heat by using your wood cookstove's oven with the door open.

The Electric Wok

I don't know anyone with an electric wok anymore, but I know they exist.  However, you don't need one because you can cook wonderful Oriental food in a stovetop wok on a wood cookstove.

The Insta-Pot

I am almost afraid to point this one out since I know many people are in love with their Insta-Pots, but you can use a pressure cooker on top of a wood cookstove quite easily.  Sure, it won't do all of the things that an Insta-Pot can do, but you can pick up a cheap used pressure cooker in second hand stores very easily, and the food possibilities are endless and fast.


My favorite thing to cook in a pressure cooker is tougher cuts of meat, but you can quickly cook vegetables, rice, and even hot cereals in them.

The Popcorn Popper

You'll need a very hot fire, but you can easily pop popcorn on top of a woodburning cookstove, and don't worry about having a fancy hand-cranked popper.  You can get popcorn that is every bit as delicious by shaking it in a plain old saucepan.

The Deep Fat Fryer

Of course you have to be careful, but the wood cookstove is great for deep fat frying.  Historically, wood cookstove cooks favored frying over baking because it is easier to control the temperature of the oil than the oven.  In the picture above, you see homemade chicken nuggets frying on the Margin Gem, and in the post I wrote about them, I discuss the details and cautions that are necessary to deep fat fry on a wood cookstove.

Some readers may look at the above points and note that specialized equipment is sometimes necessary.  For example, in order to bake waffles on your wood cookstove, a stovetop waffle iron is a requirement.  They are increasingly hard to come by in antique stores, and the price has risen exponentially in the last twenty years.  However, new stovetop waffle irons are still available from Lehman Hardware, and at anywhere between $30 - $60, they are competitively priced with new electric ones.  Stovetop waffle irons can be used on gas and electric coil-type modern ranges too, so they are not a bad investment when your countertop waffle iron gives up the ghost.

D. Use Your Wood Cookstove in Place of Other Non-Cooking Appliances

Your wood cookstove can do the jobs of other energy consuming appliances as well.  Here is a list of non-cooking appliances that you can unplug:

The Scentsy® Warmer

Wonderful aromas can be sent wafting through your home by simmering potpourri on top of your wood cookstove.  You'd be amazed how many things resting quietly in your spice rack can be put to use as perfumes for your house without having to spend a ton of money on a ceramic warmer and individually packaged lumps of colored soy oil.

Still, if the colored lumps are your preference, you can melt them in a pan on the cool end of the range just as well as in the expensive warmers.  The same can be said of candles in glass jars.  When we get down to the bottom of a candle which has a scent we really enjoy, instead of lighting the candle, we just put the glass jar as far away from the fire as possible.  The warmth of the stove still melts the wax so that it can emit the scent.  Eventually, the aroma wears away and the candle can move onto its next stage of usefulness, but we've taken all possible advantage of its perfume.  NOTE: Just be sure not to put any glass candle vessels where the heat of the fire is so intense that it could break the glass.  That could be a disastrous fire hazard!

The Clothes Iron

I know, I know.  Some of you are laughing because it's been years since you've ironed any clothes at all.  Well, more power to you.  But for those of us for whom ironing is still a very real chore, ironing can still be accomplished with a wood cookstove as your source of heat.  That's all I'll say about that here.

The Clothes Dryer


American households have to be the worst in the world about wasting energy to dry clothing.  Oops!  Sorry, I jumped up on one of my soapboxes there for a second.  Seriously, though, a clothes rack placed near the wood cookstove can speed along the drying process for freshly laundered clothes.  In the past, woodburning ranges were even equipped with rods for drying towels, mittens, and socks.  Cookstoves can still be used to cheaply and quickly dry clothes.  The double advantage in this is that your can also unplug your home humidifier if you are hanging your clothes to dry indoors.

E. Eat Leftovers

Reducing food waste is one of the easiest things a household manager can do to save money.  In the future, I hope to write a series of posts which give hints and recipes for making leftover foods into entirely new dishes.  I will admit that reheating leftovers is the primary function of our microwave oven, but there are many more tasty ways that leftovers can be reheated or re-made using the wood cookstove.  For example, instead of tossing mashed potatoes in the microwave and having them come out smelling unappetizing and looking no better, making mashed potato patties requires only a little extra effort, and the end product is three times as delicious.

Two posts that I already have which deal with leftovers include one about how to use leftover roast beef and gravy that is very good.  However, if you are really serious about stretching your grocery dollar, the most economical food discussed on this blog is definitely pot-au-feu.

A bowl of Pot-a-Feu.

Literally translated from the French, pot-a-feu means "pot on the fire."  It is as delicious as you want it to be, it is never the same twice, and it is only feasible on a wood cookstove.  

In short, to get the largest financial return from a wood cookstove, make it the energy center of the home.  This is most certainly the way our ancestors used their kitchen ranges, and if one of today's households is blessed with a working wood cookstove, it still has every capability of serving in that capacity.

So, dear readers, what have I missed?  Fill up the comments below with what you do, what you remember your ancestors doing, or what you have heard others did to save money with a wood cookstove.  I'm anxiously awaiting your feedback.

Saturday, September 23, 2017

Cheating with Your Wood Cookstove: Creamed Chicken over Biscuits

I don't remember exactly when my mom started making creamed chicken over biscuits, but I remember that I was not a little kid anymore, that it was an instant hit, and that I wondered why she hadn't tried it on us earlier.  Of course, maybe it was all very strategic.  If she had served it to us too early, our palates wouldn't have been developed well enough to fully appreciate the pleasure of this stick-to-your ribs dish, and we might have summarily rejected it as we did with several more "grown up" foods that she tried on us.  She likes to tell people how long her list of recipes-to-try-again-when-the-kids-are-gone was when we were young.

At any rate, it was Mom who initially got me hooked on this entree.  My mother-in-law also has her family hooked on her version of Creamed Chicken over Biscuits, but her method for making it is entirely different.  Both recipes are delicious, but in this post I'm going to share my mom's version.  

You can see from the labels on this post, that this is a dish made from leftovers.  Therefore, prior to this meal, you need to have roasted a chicken (to read about one way to do that in a wood cookstove click here) and made gravy from the drippings.  We had several people in my family as guests for a Sunday dinner back in August and served a roasted chicken with all the trimmings.  After the meal, Nancy picked the leftover chicken off the bones, and we saved the leftover gravy too.  A few days later, we made Creamed Chicken over Biscuits.

The first thing to do is to build a really hot fire.  Biscuits bake best in a quick oven, and so I always use a lot of little sticks, or "biscuit wood," to accomplish this.

The hot fire built of "biscuit wood" in the Margin Gem wood
cookstove.
 
To make biscuits, I used to always cut the shortening into the flour, but I've taken to a different method of incorporating shortening that my friend Leah told me about.  Now, while the oven is heating, I melt my shortening on the stove.  Sometimes I use the warming oven, other times the lid of the reservoir--wherever I think the heat will be sufficient.  This time I used a very small saucepan on the top of the stove.  I melted perhaps a 1/3 cup of Crisco.


While the shortening is melting, sift two cups of flour into a mixing bowl and add around a tablespoon of baking powder to it.  At this point you might sprinkle a little salt in too if you wish.  Mix all the dry ingredients together.

Once the shortening has melted, pour it into a heat-proof measuring cup. Then add enough cold milk or buttermilk to make one cup altogether while stirring constantly.  The coldness of the liquid causes the shortening to congeal again, thus allowing it to be evenly incorporated into your flour. Brilliant!  (I hate washing the pastry blender.)


Pour the buttermilk/shortening mixture over the flour mixture and toss lightly to mix.  Don't work the dough too hard as that will make for tough biscuits later!


Turn the dough out onto a floured board.


Knead the dough a few times, then pat out until it is about an inch thick.


Cut the biscuits in the shape and size you desire.  For many years I cut biscuits with an old metal drinking glass that Gramps kept by the utility room sink when our house was still his home.  The problem was that cutting the biscuits resulted in compressing the air in the glass, and sometimes it would "burp," causing the biscuit to become misshapen.  Last year, one of the fundraisers at school had a set of biscuit cutters on it, and I'm very pleased with my four various sized biscuit cutters.

Six beautifully cut biscuits and one not so beautiful because
it is the trimmings patted together.

Let the biscuits rest for at least five minutes.  The baking powder will cause them to rise a little, and they will be nice and light.

The next step is to put together the creamed chicken.  Here is where this recipe really qualifies as what I would call "cheating."  To whatever leftover gravy you have from the roast chicken dinner, add a can of cream of chicken soup.  Add whatever leftover chicken you have to the gravy/soup mixture.


Pop the biscuits into the hot oven now.


Put the chicken/gravy/soup mixture on the stove to come to a boil.  You probably won't want to put this right over the firebox since your fire will be so hot for baking the biscuits.  You can see in the picture below that mine was closer to the reservoir than to the fire.

If the gravy was quite thick, you may need to add a little water or milk. Don't do this until you've had a chance to warm the gravy/soup mixture, though, because leftover gravy congeals in the refrigerator and may look deceptively thick until it is heated through.


The soup/gravy/chicken combination coming to a boil over
gentle heat.
Once the creamed chicken has come to a good boil, move it to a place where it can be kept hot while your biscuits finish baking.

The biscuits finishing up in the oven while the
creamed chicken is staying warm on a simmering
pad on the back of the range.
To serve, pour the creamed chicken over the biscuits and enjoy.  I like to drizzle a bit of honey over the top of it all.

The finished product.

Notes:
 
1. You could make your own white sauce instead of using the can of cream of chicken soup.  Then this recipe is no longer cheating.
 
2. My favorite side dish for this is peas, which I like to mix into the creamed chicken mixture.  Peas are not Nancy's favorite side dish, though, so you don't see them in the picture.
 
3. As with most chicken recipes, turkey can be substituted in this dish, and this is one of our family's favorite post-Thanksgiving meals.