Showing posts with label eggs. Show all posts

Sunday, January 30, 2022

Bread Pudding Baked in the Wood Cookstove

I try very hard to control food waste around here.  With a farm dog, a pile of barn cats, and a flock of chickens, there isn't much beyond a few vegetable scraps that doesn't get consumed by someone or something.  However, I think of feeding leftovers to our animals as wasting them, so I am always on the lookout for ways to turn leftovers into something different for their second appearance on our table.  Bread pudding is one of those wonderful comfort foods that I really enjoy, and it is a great way to convert stale bread or rolls into something new.

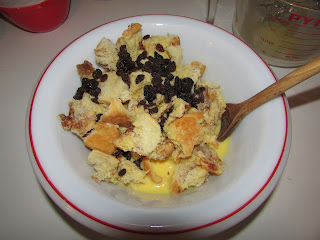
I like bread pudding best when it is made with old cinnamon rolls, and that is what you will see in the pictures below.  The best bread pudding is made with sticky rolls or rolls that had maple frosting on them. About six 3" x 3" cinnamon rolls torn into shreds are shown in the red and white bowl, two of them were sticky rolls.  Set them aside for a minute while you take care of the wet ingredients.


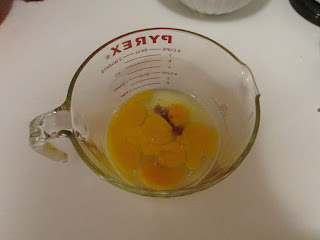
I always use seven eggs and start with about 3/4 cup milk and a splash of vanilla.


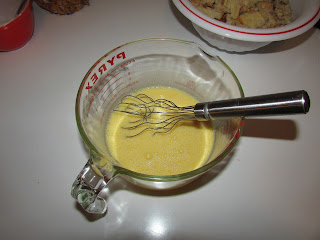
Beat the eggs and milk and vanilla together until well combined.


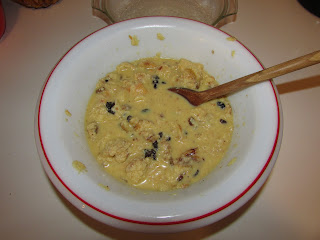
I pour the egg and milk mixture over the dry shredded rolls, add a couple handfuls of raisins and begin gently mixing it all together.


I add milk until the mixture is wet enough to be as soupy as what you see in the picture below.


Next, I transfer all of it to a greased baking dish.


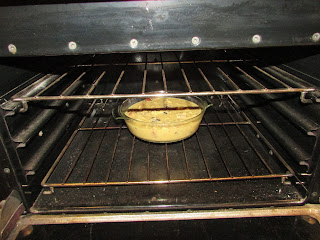
Slide the dish into a moderately slow oven (about 300 to 325 degrees F).  Don't let your fire get too brisk.  My mother-in-law bakes her bread pudding in a bain-marie, and one could certainly do that for this pudding too. 


Bake until the middle of the pudding is set and a table knife inserted near the middle comes out clean.


You will note that except for the topping on the two sticky rolls, there was no sugar added to this pudding.  Therefore, when it was still warm from the oven, I poured a couple tablespoons of leftover frosting on the top, and then just before serving, a little leftover caramel rum sauce which had been using up valuable real estate in the refrigerator for months was drizzled on top.


In my opinion, this is a dessert that is fit for a king, and the main ingredient is something that could have just been thrown to the chickens.  Let me know in the comments how you make your bread pudding!


Sunday, February 28, 2021

Grandma Marian's Rice Pudding

Both Meme and Grandma Marian were of the school of thought that rice should be cooked forever in the top of a double boiler.  I know Meme's mother (my great-great-grandmother) cooked it in the same manner, and it was always served on Saturday night for supper.  Thus, I almost laughed aloud when I read the following bit from page 50 of my reprint of the 1933 Home Comfort Cookbook:

"Rice should not be put into a double boiler and cooked slowly into a pasty mass."

That is EXACTLY what they both did, and I ate it happily every time!

If I had to hazard a guess, I would say that Grandma only made rice once per month.  It was served instead of the ever-present potato with a sprinkling of sugar and a dash of cinnamon once it was on our plates.  Other than that, it was completely unseasoned.  (I had never even heard of salting rice until I was in college, and I had never had Chinese food either.)  If any rice was leftover, she would make it into rice pudding for dessert a day or two later.  Since she didn't ever know how much rice she would have (she was constantly cooking for large groups of family and hired men), there was never any recipe for her rice pudding.  Furthermore, sometimes it all fit into a small custard cup, and sometimes it needed an 8" x 10" Pyrex dish.  Obviously, this dish is very flexible.

Also, I should give fair warning that though Grandma always called this "rice pudding," it is really more of a baked custard with rice in it.  Thus, if you are looking for a rice pudding that is more similar to a cornstarch pudding, this isn't going to fit that bill.

To start with, you need leftover cooked rice, eggs, milk, sugar, and vanilla.  You can see in the picture below that I had two different containers of leftover rice, and I would estimate that they amounted to about 2 1/2 cups altogether.


To this amount of rice, I added three eggs and some milk, a splash of vanilla, and perhaps a quarter cup of sugar.  I could have put more sugar in--Grandma certainly would have--but I like this best served with ice cream, so I didn't want it to be all that sweet.


Three eggs didn't seem to be sufficient, so I added a fourth and a dab more milk.  That's the thing with this sort of "recipe": you have to carefully observe what things look like so that you know how to adjust your proportions.  In this case, you want there to be enough egg and milk mixture to cover the rice completely.  You can see that things looked better after I added these extras.


Finally, add whatever amount of raisins you would like.  I think I put in a heaping half cup into this batch.  

Lightly sprinkle cinnamon on the top of the pudding once you put it in whatever dish you are going to bake it in.


This is a particularly good recipe to bake in a wood cookstove because you don't have to have a certain oven temperature.  I imagine Grandma baked it at 325ºF, but you just have to have a slow to moderate oven.


Watch the pudding carefully, baking it until it is firm in the middle.  Depending on the size of your pudding, this can take quite a while.  Again, just watch it carefully and don't let your fire get too hot!


I like this rice pudding best when served warm.  Grandma always served it with Cool Whip, milk, half & half, or ice cream.  My favorite is ice cream.

We have some family friends who make a very similar dish that they just call "Baked Rice."  Theirs is less sweet, has a bit of salt added to it, and is served as a starchy side dish for the main meal rather than a dessert, but it is the same basic idea.  Both their family and Grandma's has a lot of German influence, so I wonder if this is a German dish.

Please fill up the comments with information about whether you or your family make something similar, and let us all know how your method differs.

Thursday, December 31, 2020

An Egg Coddling Party around the Wood Cookstove

When my parents were married back in 1971, they were given a pair of egg coddlers for a wedding gift.  I only remember one or two times that Mom and Dad made coddled eggs while the three of us kids were at home, but that is understandable since they only had two egg coddlers.

My brother Kevin and I have taken to buying these little beauties whenever we see them, so between the two of us, we have now amassed enough of a fleet that we could have an egg coddling party.


Thus, last night my sister and her family, my brother and his family, my parents, and my aunt all came to our house and we coddled eggs and made Aebleskiver.

In the photo below, I'm beginning to fry Aebleskiver while Janet and Kevin work on preparing the accessories to the coddled eggs.  Mom commented that it was rare to see all three of us working over the same stove, but I think that has only never happened because no other stove besides a woodburning range would be big enough to accommodate all of us.  I will write a whole post about making Aebleskiver later, I promise.


The egg coddlers are little porcelain jars with stainless steel screw-top lids.  They are made by Royal Worcester and come with the following instructions:

"Lightly butter the inside of the cup.  Break egg into it.  Add butter, salt and pepper for flavor.  Screw on lid.  Cook six minutes in enough boiling water to cover coddler.  Lift cup from water by metal ring.  When you unscrew the top, grasp the whole cover.  If the egg is not cooked enough, replace the lid and return the coddler to the boiling water.

For variety, add flaked fish, cheese, herbs, chopped ham, mushrooms, etc. to the egg.  Coddlers are also ideal for heating baby foods."

What Kevin and Janet were working on in the picture above was sautéing mushrooms and cooking two different kinds of sausage as well as warming some diced ham.  We also had some chopped bell peppers and onions.


We beat a bunch of eggs together, poured a little into each coddler,  and mixed whatever other things we wanted into them and basically cooked our own individual egg casseroles.  My brother and brother-in-law wish that we had left the eggs whole, but we'll have to wait until next time to do it that way again.

The next picture is actually from the last egg coddling party that we had a couple of years ago.  You can see both the green enamel sweet corn kettle that we used again last night and my five-quart Magnalite Dutch oven.  The Dutch oven was nice because it was more shallow and therefore made it easier to retrieve the coddlers from the boiling water.


This time, we only used the green sweet corn kettle because I wanted to be able to remove the lid of the cookstove beneath it in order to facilitate the fastest boil possible.  This made it difficult to get the egg coddlers out of the water, though.  Thus, Kevin and Jason created a new kitchen tool out of a wire clothes hanger:

It worked like a charm, and I have been instructed to save it until the next egg coddling party.


We've found that six minutes is not quite long enough to suit our general taste, especially since we put so many coddlers down into the water at once, thereby reducing the water temperature below the boiling point for a while.  You can also see from the picture above that we have some coddlers that are larger than others; they naturally need some more time.  In general, we were cooking them for ten to twelve minutes.

Once the time has elapsed, unscrewing the lids is a process that needs caution and two hot pads.


When the eggs are cooked, they come out in little bell shapes.


Coddling eggs is a very labor-intensive and time-consuming way to prepare them for large groups of people, but getting together was the main point of last night's gathering.  Though we all live within an eleven mile radius, because of Covid-19, we have only been together twice since March: once on Mothers' Day and then again on Christmas.  We figured since we were already exposed to each other on Christmas, we might as well get together once more, and I really enjoyed having Janet and Kevin and their families back here with me in the house where we grew up.


Sunday, February 25, 2018

Cream Puffs: An Ideal Wood Cookstove Dessert

Cream puffs are one of my favorite desserts, and they are an ideal recipe for the wood cookstove.  If your chickens are like ours and the lengthening days have resulted in increased egg production, cream puffs are also a great food to make during this time of year.  For one thing, the weather has not gotten warm yet.  This allows the cream puffs to keep better, and standing over the stove while you make the filling is still a pleasant experience.

Cream puffs are very simple, and if you have your own chickens and a dairy cow or goat, you can produce a great deal of the ingredients for them on your own.  Here is what you will need:


1 cup water
1/2 cup cold butter
1 cup flour
4 eggs

1. The first thing to do is to build your fire so that you will have a hot oven (400º F).  As you do this, keep in mind that your baking time is going to be 45 minutes long.  I find that it is best to have a lot of pieces of firewood that are small in diameter.

2. Once the top of the stove has gotten good and hot, put the water and the butter in a medium saucepan and place it directly over the fire.  You want to bring this mixture to a full boil.

Note: I find that I have better results when the butter is cold when I put it in the water.  I don't know why, but it seems to make a difference.


3. While the water and butter are coming to a boil, crack four eggs into a measuring cup and measure your flour.  This is also a good time to grease the cookie sheet you will bake these on.

4. Once the water/butter mixture has come to a full boil and the butter is completely melted, take the pan off the fire and immediately stir in one cup of flour.  This will make a paste that smells awful and doesn't really look very nice either.


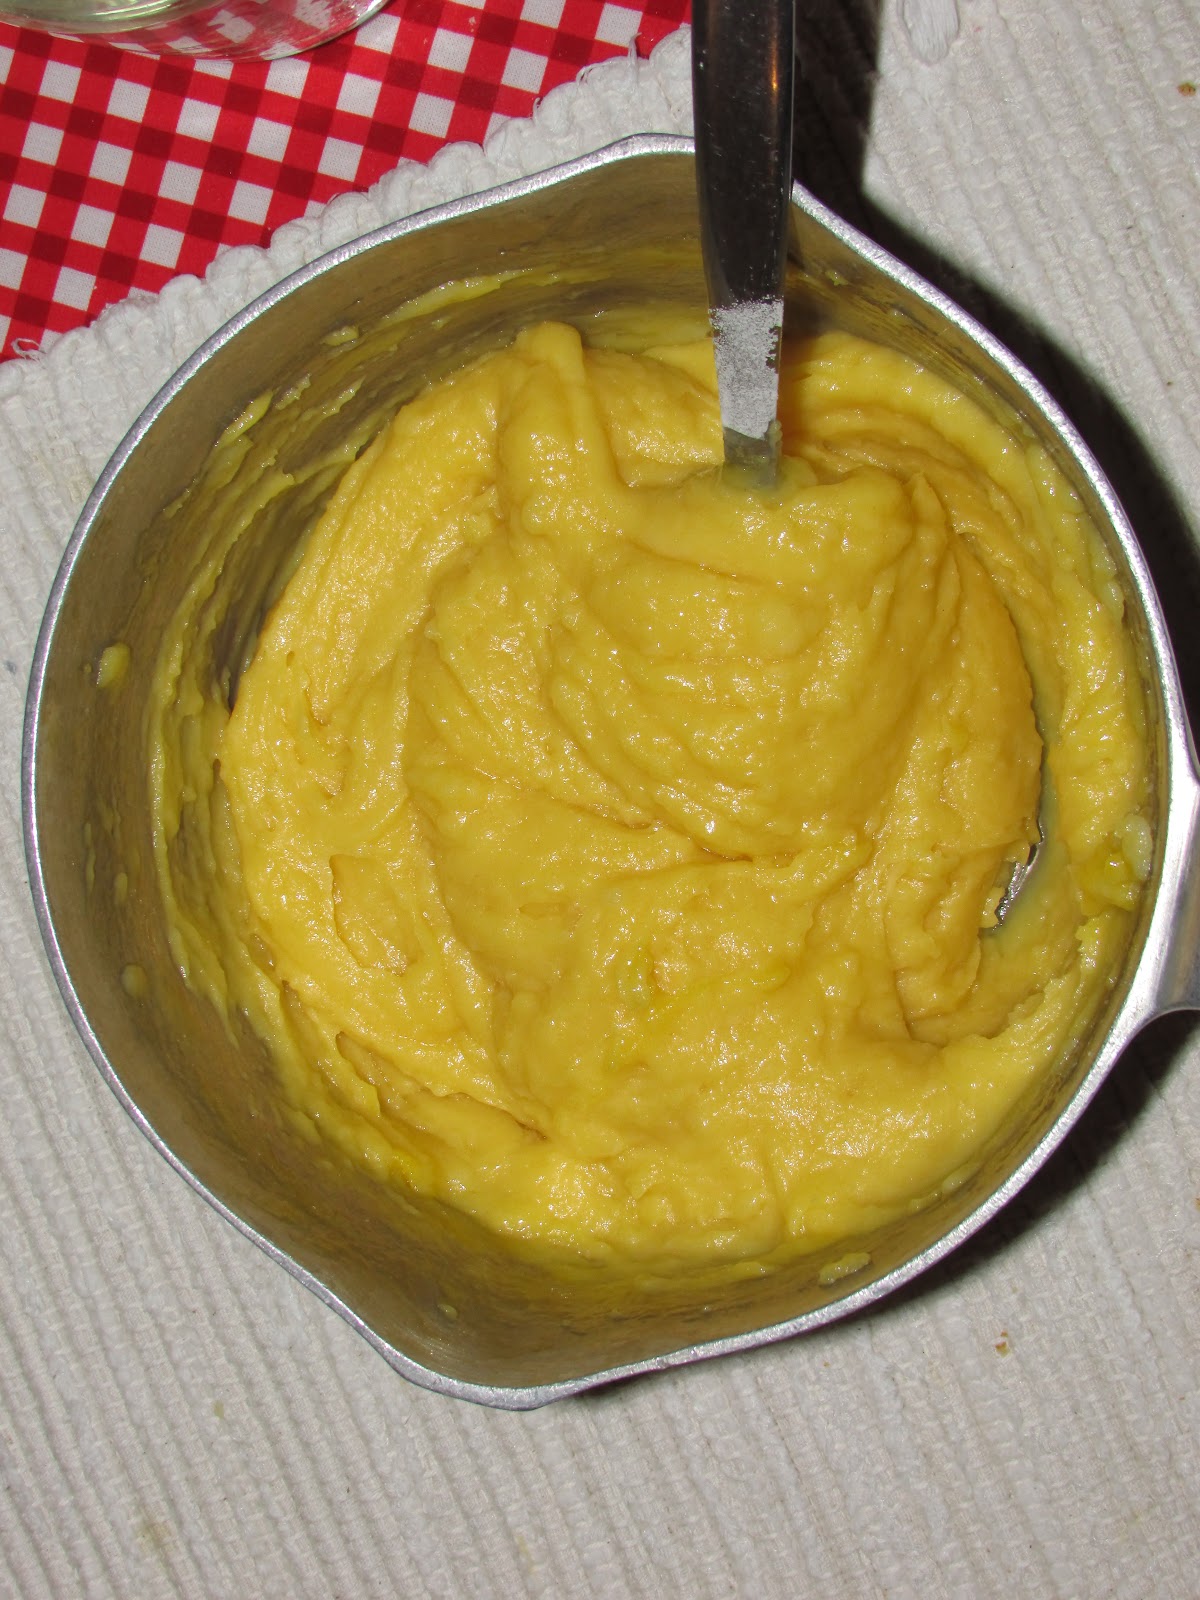
5. Stir the eggs into the paste one at a time, beating thoroughly after each addition.  Do this quickly because you don't want the eggs to cook before you've beaten them in.  Now your paste will be a sticky, bright yellow goop that still looks and smells unappetizing.


6. Drop or pipe the puff paste onto the greased cookie sheet.  You can make these as big as you want.  In stores, they seem to always be bitesized.  I tend to prefer a more bold cream puff, so I drop them by the 1/4 cup.  


7. Bake in a hot oven for 35-45 minutes, watching to be sure that the edges aren't turning too dark.  

If you are going to fill the cream puffs with a cooked custard, it is best to cook it during this time because your stove is already hot for the baking. My favorite filling is my great-grandma Gladys's vanilla cornstarch pudding. You can find the recipe here.


7. When done, remove from the oven and cool completely.

8. To serve, either slice the cream puff in half to insert the filling, or you may use a pastry gun to squirt the filling inside the cream puff.  I like to sprinkle powdered sugar over the top, but for fancier occasions, I have diluted strawberry jam with strawberry syrup and drizzled that on top of the cream puff and then dusted it all with the powdered sugar.  I know I'm weird, but I also like my cream puffs warm, so I often pop them in the microwave for a few seconds before eating them.  


I consider cream puffs an excellent wood cookstove recipe because you take advantage of the heat of the fire to make the paste while your oven is heating, and then while they are baking, you again make double use of the fire by making the custard filling.  Really, your fire is always serving a double purpose as you make these.  Also, with the exception of the butter, these are a very economical but fancy dessert.


Note: This is the same recipe for eclairs.  The difference is that eclairs are usually piped onto the cookie sheet in oblong shapes, and they have chocolate on the top. 


Grandma Gladys's Vanilla Cornstarch Pudding on the Wood Cookstove

This recipe comes from Grandma Gladys, who was one of my maternal great-grandmothers.  She passed away two months before I was born, but my recipe box has several of her mainstay menu items in it, and I think this is one of the best.  I know that boxed pudding mixes are cheap and extremely easy, but this really is such a simple recipe, and cooking on a wood cookstove makes me want to make things from scratch as often as possible.

You will need the following ingredients:


3 egg yolks
3/4 cup sugar
2 cups milk, divided
3 Tblsp. cornstarch
2 Tblsp. butter
dash salt (optional)
vanilla flavoring

First, beat the egg yolks and the sugar in a heavy saucepan.  I always use my three-quart Magnalite aluminum one.


Add the rest of the ingredients except for the vanilla and bring to a boil directly over the firebox, stirring constantly.


The pudding will thicken immediately upon boiling.  At that point, remove from the fire and add a splash of vanilla.  


That's it!  It is that easy, and it tastes so much better than instant pudding that the two are not even comparable.

Sometimes I've seen recipes like this that say "discard the whites" after telling you to separate the eggs.  That makes me crazy because it is such a waste of food.  When I make this pudding, I always fry the egg whites for my breakfast the next morning.  I like fried eggs, but I love fried egg whites.

Sunday, January 31, 2016

Popovers Fontaine

I love popovers!  I haven't made them in quite some time, but I decided to throw them together tonight since our chickens have been keeping us very well-supplied with eggs.

I wish I could remember where I got this recipe.  When I worked for the bank, sometimes I would be sent to work in the Avoca office.  I enjoyed substituting there because they had a break room where I could eat my lunch, and in that break room, they always had a stack of cookbooks that I would sit and peruse while I waited for my lunch hour to be over.  Thus, I know that I copied this recipe out of one of their cookbooks, but I didn't write down which one.

Popovers are extremely easy and fun to bake, and if you are a homesteader or farmer with your own chickens and dairy cow, you can produce most of the ingredients that you need by yourself.  Here is what you will need:

Popovers Fontaine
 
3 Tblsp. melted butter
3 eggs
1 cup milk
1 cup flour
1/2 tsp. salt
 
First, build your fire so that you will have a hot oven.  You're shooting for about 400 degrees.  Then, put the butter in a dish in the warming oven or on top of the reservoir (or wherever) of the range to melt.
 
The butter melting in the warming oven.

Grease 8 five-ounce custard cups and place them on a baking pan with edges.  I know that some people bake popovers in muffin tins, but I've never had very good luck with that, and using custard cups has never failed me.  You MUST put the cups on a pan.  Most of the shortening that you use to grease the cups will come out and dribble down the sides of the cups onto the pan.  You don't want that mess on the bottom of your oven!


Beat the rest of the ingredients together with a whisk.  Add the melted butter last.  The batter may look a little lumpy.
 
Fill custard cups half full of the batter.  Place in the oven until they puff up and are golden brown.  The recipe originally stated that they needed to be baked from 45-50 minutes.  I find that amount of time to be way too long.


I love to watch popovers bake.  You never can predict how they are going to look when they come out of the oven.
 

I always eat these with a little homemade pancake syrup, but I think that they would be good dusted with a little powdered sugar, too.  Fruit makes a great accompaniment for popovers.


My favorite memory surrounding this recipe is from the day Nancy and I were married.  My aunt and uncle stayed overnight here with me on the night before we were married, and so I baked popovers in the Qualified Range for our breakfast.  Just as we were sitting down to eat, my brother and my sister both arrived separately, so I ended up serving an impromptu breakfast for five that morning.  If you have unexpected company, these are an easy but novel go-to food.  I hope you enjoy them! 


Thursday, March 12, 2015

Baking an Angel Food Cake from Scratch in a Woodburning Cookstove

As the days get longer and warmer and the chickens begin to be more reliable about laying, baking an angel food cake from scratch is a great way to use an over abundance of eggs.  Now, many people think that angel food cakes are one of the most difficult things to bake, but I have had a great deal of success baking angel food cakes in woodburning cookstoves.  In fact, I honestly prefer to bake angel food in a woodburning range over a modern oven.  It seems to me that they remain more moist than when they are baked in our gas oven.

For as long as I can remember, the most frequently requested birthday cake on my mom's side of the family has been an angel food cake.  My grandma Marian is an expert on angel food cake baking, and until recently, she would bake many of these cakes throughout each year for friends, neighbors, and family members.  For my brother and sister and me, it never felt like our birthday until we had an angel food cake with caramel frosting.  Others in the family occasionally requested different frostings, but the cake was always the tender, cloud-like angel food that we all loved.

Directions for baking angel food cakes have changed over the years.  Originally, it was considered best to bake angel food cakes for a long period in a slow oven, the heat of which was gradually increased during the baking time.  For example, Grandma Ruth (my great-grandmother whom I have mentioned frequently on the blog) included these baking instructions on her angel food cake recipe:

"Bake at 275 for 20 minutes, 300 for 30 minutes, and 325 for 10 minutes."

In fact, in the December 1937 issue of Kitchen Klatter Magazine, the following article about baking angel food cakes in a woodburning cookstove was contributed by reader Helen F. Karr of Doniphan, Nebraska:

"I have my fire out and my stove cold.  I put my fuel in and have it ready to light before I start to mix my cake.  I mix my cake just as you do your cake and put it in the pan, then into the cold oven.  I light my fire.  I do not put much fuel in at a time because our stove doesn't take much to heat it.  For the first 15 minutes I just have my oven warm up.  Then increase the heat for the next 15 minutes.  By the next 15 minutes I have my oven about hot enough to bake a loaf cake, then keep it about the same for the next 15 minutes or just a little hoter [sic].  If not done I just let the oven cool down a little.  The heat that is in the oven will finish it.  I don't like to have my oven to get hot too fast."

Sometime in the mid-twentieth century, opinions about how to bake an angel food changed so that directions now call for oven temperatures ranging between 350 and 400 degrees coupled with shorter baking times.  I have used both baking methods and cannot tell much difference in the end product.  I tend to favor the cooler oven temperature method, however.

Before I give you the recipe that I use for angel food, I need to warn you that not even the smallest little bit of fat or grease may come into contact with your cake ingredients or any of the utensils that you use to mix or bake the cake.  The presence of any oils will make your cake fall, and that is the last thing you want after you go to all of the effort to make an angel food cake from scratch!

The recipe that I use for angel food cake is one that I have devised.  I took one of the recipes for angel food out of the Kitchen Klatter Cook Book and altered it until I got the results that I desired.  This makes a very tall, finely textured cake.  Here is what you will need:


Jim's Angel Food Cake

1 1/6 c. cake flour
1 3/4 c. powdered sugar
1 3/4 c. egg whites
1 1/6 c. sugar
1 3/4 tsp. cream of tartar
1/2 tsp. salt
1 tsp. vanilla
1 tsp. almond flavoring

The first thing that I always do is to measure the cake flour and the powdered sugar.  I measure both by sifting them into dry measuring cups and then leveling them off with a table knife.


Of course, most people don't have a 1/6 c. measuring cup, so I just use my 1/3 c. and fill it only halfway.


Once you have measured and combined the cake flour and powdered sugar, you must sift both of them together at least three times.  This is necessary because when you eventually stir them into the egg whites, you want to make sure that they are already evenly mixed.  Once you have sifted them together several times, put the flour and powdered sugar mixture aside.

Now begin separating your eggs.  The number of eggs that you will need is totally dependent on their size.  I just keep cracking and separating eggs until I have the required 1 3/4 c. of egg whites.  Usually, this is about 12-14 eggs.

Caution:  You must be absolutely sure that no egg yolk--not even the smallest little bit--accidentally lands in your egg whites!  The presence of any egg yolk will result in your cake falling.  This is why I separate my eggs over  a small bowl.  That way, I can inspect every white thoroughly before pouring it into the measuring cup.


Save the egg yolks for making homemade noodles or for Sunshine Cake (or both, depending on how many you have).  Place the whites in a large mixing bowl and add the salt and cream of tartar.  Begin beating the egg whites on high speed.


(A silly side note about the mixer in the pictures: This vintage avocado green Sunbeam belonged to Granny, my dad's mother.  I inherited it from her in 1995 when she and Gramps moved into a retirement home.  When I was little, almost every appliance that my mother had was avocado green.  We had an avocado green refrigerator, stove, iron, vacuum cleaner, electric skillet, blender, etc., and I think that it is the most hideous color.  However, I decided that I would use Granny's mixer until I had worn it out.  After twenty years of fairly hard use, it's still working fine, and this is after Granny used it for I don't know how long!)


When the whites become foamy, begin gradually adding the granulated sugar.


Continue beating at high speed, scraping the sides of the bowl occasionally.


Now for the fun part: figuring out when the egg whites and sugar have been sufficiently beaten.  Some recipes say to beat them until "stiff, but not dry, peaks form."

Grandma Ruth had a different method for determining if the egg whites were beaten enough, and it has worked for me every time.  She would take the bowl of egg whites off the mixer and carefully raise it upside down above her head.  If the egg whites don't fall out, they have been beaten enough.  If, as you begin to tilt the bowl at a dangerous angle, they begin to slide even a little bit, put the bowl back on the mixer and beat them some more.  Then, take the bowl off and try the test again.

Be careful, though!  If the egg whites are permitted to fall all the way out of the bowl, you'll have no choice but to start over completely.


Once the egg whites are done, begin folding the cake flour/powdered sugar mixture into them a little at a time.  My grandma Marian taught me that the best tool to use to do this is a flat beater as you see in the picture below.

This process has to be done VERY gently, being sure to pull the egg whites up from the bottom of the bowl.  The series of photos below shows the motion that your beater should cycle through.


The picture above shows the vanilla and almond flavoring being stirred in at the end.  Grandma Marian always taught me to add the flavorings last so that they didn't lose any of their intensity due to evaporation during the mixing process.

The cake that you see me baking here was for my niece, whose favorite colors are pink and purple.  We happened to have pink nonpareils, so I stirred some of those in to create a pink "fun-fetti" effect.  If you are going to stir in nonpareils, they must be put in at the end with only a minimal amount of stirring because their color quickly begins to bleed into the cake batter.


Gently pour the cake batter into an UNGREASED angel food cake pan.


Run a table knife through the batter to release any air bubbles.


Place the cake in a slow oven (or whatever temperature you have decided at which to bake angel food cakes).


The oven door of the Margin Gem.  Since the temperature gauge
on the Margin Gem is not very accurate, I don't usually pay much
attention to the numbers.  Instead, I pay attention to the relative
location of the indicator needle.  This is what the gauge looks like
when the oven is running at about 325.
While the cake is baking, I gradually add more small pieces of fuel to the fire in order to gradually increase the heat of the oven.  Don't add too many pieces at once because you don't need a raging inferno, and small pieces will afford you more control.

You can see in the picture below, how tall the cake will rise during baking.  Angel foods will shrink back down when they get to the end of their baking time.

An angel food cake baking in the Margin Gem cookstove.

Watch the cake and your oven temperature carefully during baking.  I don't like to let the oven get too hot because then the top of the cake gets too brown for my taste.

I would NOT recommend turning the cake until it is close to the end of the total baking time because you don't want to run the risk of it falling because you jostled it.

You can tell when the cake is done by the fact that it will obviously begin to pull away from the sides of the pan.


When the cake is done, remove it from the oven and turn it upside down.  The cake pan that I use no longer has the three little legs that most angel food cake pans have which elevate them off the surface that they are resting on when they are upside down.  This makes no difference to me, though, because  the cakes are often too tall for those little legs to be effective anyway.  Thus, I turn the cake upside down over a vintage Pepsi bottle that I have saved just for this purpose.   (If you are a Coke lover, you could use a Coke bottle instead, but I wouldn't guarantee the results.  My grandma turns her canning funnel upside down and then puts a wooden handled cookie cutter over the narrow hole and uses that in place of a bottle.)

The cake needs to be left upside down in the pan until you can no longer feel any heat at all when you place your hand on the bottom of the pan.


Once the cake is completely cool, run a very thin-bladed, non-serrated knife around the outer edge of the cake as well as around the center tube of the pan.  I find it best to not move the knife up and down at all, but rather slide it all the way around with the blade completely inserted the whole time.  This seems to prevent the cake from bunching up and creating holes along the outside.


Invert the pan and remove the cake to a cake stand.  

Grandma Marian always says that if you want a particularly elegant angel food, you should rub the brown outer edge pieces off with your fingers.  If you decide to do that, don't discard them.  They are extremely tasty.


At this point, I always frost any angel food that we are not selling.  My favorite frostings to put on angel foods are either caramel (a cooked frosting that I really should share with you) or plain powdered sugar icing with almond flavoring added to it.

To serve an angel food, cut it with a serrated bread knife using a back-and-forth sawing motion rather than a slicing motion.  If you slice, you will mash the cake into a misshapen and unappetizing blob.

Angel food cakes will keep at room temperature for a few days, but you must not seal them completely.  I find that Grandma Marian's method of laying the knife that you are using to cut the cake between the lid and the bottom of the cake stand--thereby creating a little ventilation--does a beautiful job of keeping the cake in its prime.  If the cake stand is completely sealed (other than in transport), the cake will quickly become a soggy mess.

If you have a favorite method of baking an angel food in a wood cookstove, please fill up the comments field with additional information for us all to benefit from.