Showing posts with label canning on a cookstove. Show all posts

Tuesday, July 6, 2021

Recreating One of My Favorite School Lunches on the Wood Cookstove

You would never have caught me saying that I loved school lunches when I was growing up.  The food that my mom, grandmothers, and aunts made at home was far superior to anything that was served to us at school.  There were a couple of meals, however, that I did really like.  One was maidrites (or sloppy joes or taverns--whatever you call them) and the other was beans and wieners.  I know, I know.  I suspect that most of the other kids thought what you're thinking because by the time I was in high school, we never had them anymore.

Beans and wieners were always served with a piece of delicious cornbread and a helping of canned pineapple.  This combination never changed, and that was fine with me.  These days, this is a meal that I make on one wood cookstove or another at least once a year using foods that I have canned on a wood cookstove.

In my previous post, I wrote about how to make homemade cornbread in a wood cookstove.  While that is baking, I use the heat of the stovetop to make my beans and wieners.  

In the picture below, you can see a home-canned jar of pork and beans processed on the Margin Gem last year that I wrote about in this post.  The half-pint jar is extra tomato sauce from when we canned Homemade Heinz Ketchup last summer.  You can read about that recipe at this post.  The jar on the right is a pint of home-canned pineapple.  I blogged about that here.  If you've ever had home-canned pineapple, you'll never want to buy a can of it in a grocery store again.  It is SO GOOD!  

Of course, the remaining item in the picture is the package of hot dogs.  I have to admit that, in my opinion anyway, the cheaper the hot dogs, the better the beans and wieners taste.  I don't even want to think about why.


For this batch of beans and wieners, I mixed the jar of beans and the jar of tomato sauce with a little extra brown sugar and a dash of dry mustard and cinnamon and the tiniest sprinkling of ground cloves.  These are the spices that go in the homemade ketchup recipe.  Under ordinary circumstances, I would have just added some homemade ketchup to the jar of beans.  However, the beans in that batch were extremely dry, so I knew I needed more liquid than normal, and the half-pint of tomato sauce fit the bill perfectly.

I sliced maybe four hot dogs into the mixture, stirred it all together, and took it out to the Hayes-Custer cookstove in the summer kitchen.


Since you have to have a pretty hot oven to bake the cornbread, cooking the beans and wieners directly over the firebox is not a good idea because they will almost certainly scorch.  Thus, I had them in the middle of the cooktop.  I stir them frequently until they have come to a boil and the hot dogs are heated through.


By the time the beans and wieners are cooked, the cornbread should be done.


Now at school, of course, this meal was served on putrid-green lunch trays with all the divided compartments to keep the foods from running together.  Those trays were a source of particular frustration to me on Beans and Wieners Day because I discovered early on that the cornbread and the beans and wieners are best eaten together.  I used to labor diligently to make sure that each forkful had a piece of cornbread and a dollop of beans and wieners on it.

Now that I'm grown up and can serve this the way I want, I pour the beans and wieners right on top of the slab of cornbread.  Delicious!  It's definitely my favorite way to eat cornbread since it's a lot less work to make sure that each forkful has some of both.  

The home-canned pineapple sends this meal over the top, and I don't know why I don't make it more often.

Saturday, January 9, 2021

Canning Pineapple on the Wood Cookstove

First, some news: Nancy and I finally made donuts again, so there are now pictures on that post from April.

Speaking of April, sometime around Easter of last year, one of the grocery stores near us sold pineapples for less than a dollar each with no limits on the number you could buy.  We bought five and I canned at least three of them.  That was the first time I had ever canned pineapple, and when we opened a jar to taste it, we were immediately hooked.  Home-canned pineapple has outstanding flavor!  My personal opinion is that the flavor is so good because it is in glass rather than metal or plastic.

At any rate, pineapple went on sale again at the same store right around Christmas, and I finally got around to canning the ones we bought just last Thursday.

As always when I'm water bath canning on a wood cookstove, I start by putting my canner full of water directly over the firebox.  Because I knew that preparing the pineapple for canning wouldn't take very long, I also put my sugar syrup on to come to a boil.  Pineapple is very sweet on its own, so I made a very light syrup.  Canning manuals say that a light syrup is one cup of sugar to three cups of water.  I made mine a little lighter than that even.

When I'm water bath canning, I always like to have the teakettle near the fire too, in case I've missed my guess and have to add water to the canner.  Using boiling water from the teakettle doesn't cool the canner down when you add it, which is important to keeping your processing time accurate.

The canning lids are in warm water on the cooler part of the stove away from the fire.

The Margin Gem with canner, syrup,
teakettle, and lids heating up.  The
oven door is open because, well, it's
January, you know.

With all of that on the stove, I went to the counter in the pantry to get the pineapple into the jars.  I cut them into pieces that would be larger than commercially canned tidbits but smaller than what are sold as pineapple chunks.  Fill the jars to within a half-inch of the top.


Both times I've canned pineapple, it worked out that you can roughly figure that one pineapple will yield two jars full.

After covering the fruit with the boiling syrup and affixing the lids and bands, all went into the canner.  This time, right after putting in one of the first jars, I heard that telltale "pop" of a jar that just broke.  I tried to lift the suspect jar up to see if that was what happened, but I couldn't tell for sure.  Once I had the rest of the jars in the canner and I lifted the lid to see if the water had reached the rolling boil that tells me when to start counting processing time, look what was floating.


As frustrating as that is, it happens sometimes!  

My most recent Ball Blue Book says that pineapple in pint jars needs to process for 15 minutes in the boiling water bath.


As you can see, the finished product is a beautiful yellow, and it adds a nice bit of color to the fruit room shelves.  Back in April, I pushed the pencil on this, and when pineapple is less than a dollar each and you include the cost of the sugar and the canning lids, you can save quite a bit of money on canned pineapple by putting it up yourself.  Besides that, the flavor is fantastic!

Saturday, November 28, 2020

Book Review: "The Prepper's Cookbook" by Deborah D. Moore

It's been a quite a while since I've posted a book review on this blog, but I recently read a cookbook that has been in my collection for perhaps a couple of years: A Prepper's Cookbook: Twenty Years of Cooking in the Woods by Deborah D. Moore.  I don't remember where I found this little gem, but it is available from retailers online.  Originally, I purchased this because the advertisement I saw said that it contained information on how to cook on a woodburning cookstove.  It does indeed.

Situated in Michigan's Upper Peninsula, Ms. Moore's home is remote, and she has to be ready to be snowed in for days at a time.  Thus, she keeps a very well-stocked pantry that is a combination of home-preserved and store-bought foods.  Ms. Moore has also cooked on her Enterprise King wood cookstove for more than twenty years, so she definitely qualifies as an expert on prepper cooking.  For me, though, the best thing about this cookbook is that it is a modern collection of recipes that have all been regularly prepared on a woodburning range.


Ms. Moore has included a very wide variety of recipes in her cookbook.  With Harvest Chowder on page 19 and Pecan Chicken on page 165, she's got literally everything from soup to nuts.  The recipes vary greatly in their difficulty levels too: some are a lot of work; others are simple, but all are made with ingredients that could easily be a part of any well-stocked pantry and freezer. 

Before each section of the cookbook, Ms. Moore has placed brief essays on many different subjects.  This is where she includes five pages of information about cooking on a woodburning cookstove.  In such a short space, Ms. Moore does an excellent job of giving the basics.  The only thing she says that I would disagree with is that she advises cleaning all of the ashes off the top of the oven box.  I'm sure that on her stove that gives her the best baking results.  However, in both the Qualified Range and the Margin Gem, I have found that leaving at least a half inch of ash on top of the oven box is beneficial.  See, in these models of cookstove, the oven basically heats from the top down, so to create the most even heating, it is important to keep the flue on the bottom of the oven clean, but a layer of insulation on the top is good.  Other than that, Ms. Moore and I are largely in agreement about these wondrous appliances.

On a side note, I read a negative review of this cookbook online from a reader who said she was disappointed because the information about cooking on a woodburning range was so short.  I wish I could get a hold of her and direct her to my blog!

My only negative criticisms are that there was some kind of a printing error on one of the recipes, making it obviously incomplete.  I also did not enjoy some of the essays at the beginning of the different sections of the cookbook.  These are generally small, though, so they aren't a big problem for me.

When I read this book in the late summer, one of the recipes that really caught my eye was the one for "Canned Cole Slaw."  I did not grow any cabbage in my garden this summer, but I had everything else the recipe called for, and the idea of having cole slaw in a jar was intriguing.  I tried it, following the recipe to the letter.


On Sunday, October 18th, I opened a pint of it to see what it tastes like.  Following Ms. Moore's advice, I rinsed the slaw twice.  This allowed much of the sugar, vinegar, and celery seed to come off.  I then mixed some sugar and a little pepper into some mayonnaise and folded that into the slaw.  The end product was good, if a bit krauty, but even Ms. Moore says in her narrative that the recipe is not meant to be a substitute for fresh cole slaw, rather a close second during the long winter months when fresh produce is harder to come by.  

I'm looking forward to trying other recipes from this cookbook in the future.

Tuesday, August 11, 2020

How to Can with Antique Zinc Canning Lids


My upfront disclaimer:

I am NOT recommending that anyone can with zinc lids.  The safest way to can foods at home is to use the flat metal dome lids that have the sealing compound attached to the outer rim.  I find that kind of lid to be extremely convenient and reliable, and the "ping" that you hear as they seal is one of the most rewarding sounds that I know.  They are definitely my favorite canning lids to use.

After I started writing my last post about canning with glass lids, I had to do my Covid-altered grocery run, and Nancy and I made a trip to our closest formerly-Amish stores.  I've talked to a few others too, and the current canning lid shortage is confirmed.  In fact, one of our friends told us that her canning lid supplier--a very fascinating Mennonite store named The Dutchman in Cantril, Iowa--called her and told her that they would not be able to get canning lids until September!  My thinking is, with the way 2020 has gone so far, what's to say they will even be able to get them then?

And so, while I'm not advocating canning with anything other than new dome lids, it seems like knowing how to can using other types of canning lids might be a prudent skill to have right now.  Plus, friends, zinc lids seem to be EVERYWHERE.  You frequently see them at antique stores, second-hand stores, and estate sales; and, if you're like us and living in a farmhouse that has been in the same family for generations, there is likely a stack of these in your basement.  If you can't find them in these places, never fear; Ebay has a ton of them too.

You will also need rubber sealing rings.  These don't seem to be as plentiful as the lids, but that's all right because they are still available new.  I see them in Amish stores, and Lehman Hardware currently carries them, too. You can buy them here: https://www.lehmans.com/product/standard-old-style-canning-jar-rubbers/  They also carry wide-mouth ones.  The rubber rings used with zinc lids come in two styles: with a tab and without a tab.  I see the ones with a tab far more often.

The kicker with zinc lids, though, is that you need to have older canning jars.  Whereas nowadays the sealing edge is the top lip of the jar, it used to be down on the shoulder.  The new style canning jars don't have a sufficiently wide shoulder to create a seal.

Two Kerr canning jars.  This is not the best example, but the one on the left is older and has
the wider shoulder.  The jar on the right is newer, and you can see that the shoulder
has been reduced.

Before using zinc lids, inspect them carefully.  Zinc is a pretty malleable metal, so these lids can be a bit susceptible to damage--especially after decades of use.  They should not bulge up in the center, and when you lay them right side up on a flat surface, the bottom edge of the lid should sit flat all the way around.  Also, look on the underside of the lid and make sure that the white piece of milk glass is present.  I don't know how it could fall out, but apparently it happens.


This is an example of a lid that is in good shape.  Notice how the edge sits
on the counter all the way around.

A view showing the milk glass on the inside of a zinc lid.

To prepare zinc lids for canning, both the lids and the rubber rings need to be thoroughly washed and then scalded.  They are to remain in hot water until used.  Some vintage canning books recommend the lids (not the rubber rings) actually be boiled for anywhere between ten and thirty minutes before use, and with this sort of lid, that would be fine, too.

A zinc lid and rubber ring sitting in scalding water on the Margin Gem.  It 
was so cool here a week ago today (Aug. 4) that I fired up the Margin Gem
and did the day's canning in the house.


Once your jars are packed with whatever you are canning, the first step is to stretch a rubber ring over the top of the jar and seat it down on the shoulder.  


Screw the zinc lid down as firmly as you are able; then unscrew the lid a quarter inch.  


Place the jar in the canner and process according to what is required for the food you are canning.

Immediately upon removal from the canner (you shouldn't let jars remain in a pressure canner to cool once the pressure has gone down), tighten the lid down as much as you can.  


Testing to see whether you have a good seal is not all that easy with zinc lids.  This is probably why they fell out of favor.  The top of the lid should have a slightly concave shape.  Once the jar is completely cool, you can also turn the jar upside down or on its side to check for leaks.  If it leaks, you definitely don't have a good seal and need to start the whole canning process over.


I canned a jar of food using zinc lids with my grandma Marian once.  When she had first started canning on her own, these were the lids of choice, so she knew what she was doing.  She reminisced about her own mother using them, saying that Grandma Gladys kept a small hammer in the kitchen and tapped around the edges of the lids once the jars were cool to make sure they had a good seal.  I can't think that this was at all helpful. 

To open the jar when you are ready to eat its contents, you can pull the tab to break the seal and then unscrew the lid, or you can just unscrew the lid.  I would advise listening for that telltale sign of a good, safe vacuum which is the sound of air rushing into the jar when you open it.

Again, I wouldn't advise canning with zinc lids if you don't have to.  But if you have to, it's best to know how to do it properly.

Friday, July 31, 2020

How to Can Using Glass Canning Lids and Top-Seal Rubber Rings

First of all, let me say right up front that I am NOT recommending that anyone can with glass lids.  The safest way to can foods at home is to use the flat metal dome lids that have the sealing compound attached to the outer rim.  I find that kind of lid to be extremely convenient and reliable, and the "ping" that you hear as they seal is one of the most rewarding sounds that I know.  They are definitely my favorite canning lids to use.

However, from what I read online and what I see in stores around here, we are currently in a nationwide shortage of that type of canning lid.  Our experiences so far in 2020 have taught us that supply lines can certainly become unreliable, so I think it is anybody's guess as to when canning lids will be readily available again.  And surely Nancy and I are not the only people in whose basement rest boxes of antique canning supplies which have been passed down from generation to generation simply because no one took the time to throw them out!

Now, part of this blog's purpose is the preservation of the nearly lost skill of cooking on a woodburning cookstove, and let's be honest: its tone is unmistakeable.  I am a huge proponent of using wood cookstoves.

This post is different, though.  This is not a ringing endorsement for the use of glass canning lids; it is merely an educational post so that information about another nearly lost skill is out there and available for others.  I'm afraid it could come in quite handy in the near future.

Enough with the disclaimers and onto the meat of the post:

The data that I'm going to share with you comes from my 1937 Ball Blue Book, my 1946 Kerr Canning Home Canning manual, and my 1953 Ball Blue Book.  While I wouldn't consider the canning time tables and the instructions for oven and open kettle canning pertinent anymore, the information on how to operate the canning hardware itself is still accurate for these vintage lids.

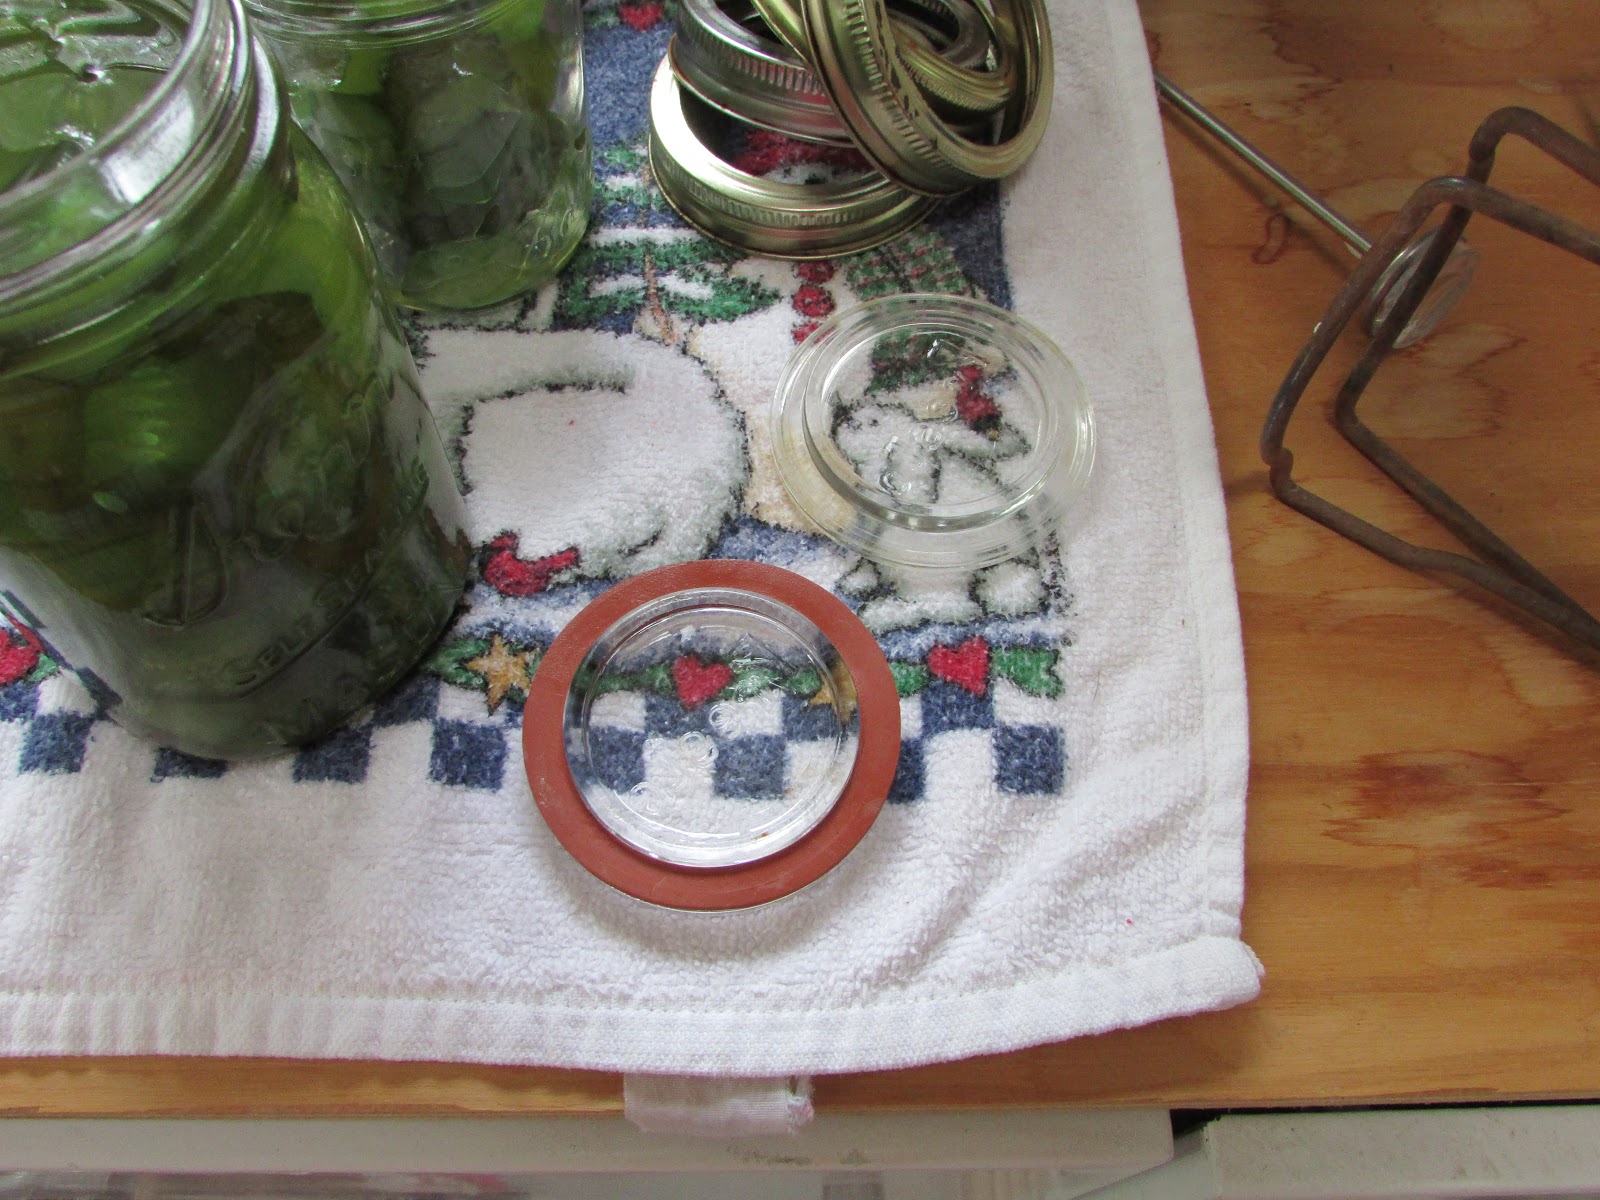
The equipment that you will need is unique to this type of jar closure.  Of course, the first necessity is the actual glass lid itself.  To be clear, there were two types of glass canning lid marketed in the first half of the twentieth century.  One type was for the bail-type jars and had a niche in the top in order to accommodate the upper wire bail which held it in place. These are larger in diameter and have a convex shape.

The lids that I'm talking about here are the same diameter as today's dome lids and fit over the opening of the jar just like they do.  They have a lip on the bottom side which fits down inside the jar.

A picture of a Presto brand glass canning lid.
These lids can only be used with metal bands that are specifically made for them.  I have two different styles of bands; one has the hour-glass shaped opening in the top, and the other looks like a standard canning jar ring.


The picture below is of a canning ring for glass lids on the left and a standard ring for dome lids on the right.  You can see that the ring for the glass lids is taller than what is used today.  That is because the glass lid and the rubber ring are much taller than the sealing edge that a dome lid has.


To use glass lids, you also have to have a "top-seal" rubber ring.  These are entirely different than the rubber rings that are used with the old zinc canning lids; they are smaller in diameter and never have a tab.

When you are going to use them for canning, the rings must be softened and hydrated.  This is accomplished by scalding them and leaving them in hot water until you are ready to put them on the jar.  You can also boil them for five minutes.


Once your jars are packed with the food to be canned, fit the rubber ring around the outside of the bottom of the glass lid.  


Place the lid and rubber ring on the top of the jar.


The next step is to screw the ring onto the jar firmly tight.  Then unscrew the ring one quarter inch.


Process the food in whatever method you would ordinarily use for what you are canning.  In these pictures, I was canning Grammer's Sweet Pickles ("Grammer" is our name for my paternal great-grandmother who was the first woman to live in our house).


At the end of the processing time, remove the jar from the canner and set it on a towel.


Immediately tighten the ring that quarter of an inch that you backed it off before processing.


After the jar is completely cooled, you can check whether the jar has sealed by lifting the jar by the glass lid.  If you can lift it by the lid only, the jar is sealed.


To open the jar, insert the tip of a paring knife between the rubber ring and the lip of the jar.

I've read that glass lids are still popular with some home canners for extremely high acid foods like pickles because the food doesn't touch any metal.

Obviously, this kind of canning lid can be reused indefinitely.  Vintage instructions indicate that new rubber rings should be used, but rings were very often used multiple times.  I have used both new (unused old stock) and used rings with equal success so far.  I don't know whether the rubber rings available for use with the new Tattler lids would work for this type of lid, but I suspect not, due to the fact that their width is not the same.

One can usually purchase new old stock rubber rings on Ebay.  Be sure that they are labeled "Top Seal."  Common brands are Top Flite, Ball, Cuppers, and Bulldog.

Again, this is not a recommendation to use this type of lid, but who knows what skills we may need to revive in the future?

Let me know in the comments what you think.  Have you used this type of lid before?  Should I write a post about using the old zinc lids too?

Be safe, everyone!

Thursday, July 9, 2020

Oven Canning Dry Goods in a Wood Cookstove

I don't think I'm an alarmist, and I really wouldn't even consider myself a prepper, BUT...

I'll admit that when everything fell apart in practically the blink of an eye back in March, we were thankful that a) we had a well-stocked fruit room, pantry, and freezer, b) that for years now we have made it a practice to have more than enough toilet paper on hand at all times, c) we had kept a complete year's worth of garden seed (hadn't planned that intentionally--just a happy accident this time), and d) we had more than enough work, projects, puzzles, board games, and other activities to keep us so busy at home that there has been no time for boredom.

I don't have a crystal ball that lets me see into the future, and I think I'm like the vast majority of people who, if they are being truly honest, don't know which "experts" to believe regarding what the coming months of the continuing Covid Saga will look like.  And so, while most things are readily available again, we are slowly replenishing our stockpiles of a few things "just in case."

When we were at our local Sam's Club a few days ago, they had 25 lb. bags of long-grain white rice for under $10.00.  I don't know that we even eat five pounds of rice in a year, but we do like it, and in some kind of major catastrophe, it could be a welcome thing to have on hand.  As a regular habit, we keep rice in the freezer for a while and then transfer it to an antique two-quart canning jar that we use it out of.  However, we are in the season where our garden is steadily contributing to the contents of our already-full freezer, so we didn't want to sacrifice the real estate there to a large bag of rice.

I remembered reading an article in the May/June 2012 issue of Countryside & Small Stock Journal about oven canning dry goods.  I hunted up that article and reread it; then I did some further online research about oven canning flour, rice, beans, and such.  In a nutshell, the idea is that you heat the dry goods inside open canning jars for a length of time and at a temperature sufficient to kill any of the insect larvae that are inherently present in such foods.  The temperature needs to be low enough that you don't toast the food, of course.  Then, you put a hot canning lid on the hot jars of hot food, and the canning lids seal as a vacuum is created while everything cools.  This would allow us to store the rice on a shelf in the fruit room rather than in the precious space of the chest freezer, and it would be safe from both pests and environmental issues (aside from earthquakes).

However, another discovery that I made in my research was that there are no hard and fast rules for dry canning.  Each video I watched instructed me to use different times and temperatures ranging from a half-hour to an hour and a half at anywhere from 215-250ºF.

Initially, I thought I'd probably do this job in one of our modern stoves because I've never tried to maintain such a low oven temperature in a wood cookstove.  Being able to digitally set an exact temperature on our newer Frigidaire gas range was particularly enticing.  I wasn't excited about turning on one of the ovens in the air-conditioned house, though, and--truth be told--it seemed pretty hypocritical when I'm always saying that you can do anything on a wood cookstove that you can do with a modern gas or electric stove.

Then I remembered another truth that the modern appliance companies don't want to talk about much: oven temperatures in modern ovens are really not all that steady--especially in gas ovens.  I know this for a fact because when our gas oven is first turned on, it gives a reading of what the current oven temperature is.  Sometimes, I've accidentally turned it off and then had to turn it back on right away, and I can assure you that when you are choosing an oven temperature on a modern oven, you are choosing an average temperature.  Thus, I figured that oven canning in a wood cookstove was certainly possible and struck out on a new adventure with the Hayes-Custer out in the summer kitchen.

The first thing I did was wash a bunch of one-quart canning jars.  Then, to make sure that they were completely dry inside, I put them on a jelly roll pan in a slow oven for fifteen minutes.


After that, I removed them from the oven and filled them with the dry rice.  

It seems important to note here that one of the jars in this first batch had a regular mouth on it and the Atlas insignia on the bottom, though it didn't have the traditional "Atlas Strong Shoulder Mason" embossed on the side. We have used it for wet canning before, so I thought it would be fine for this application.  Not so.  The empty jar came out of the oven with fine lines that looked like crazing on the inside.  I ran my finger against the inside of the jar, and it came out with shiny glass powder on it. Obviously, the jar's useful life is over.  I know that there were lots of regular mouth glass jars which were used to package coffee, salad dressing, and other foodstuffs years ago, and many of them have been successfully used for home-canning against the advice of the jar companies and the USDA for a long time.  However, it appears that oven canning may be particularly hard on this type of jar, so I would advise strictly using canning jars.

Once the jars were full, everything went back into the oven.  I'm not going to share the time and temperature that I used (I'm not throwing my hat into that ring!), but I will tell you about regulating the oven temperature:

Longtime blog readers will no doubt be tired of me preaching the value of using little pieces of wood for building hot fires for high oven temperatures, but the same is true for maintaining the temperature of a slow oven.  The difference is that you just don't put so many pieces on the fire at once. Instead, let each piece burn down quite a bit before you add another.

Actually, there is another method for maintaining a slow oven, too: once you have a well-established bed of coals but before the oven is very hot, add a single large piece of wood which is dense and will burn slowly for a long time.  I used this method with a piece of black walnut on the second batch of jars, and it worked great, too.

As a side note, I think it would be rather difficult to do much other cooking while simultaneously oven canning just because you are keeping such a cool fire.  The fire might be perfect for stews and the like, though.


Place the lids and rings that you are going to use in a shallow baking pan. During the last fifteen minutes of the time that the jars of dry goods are in the oven, put the pan of lids and rings in the oven to heat up as well.  A nice feature of oven canning dry goods is that you can use canning lids that have already been used once.  I used half new lids and half used lids to see how it would go, and everything sealed just fine.  Tattler lids are not recommended for this application.

When the jars are ready to be sealed, take one jar out of the oven at a time.  Fix the lid and ring on the top and place the jar in a draft-free place to cool and seal.


In case you are curious and for my own record-keeping, 25 lbs. of rice fills 15 quart jars.

On that same day, I also canned our first small picking of green beans (on the right in the picture below), and then I tried something new and canned hamburger patties.  I've canned meat on a wood cookstove several times, but I've never canned hamburgers.  The idea came from Linda at the Youtube channel "First Coffee Then Life Sustainably Off Grid & Happy." We'll see what we think when we open them.

I will take the rings off the jars of beans and meat before putting
them on the shelf, but I can see no reason to remove the rings from the rice.

Everything I have read about oven canning dry goods tells me that the shelf life of foods stored in this way is anywhere from 20 - 30 years.  I know it won't take us that long to use this rice!  Another advantage is that as long as you've got plenty of jars (we do), have kept a few used canning lids and your firewood is free, storing rice in this manner costs only your time.

Wednesday, May 27, 2020

Canning Homemade Pork and Beans on the Wood Cookstove

Life has certainly been different the last two months, hasn't it?  I never would have imagined that the last day of school for the 2019-2020 school year would have been Monday, March 16th, and I would never have predicted that I would have as much time at home as I've had over these last several weeks. 

It seems like we've been in this COVID-19 situation for such a long time.  It was winter when everything seemed to come to a grinding halt, and now we have arrived at the unofficial start of summer.  We had a few warm days early on, but then our temperatures dropped back below normal, and our biggest snowfall of the season occurred on April 16th.  We haven't been overly warm since then, but we've got a beautiful garden this year, even though we lost a few green bean plants to frost, and our tomato plants were a bit damaged.

Our wood cookstove has been very busy during all of this time.  We turned off our electric water heater for the season on October 11 last year, which means that the Margin Gem cookstove has been fired daily ever since (except for the single whole day we spent in San Antonio where my brother was honored as the president of the National Corn Growers Association). Since October 11, every meal that we've made at home has been cooked on the wood cookstove except for one crockpot supper and one recent dinner that was cooked on the grill.  The only thing we've done on a modern stove is make popcorn (We've popped corn on the wood cookstove too, but that needs to be its own post.) We've been very thankful for the economy of the wood cookstove since the financial state of things has changed so dramatically.

We've also been very thankful for a well-stocked freezer and fruit room. The rows and rows of home-canned fruits, vegetables, meats, pickles, juices, jams, and jellies have been such a blessing during this time.  For many years, I've enjoyed canning lots of different foods, but we never seem to eat as much of it as we should.  That has changed dramatically. Since March 16th, we've eaten out (carry out only) a total of five times. Now, I know that for some of my readers that is more than they would normally eat out in that amount of time, but for us this is a dramatic change.  Thus, we are barreling through our canned goods right now, and it is a good thing for the inventory.

I have also done a fair amount of canning since being home during the quarantine.  At the time everything shut down, we still had three bushels of fall apples in our utility room.  They were my first priority.  Other than an apple crisp and Danish apple bars, I canned the rest of them.  While the water bath canner was on the stove, I also made and canned a couple batches of grape jelly from juice that my sister-in-law canned some time ago.

One of the supermarkets in Council Bluffs had a sale on pineapples for 98¢ each a couple weeks ago, so I bought five and canned three of them.  I had never canned pineapple before, but if I can find a bargain like that again, I will certainly do it in the future.  Nancy and I agree that the home-canned pineapple tastes much better than commercially canned pineapple, and when I pushed pencil to paper and figured the cost of the lids, sugar, and fruit, I discovered that we saved almost $5 over the store brand pineapple tidbits and nearly $8 over Dole brand.

Then with rhubarb coming available and in an effort to clean out our freezer, I've made and canned three batches of pineapple-rhubarb jam and one batch of strawberry-rhubarb spread.  Of course, all of this has been done on the Margin Gem wood cookstove.

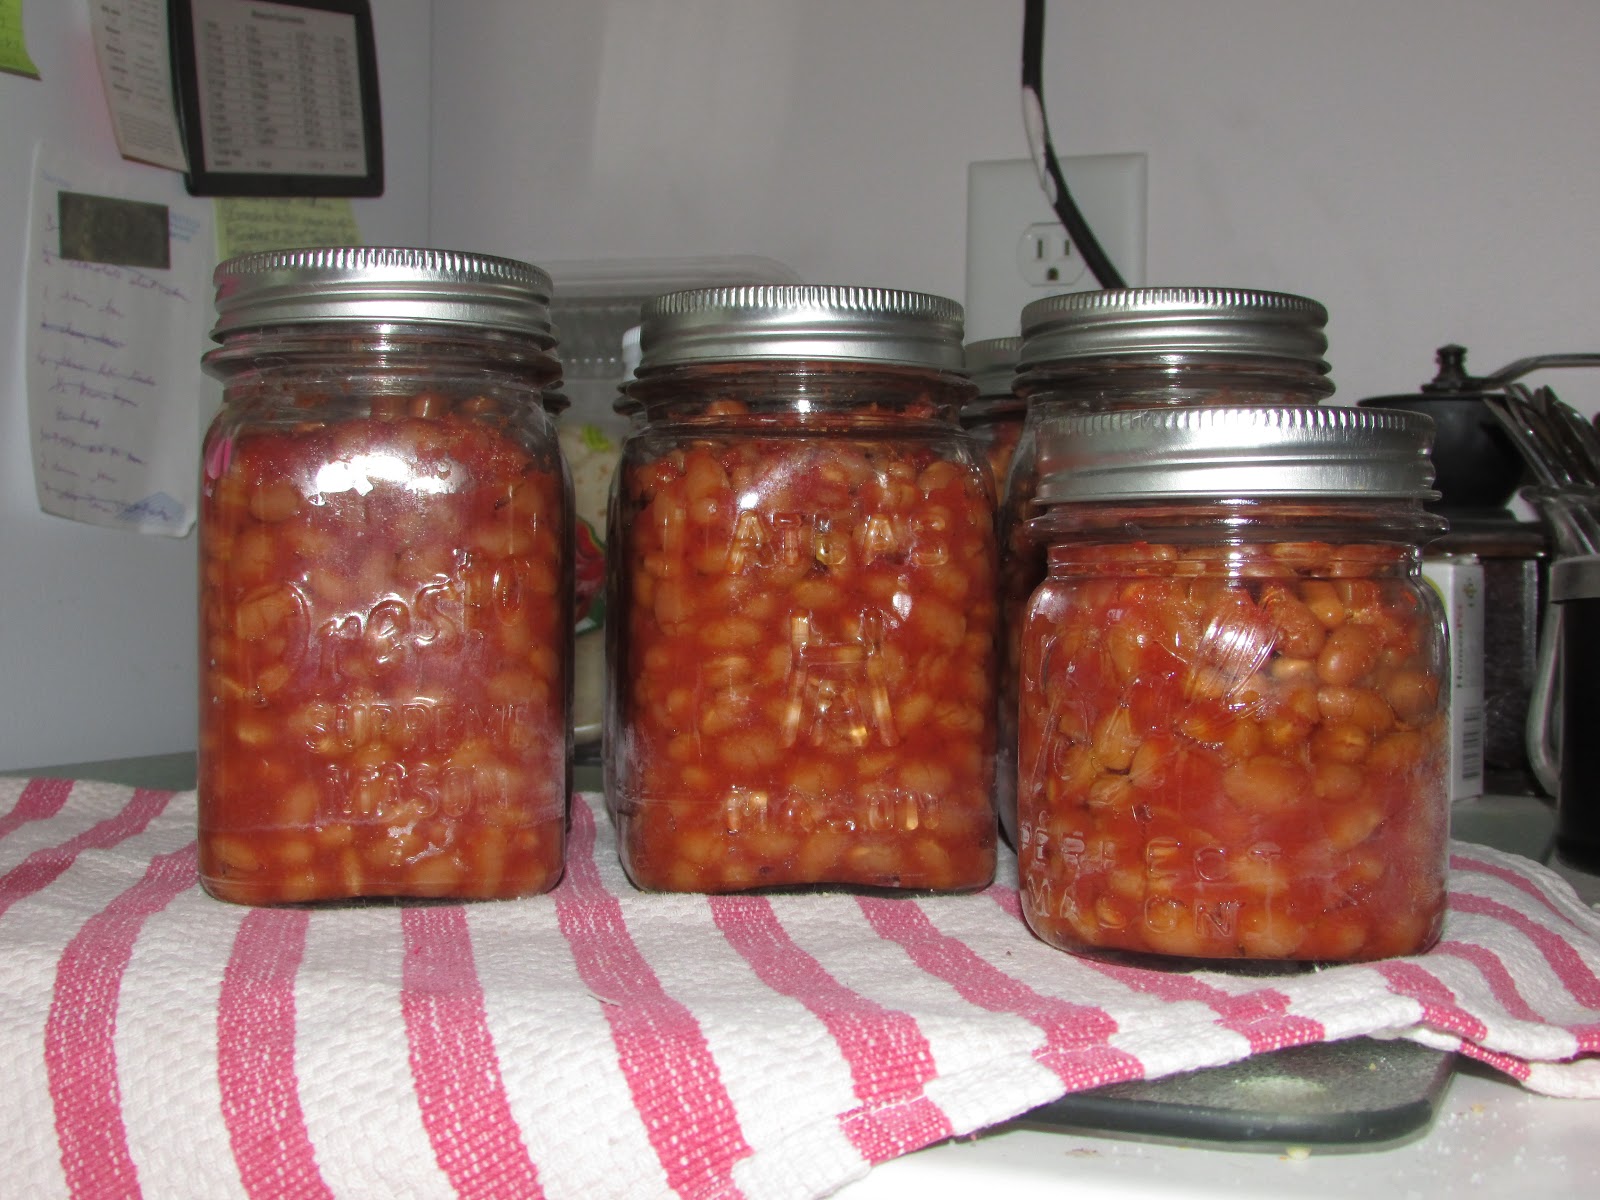
The only time I have used the pressure canner during quarantine has been to can homemade pork and beans.  This was the second time I did this, and I am so happy with the results.  See, I love Van Camp's pork and beans (doctored up, of course), but the price of these has really gone up quite a bit since I first started doing my own grocery shopping twenty-some years ago.  Besides, I like being able to make foods myself when I'm able.

The method and recipe I use is based on the "Baked Beans" recipe in my Kerr Home Canning and Freezing Book from the 1970s, but I've changed it to suit my taste and updated it to meet today's standards for safe canning.

The first thing you do is thoroughly wash four cups of navy beans.  In a heavy enamel or stainless steel kettle, cover the beans with plenty of water and let them soak overnight.  You may have to add water to them in the morning; I certainly did.  Place the pot of beans directly over the firebox and bring to a boil.  Continue boiling for 45 minutes.  You can move the pot to a cooler spot on the stove if you need to as they don't have to boil fast.


As the beans cook, they will absorb more water.  Add boiling water from the teakettle as needed to keep plenty of moisture on the beans.


At the end of the 45 minutes, the beans will not be cooked thoroughly enough to be tender yet, but that is all right.  They will finish cooking during the canning process.


At the end of the 45 minutes, drain the beans in a colander, reserving the juice.


At this point in the process, build your fire very hot and put your canner on the stove to begin heating.  Also put your canning lids in hot water over a cooler part of the stove.

Return the beans to the heavy kettle that you were using in the initial cooking time, and then add two cups of the reserved bean liquid.

Now is the time to dress the beans up in whatever way you desire.  A little bacon or salt pork may be added at this point, and in the pictures below you can see that I added some of my Homemade Heinz Ketchup and some brown sugar and four teaspoons of salt.  I also put a little bacon in; I have used salt pork before too.  Some people like to add molasses, prepared mustard, or onions at this point.  Mix all together well.


Pack into canning jars leaving one inch of headspace and making sure each jar has a little more moisture than what you think is ideal.  This is very important.  The first time I canned these, I didn't keep them wet enough and packed them too full.  As a result, I had several jars that didn't seal because the beans expanded while they processed and the thick juice was pushed up between the lid and the sealing edge of the jar.

Pack jars into the canner, and begin the pressure canning process.  For more details on how to pressure can on a wood cookstove, please visit this post.  Baked beans need to process for 75 minutes at whatever pressure is appropriate for your altitude.


Those four initial cups of beans resulted in six and a half pints of canned beans.


It's been a couple of years, but I have pushed the pencil on this recipe, and canning your own baked beans does result in a small savings over purchasing them.  My mother and grandmothers always said that another advantage of home canning is that you always know exactly what is in each jar, too.  If you use canned pork and beans, consider giving these a try sometime.

Thursday, December 6, 2018

Corn Cob Jelly: A Great Wood Cookstove Recipe

Just about a year ago, I wrote a post about using corn cobs as fuel in a woodburning cookstove.  I wrote then that the corn harvest was finished in our area.  This year, we had a really wet October, a relatively dry and cold November, and then winter storm Carter hit us hard last weekend.  Most of the corn has been harvested, but not everyone is finished yet, and we've got several inches of snow on the ground.  Next week is supposed to be warmer, though, so maybe the harvest will be finished then.

At any rate, I wanted to share with you another use for corn cobs today. This is the recipe that I use for corn cob jelly.  I don't much care for it, but some people like it, and it is certainly unique.  Corn cob jelly is also a particularly efficient thing to make on a wood cookstove because of the long cooking time and the fact that you can burn the by-products from this process in your stove later on.

This recipe was given to me by Marsha S. from Carson, Iowa, and if I remember right, it belonged to her mother.  We worked together sometimes during my banking days, and I quite enjoyed talking to her about food--actually, I enjoy talking to anybody about food.  

The first step in making corn cob jelly is to choose a dozen corn cobs. Look for cobs that are relatively clean and are as dark red as possible because they will tint your finished jelly a prettier color.

Some corn cobs in a five-gallon bucket on the kitchen floor.

Wash and drain the corn cobs and break them into small pieces.  The washing and draining isn't difficult, but I find that breaking them into small pieces can be challenging.  I used a knife to aid this process, but it was still on the difficult side.

Put the clean broken corn cob pieces into a large kettle and add three pints of water.  Place the pot of corn cobs directly over the fire and boil the cobs for a half hour with the lid on the kettle.

The broken corn cobs in the three pints of water
coming to a boil over the firebox.

If you are going to be water-bath canning this jelly on the wood cookstove, I would suggest that you start heating your canner of water while the corn cobs are boiling.  This would also be a good time to get your jars washed and inverted on clean towels in the warming oven and your canning lids down in hot water.

Once the half hour has elapsed, strain the juice from the corn cobs.  I accomplish this by putting an old piece of cotton tea-towel in a colander over a glass measuring cup.  Don't get lazy and skip the cloth; you don't want corn chaff in the liquid.

Straining the juice off the cooked corn cobs.

You will find that your three pints of liquid has reduced to about half the volume that you started with, and this is perfect because you want three cups of corn cob liquid.  If you have a little more or a little less, either discard the extra or add hot water to make up the difference.

Three cups of the corn cob liquid.

The rest of the ingredients that you will need are as follows:

  • the juice of one lemon
  • one box pectin (5 1/2 to 6 Tbsp. if you buy it in bulk)
  • 3 cups granulated sugar, measured and ready in a separate bowl


All of the ingredients that go into corn cob jelly.  I believe the
glass juicer on the right belonged to my great-grandmother who
was the first woman to live in our house.


Combine the lemon juice and the pectin with the corn cob liquid and put them in a heavy-bottomed stock pot.  Place the pot directly over the hottest part of the cooktop and bring to a boil as rapidly as possible.  For this step, you need to have a raging fire going, and I find it is best accomplished with sticks of a one- to two-inch diameter.

A shot of the raging fire needed for making jelly.

In this picture, you can see the pre-measured sugar on top of
warming oven to the left, the hot jelly jars inverted on the
right side of the warming oven, the cob/lemon/pectin mixture
over the firebox, the canner nearby, and the pan of hot water
and lids to the far right of the cooktop.  Of course, the ever-
present teakettle is ready with hot water in case I missed my
guess on how much water was needed in the canner.

Once the mixture has come to a full boil, add the three cups of sugar. Return to a full rolling boil as quickly as possible and let the mixture boil for exactly three minutes.  (Yes, this is correct.  In fruit jellies this is usually just one minute.)

Remove the entire kettle from the fire, skim any foam, and pour immediately into the hot canning jars from the warming oven.  Seal and process in the hot water bath for 10 minutes.

You can see the fire still running hot while
the jars of jelly are processing directly above
the firebox.

For me, this recipe yields four 8 oz. jars and one 4 oz. jar of jelly.  You can see the amber color that this batch turned out to have.  Sometimes, it is slightly more pink than this.


I threw the boiled cobs out onto the cement patio to dry in the sun and had burned a few of them as kindling before the snow covered them over.

It feels strange to share a recipe on this blog that I don't like, but I feel this is a good recipe because the end product tastes exactly like some professionally made corn cob jelly that I was once given as a gift.  It does add a nice color to the jelly shelf, and for those who like the taste of field corn or do not have enough exposure to it to reckon it as a barnyard taste and smell, this could be quite enjoyable.

Fill up the comments with your own version of this distinctive condiment or your thoughts thereon.  Thanks for reading, and may your wood fires be burning brightly!