Showing posts with label cleaning a wood cookstove. Show all posts

Monday, May 18, 2020

Glaze Creosote Confession: The Potentially High Cost of Ignorance

This was my twenty-third winter season cooking on a woodburning cookstove, but I still have things to learn.  Truthfully, I'm kind of embarrassed to share the information in this post, but since the whole point of this blog is to help others enjoy cooking on woodburning cookstoves, I feel obligated.

First, some history:

The first wood cookstove that I used was the Qualified Range.  I bought it new in January of 1997 and had it installed in the little house with a pre-fabricated metal chimney.  I would say that the distance from the stove collar to the top of the chimney was probably less than twelve feet.  I never had any trouble with creosote accumulation in that setup.  However, I only used it from January of 1997 to May of 1998 because then I moved to the "big house."

When I moved into the "big house" on the farm, I had to wait a winter before I was able to get a new stainless steel liner put in the original brick chimney, but by the fall of 1999, I was again using the Qualified on a daily basis for cooking and heating.  The Qualified was in use in the "big house" from 1999-2011 when it was replaced by the Margin Gem.  During those twelve years, I had one chimney fire, but it started in the stovepipe of the stove and spread to the chimney.  It was easily extinguished by closing the drafts of the stove, and since it happened in the summer, it was not difficult to get on the roof and sweep the chimney clean again.  Had I been more diligent about keeping the stovepipe clean, the fire wouldn't have happened at all.

With the Qualified Range, there was never a lot of creosote in the chimney. I would sweep it in the fall of the year before daily firing of the stove began, and what creosote was present was always light, flaky, and easy to remove.  The creosote in the stovepipe was always the same, but would sometimes cling more stubbornly.

Now, the Qualified Range was not airtight.  It had the old style sliding drafts on the left side of the firebox, and though they were made well, there were some gaps that were inherent with that sort of stove construction.  Tiny gaps were also present in the top left corner of the firebox and where the outer front door latched to the cast iron of the firebox.  Further, the standard of fit and finish for the cast iron stovetop was lower than that of the Margin Gem.  If a bright fire was burning in the stove and all of the lights were put out at night, you could see tiny yellow flickers against the backsplash of the stove and on the kitchen ceiling.  Obviously, there were plenty of places where air could gain entrance to the stove even when it was shut down tightly.  Therefore, the Qualified could not hold a fire overnight or during the day when Nancy and I were gone to work and school.

The Margin Gem began its career in our kitchen in the spring of 2012 and has been in daily use from late September or early October until May ever since.  Shortly after it was installed, I noticed that the creosote in the chimney was different.  Some of the dry, flaky, familiar stuff was present, but there was a coating of black, tarry stuff that was very smooth.  This, however, appeared to only be in the top three or four feet of the chimney, which is the part that sticks out above the roof line.  It was a thin layer, as I said, and I didn't think a whole lot about it.  I attributed it to the fact that the stove is airtight and also to the fact that because the Margin Gem has both a hyper-heat water reservoir and a waterfront for the range boiler, a lot of the heat from the fire was being absorbed before it had a chance to travel up the chimney.

I didn't think a whole lot about this new creosote.  Usually, after a summer of only intermittent firing--usually using small sticks that burn hot and quick--the hard, shiny stuff would sweep out of the chimney with the fall sweeping that began the continual firing season.

Fast forward to this last winter.  During the months when the Margin Gem is being fired daily, I sweep the chimney once per month as long as the roof is free of snow.  During December and early January, we were burning some mulberry wood which had been dead for at least six years, but was more wet than I would have liked.  When I went to sweep the chimney in early January, my chimney sweeping brush got stuck in the chimney.  The shiny, hard creosote had become quite thick on the inside of the chimney, and it was no longer just in the top three or four feet of the flue.  I had a really tough time getting my brush back out of the chimney, and I knew we had to do something.

My first thought was that we needed to have a professional chimney sweep come and clean the chimney.  I did some phone calling and discovered that where we live, professional chimney sweeps are few and far between, and they are really busy.  We would have had to wait a very long time before a professional chimney sweep would have been able to come to our house--in fact, I was basically told that we wouldn't be able to see a chimney sweep until after the heating season was over.

We couldn't wait that long.  During the winter months, the Margin Gem heats our home and our hot water, and it cooks nearly all of our food.  I was worried about the creosote situation and began doing some research. I learned that professional chimney sweeps use mechanized equipment to clean chimneys rather than just a steel brush on rods like I have.  I discovered that our nearest Menards carries such equipment and promptly plopped down around $150.00 for a set of chimney cleaning equipment that attaches to a drill.  (I didn't know that this kind of chimney cleaning equipment even existed, and I'll write a post about it sometime because it is worthy of a lengthy discussion by itself.)

I got my new purchase home and opened the package.  Having never known anything about this sort of chimney cleaning device before, the first thing I did was open the instruction booklet.  Among other disappointing information there (which I will discuss in a later post), the instruction booklet said that the chimney sweeping equipment was not for use on "GLAZE CREOSOTE."  There it was: a name for the stuff I had seen lining the chimney!

After more research, I knew how dangerous glaze creosote in a chimney can be (if ignited, it burns at a higher temperature than light, flaky creosote does).  That same research taught me that there is no mechanical way to remove it, so sweeping wasn't going to make any difference.  Glaze creosote must be removed chemically.  Even professional chimney sweeps must treat glaze creosote with a chemical first and then come back to sweep it later, and the powders and chimney sweeping logs commonly advertised and sold locally have no effect on this type of creosote.  Internet reviews told me that two different products were highly recommended for use in glaze creosote removal: Cre-Away and Anti-Creo-Soot.  These are environmentally safe products that convert the glaze creosote from a hard substance to flaky creosote which is easy to remove.  Unfortunately, neither of these compounds are sold locally, so we had to order online and wait for delivery.  For a few days, we limped along with a stove that was operational but obviously not breathing as well as she should.  Then we began the glaze creosote mitigation process.

The two chemicals we used to remove our glaze creosote.  (Because I know
someone will ask, the cookstove on the left is the ceramic base to a lamp that
sits on the corner of our kitchen table.)

The Process of Glaze Creosote Removal:

The sites I read told me that I should start by using the Cre-Away.  Cre-Away is a fine white powder which comes in a plastic bottle with a hinged nozzle on the top.  You apply the Cre-Away to the chimney by squeezing puffs of it up into the stovepipe and the bottom of the chimney.  Because our chimney is so tall, the directions on the bottle also recommended sprinkling it down from the top of the chimney.  As we had very little snow this winter, this was not a difficult process.

Once Cre-Away has been placed in the chimney, the next step is to build a hot fire in the stove to activate the chemical reaction.  The flue temperature has to reach a minimum of 300ºF in order for each of the products to work, so I moved the flue thermometer that we have on our Jotul heating stove to the stovepipe of the Margin Gem.

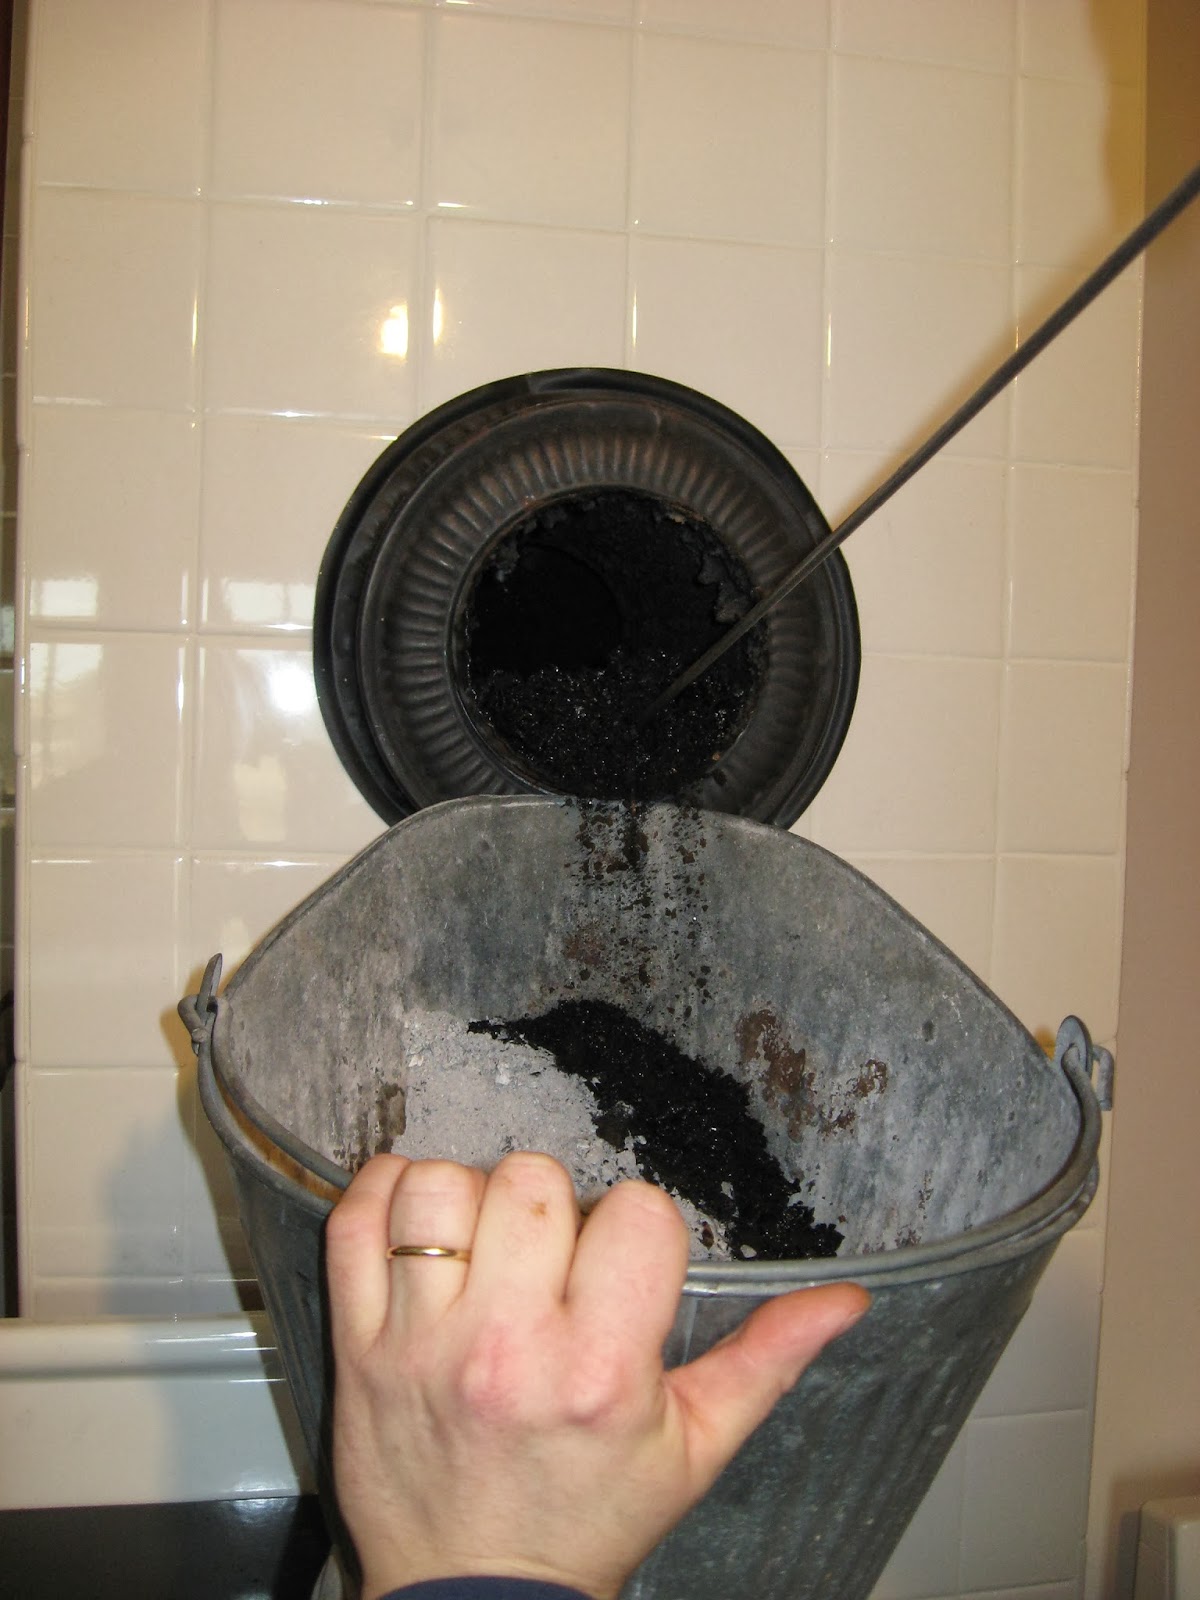
Cre-Away was amazing!  It wasn't long before I could hear chunks of creosote falling down the chimney.  For three days in January, as soon as I got home from school, I would take the stovepipe down, remove the pile of creosote that had fallen down the chimney in the last 24 hours, and re-apply the Cre-Away.

The next step was to use the Anti-Creo-Soot.  This is a liquid, and to apply it you spray it into a good hot fire.  You can see in the picture above that the Anti-Creo-Soot which I purchased was in a gallon jug.  You can purchase smaller spray bottles of this compound, but they are more expensive, so it was cheaper for me to buy the gallon jug and pour some into our own spray bottle.  For the first application of Anti-Creo-Soot, the directions say to apply 60 (that's right, sixty!) squirts to the inside of the firebox or directly onto the fuel.  In severe cases of glaze creosote, the directions recommend sixty squirts each day for seven days.  Twelve squirts per day after that is what they advise for keeping your chimney clean thereafter.  Again, flue temperatures must reach 300ºF, in order for this compound to be activated.

Anti-Creo-Soot was excellent too.  It was very easy to apply, and chunks of creosote continually rattled down the chimney, especially when the fire was first stirred up in the morning or upon my return from school in the evening. I continued to regularly take the stovepipe down and clear away the piles of creosote left in the elbow at the bottom of the chimney.

Finally, a thorough sweeping is in order.  I am happy to report that this sweeping was easy, and I've never seen so much creosote come out of the chimney at once.  The Margin Gem was breathing freely again, and I could breath a sigh of relief!

I continue to squirt Anti-Creo-Soot into the firebox occasionally--especially when I know I'll be sweeping the chimney soon--and the effect that it has had is remarkable.  I cannot say enough good things about both of these products!

Summary:

Here is an abbreviated list of the new things I know after having dealt with this situation:

1. Only burn dry fuel!  I knew this but admit to not prioritizing our fuel supply as well as I should have.  Also, I was under the impression that creosote only formed from wood that was wet because it hadn't been dead long enough.  Not so!  Wood that has been "seasoned" for adequate time but has been allowed to become wet again is just as susceptible to depositing creosote in a chimney.

2. There are different types of creosote, so you must pay attention to what is present in your chimney.

3. Glaze creosote can be removed by a do-it-yourselfer; you don't have to hire a chimney sweep if you are able to access your chimney yourself.

4. Glaze creosote can only be removed by using chemical compounds to loosen it before it can be swept away.

5. Cre-Away and Anti-Creo-Soot are awesome!  They are very effective in glaze creosote removal and are easy to use.

I hope that embarrassing myself and letting you all in on my former ignorance proves helpful to someone and that I can save someone else the danger of a chimney fire or the expense of hiring out work that one can do oneself.  Be safe!


Friday, January 31, 2014

Sweeping the Chimney: A Task for a Warm Winter's Day

In our corner of the world, the temperatures in January were a real roller coaster.  We've dipped below zero a few times, and we've been up near sixty.  Fortunately, the warmest days have landed on the weekends, and we've taken advantage of them. 

So what do wood cookstove owners do on those warm days?

We cut, split, and stack firewood, and sweep the chimney, of course!

When we were using the Qualified range, I only swept the chimney once per year in the fall, and really there was never much to sweep out as long as we were burning good, seasoned hardwood.  However, the Qualified wasn't airtight, and though we would load it up and shut it down during the day and at night, it couldn't hold a fire long, so it was consistently burning hot.

The Margin Gem is a different story, though.  When we are home, it is burning hot, but during the days and at night, we load it up and shut it down, too, and it actually holds a fire for a long time (our record is over 24 hours).  Since it has the capability of a slow burn, creosote naturally does accumulate more than it did with the Qualified.

As most of you probably already know, the creosote that I'm talking about is a product of the incomplete combustion of wood.  This black or dark brown substance clings to the inside of a flue, and unfortunately, it is flammable.  Thus, it is what is responsible for the dangerous chimney fires that wood burners want to work hard to prevent.

A couple of weekends ago, we swept our chimney for the third time this heating season.  The process is fairly simple.  The first thing that I usually do is disconnect the stovepipe from the chimney and cover the flue opening with a plastic grocery bag held in place with the elastic band from a discarded pair of underwear. 

What?  Too much information?


The reason I cover the chimney opening is twofold.  First, the soot is prevented from falling all over the stove and the floor as it falls down the chimney.  Second, this helps stop the regular draft of the chimney, so less of the soot is flying into my face while I'm on top of the roof.

We have been maintaining the same fire in the cookstove since Nov. 9.  (It would have been longer than that, but that was the day of our wood cookstove workshop, and we wanted our guests to have the experience of starting the stove.)  Therefore, even though we waited until there was only a small bed of coals in the bottom of the firebox, I skipped this step because I didn't want the smell of the burning coals to simply be escaping the stove into the house for that long.  Thus, I got a face full of soot.
 
Next, I climb to the top of the roof with my chimney sweeping brush and lengths of rod which screw together at intervals to push the brush down the chimney and pull it back up again.


The north side of our roof isn't that steep as roofs go, and it is covered with asphalt shingles which generally afford pretty good traction, but it still bothers me a little to go up there.  I don't really understand it, either.  When I was in junior high, my grandparents on my dad's side re-roofed the dairy barn here on our farm.  At the time, Granny was a spry 72 years old, and she was the one who had to do all of the high work, so it was she who straddled the ridge pole to nail the cap back on, and I remember getting up there and straddling it with her for a lark.  I don't know what changed for me, but you wouldn't catch me dead up there now, so I generally don't like to get up on the roof to sweep the kitchen chimney.  However, I learned something this year.  If I sweep the chimney on a warm enough day, I can do the job barefooted, and I don't feel at all like I'm in danger of slipping and falling down the roof.  Weird, I know, but I thought I'd tell you about it in case it will help any of you reading this.

As you run the brush up and down the chimney, the larger chunks of creosote fall down to the bottom.  Some chimneys have small square clean out doors for the removal of this refuse, but since our kitchen chimney is the original chimney of the house with a new stainless steel liner in it, the bottom of the chimney is now where the stovepipe enters.  Thus, the creosote must be raked out of the chimney there.


Another thing that I have learned in our second year of having the Margin Gem is that sweeping the chimney is made much easier and more effective if the fire which precedes the sweeping is a really hot fire of small, very dry pieces of wood.  This makes the creosote in the chimney very flaky and easy to dislodge.

Of course, if your cookstove is vented through a chimney which exits through the ceiling--like the chimney for our Jotul heating stove--this whole process is much easier and can be accomplished while standing securely on the floor in the house.


Sweeping a chimney is a little messy, and it does take some time, but it is one of those things that responsible wood burners have to do occasionally in order to keep the fire department from coming over for a visit.  I hope your wood fires are burning brightly and your chimneys are drawing well!

Saturday, October 6, 2012

Winterizing a Cookstove

I received a comment yesterday asking for my suggestions about what to do to protect an outdoor cookstove during the winter.  Since our weather has gotten colder, I need to get down to our summer kitchen to winterize our Riverside Bakewell.  Though the Riverside is not technically an outdoor stove, it is exposed to freezing temperatures, and snow frequently sifts into the summer kitchen via the air vents near the ceiling and lands across the stovetop.  Therefore, we have a ritual that we perform every fall to protect the cookstove from the elements.

Here is what we do:

1) Drain the reservoir and wipe it dry with a terry cloth towel.

2) Clean the stovetop with a grill brick as you can see us do to the Margin Gem a couple of posts ago in  Cleaning a Woodburning Cookstove.  We then coat the stovetop with vegetable oil.  The only exposed cast iron on the Riverside Bakewell is the cooktop.  The rest of the stove is enameled, so there is no need to protect the other surfaces.

Side Notes: This step may vary depending on the type of stove that one has.  If a stove has surfaces that are not enameled, or if it is likely that a stove needs additional protection, I would put a layer of stove black on all of the surfaces that are not otherwise protected.  After the stove black is worked into the metal and well buffed, I would apply the layer of vegetable oil.  I've used three different kinds of stove black, and my preference is certainly a semi-paste called William's Stove Polish.  If your local hardware store does not carry it, it is widely available online.  If you choose to black your cooktop, be warned: in my experience, stove black has a habit of attaching itself to things that you'd rather it didn't.  If a stove is to reside outdoors, though, skipping the stove black seems risky.

I would not coat any enameled part of a stove with oil.  If you do, you'll want to completely remove the oil from the enamel before firing the stove again, and I imagine that this will not be an easy task.

3. I then start a small fire in the stove with little sticks or corncobs.  This fire is not intended to last long or be very hot.  The intent is just to give the new layer of vegetable oil a chance to seal, and to thoroughly dry the reservoir.  Under ordinary circumstances, a stove should NEVER be fired with an empty water reservoir.

4. Once the fire is out, remove all ashes and soot from the stove.  (Don't forget that a bit of fly ash frequently lands inside the oven, too.)  When wood ash combines with water in any form, potash lye results, and this can be very corrosive to metals.

These steps are sufficient for our Riverside Bakewell.  But all situations are different.  In her book Woodstove Cookery: At Home on the Range, Jane Cooper writes the following:

"If you plan to store the stove in a garage or shed, it will also be necessary to coat the stove's metal with oil, grease or petroleum jelly--anything without salt which retards rust.  Don't, however, think of this as a way to recycle old crankcase oil or motor oil because they will do nasty things to your house when the stove is finally re-fired."

Of course, if the cookstove is going to be fired outdoors, the issue of what will happen to the burning layer of oil may be considered somewhat less of a concern.  Just remember that whatever was applied to the stove is unlikely to burn off entirely except for on the part of the cooktop that is over the center of the firebox.  Furthermore, it would certainly be folly to coat the inside of the oven with anything other than stove black and an edible oil or shortening.  Even that will have to be burned off enough that it will not impart its own flavor to whatever is being cooked in the oven once the stove is put back into regular use.

The bottom line is that moisture is the enemy of the unused cookstove, so any steps which can be taken to keep the stove dry are advisable.

If anyone reading this has something else that they would advise, please make good use of the comments field to help a fellow wood cookstove cook.

Tuesday, September 25, 2012

Cleaning a Woodburning Cookstove

After some unfortunate incidents with the caramel from sticky rolls boiling over on top of the stove, a rather large splash of oil while frying chicken, and a gurgle of ketchup which managed to even hit the ceiling, the time had come to clean the cookstove.  Marjorie needed a bath.

If you click on this picture, you can get a better glimpse
of how dirty Marjorie the Margin Gem had gotten.

Her cooktop was particularly unbecoming.

Grease from frying chicken had cooked onto the stainless steel trim
that surrounds the cooktop.
The light-colored square on the top of the water reservoir
is the outline of my breakfast griddle.  I had left it on the reservoir
but didn't realize that it was covering the holes which are on the left.
Those holes are steam vents for the water reservoir, and when I
realized what had happened, the griddle was sitting in a puddle of
water.  Not only did the bottom of the griddle have to be re-seasoned,
but the top of the reservoir had retained its autograph.

I started out with a stainless steel soap pad on the top of the reservoir. 


The soap pad and I were soon good friends.  We spent a lot of time together.

The soap pad skittered across the stainless steel cooktop trim,
followed closely by a damp rag.  Then, the soap pad waltzed all
over the backsplach and stainless steel section of stovepipe.

In the picture above, please note how rusty the stove collar is at the base of the stainless steel stovepipe.  When Marjorie arrived last year, like all new cookstoves, her highly polished cast iron cooktop had been coated with a thin layer of some type of petroleum product in order to keep it from rusting before it was put into use.  Unfortunately, whoever had applied this coat of oil, missed putting it on the collar.  Hence, the collar began to rust even before we had installed the stove in March, but I hadn't done anything about it yet.

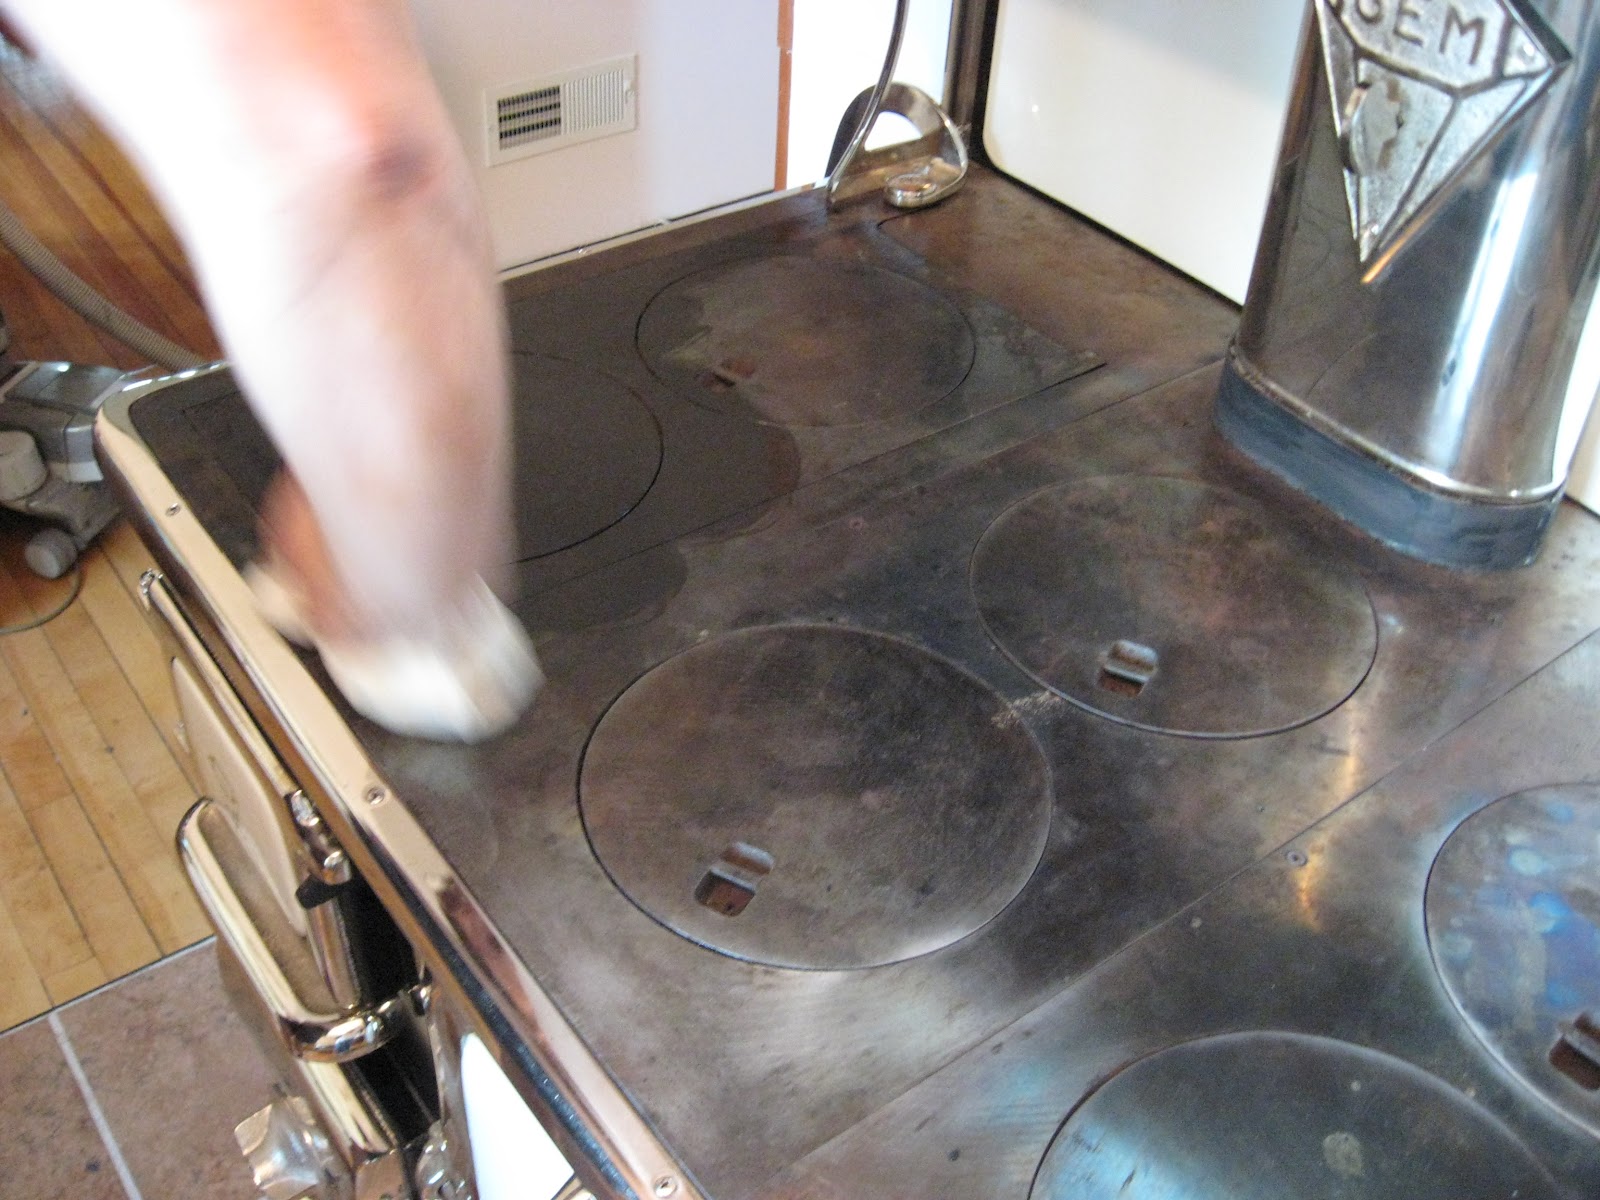
The next thing that I did was begin working on the cooktop.  I rub a grill brick all over the cast iron.  This effectively removes any food and grease that has cooked onto the stove.  It also smells very strongly of sulfur.


The grill brick leaves all manner of sand in its wake.  I remove this with the vaccuum cleaner.  Next, I was on to soot and ash removal.  I removed the short length of stovepipe which connects the stove to the chimney, then began cleaning the flue which stretches up from the bottom of the back of the stove to the top of the warming oven.
A view down the stovepipe from the top of the warming oven
before cleaning.
The next step was to remove fly ash from the top of the oven and creosote which had accumulated along its right side and beneath it.  New cookstoves are generally shipped with a handy little tool called a soot rake which is made for this task.

The soot rake scraping across the top of the oven.
The manufacturer's identification plate masks the
oven clean out door.  The soot rake is pulling
creosote from beneath the oven.
After that, I drained the reservoir and began working on cleaning it out.  You can learn more about that in the previous post.

 
After the stovepipe had been cleaned outdoors and re-attached, the next job was to coat the newly scrubbed cooktop with vegetable oil.  I also put a layer of stove black on the collar.


All other surfaces were wiped clean and parts replaced, and the ashes which had missed falling in the ash pan were also scooped out.  The water reservoir was refilled, and a new fire lit.  As the coat of vegetable oil burned onto the stovetop, the kitchen took on the scent of a large hot breakfast griddle, and Marjorie was once again a gleaming beauty gracing our kitchen.