Showing posts with label beef recipes. Show all posts

Sunday, July 19, 2020

Using a Grill Roaster on a Wood Cookstove

Probably fifteen years ago, I purchased this blue enamel "Grill Roaster" at Cappel's Ace Hardware in Atlantic, Iowa.


What makes it a "grill roaster" is the fact that the bottom is perforated.


I bought it expressly for using on a wood cookstove because it looked like the round shape would fit perfectly in an eye over the firebox of the Qualified Range.  I think perhaps it is truly meant for roasting vegetables on the grill, but from the beginning I wanted to try cooking a beef roast in it. I don't know why, but I wasn't ready to try it right away when I bought it, so I relegated it to a shelf in the fruit room in the basement.  And there it sat until Friday when I brought it out, washed it, and finally got around to trying it.

The roaster does fit neatly over the eyes of the Qualified, the Hayes-Custer, and the Margin Gem.  Bingo!

For Friday night's supper, I seasoned a beef roast with seasoned salt and Mrs. Dash and put it in the grill roaster, the inside bottom of which I had coated with non-stick cooking spray.

My fire that night was fueled by a combination of mulberry, elm, and pear wood, and I didn't manage it any differently than I would have under ordinary circumstances--mostly because I was also cooking corn on the cob, fresh green beans, and frying angel hair nests.  (The fried angel hair nests sounded like a much better idea than they turned out to be.  Going to have to work on that one.)

I put the roaster over the rear opening above the firebox, removing the lid so that it was directly over the flames.


The juices that the meat dropped into the fire were burned immediately, and the summer kitchen (and the air outside the summer kitchen) smelled like I was grilling.  I could tell from the aroma early on that the roast was cooking pretty quickly, so I turned it not long after I had put it on to cook.


For the size roast it was, it didn't take long for it to cook at all.  I had to turn it frequently to make sure that neither side was burning, and it smelled awesome the whole time it was cooking.


The flavor of the roast was outstanding--exactly like grilled steak.  You would have thought I had used charcoal.  It was tough, however, but I do not attribute that to the cooking method or speed.  I knew from the start that the particular cut I had bought would never be tender.  It was not what I would ordinarily have bought for a beef roast, but it was cheap.  I'll do better next time, and there will be a next time.

Overall, I was very pleased with the way the grill roaster worked on the wood cookstove.  There was no noticeable difference in the firebox or ash pan due to the juices dropping into the fire, either.  We will certainly be trying other foods cooked in this manner.

Friday, July 3, 2020

Cooking Beef Tongue on the Wood Cookstove

I know this post won't appeal to everyone who reads this blog, so my feelings will not be a bit hurt if you skip over this one.  I think it's kind of a timely post, though.  Because of Covid-19's effect on the meatpacking industry, meat prices and availability have fluctuated hugely across our nation.  In our area, the retail price of beef was particularly volatile for a while, and farmers worried about whether they would be able to market their hogs and cattle.

A result of this was a surge in demand for the work that our local independent butcher shops do.  Last I heard, both of our nearest meat lockers are booked for custom processing through January of 2021, and I understand this to be a fairly universal situation in our state.  Thus, I imagine that there will be a lot of people who will be putting a beef tongue in their freezer over the next several months.

Now I know some people just cook tongues for their dogs, but I like tongue, and I dislike the idea of wasting good beef on pets.  Besides, the dog will get a few pieces of this meat anyway since there are parts of the tongue that have a little too much connective tissue to be palatable.

Here is one way to prepare it:

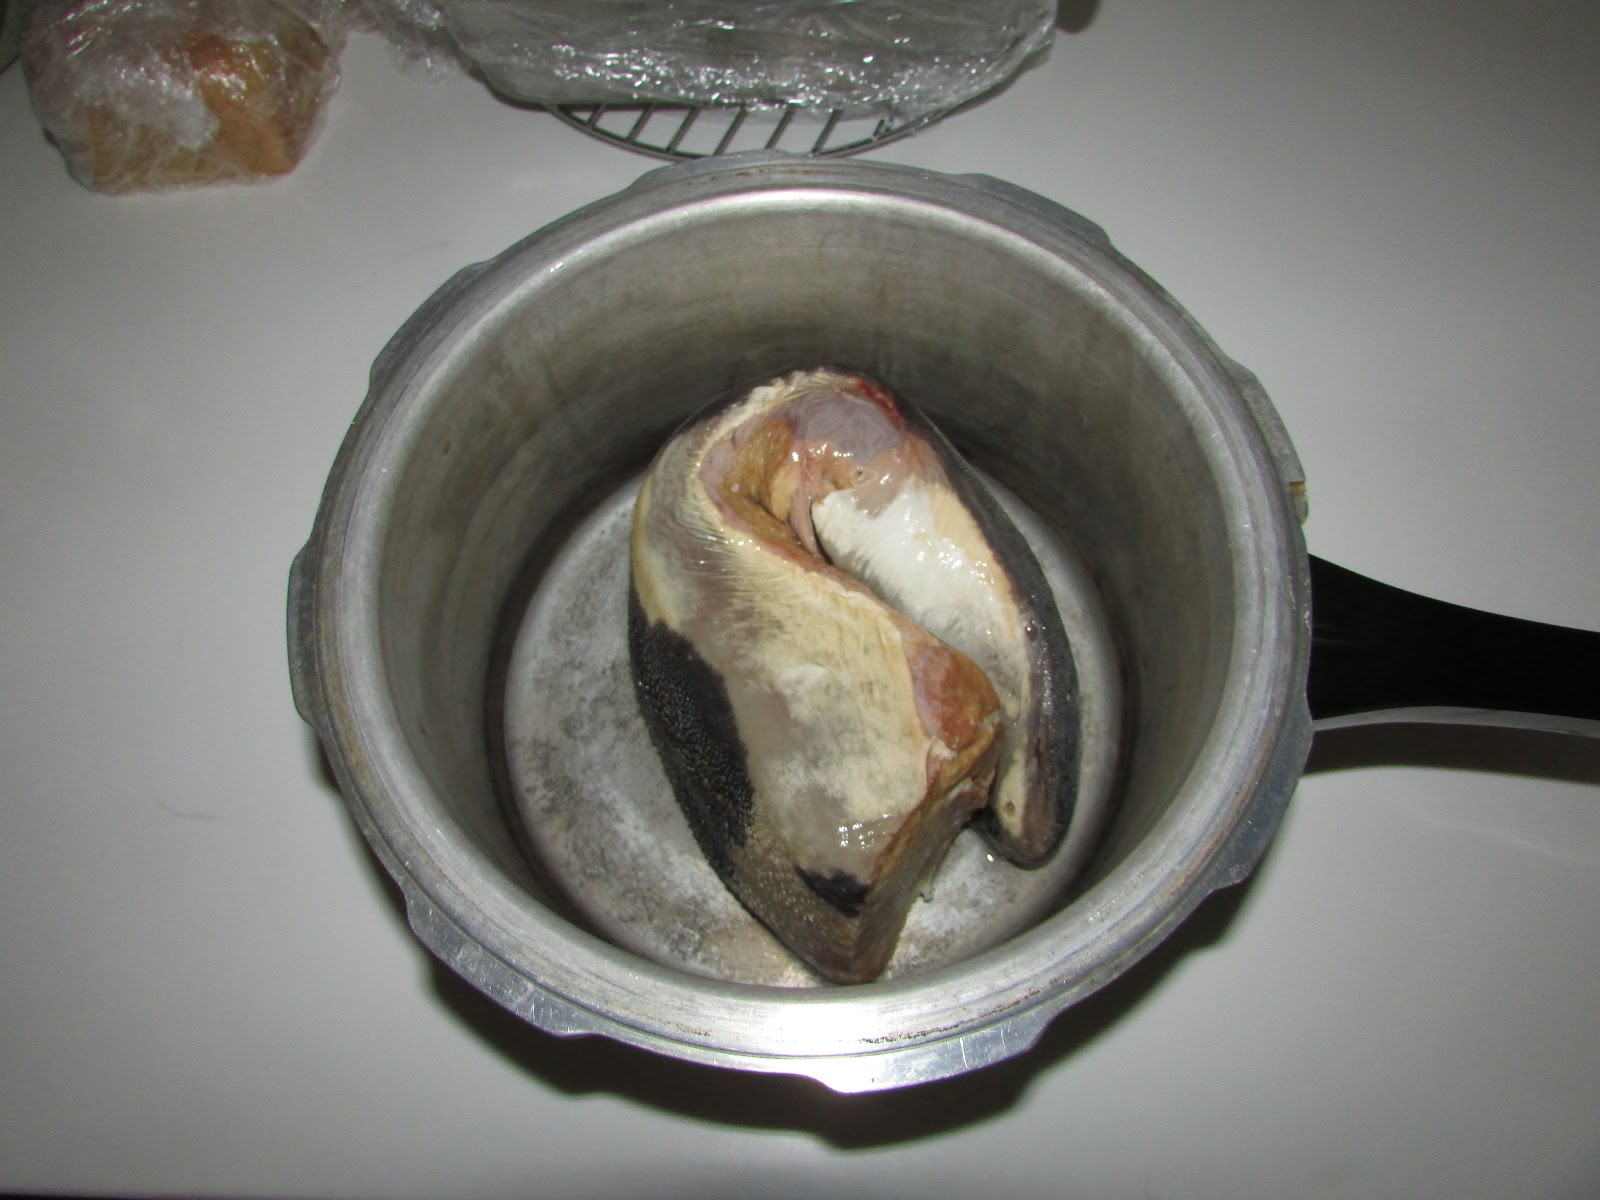
1) Place the beef tongue in a pressure pan.  Tongue can be a little tough, so the pressure cooker helps tenderize it.


2. Season the tongue generously.  For this one, I used seasoned salt, Mrs. Dash, onion flakes, and bay leaves.  If you'd rather, I think the bay leaves could be exchanged for a heavy dose of garlic with excellent results, too.


3. Cook the tongue for one hour at ten pounds of pressure.  I was not maintaining a very hot fire when the following picture was taken, so I just left the pressure cooker directly over the firebox for the whole time.  The fire wasn't hot enough to make the pressure regulator jiggle constantly, but it did keep it jiggling the required two to three times per minute.


4. Once the pressure has been released, remove the lid of the pressure cooker to remove the cooked tongue.


5. The next step is the one that will be most stomach churning for the faint of heart: you have to peel the tongue.  The outer layer of a bovine tongue is incredibly rough (as you know if you've ever been affectionately licked by Old Bossy), but once the tongue is cooked, the outer skin is easily removed.


6. Unfortunately, the shape of the tongue is still recognizable.  Nancy finds this particularly unappetizing to look at, so it is best to slice the tongue and rearrange the pieces on the plate.


7. At this point, I also removed the parts on the bottom of the thick end of the tongue which are heavy on the connective tissue and set them aside for the dog.  You could eat the tongue like roast beef at this point, but we were taking this one a step further.


8. Since I was going to put sauce on this meat for barbecue sandwiches, I chopped the slices into smaller pieces. 


9. I put the sauce onto the meat and returned it to the stove to come to a boil while I toasted the homemade hamburger buns.  I put different sauce on the meat than I usually do, and we didn't like it as well, so I'm not going to share that part of the recipe with you.


10. Enjoy the finished product!  Anyone who was not in on the preparation of the meat would never know that they are eating tongue.

Thursday, September 12, 2019

Some Vintage Instructions for Roasting Beef in a Wood Cookstove

I'm beginning to feel the itch to cook on the wood cookstove.  I had hoped that I would get the Riverside Bakewell, the Hayes-Custer, or even my brother's Montgomery Ward hooked up in the summer kitchen over the last few months, but this whole being a new author thing has taken up far more time than I imagined (very excited about it, though).

It is too warm and humid to fire up the Margin Gem, and the forecast for the next few days looks like that trend is going to continue.  However, on my way to school the last couple of days, I've been watching fields of corn and soybeans that are beginning to turn, so my mind is looking ahead to the days when a fire will be burning in the kitchen stove once again.

As I was thinking about this, I ran across a recipe from 1872 that I copied from the Anita, Iowa, centennial cookbook late last school year.  Really, I wouldn't call it a recipe so much as it is directions for how to cook a roast in a wood cookstove, and even at that, the directions are pretty sparse.  What I do think it shows well is how efficient cooks thought of ways to stretch the meat and how one might have handled the lack of refrigeration in the early 1870s.  I've been told before that beef was the early cook's friend because of its relative shelf stability compared to other meats.

These directions were shared by Mrs. William A. Suplee.

To roast in a cooking stove, the fire must have careful attention lest the meat should burn.  Lay it, well floured and seasoned, into a dripping pan, with rather more than enough water to cover the bottom.  Turn the pan around often, that all parts may be equally roasted, and baste frequently.  The oven should be quite hot when the beef is first put in that the outside may cook quickly and thus retain the juices.  A large roast of 8 or 10 pounds is much better and more economical than a small one, even in a small family.  The first day it can be served rare; that which is near the outside will be well enough done for anyone.  It can be re-roasted the next day.  If much remains, serve cold on the next, or cut in very thin slices, dip each one in flour, then chop 2 onions fine.  Place a layer of meat in a baking dish and sprinkle with salt, pepper and onion.  Above this, place a layer of sliced or canned tomatoes.  Alternate layers until the dish is nearly full, moistening with the gravy.  Place a layer of tomatoes upon the top.  Fill with boiling water, cover with a plate, and bake 2 hours.

I don't think I'll be trying to stretch one roast over three days like this because Nancy isn't fond of leftovers, and the method of serving it the third day doesn't appeal to me because I'm not that fond of tomatoes cooked like that.  Thus, I'll stick to my method of roasting beef in the cookstove, which you can find at this link, but it is fun to read vintage pieces of kitchen advice.

Monday, November 28, 2016

Grandma Marian's Biscuits and Gravy

I think that when most people hear the phrase "biscuits and gravy," they think of the wonderful combination of breakfast sausage and white gravy poured over biscuits.  This dish is a traditional favorite from the southern United States which has steadily gained so much popularity in the north that it is now on our school lunch menu.  I can remember the first time I tasted that dish.  We were visiting my dad's older sister at her home in Tennessee near where her husband had grown up, and she had set out to give us a sampling of all of the southern foods that she had learned to cook.

Grandma Marian, my mother's mother, had been serving us her own version of biscuits and gravy for a long time before that.  I don't know whether this dish originated with her, but I know that I've never seen anyone outside our family make it.  At Grandma's house, roast beef frequently appeared on the menu.  As long-time cattle producers, our family has always done our part to support the beef market, and to this day, I believe I could sit down to a dinner of roast beef and some sort of potato every noon and never get tired of it.  Grandma is an expert when it comes to roast beef.  Each of her roasts was always perfectly cooked and carefully seasoned with salt, pepper, and plenty of bay leaves, and her gravy was legendary. 

If any beef and gravy were left over, they would appear a day or so later in this delicious entrĂ©e, which is particularly suited to being made on a woodburning cookstove.  Grandma always baked this in a glass baking dish.  Sometimes such a small amount was left over that everything fit in a dish that was only about six inches in diameter; other times so much would be left over that it would be made in a 6x12 rectangular casserole dish.

Our Sunday dinner one recent weekend was a beef roast cooked in the method that I wrote about in the post called "Automatic" Cooking on a Woodburning Cookstove.  As neither Nancy nor I felt like having gravy that day, I refrigerated all of the leftovers, including the generous amount of liquid in the bottom of the roaster.  A few days later, we had Grandma Marian's Biscuits and Gravy for our supper.  Here is what to do to make it:

1. Build your fire so that you will soon have a hot oven (400-425 degrees).

2. If you are going to make your biscuits from scratch, put your shortening in the warming oven, on top of the reservoir, or wherever it will melt for you.  Later, you'll mix your cold milk or buttermilk into the melted shortening, which will cause it to congeal again.  This way, you save having to cut your shortening into your flour.

3. While the oven is heating, either make your gravy or reheat any leftover gravy.  While it is still on the stove, cut the leftover roast beef into chunks and add it to the gravy to heat.  Grandma would sometimes add chunks of any carrots that had been cooked with the roast, or she would add peas to the gravy so that this could be a one-dish meal.

The shortening for the biscuits melting in the sauce dish
in the warming oven while the gravy cooks directly over the fire.
4. Once the meat and gravy are thoroughly heated, remove them to a casserole dish of a size suitable so that the gravy doesn't go much more than halfway up the sides of the dish.  This is important because you don't want the gravy to boil over onto your oven floor.  Keep the dish of gravy warm while you mix your biscuits.


The beef and gravy resting on the opened warming oven door.
5.  Either roll and cut your biscuits or drop them by spoon on the top of the hot gravy.

Nancy and I agreed that these were the best biscuits that I have
ever made.  Unfortunately, I only measured the flour; I just
guessed on the shortening, buttermilk, and baking powder, so
I'm going to have to practice to recreate them.

6. Slide everything into your hot oven and bake until the biscuits are a fairly deep brown.

Keep two things in mind as you do this.  You want to be sure to give the biscuits plenty of time to bake because if you don't, they will be very doughy since their bottoms are steamed by the gravy.  Also, don't let your fire get your oven too hot.  If you do, the tops of the biscuits will be too brown before the center of the biscuits is thoroughly baked.


Our recent rescue kitten "Charlotte" soaking up the heat from the
cookstove.  Our joke is that if we had known how much time she
was going to spend under the stove, we would have named her "Cinderella."


7. To serve, I like to drizzle a little honey over the whole mess, but that is really unnecessary.  I just come from a terribly long line of sweet tooths.  --Hmmm.  My computer doesn't like "sweet tooths," but I'm pretty sure that it isn't right to say that I come from a long line of sweet teeth.

Put a dish of some kind of fruit alongside of this, and you have
one delicious repast.
Has anyone else eaten this dish before?  I'd be interested to know if others make this same thing.  Let me know in the comments below.  Enjoy!

Tuesday, December 29, 2015

Using the Wood Cookstove as a Slow-Cooker

On some cold days, you just don't want to shut the oven door on a woodburning cookstove.  In fact, you simply don't want to do anything that will reduce the radiant surface area of the cookstove.  The cooking method that I'm sharing in this blog post is perfect for those cold days--like yesterday and today--when the fire is going full tilt for heat and you don't want to sacrifice any of it for cooking your supper.

I first tried this almost eight years ago when I wanted to see if I could mimic a Crock-pot with the oven of the wood cookstove.  In a Crock-pot, the heat comes at the food from the sides as well as the bottom of the crock.  I have only used this cooking method for slow-cooking roasts, but it works really well.

First, you must select an appropriate cooking vessel.  Yesterday, I used my three-quart Saladmaster saucepan.  It belonged to Granny, who purchased it in 1963 and used it so hard that the handle fell off years before it ended up in my possession in the late 1990s.  Its handlelessness (I know that's not a word, but I like it anyway.) is precisely the reason that I use it.  You want to choose a vessel that can have all parts of it exposed to heat.  I don't use the lid that actually goes with this pot because it has a handle that would not be oven safe.  Instead, I used an all metal lid that I purchased at a second-hand store in Atlantic.  I have used aluminum foil as a lid, too.


Next, prepare your food as you would for any ordinary slow cooker.  I had chosen a small chuck roast, so I first seared the outside of it in a little butter.  Then I added some beef broth, some dried onions, and some seasonings.


Place the cover on the vessel.


Slide it into the rear corner of the oven closest to the firebox side of the stove.  Leave it there with the oven door open for as long as is necessary to cook whatever you have chosen.  Our small roast was in the corner of the oven from about ten o'clock in the morning to our suppertime at half past six.


In most wood cookstoves, this corner of the oven would be the hottest area because the firebox is immediately to the left, and when the oven damper is in the baking position (where ours stays during cold weather), all of the flue gases travel up the back of the oven on their way to the stovepipe.

To increase the heat, I removed the rack from below the kettle in the middle of the afternoon.  This afforded greater heat transfer to the food by conducting heat directly from the oven floor to the bottom of the kettle.


The roast turned out to be very flavorful, and coupled with potatoes that we baked this way and some homegrown frozen sweet corn, it made an excellent supper.

On the upper side of the roast, you can see two light-colored
places where bubbles had been rising as the roast simmered
in the open oven.
 
If you try using this method of slow cooking in your wood or coal cookstove, please let me know how it worked for you by utilizing the comments section below.  Happy cooking!

Saturday, December 8, 2012

Century-old Recipe for Meatloaf

Not too many years ago, Nancy, her mother, and I had all gone down to Clearfield, Iowa, to visit Nancy's grandparents.  Nancy's grandma Ruth, an avid cook in her day and still a food aficionada at age 97, had apparently been rummaging through old cookbooks and had decided to send a couple home with Nancy's mom.  I was not the driver on the two-hour return trip, so I sat in the back seat and read the cookbooks.  One of them was the 1915 Clearfield Presbyterian Church Cookbook.  The Clearfield Presbyterian Church is long gone, but a recipe that caught my eye needs to be carried into the future.

The recipe was simply labeled "Beef Loaf," but what made me pay attention to it was the ingredient list.  Most meatloaf recipes are fairly similar in nature: meat, meat stretcher, an egg or two, some moisture, and your seasonings.  What caught my eye about the ingredients was that this recipe included ground bacon.  Now, I'm an unashamed meatloaf lover, and I've had meatloaf that was draped in bacon, but the idea of grinding bacon and including it inside the meatloaf was intriguing to me.  Furthermore, with not nearly enough shame, I will admit that I believe the following verse: "Bacon and butter make everything better."  Thus, I definitely had to try this recipe! 

The first try was a success; the second try earned me an "I sure wish I could make a meatloaf like you" at a church dinner.  Thus, this recipe has now become one of my "go to" recipes when cooking for a potluck, so I pulled it out for the Nightingale Circle Christmas Potluck which we hosted at our house last Wednesday evening.  Here is what you do:


1. First crush enough saltine crackers to make a cup of cracker crumbs.


2. Grind one pound of bacon and set aside.

Normally, I would be ashamed to show you that we have an electric
food grinder.  (We have a hand-cranked one that I have used many times
for this recipe.)  However, we bought this grinder a few weeks ago at the
Goodwill Warehouse in Omaha.  You pay for your merchandise by the
pound there, so I estimate that this vintage deluxe Kenmore grinder cost
us less than $6.70.  Aren't you impressed?  You'll see why I wanted it if I
write a post about making suet pudding for Christmas.

3. Mix cracker crumbs, eggs, milk, dried onion, and salt and pepper.


4. Add the ground bacon.


5. Add the ground beef and mix thoroughly.


6. Shape into a loaf and put into a baking dish. 

Keep in mind that you've got four pounds of meat here,
so you need a big pan.  This Pyrex dish is 11" x 14" and
holds 4.8 quarts.
7. Bake in a moderate oven for approximately 1 1/2 hours.

You see the meatloaf cooking here in the stovetop oven.  I actually started it in
the Margin Gem's oven, but I had to finish it on top of the stove
because the dinner rolls wouldn't fit in the stovetop oven, so they had
to be baked in Marjorie's oven.  This stovetop oven is coming in handy!

8. During the last ten minutes, I like to glaze it with two cups of homemade ketchup, about 3/4 of a cup of brown sugar, and two teaspoons of dry mustard.


Mix all of that together until it is smooth and poor over the top of the meatloaf.

The finished product with about half of it gone.
Notes:

a) At first glance, one might think that this meatloaf is bound to be greasy since it has a pound of bacon in it.  Surprisingly, most of the bacon fat cooks out during baking, and there is no greasy texture or taste.

b) Because the bacon fat cooks out, the hot fat tends to sputter a lot in the oven, so be prepared to run a damp cloth over the inside of the oven after it has cooled down to being just warm.

c) The original recipe did not call for the dried onion or the glaze, but it was quite bland without them.  The original recipe also called for a tablespoon of butter.  Despite my mantra above, I leave that out because it seems superfluous even to me.

The recipe:
 
Beef Loaf
 
3 lbs. ground beef
1 lb. ground bacon
2 eggs
1 cup cracker crumbs
1 cup rich milk
3/4 cup dried onion (or to taste)
Salt and pepper to taste.
 
Mix all together and shape into loaf.  Bake approximately 1 1/2 hours in moderate oven.
During last ten minutes, glaze with the following:
 
2 cups ketchup
3/4 c. brown sugar
2 tsp. dried mustard


I hope you enjoy this one as much as I do.

Tuesday, June 12, 2012

Perfect Roast Beef from Your Wood Cookstove

For nearly a year now, I've wanted to blog about my favorite method for cooking roast beef in a wood cookstove, and tonight I finally get to do so.  Here is what I do:

If you are starting with a cold stove, the first thing to do is to start a brisk fire a little before the time when the roast needs to start cooking in order to be done at the desired hour.  Once the kindling is burning and a good draft is established, shut the oven damper as soon as possible so that the oven is heating.  Then, take advantage of the hot cooktop!  Place the bottom of your roaster over the firebox.  Sometimes I add just a little bit of butter, but today I gave it a quick squirt of non-stick cooking spray.  Then, put the roast in with whatever you consider the top side down. 

Beef roast searing over the firebox.

This is a shot of the fire which was burning under the roast in the
picture above.  As you can see, it is pretty brisk.

Once the top of the roast is seared, turn it over with a fork and sear the other side.  I often sear the vertical sides, too.  While the bottom is searing, season the roast with salt and pepper and then lay several bay leaves on top of the roast.  Pour enough hot water from the teakettle into the bottom of the roaster to just cover the bottom of the pan.

The seasoned roast, seared on both sides, is getting
a little drink from the teakettle.

Place the lid on the roaster and put the roast in the oven, which should be plenty hot at this time.  Mine was at four hundred degrees.  Of course, you won't want the roast to continue cooking at such a high temperature.

The roast beef in the oven.  By the way, the roaster was purchased
last year on our trip to The Dutchman, the Amish and Mennonite
equivalent of Wal-Mart in Cantril, Iowa.
This afternoon, I had to go to my parents' house for awhile once the roast was in the oven, so I put two large pieces of wood in the firebox.

Two large pieces of wood placed on the hot fire which
was seen in a picture above.  Sorry about the pic. being
off center.

Then I closed the bottom draft on the ash door, closed the side draft almost completely down, and shut the damper most of the way.  This slowed the fire, but kept a gentle roasting heat for the time that I was gone.

The stovepipe damper on the Margin Gem.

When I came back about two hours later, the house smelled heavenly, and the little chuck roast was done to a turn.  It was tender and juicy, and it was swimming in a beautiful brown juice which would have made the perfect gravy.  (I don't always make gravy because I'm not a gravy lover.  The beautiful juices from this roast went to the barn cats.)

The perfect beef roast cooked on the wood cookstove.

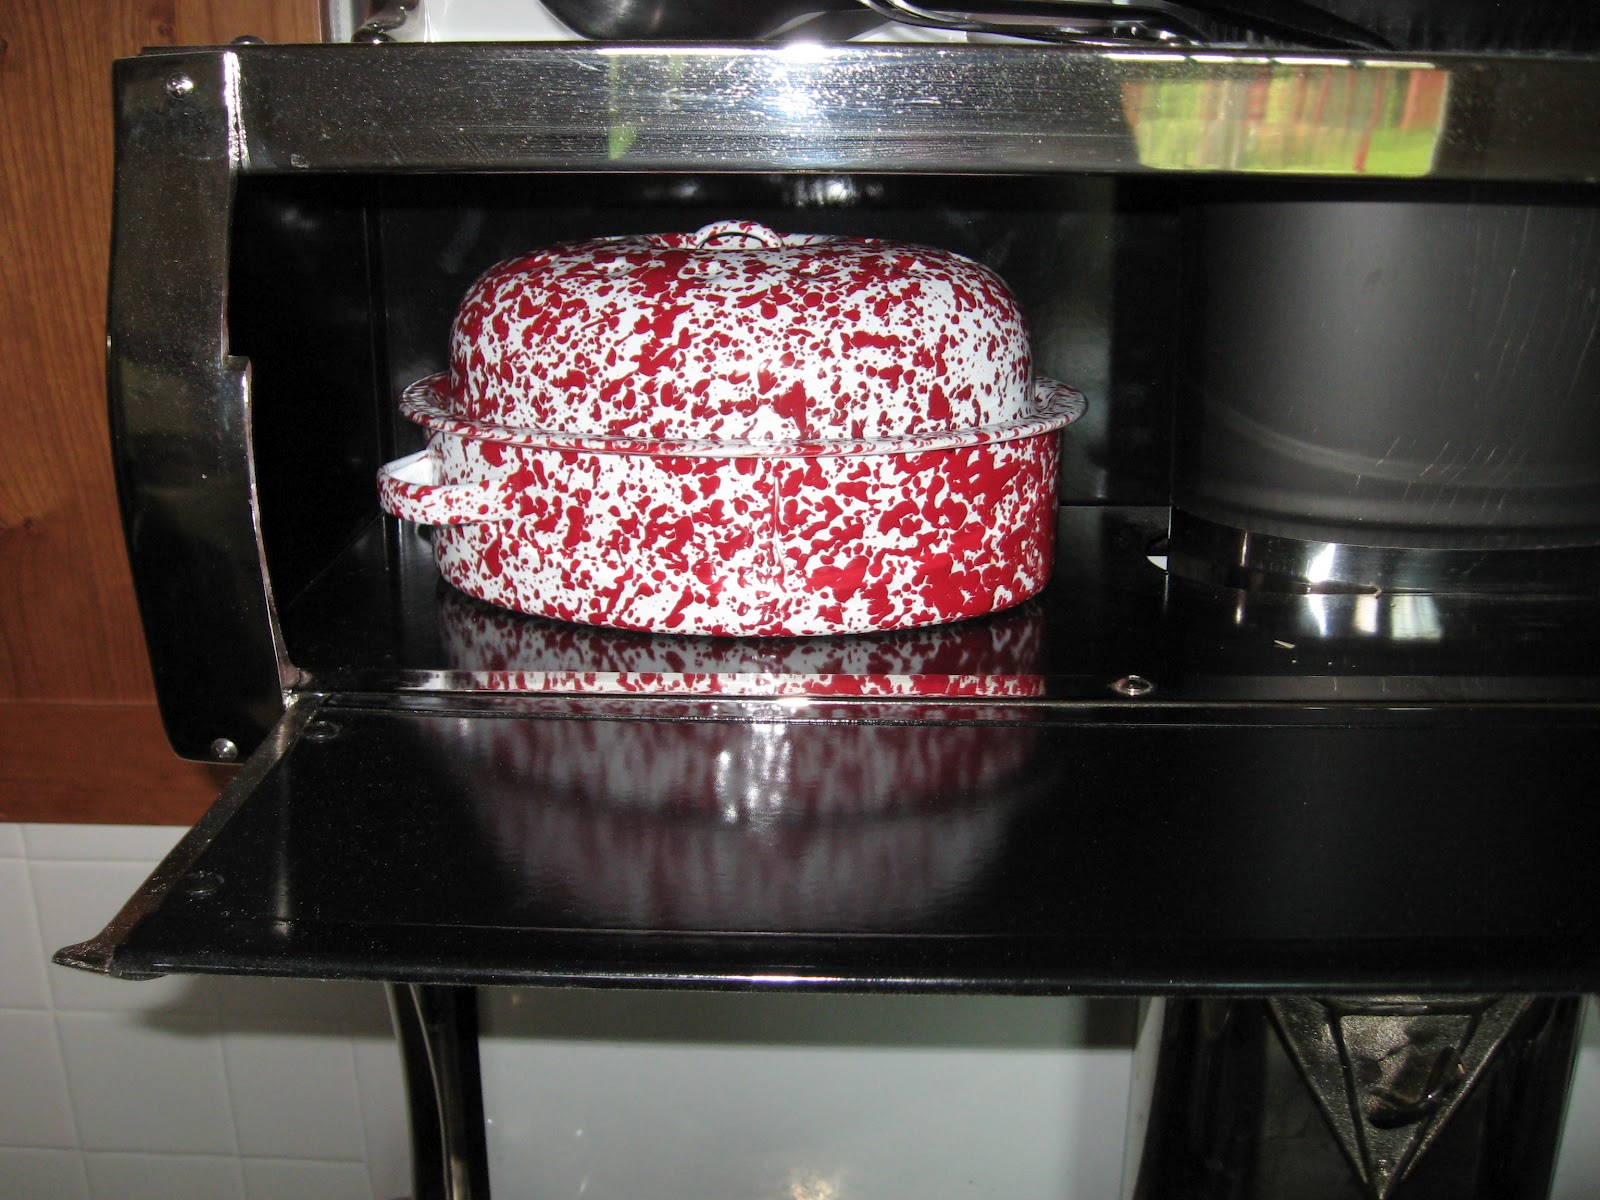
Of course, the side dishes weren't done yet because I hadn't been home, so the roast went into the warming oven where it would remain hot but not continue cooking until the rest of the meal was ready. 

The beef roast hanging out in the warming oven until the rest of
the meal was ready.

Because it is summertime and we don't have a fire in the stove each day, I was multi-tasking, cooking not only supper, but also maidrites for lunches this week and black raspberries for jelly.

I'm sure that the number of methods to cook roast beef on a wood cookstove is equal to the number of people who use these stoves, but this method has always yielded a great final product for me.  I've used two other methods for cooking roast beef, but they are more suitable to cold weather cooking, so please stop in again to see other options.  If you've got your own method, as always, please share!