Showing posts with label stovetop meals. Show all posts

Sunday, January 9, 2022

Iowa State University's Minnesota Wild Rice Soup

When I was a student at Iowa State University back in the mid-1990s, the school's food service system in the dormitories was outstanding.  The food was truly excellent, and most of it was made onsite at the various dormitory complexes.  In retrospect, the variety available to us was amazing, too.

At that time, any student who ate at the dining hall could request any of the recipes for the foods we were served.  After eating this soup for two years and loving it from the start, I marched myself into the kitchen one day and asked for the recipe.  I'm so glad I did!  I have a niece and nephew who have been part of the dormitory system at ISU within the last two years, and they tell me that this soup is no longer served there.  I find that very sad because this is my favorite soup of all time.

The recipe that the food service people gave me was in huge quantities, of course, but I gave the recipe to my aunt Ellen, who is a fabulous cook, and she reduced it to proportions that are manageable in a home kitchen.  However, as always, I have altered the recipe since then to make it a little simpler and easier to make; however, the flavor is exactly the same as what we ate at ISU.  Here is what you need to do:

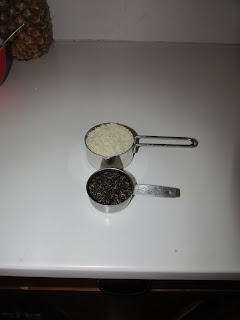
1. Bring four cups of chicken broth to a boil directly over the firebox.  I've used homemade broth, store-bought canned broth, and broth made from bouillon paste or cubes.  In the pictures below, you see four cups of water with four Herb Ox chicken bouillon cubes in them.


2. To the boiling broth, add 1/2 cup white rice and two or three tablespoons of wild rice.  I used three in this batch, and I prefer that amount.


3. Cover the broth and rice mixture with a tight-fitting lid.  

4. While the rice and broth are boiling over the firebox, chop a scant cup of onion, a stalk of celery, and a carrot into small pieces.


4. Add the onion, celery, and carrot to the rice and broth.  By this time, some of the liquid will have cooked off and been absorbed by the rice, and you need to begin watching the soup kettle carefully.  Keep your teakettle of boiling water handy because I have never made this soup but what I've had to supplement the liquid with water from the teakettle.  You can see in the picture below that I also had to move the kettle away from the fire.  Stir this occasionally, adding water as needed to keep it from sticking to the bottom of the soup kettle.

5. While the rice and vegetables are cooking, melt four tablespoons of butter over a cool part of the cooktop.


6. Sift six tablespoons of all-purpose flour (1/2 cup minus 2 tablespoons).


7. Move the melted butter directly over the firebox, add the flour to it, and cook it into a roux.


8. I didn't get any pictures of this, but once you have cooked the roux, remove it from the heat.  Measure 3 3/4 cups of milk.  Stir enough of this milk into the roux to make it into a white sauce.  When the carrots are soft, add the remaining milk and the white sauce to the rice, broth, and vegetable mixture.  

9. At this point, add two tablespoons of slivered almonds and 1 1/2 cups of cubed ham.  (I just add a whole one-pound package of ham because the few pieces of ham that are left always spoil in the refrigerator before I get them used.)  The ham and the almonds add a surprising amount of flavor, and the almonds add a nice crunch to the soup.


10. Move the soup kettle back over the firebox and return everything to a boil while stirring constantly to prevent it from scorching.

11. At this point, season the soup with a dash of pepper, a couple dashes of celery salt, and a couple dashes of garlic salt.  Be very careful about not over salting as there can be quite a bit of salt in the chicken broth depending on what kind you used, and the ham adds salt, too.


12. Once the completed soup comes to a full boil again, it will have thickened too, and it is ready to serve.

Since our stovetop was cluttered with our teakettle and another pot of water to add humidity to the air in the house, I put the soup kettle up on a trivet to keep it hot while I made some toast to serve with the soup.

You can see the finished soup in the picture below.  It is fantastic!  As you can tell from the description, the person cooking this soup is constantly occupied with the process for a good forty minutes or so, and with the ham, wild rice, and almonds, I wouldn't call this an economical dish, either.  Thus, I don't make it often, but when I do, it is worth every bit of time and money.  


Thursday, December 31, 2020

An Egg Coddling Party around the Wood Cookstove

When my parents were married back in 1971, they were given a pair of egg coddlers for a wedding gift.  I only remember one or two times that Mom and Dad made coddled eggs while the three of us kids were at home, but that is understandable since they only had two egg coddlers.

My brother Kevin and I have taken to buying these little beauties whenever we see them, so between the two of us, we have now amassed enough of a fleet that we could have an egg coddling party.


Thus, last night my sister and her family, my brother and his family, my parents, and my aunt all came to our house and we coddled eggs and made Aebleskiver.

In the photo below, I'm beginning to fry Aebleskiver while Janet and Kevin work on preparing the accessories to the coddled eggs.  Mom commented that it was rare to see all three of us working over the same stove, but I think that has only never happened because no other stove besides a woodburning range would be big enough to accommodate all of us.  I will write a whole post about making Aebleskiver later, I promise.


The egg coddlers are little porcelain jars with stainless steel screw-top lids.  They are made by Royal Worcester and come with the following instructions:

"Lightly butter the inside of the cup.  Break egg into it.  Add butter, salt and pepper for flavor.  Screw on lid.  Cook six minutes in enough boiling water to cover coddler.  Lift cup from water by metal ring.  When you unscrew the top, grasp the whole cover.  If the egg is not cooked enough, replace the lid and return the coddler to the boiling water.

For variety, add flaked fish, cheese, herbs, chopped ham, mushrooms, etc. to the egg.  Coddlers are also ideal for heating baby foods."

What Kevin and Janet were working on in the picture above was sautéing mushrooms and cooking two different kinds of sausage as well as warming some diced ham.  We also had some chopped bell peppers and onions.


We beat a bunch of eggs together, poured a little into each coddler,  and mixed whatever other things we wanted into them and basically cooked our own individual egg casseroles.  My brother and brother-in-law wish that we had left the eggs whole, but we'll have to wait until next time to do it that way again.

The next picture is actually from the last egg coddling party that we had a couple of years ago.  You can see both the green enamel sweet corn kettle that we used again last night and my five-quart Magnalite Dutch oven.  The Dutch oven was nice because it was more shallow and therefore made it easier to retrieve the coddlers from the boiling water.


This time, we only used the green sweet corn kettle because I wanted to be able to remove the lid of the cookstove beneath it in order to facilitate the fastest boil possible.  This made it difficult to get the egg coddlers out of the water, though.  Thus, Kevin and Jason created a new kitchen tool out of a wire clothes hanger:

It worked like a charm, and I have been instructed to save it until the next egg coddling party.


We've found that six minutes is not quite long enough to suit our general taste, especially since we put so many coddlers down into the water at once, thereby reducing the water temperature below the boiling point for a while.  You can also see from the picture above that we have some coddlers that are larger than others; they naturally need some more time.  In general, we were cooking them for ten to twelve minutes.

Once the time has elapsed, unscrewing the lids is a process that needs caution and two hot pads.


When the eggs are cooked, they come out in little bell shapes.


Coddling eggs is a very labor-intensive and time-consuming way to prepare them for large groups of people, but getting together was the main point of last night's gathering.  Though we all live within an eleven mile radius, because of Covid-19, we have only been together twice since March: once on Mothers' Day and then again on Christmas.  We figured since we were already exposed to each other on Christmas, we might as well get together once more, and I really enjoyed having Janet and Kevin and their families back here with me in the house where we grew up.


Sunday, July 19, 2020

Using a Grill Roaster on a Wood Cookstove

Probably fifteen years ago, I purchased this blue enamel "Grill Roaster" at Cappel's Ace Hardware in Atlantic, Iowa.


What makes it a "grill roaster" is the fact that the bottom is perforated.


I bought it expressly for using on a wood cookstove because it looked like the round shape would fit perfectly in an eye over the firebox of the Qualified Range.  I think perhaps it is truly meant for roasting vegetables on the grill, but from the beginning I wanted to try cooking a beef roast in it. I don't know why, but I wasn't ready to try it right away when I bought it, so I relegated it to a shelf in the fruit room in the basement.  And there it sat until Friday when I brought it out, washed it, and finally got around to trying it.

The roaster does fit neatly over the eyes of the Qualified, the Hayes-Custer, and the Margin Gem.  Bingo!

For Friday night's supper, I seasoned a beef roast with seasoned salt and Mrs. Dash and put it in the grill roaster, the inside bottom of which I had coated with non-stick cooking spray.

My fire that night was fueled by a combination of mulberry, elm, and pear wood, and I didn't manage it any differently than I would have under ordinary circumstances--mostly because I was also cooking corn on the cob, fresh green beans, and frying angel hair nests.  (The fried angel hair nests sounded like a much better idea than they turned out to be.  Going to have to work on that one.)

I put the roaster over the rear opening above the firebox, removing the lid so that it was directly over the flames.


The juices that the meat dropped into the fire were burned immediately, and the summer kitchen (and the air outside the summer kitchen) smelled like I was grilling.  I could tell from the aroma early on that the roast was cooking pretty quickly, so I turned it not long after I had put it on to cook.


For the size roast it was, it didn't take long for it to cook at all.  I had to turn it frequently to make sure that neither side was burning, and it smelled awesome the whole time it was cooking.


The flavor of the roast was outstanding--exactly like grilled steak.  You would have thought I had used charcoal.  It was tough, however, but I do not attribute that to the cooking method or speed.  I knew from the start that the particular cut I had bought would never be tender.  It was not what I would ordinarily have bought for a beef roast, but it was cheap.  I'll do better next time, and there will be a next time.

Overall, I was very pleased with the way the grill roaster worked on the wood cookstove.  There was no noticeable difference in the firebox or ash pan due to the juices dropping into the fire, either.  We will certainly be trying other foods cooked in this manner.

Monday, June 8, 2020

Tonight's Supper: Shrimp Scampi on Capellini Pasta

I don't have a single drop of Italian blood in me, and this landlocked Iowa boy would take beef, pork, or poultry over anything from the sea most every time, but I do have a weakness for shrimp.  The last time Nancy and I were in the grocery store together, which we think was sometime in March, Nancy put a bag of frozen shrimp in the cart, saying that we would use them as some kind of treat during the Covid-19 Quarantine time.  The bag was put in the freezer in the basement, and Nancy forgot about it. When she went down to retrieve her ice cream yesterday, she saw it there and asked if we could have "shrimp something" for supper after she got home from work today.

"Shrimp something" would probably have been shrimp Alfredo, but I neglected to buy cream on my last grocery run, so I had to strike out on my own.  The results were so good that I have to blog this before I forget what I did so that I can recreate this supper sometime in the future.

First, since I use this blog for personal record keeping, I need to report that as of last Friday (June 5) I have done all of our cooking out in the summer kitchen on my brother's Montgomery Ward Economy Cookstove that I blogged about back in 2013 in this post.  Our last daily fire in the Margin Gem went out on the morning of June 1, which was when it began to get pretty warm around here.  Obviously, that was also the day that I turned on the electric hot water heater, which we will run for the next four months. This was the latest in the season that we have ever waited to do that, beating our previous record of May 27th.  Thus, the stats for the 2019-2020 heating season are that from October 11 to June 1, all hot water was heated by the Margin Gem, and it cooked all but four of the meals prepared at home during that time (two frozen pizzas, one crockpot roast, and one meal cooked entirely on the grill).  Also, because of Covid-19, the Margin Gem cooked all but seven of the meals I ate between March 16 and May 31.

My brother's Montgomery Ward Economy Cookstove
temporarily installed in our summer kitchen.

I worked the primary election on June 2, and I had cooked enough food ahead that the only cooking I did between the Margin Gem and this little stove was French toast on the gas stove (a ridiculously difficult task--so hard to get it to brown evenly over a gas flame) and baking four potatoes in the electric stove in the basement.

I am writing a whole post about cooking on this little cookstove of Kevin's, so all I'll say here is that it has worked surprisingly well--great really.  I was so anxious to get cooking on it, you'll notice that I didn't get the floor of the summer kitchen scrubbed yet.

Anyway, back to supper tonight.  I started by making the angel hair pasta. To roughly a cup of all-purpose flour, I added a sprinkling of baking powder and a dash of salt, then an egg.  I worked additional flour into the pasta dough until I couldn't get it to take any more by hand.  Then, I started running it through the rollers of my Atlas pasta machine.  I got to level 7 on the rollers and then cut the pasta with the cutter labeled capellini (Italian for "little hairs," slightly larger than true angel hair).  I kind of clumped the pasta into little loosely packed nests and set them aside on a plate to dry a bit while I did other things.  These were probably the best pasta I've ever made.

Making pasta is a messy proposition no matter how you look at it.

I started the fire out in the summer kitchen then, and put a pot of salted water on to boil for the pasta. I also put on the base to the steamer with a little water in it.  While they were heating, I headed to the gardens and picked some garlic chives and two onion leaves.  I washed those and snipped them into a frying pan with a 1/2 stick of butter in it.  Then, I took two tiny garlic bulbs harvested yesterday and put them through my Pampered Chef garlic press; they would have been the equivalent of two store-bought garlic cloves.  The frying pan was carried out to the stove then, where the other two kettles had come to a boil.

While the butter was beginning to melt and cook the herbs from the garden, I put a large head of broccoli in the steamer and dropped the nests of pasta into the boiling water.  By that time, the butter was simmering nicely, so I added about nine oz. of the cooked, frozen shrimp and a few parsley flakes.  Since the shrimp was already cooked, it just needed to thaw and heat through.

Tonight's supper cooking on my brother's little stove.
Sorry about the lens cap on the right side of the pic.
I couldn't hold onto the lids of the two kettles and
keep the lens cap out of the way at the same time.

Everything was finished cooking at the same time, so I carried it all back into the house.  We used a slotted spoon to fish the pasta nests out of the water, draining them as we did so.  Then, we scooped the cooked shrimp and its buttery juice over the pasta and sprinkled it with grated parmesan cheese.  The steamed broccoli was seasoned with a quick sprinkle of garlic salt, and supper was served.

Our supper.  Next time we'll be sure to buy shrimp that doesn't
have its tails on.

Nancy said I had hit the nail on the head with what she had in mind for "shrimp stuff," and we agreed that our supper tasted like it had come from a fine Italian restaurant.  It really was outstanding if I do say so myself. Making the pasta was the most difficult part of this meal, and if I were in a hurry and not in the middle of a pandemic, I would have bought angel hair nests in the grocery store and not thought twice about it.  We are looking forward to having this meal again when our own broccoli is ready to eat.

Wednesday, October 31, 2018

Using a Pressure Cooker on a Wood Cookstove

When I worked as a local banker, my boss was a lady from Carson, Iowa, who is a lot of fun to visit with.  We enjoyed talking about food and cooking, and I'll never forget her telling me that she resisted getting a microwave oven for a long, long time when they became popular in the late 70s and early 80s.  As I remember, she finally caved under a great deal of pressure from her mother-in-law, but only used the microwave to reheat leftovers.

"I didn't need a microwave," she insisted, "because I have a pressure cooker.  I can cook things fast in it, which is why I call pressure cookers 'the poor man's microwave.'"

Microwaves are now standard equipment in the modern kitchen, but Instant Pots seem to be the current rage in countertop kitchen appliances, and one of their features is the ability to cook things quickly by using pressure. However, this is certainly not new technology; what is new about an Instant Pot are its safety features, automation, and some of its versatility.

Those of us who are cooking on a woodburning cookstove aren't exactly known for being the cooks who are taking advantage of the latest technological advances, though, are we?  That said, a carefully used pressure cooker can help us speed things up a little when we feel like it and add some variety to our cooking.  This was the case on Monday of this week when I had been out with a friend on a photography romp all afternoon and had nothing planned for supper when I returned home after 4:30.

I dug around in the freezer and found a package of country pork ribs.  I put them in the microwave to defrost a little (only because they had been packaged with waxed paper between them and I couldn't get it free) and brought my smallest pressure cooker up from its basement abode.  This pressure cooker was given to me by my aunt who had received it from one of my great-great aunts who had bought it sometime in the 1940s.  It came to me with its original instruction booklet which includes several recipes--what a blessing!

When cooking with one of these pans, the first step is usually to establish the pressure.  For the wood cookstove cook, this means that you are going to start the cooking process with the pan directly over the firebox.  You can see in the picture below that for what I was going to do I also put the rack in the bottom and added about a 1/2 inch of water.


Next, I inserted a small old Pyrex pan (I think it was the precursor to the Visions Cookware line) that I got from Nancy's grandmother.  Into that I put my three small pork ribs, which were still pretty frozen in the middle.


Over the ribs I poured barbecue sauce, which I made out of homemade ketchup and some barbecue sauce concentrate from Watkins.  In hindsight, I should have seasoned the meat more before putting the barbecue sauce on it because it was plenty bland.


I then put the lid on the pan, set the weight on the petcock to ten pounds of pressure, and moved the pan to the hottest lid over the firebox and began waiting for the weight to jiggle.


The jiggling began in a surprisingly short time, and then "the dance" commenced.  "The dance" is my tongue-in-cheek term for the movement of cooking vessels across the wood cookstove cooktop to adjust their cooking temperature.  High heat is right over the firebox, and lower heats are further away.  Instead of adjusting a dial, pushing a button, or tracing your finger over a fancy touch response induction range, you slide the pots and pans to the area of the cooktop which has the desired heat.

In a weighted-gauge pressure cooker, once the appropriate pressure has been reached (as announced by the jiggling weight), the heat needs to be reduced so that the weight jiggles a minimum of three to four times per minute but does not jiggle constantly.  You can see in the picture above that I wasn't stoking a raging fire, so I didn't have to move the pressure cooker too far away from the firebox in order to maintain the correct number of jiggles per minute.

A quick word about safety: I wouldn't recommend leaving a pressure cooker unattended for long periods of time on any cooking device, not just a wood cookstove.  The occasional short absence from the kitchen should be fine, however.


I'm sure the meat was cooked much earlier, but because I was busy with other things and because I knew that this cheap cut of meat would be made more tender by a longer cooking time, I let these cook for an hour, and then stuck a thermometer in them to be absolutely positive.

I don't know why I felt the need for the thermometer on Monday.  I think it was due to the fact that it was resting above the warming oven from a different project.  Usually, I would just have cut one open to make sure there was no longer any pink in the center.


The ribs were done, were fork tender, and we enjoyed them.

I should try using the pressure pan for more foods; usually I just use it for meats.  One of my favorite things to cook in it is tongue.  Let me know if you're interested in seeing that process!  Also let me know whether you use a pressure pan, and if so, what you cook in it.

Friday, January 15, 2016

Chinese Cooking: Taking Your Wood Cookstove for a "Wok"


Nancy and I love Chinese food.  We both savor every bite of crab rangoon, but she prefers cashew or sesame chicken, while I have a deep and abiding affection for sweet and sour.  I had never eaten Chinese food at all until I went to college at Ames, and I don't even remember what prompted me to wander into my first Chinese restaurant there on Welch Avenue in Campustown, but I'm surely glad that I did.

Long ago, before the shopping mall that is closest to our home became a virtual ghost town, there was a fairly decent Chinese restaurant in the food court there.  The restaurant was designed so that you could watch the cooks prepare your food while you waited, and I'll admit to being fascinated by the fast-paced, fiery spectacle that Chinese cooking presented.  Thus, when I saw an out-of-the-ordinary wok on clearance in Atlantic, I snatched it up.

The wok is out of the ordinary because, instead of having a completely rounded base, it has a base that fits down inside the "eye" of the cooktop.

The directions that were attached to the wok at purchase stated that the shelf around the perimeter of the wok is to be used as a place where you can put cooked food to stay hot while other food is cooked down at the center base.
A side view of the wok as it rests on top of the firebox.
 
It may be kind of weird, but I always associate woodburning cookstoves with distinctly American cooking, but it turns out that they are surprisingly well suited to Chinese cooking.  In the photos below, you can see what I mean.  I'm not going to share any recipe in this post because I'm very new to the homemade-Chinese-cooking experience, and I'm not completely happy with the things that I have created yet--tasty though they were.
 
The first thing that I did was cook the sauce for our entrée.  As soon as it was finished, it was removed to a trivet at the back of the stove.  Then I made the fried rice.
Fried rice cooking in the wok.
Wok cooking is usually done for a very short time at a very high heat.  Thus, building a hot fire and then putting the wok down in one of the eyes above the firebox creates the ideal wok cooking scenario. 
The wok resting in the eye directly above the firebox with a hot fire
built directly below it.
Once the fried rice is finished, it can be put into the warming oven so that it stays hot while the meat is cooked.
The finished fried rice in the warming oven.
Since the base of the wok is so small, only a little of the meat can be cooked at a time.  As the meat (in this case chicken) cooked, I removed it from the wok to drain on a paper towel-covered plate in the warming oven.

You can see how the versatility of the wood cookstove comes
in handy while cooking Chinese at home.
Once the meat is finished frying and has all had a chance to drain, the oil is discarded from the wok and then the meat and sauce are combined and cooked in it for a very short time.  Everything is then served over the fried rice. 
 
Of course, one wouldn't have to have a wok as unique as mine to make Chinese on a wood cookstove.  In fact, one wouldn't need a wok at all to make the Chinese dishes that I've been experimenting with, but it certainly goes a long way to making my concoctions feel authentic.  Either way, the wood cookstove is great for cooking Chinese!

Wednesday, January 14, 2015

Making Waffles on a Woodburning Cookstove


Nancy and I both enjoy a good waffle, and I enjoy waffles made from scratch a whole lot better than those made from a mix.  I still have and use the first electric waffle iron that my mother's side of the family owned.  It belonged to my great-great grandparents and then made it to my aunt Meme's possession.  It is a unique (and a bit scary) looking contraption, but it still turns out a good waffle.  I also have a 1950s waffle iron that I bought on a household auction several years ago, which makes waffles which are in the shape of a half oval.

Several Christmases ago, my sister and sister-in-law got into cahoots and purchased me a new Belgian waffle iron.  At the time, my wife was a bit dubious about this purchase because she knew that I was not about to give up my antique waffle irons, but I really like this new Belgian waffle iron, too.  It is constructed so that you pour the waffle batter in one side, shut it, and then flip it so that the waffle that you just poured is now baking upside down.  It makes a great waffle and is fun to use.

Now, of course, these waffle irons are all very well and good, but they are all electric, and I obviously like to have non-electric options when it comes to cooking.  Thus, I purchased an antique stovetop waffle iron several years ago when I was in college.  I tried it out on the Qualified range a few times, but I could never get it to work right.  The problem that I had was that no matter what I did, the waffle would be undercooked between the pegs.  Finally, after several failures, I examined the waffle iron more closely and noticed that the pegs seemed to be farther apart on this waffle iron than on others.  I sold that waffle iron and began the hunt for a replacement with pegs which were a more standard distance apart.

I finally found one at Carstens Farm Days in September of this year, but it wasn't until last month that I finally was able to take the time to re-season it and begin experimenting.  I'm pleased to report that a successful waffle was no real trouble once I got the hang of things.

The first thing that one must do to bake a waffle on a woodburning cookstove is to build a hot fire.  I find that the fire has to be very hot.  Below, you can see a picture of one of the blazing fires that I used to make waffles.


You can see that I like to use small pieces of wood in order to make a really hot fire.  I find that doing so affords more control.  This is perhaps a bit difficult to explain, but here goes.  When you build a hot fire with large logs or split pieces, it takes a long time to reach the fire's peak heat; furthermore, you don't have much control over the temperature at that point until the wood burns down quite a bit.  When using small pieces to create a very hot fire, you can increase the heat by adding even more small pieces.  If you get the fire too hot, though, it won't take as long for the small pieces to burn away and thus cool the fire.

Notice also in the above picture that in the middle of the right-hand wall of the firebox is a perforated metal bar that extends vertically from below the grate.  These are part of the Margin Gem's air-jet re-burn design.  The reason that I mention these is because the air-jets on the middle right side of the firebox are the ones that seem to get the most air--and consequently create the most heat--so the hottest part of the Margin Gem's cooktop is usually in the area indicated by the red circle in the photograph below.


I usually place the waffle iron there, as seen in the picture below.

The waffle iron in place.
Poor Marjorie!  Every time she gets her picture
taken, she's so full of splatters.  In this case, it
was because Nancy had just finished frying
bacon to go with our waffles.
I also have had success removing a stove lid over the fire, putting the waffle iron over an open "eye" above the firebox like so.

You can kind of see the fire through the gap
between the irons and their base.
Each placement of the waffle iron has its advantages and disadvantages.  In the case of putting the waffle iron on the closed cooktop, it heats more evenly because cold room air is not rushing through the gap between the irons and their base to get to the fire.  However, if you fill the waffle iron too full, the batter will run out onto the cooktop and burn there, creating pretty acrid smoke.  Also, you have to lift the irons to turn them.

If you put the waffle iron over an open eye above the fire, the edges of the waffle do not brown as nicely as the center because of the air rushing by, but any extra batter that jumps out of the waffle iron merely lands in the fire, and the smoke which results is just carried out the chimney.  If the eye of your stove is large enough, you can simply rotate the irons without lifting them, since the edge makes an arc below the surface of the cooktop.

Anyway, once you put the waffle iron on to heat its first side, you need to start mixing your waffle batter.

The waffle recipe that I like to use belonged to my great-grandma Ruth.  I've mentioned her here on the blog before.  When I was home on Christmas break from Iowa State University some twenty years ago, I decided to copy all of the recipes from my mom's and grandmothers' boxes that I figured I would want.  I didn't copy many recipes from Granny, my dad's mother, because she was very much a by-guess-and-by-golly cook--and, by golly, she was a good cook when she wasn't trying to substitute for ingredients that she didn't have.

Grandma Marian, my mom's mother, was a much more precise cook in her day, and she had two boxes worth of recipes for me to look over.  After I picked out the recipes that I wanted, she volunteered to copy them for me, and to tell the truth, that was one of the most meaningful things she could have ever done for me because they are in her handwriting and because she took the time to leave little notes on many of the recipes for me.  Some of the recipes have extra directions or advice, some have opinions, and some have memories attached.  On one recipe, she wrote "This is from the days when we milked," meaning that it was a recipe that was used when every Iowa farm still had at least one dairy cow.

Well, the 21st of this month will mark the fourteenth year that I have kept a dairy cow of my own, and so I feel that I have some understanding of how ample milk and cream can affect one's cooking.  Grandma Ruth's waffle recipe is one such recipe.


Here is what you need:

1 cup flour
1 egg
3/4 c. milk
1/2 c. cream
1/2 tsp. salt
3 tsp. baking powder

Note that the cream is the only fat in the recipe.

Put all of these ingredients into a small mixing bowl (I prefer to use my 8-cup Pyrex measuring cup as a batter bowl because of its handy pouring spout).  Whisk until smooth, but try not to beat.  Depending on the size of your egg and the thickness of your cream, you may need to add a little more flour.  I usually just put in a sprinkle of salt from the range shaker rather than a whole half teaspoon, and I scant the baking powder by at least a teaspoon too, but you can do what you want to.


Once one side of the waffle iron has heated, turn the irons so that the other side heats before putting any batter in.  Once both sides have been heated, I open the waffle iron and squirt some non-stick cooking spray on both sides of the waffle iron.  I don't know if I will always have to do this or not, but right now the waffle iron is not seasoned well enough to be a completely non-stick surface.  BE CAREFUL, however!  Most cooking spray cans warn you against spraying a hot surface because of the danger that the spray will ignite.

As soon as the waffle iron has been sprayed, I pour the waffle batter in.  If the waffle iron is as hot as it should be, the waffle batter will sizzle as soon as it makes contact.  Close the waffle iron and immediately flip it so that what was originally the top of the waffle is now on the bottom.


When the waffle has baked long enough, the waffle iron should easily open, and the waffle should be easily removed from the waffle iron.

To bake the next waffle, I spray the waffle iron again, pour in the batter, and then immediately turn the iron again.

These waffles served with our homemade syrup are wonderful, and I'm glad that in the event of a power outage, we'll still be able to have them on the menu.