Showing posts with label Margin Gem. Show all posts

Friday, April 30, 2021

In Praise of the Margin Gem's Waterfront

Things have been ridiculously busy in our lives over the last several weeks.  School has kept me occupied with both substituting and accompanying the choirs; our church has hired a pastor; after a futile housing hunt we prepared our little house here on the farm for him and his wife to live in; and our church is converting a former doctor's office into our new church building.

You will note from the list above that I haven't done any spring gardening or cleaning, and I didn't even put mowing on the list, though the yard is beginning to look like a jungle.  All of these necessary activities have prevented me from posting very regularly.

Through it all, we've still managed to be firing the Margin Gem on a daily basis.  My goal is to have it heat all of our hot water until the end of May, but we shall see.  Lots of factors play into this, such as how much time I have to keep gathering and cutting fuel, how hot the weather becomes, the levels of humidity indoors and out, whether I can keep enough dry fuel ahead, etc.

Today, though, I just wanted to write a quick post to say how truly impressed I am by the water heating capacity of our Margin Gem system.  In something I read or watched or in a phone conversation with Daniel Fenoff of Stoves and More LLC, where we purchased our Margin Gem back in 2011, I remember him saying that during the summer months they lit a fire in their cookstove each morning in order to cook breakfast.  That fire heated enough water to meet their hot water needs until they had another fire in the evening to cook supper.  

With our schedule as full as it has been, we haven't been doing a lot of cooking.  Last night we had a cold supper, for example, and the night before that, all I made was a dish that my niece calls "Bougie Ramen."  As that involves simply boiling water for three minutes, it was far faster to cook it on the electric stove down in the basement.  Thus, what we've been doing is not starting a fire in the cookstove until just before we go to bed.  Once the fire is well established, I put large chunks of wood in the stove and turn the draft down so that the fire will burn all night.  When we get up in the morning, there is a nice bed of coals that I rake together.  I throw some kindling on this, wait a few minutes after it has caught fire, and throw a few more small pieces in.  This fire is sufficient to fry a couple eggs or make French toast, and it tops off the hot water enough that we can shower and wash dishes in the mornings.

(Note: The above firing method of firing the cookstove can create an unduly large accumulation of creosote in the chimney.  In order to prevent that, I have to use the driest wood that I can find.)

You don't have to have a very hot fire in order to heat quite a bit of water.  I think this is due to the large surface area of the Margin Gem's waterfront.

The interior of the Margin Gem firebox.

In the picture above, you can kind of see the waterfront.  It is the whole left side of the Margin Gem's firebox and measures approximately 16" x 12" which results in about 192 square inches of heat exchanging space.  Coupled with a stone-lined 40-gallon Vaughn range boiler, the heating capacity of this system is impressive, I think.

A picture of the Vaughn range boiler before it
was attached to the Margin Gem.

If I were going to level any complaint against this water system of ours, it would be at the mixing valve which tempers the water as it leaves the tank and goes into the house plumbing.  

Our problematic mixing valve.

Sometimes in the middle of a shower (and perhaps it does this at other times too, but we have no way of knowing) it behaves badly, sending the water from very pleasant to too cold to uncomfortably hot for no apparent reason.  We notice that this happens most frequently when the water in the tank is extremely hot.  I believe this little defect to be the result of the fact that it was damaged by the plumber during installation.  While this is annoying, it hasn't proven to be dangerous, and getting it replaced will not necessarily be expensive, but it will be colossally inconvenient.

The longterm weather forecast is for fairly cool weather, so we'll see how long we can hold out until we switch to electrically heated water for the summer.

Friday, April 9, 2021

Chicken Pot Pie Baked in a Wood Cookstove

This is a picture of an earlier chicken pot pie which
was baked in the Margin Gem; it's not the one you
will see in the photos below.

One thing Nancy and I both love is good chicken pot pie, and we're pretty happy with the version that I make.  Pulling a meat pie out of the oven of a woodburning cookstove gives one a feeling of satisfaction that is a close second to that of a beautifully browned turkey or a golden loaf of bread.

As always with any wood coookstove dish that is going to be baked, the first thing you have to do is to build your fire and heat the oven.  You need a "hot" oven for baking a pot pie, so build your fire so that your oven will run at about 425ºF.

I think the second step to making a really good chicken pot pie is making the right crust, and I'm excited to share the recipe that I use.  It originated from my reprint of the 1950 Betty Crocker Picture Cookbook (Wiley Publishing, Inc. and General Mills, Inc.), and it was labeled "English Pastry."  For a meat pie, especially a chicken pot pie, I think people generally are looking for a thicker, richer crust than one might find on a homemade fruit pie, for example.  As always, I've tweaked the recipe a bit, and now it's exactly what I'm looking for.

The ingredient list for the crust is as follows:

2 cups sifted all-purpose flour

2 tsp. baking powder

1 tsp. salt

2/3 cup butter flavor Crisco

1/2 c. hot water

1 Tablespoon lemon juice

1 egg yolk

1 egg white

1 Tablespoon cold water

Here is what you do:

1. Sift the flour, baking powder, and salt together.


2. Measure the butter flavor Crisco and pour the half cup of hot water over it from the teakettle.  Obviously, this will soften the shortening significantly.

3. Add the tablespoon of lemon juice to the shortening/hot water mixture and stir around a little.

4. While stirring the above mixture vigorously, add the egg yolk.  You've got to stir while doing this so that the egg yolk doesn't cook.


5. Combine the wet ingredients with the dry, stirring until no lumps of shortening are visible.


6. Pop the crust mixture into the freezer to chill while you mix and cook the filling.  If you're not going to be assembling this pie immediately, just put the pastry dough into the fridge.

Now, in the pictures that you see below, I used a quart of chicken breast meat that I had canned on the Margin Gem last fall.  When I can chicken, I fill the jar loosely with pieces of meat, and then I fill the jar to an inch from the top with hot water and add a bouillon cube or two.  After the meat has been processed in the pressure canner, the chicken usually condenses down to a little over a pint of meat swimming in about that much broth.

Here is what I did for the filling.  I'm sorry that there aren't any hard and fast measurements for any of this; it is always just by guess and by golly.

7. Drain the quart of canned chicken, putting the broth in a tall-sided frying pan.  I use my Magnalite chicken fryer.  To the broth I added one bouillon cube and a teaspoon of chicken base.  Put that directly over the firebox to come to a good boil.

8. While that was heating, I poured about a 1/2 cup of heavy cream into it along with the juice from a six-ounce can of mushrooms.

9. Add a half teaspoon of paprika, a dash of pepper, and a sprinkling of seasoned salt.

10. I beat about six tablespoons of all-purpose flour into a cup of cold milk until it was smooth.  

11. While stirring the hot mixture constantly, I added the milk and flour mixture. 

12. Once the flour and milk is added, stir constantly with a fork until everything comes to a boil and begins to thicken.  Once that happens, add the canned chicken, the canned mushrooms, a tablespoon of onion flakes, and a cup or two of mixed vegetables.  Bring everything to a boil again, stirring quite frequently.


13. Move the filling mixture as far away from the fire as possible so that it will just simmer very gently while you work on the crust.


14. Whisk the egg white and cold water from the crust ingredients until they're a little frothy on top.


15. Remove the pastry dough from wherever you had it chilling.  Pat 3/4 of the dough into the bottom and up the sides of a deep dish pie pan.  I find that our Pampered Chef deep dish stoneware pie plate is perfect for this.


16. Roll out the remaining pastry dough until it is just large enough to fit over the top of the pie.  I didn't stop quite soon enough in the picture below.


17. Pour the hot filling into the bottom crust, leaving about a half-inch of space at the top so that the pie won't boil over in your oven.


18. Put the top crust on the pie, pinching the edges together to seal.  (I'm embarrassed at the looks of this one as I didn't center the crust right and had to go back and patch it.)

19. Poke holes in the top crust to vent the pie; then brush the egg white/water mixture over the top.


20. Slide the pie into the hot oven and bake for about 25 minutes or until the pastry is a beautiful brown.


I took a picture of the oven thermometer while the pie was in the oven.  If you look closely, you can tell that the thermometer doesn't indicate that the oven is anywhere close to 425ºF, but experience tells me that it is.  If the thermometer on your wood cookstove's oven is not accurate, that doesn't mean that it's not useful.  For example, after almost a decade of baking in the Margin Gem, I don't pay any attention to the numbers on the thermometer.  Instead, it is more helpful to think of the thermometer like a clock face.  If the needle is pointing to 10:00, the oven is at 350º.  Eleven o'clock is 375º; noon is 400º; one o'clock is 425ºF.  If the needle goes past three o'clock, I need to open the oven door! 


After three or four attempts at photographing what the fire looks like in order to maintain a hot oven in the Margin Gem, I settled on this one.


Watch the pie carefully during the last few minutes.  When you're baking at an oven temperature this high, you don't want to let the crust burn.

Doesn't the egg white wash make a nice looking
crust?


I took this picture because I wanted to show that when this crust
is baked in a stone pie plate, it pulls away from the edges once
it's done (as long as you've done a good job of sealing the edges
and none of the filling has boiled down between the crust and
and the pan). You can see it particularly well at the lower left side.

21. After you remove the chicken pot pie from the oven, let it cool for a few minutes before you cut into it.  That will let the filling thicken even more, and it will be easier to neatly remove a piece.  

A piece of the finished chicken pot pie.

We find that this version of chicken pot pie reheats into very tasty leftovers.  In this household, that is a very high recommendation for any recipe!


The picture below is of the pie in the picture at the beginning of this post before it was baked.  I included it to prove that I can actually make a top crust that doesn't have to be patched!


Monday, May 18, 2020

Glaze Creosote Confession: The Potentially High Cost of Ignorance

This was my twenty-third winter season cooking on a woodburning cookstove, but I still have things to learn.  Truthfully, I'm kind of embarrassed to share the information in this post, but since the whole point of this blog is to help others enjoy cooking on woodburning cookstoves, I feel obligated.

First, some history:

The first wood cookstove that I used was the Qualified Range.  I bought it new in January of 1997 and had it installed in the little house with a pre-fabricated metal chimney.  I would say that the distance from the stove collar to the top of the chimney was probably less than twelve feet.  I never had any trouble with creosote accumulation in that setup.  However, I only used it from January of 1997 to May of 1998 because then I moved to the "big house."

When I moved into the "big house" on the farm, I had to wait a winter before I was able to get a new stainless steel liner put in the original brick chimney, but by the fall of 1999, I was again using the Qualified on a daily basis for cooking and heating.  The Qualified was in use in the "big house" from 1999-2011 when it was replaced by the Margin Gem.  During those twelve years, I had one chimney fire, but it started in the stovepipe of the stove and spread to the chimney.  It was easily extinguished by closing the drafts of the stove, and since it happened in the summer, it was not difficult to get on the roof and sweep the chimney clean again.  Had I been more diligent about keeping the stovepipe clean, the fire wouldn't have happened at all.

With the Qualified Range, there was never a lot of creosote in the chimney. I would sweep it in the fall of the year before daily firing of the stove began, and what creosote was present was always light, flaky, and easy to remove.  The creosote in the stovepipe was always the same, but would sometimes cling more stubbornly.

Now, the Qualified Range was not airtight.  It had the old style sliding drafts on the left side of the firebox, and though they were made well, there were some gaps that were inherent with that sort of stove construction.  Tiny gaps were also present in the top left corner of the firebox and where the outer front door latched to the cast iron of the firebox.  Further, the standard of fit and finish for the cast iron stovetop was lower than that of the Margin Gem.  If a bright fire was burning in the stove and all of the lights were put out at night, you could see tiny yellow flickers against the backsplash of the stove and on the kitchen ceiling.  Obviously, there were plenty of places where air could gain entrance to the stove even when it was shut down tightly.  Therefore, the Qualified could not hold a fire overnight or during the day when Nancy and I were gone to work and school.

The Margin Gem began its career in our kitchen in the spring of 2012 and has been in daily use from late September or early October until May ever since.  Shortly after it was installed, I noticed that the creosote in the chimney was different.  Some of the dry, flaky, familiar stuff was present, but there was a coating of black, tarry stuff that was very smooth.  This, however, appeared to only be in the top three or four feet of the chimney, which is the part that sticks out above the roof line.  It was a thin layer, as I said, and I didn't think a whole lot about it.  I attributed it to the fact that the stove is airtight and also to the fact that because the Margin Gem has both a hyper-heat water reservoir and a waterfront for the range boiler, a lot of the heat from the fire was being absorbed before it had a chance to travel up the chimney.

I didn't think a whole lot about this new creosote.  Usually, after a summer of only intermittent firing--usually using small sticks that burn hot and quick--the hard, shiny stuff would sweep out of the chimney with the fall sweeping that began the continual firing season.

Fast forward to this last winter.  During the months when the Margin Gem is being fired daily, I sweep the chimney once per month as long as the roof is free of snow.  During December and early January, we were burning some mulberry wood which had been dead for at least six years, but was more wet than I would have liked.  When I went to sweep the chimney in early January, my chimney sweeping brush got stuck in the chimney.  The shiny, hard creosote had become quite thick on the inside of the chimney, and it was no longer just in the top three or four feet of the flue.  I had a really tough time getting my brush back out of the chimney, and I knew we had to do something.

My first thought was that we needed to have a professional chimney sweep come and clean the chimney.  I did some phone calling and discovered that where we live, professional chimney sweeps are few and far between, and they are really busy.  We would have had to wait a very long time before a professional chimney sweep would have been able to come to our house--in fact, I was basically told that we wouldn't be able to see a chimney sweep until after the heating season was over.

We couldn't wait that long.  During the winter months, the Margin Gem heats our home and our hot water, and it cooks nearly all of our food.  I was worried about the creosote situation and began doing some research. I learned that professional chimney sweeps use mechanized equipment to clean chimneys rather than just a steel brush on rods like I have.  I discovered that our nearest Menards carries such equipment and promptly plopped down around $150.00 for a set of chimney cleaning equipment that attaches to a drill.  (I didn't know that this kind of chimney cleaning equipment even existed, and I'll write a post about it sometime because it is worthy of a lengthy discussion by itself.)

I got my new purchase home and opened the package.  Having never known anything about this sort of chimney cleaning device before, the first thing I did was open the instruction booklet.  Among other disappointing information there (which I will discuss in a later post), the instruction booklet said that the chimney sweeping equipment was not for use on "GLAZE CREOSOTE."  There it was: a name for the stuff I had seen lining the chimney!

After more research, I knew how dangerous glaze creosote in a chimney can be (if ignited, it burns at a higher temperature than light, flaky creosote does).  That same research taught me that there is no mechanical way to remove it, so sweeping wasn't going to make any difference.  Glaze creosote must be removed chemically.  Even professional chimney sweeps must treat glaze creosote with a chemical first and then come back to sweep it later, and the powders and chimney sweeping logs commonly advertised and sold locally have no effect on this type of creosote.  Internet reviews told me that two different products were highly recommended for use in glaze creosote removal: Cre-Away and Anti-Creo-Soot.  These are environmentally safe products that convert the glaze creosote from a hard substance to flaky creosote which is easy to remove.  Unfortunately, neither of these compounds are sold locally, so we had to order online and wait for delivery.  For a few days, we limped along with a stove that was operational but obviously not breathing as well as she should.  Then we began the glaze creosote mitigation process.

The two chemicals we used to remove our glaze creosote.  (Because I know
someone will ask, the cookstove on the left is the ceramic base to a lamp that
sits on the corner of our kitchen table.)

The Process of Glaze Creosote Removal:

The sites I read told me that I should start by using the Cre-Away.  Cre-Away is a fine white powder which comes in a plastic bottle with a hinged nozzle on the top.  You apply the Cre-Away to the chimney by squeezing puffs of it up into the stovepipe and the bottom of the chimney.  Because our chimney is so tall, the directions on the bottle also recommended sprinkling it down from the top of the chimney.  As we had very little snow this winter, this was not a difficult process.

Once Cre-Away has been placed in the chimney, the next step is to build a hot fire in the stove to activate the chemical reaction.  The flue temperature has to reach a minimum of 300ºF in order for each of the products to work, so I moved the flue thermometer that we have on our Jotul heating stove to the stovepipe of the Margin Gem.

Cre-Away was amazing!  It wasn't long before I could hear chunks of creosote falling down the chimney.  For three days in January, as soon as I got home from school, I would take the stovepipe down, remove the pile of creosote that had fallen down the chimney in the last 24 hours, and re-apply the Cre-Away.

The next step was to use the Anti-Creo-Soot.  This is a liquid, and to apply it you spray it into a good hot fire.  You can see in the picture above that the Anti-Creo-Soot which I purchased was in a gallon jug.  You can purchase smaller spray bottles of this compound, but they are more expensive, so it was cheaper for me to buy the gallon jug and pour some into our own spray bottle.  For the first application of Anti-Creo-Soot, the directions say to apply 60 (that's right, sixty!) squirts to the inside of the firebox or directly onto the fuel.  In severe cases of glaze creosote, the directions recommend sixty squirts each day for seven days.  Twelve squirts per day after that is what they advise for keeping your chimney clean thereafter.  Again, flue temperatures must reach 300ºF, in order for this compound to be activated.

Anti-Creo-Soot was excellent too.  It was very easy to apply, and chunks of creosote continually rattled down the chimney, especially when the fire was first stirred up in the morning or upon my return from school in the evening. I continued to regularly take the stovepipe down and clear away the piles of creosote left in the elbow at the bottom of the chimney.

Finally, a thorough sweeping is in order.  I am happy to report that this sweeping was easy, and I've never seen so much creosote come out of the chimney at once.  The Margin Gem was breathing freely again, and I could breath a sigh of relief!

I continue to squirt Anti-Creo-Soot into the firebox occasionally--especially when I know I'll be sweeping the chimney soon--and the effect that it has had is remarkable.  I cannot say enough good things about both of these products!

Summary:

Here is an abbreviated list of the new things I know after having dealt with this situation:

1. Only burn dry fuel!  I knew this but admit to not prioritizing our fuel supply as well as I should have.  Also, I was under the impression that creosote only formed from wood that was wet because it hadn't been dead long enough.  Not so!  Wood that has been "seasoned" for adequate time but has been allowed to become wet again is just as susceptible to depositing creosote in a chimney.

2. There are different types of creosote, so you must pay attention to what is present in your chimney.

3. Glaze creosote can be removed by a do-it-yourselfer; you don't have to hire a chimney sweep if you are able to access your chimney yourself.

4. Glaze creosote can only be removed by using chemical compounds to loosen it before it can be swept away.

5. Cre-Away and Anti-Creo-Soot are awesome!  They are very effective in glaze creosote removal and are easy to use.

I hope that embarrassing myself and letting you all in on my former ignorance proves helpful to someone and that I can save someone else the danger of a chimney fire or the expense of hiring out work that one can do oneself.  Be safe!


Thursday, November 28, 2019

Full Thanksgiving Dinner Cooked on the Wood Cookstove

Well, today was Marjorie the Margin Gem's first Thanksgiving.  She has baked pies for Thanksgiving every year since she was installed in 2012, but this was the first year since her installation that we hosted Thanksgiving.

Today was not our family's official Thanksgiving dinner.  That will be tomorrow when we all get together at my parents' home.  This was the year for my brother and sister's families to be with their in-laws. so since our get-together isn't until tomorrow--on a non-official holiday--my brother wanted to have one of those days where we all bring things we've never made before.  (Stay tuned for a post about one of the dishes that I'm making for the first time.)

While tomorrow will be fun and interesting, some of us were a little sad because we wouldn't have any of the traditional foods that we eat on Thanksgiving.  Therefore, Nancy and I hosted the traditional dinner today for just eight of us: Nancy's folks, my folks, my aunt and grandma, and Nancy and me.

Of course, this meant that I had the perfect opportunity to blog cooking a whole Thanksgiving dinner on a wood cookstove.  I have read a description of cooking on a wood cookstove as a "dance" as you move pots and pans around to the appropriate heat levels for where their respective foods are in their cooking process, and you can see from the movement of things in the pictures, that there are lots and lots of movements to this dance.

Last night, I cooked the cranberry sauce and put the bread for the dressing in the warming oven to dry out.


This morning, I got up early and baked the pumpkin pies.  The recipe for pumpkin pie that I used today is from my great-great-grandma, Mabel Ford.  I blogged it several years ago, and you can see it here.

This is a picture of the pumpkin pies when they first went into
the oven.  The firebox is open to prove that I'm cooking over a
wood fire.

The pumpkin pies after they were finished baking.
The next job was to make the fruit salad dressing, but since I'm going to make a separate blog post about that, I'm saving those pictures for later.

Then, I had to assemble the stuffing so that I could get some of it in the bird and put him in the oven.  First, I saute'd some celery and onion in butter.

Celery and onion frying in butter for the dressing.
After I transferred the cooked celery and onions to the bowl of the dried bread, I cut up the turkey's liver and fried it in butter too.  Yes, I know that is a large chunk of butter, but we put melted butter in the dressing anyway, and I've learned that if I fry the liver pieces in a lot of butter, they remain more tender than if they are fried in only a little.  The final dressing product is much better this way.

The turkey liver chopped fine and frying in a lot of butter.  It
will later be added to the dressing.
 Once I had some of the dressing stuffed inside the turkey, it was ready to go into the oven.  I used an oven bag this time, but I didn't think it helped make the turkey any more moist.  You can read my instructions for roasting a turkey in a wood cookstove at this post.


With the turkey in the oven, there was no room for anything else, and I still had lots of things that would need to be baked.  Thus, I had to get one of my stovetop ovens out.  In the picture below, it is heating up over the firebox.  On the open door of the warming oven, you see two pans of dinner rolls rising.  The turkey neck and gizzard are in the saucepan on the far right, cooking for the cats.


Then, it was time for a few more things to begin to cook.  The first pan of dinner rolls is baking in the oven on top of the stove.  The dressing is in a 9"x9" baking pan sitting on a simmering pad under the lid to the roaster. The pot on the left is the mashed potatoes, and the frying pan contains the syrup for sweet potatoes beginning to cook.


In the picture below, the potatoes had moved to the back center of the stovetop, the sweet potatoes had been added to the syrup, a pot of green beans had been added, and the dressing moved to the right because the stovetop is so busy.  The turkey was finished cooking, and was ready to be removed from the oven.


Then, the turkey was moved to the simmering pad on the back of the stove to await serving.  The dressing has been put into the stovetop oven, and the rolls have been put into the stove's oven.


I'm sorry that this next picture is a little blurry.  The dinner rolls that had been baking in the stovetop oven were nearly done when I transferred them to the cookstove oven.  However, they had not browned on top, so I put them on the top shelf of the oven.  The second pan of dinner rolls is beginning to bake on the bottom rack in the back, and the dish of scalloped corn is beginning to cook at the front of the oven.

It is important to note that the second pan of dinner rolls didn't brown very nicely on the bottom, so I later transferred them to the bottom rack of the stovetop oven beneath the dressing, and the bottoms browned perfectly.  I didn't get a picture of the little stovetop oven full of both dressing and rolls, though.


In this next picture, you will see that the green beans were removed from the stovetop and made into green bean casserole.  It is baking in the front of the oven while the scalloped corn continued to cook in the back.  All of the dinner rolls were out of the ovens by this time.


You still can't see the corn, but in this picture, you can see the edge of a round Pyrex pan on the top rack of the oven.  The sweet potatoes had been put into this pan, and marshmallows had been put on top.  The platter for the turkey was resting in the warming oven to take the chill off of it before receiving the bird.


I poured the drippings from the turkey into my Magnalite chicken fryer and made the gravy in that.  The dressing was basically done at this point, so the oven holding it was moved away from the firebox.  You can also see that the green bean casserole has the french fried onions on the top and is browning nicely.

The marshmallows on the top of the sweet potatoes had roasted to a fantastic golden brown and had been removed to the warming oven.


Meal preparations were complete when this last picture was taken.  The sweet potatoes are still in the warming oven along with the mashed potatoes and the gravy boat.  The dressing is staying warm in the stovetop oven, but the door has been opened to stop it from cooking further.  The gravy is finished and has been taken away from the firebox.  The vegetables in the oven are done, and the turkey was on the platter at the table.


Everything turned out quite delicious with the exception of the dressing, and that wasn't the cookstove's fault.  The sage that I put in the dressing was gritty.  How I figured out that the grittiness was from the sage is a long story, but has anyone else ever experienced that?  I bought the sage in a bulk foods store, and I won't be doing that again.

When my father-in-law walked in the kitchen door just before noon, he asked how the stove was working.  I told him that it was working just fine. It was, too, but I have to say that I cooked more Thanksgiving meals on the Qualified Range, and I have to admit that that was an easier stove to cook a large meal on than the Margin Gem.  I think the difference is that the Qualified responded more quickly to adjustments of the drafts and the additions of more firewood.  The Margin Gem responds to these things, but seems sluggish in comparison.  I don't know how to explain it any other way.

We had enough food for more than the eight people who were here, but to cook these same dishes for a larger crowd using only the wood cookstove would have presented some interesting challenges and demanded some different planning.  I'm looking forward to trying that sometime!

Hope you had a happy Thanksgiving!


Monday, March 4, 2019

Link to a Video of a Different Toasting Method in a Wood Cookstove

Back in 2011 when we first ordered our Margin Gem cookstove, I spent a lot of time scouring the internet for information about new wood cookstoves.  In doing so, I ran across a video from Ron and Lea Winans (their Youtube channel is called Family Heritage Living) who already had a Margin Gem installed in their kitchen.  When I started this blog in 2011, I contacted them, and Lea was one of the first people to leave comments. In fact, she commented on my second post ever, which was about baking white bread in a wood cookstove.

In the last eight years, my life has remained pretty much the same. However, the Winans' lives have undergone drastic changes as they have moved to an off-grid cabin in Michigan's Upper Peninsula and now pursue a nineteenth century homesteading lifestyle with some modern technology mixed in.  They moved their Margin Gem cookstove with them, and it is still their sole means of cooking.

I have never met any of the Winans personally, but after watching many of their videos and reading large chunks of their blogs, I feel like we are neighbors who live a long way apart.  They are also fellow Christians, and I appreciate their transparency as they seek to honor the Lord in their lives.

This last week, I was excited to see a new Youtube post from Family Heritage Living about how they make breakfast sandwiches on their Margin Gem Cookstove.  We do that too, but we cheat and use our electric toaster to toast whatever we use for our bread.  Lea, on the other hand, has five hungry guys to feed at once, so a pitiful little electric toaster wouldn't do her any good even if she had enough electricity to power it.  I wrote a post about using a woodburning cookstove to make toast in five different ways back in December of 2014, and you can read it here. However, Lea uses an entirely different method, and you can watch her video at the link below.

https://www.youtube.com/watch?v=5usuSHidvAc

If you scroll through the comments, you will see where I asked Lea to clarify questions about temperature and rack placement.  These details are important to achieving results as good as hers.

The Winans have posted several videos about how to accomplish different cooking tasks with a Margin Gem cookstove on their Youtube channel, so if you have a snowy evening when you can spend some time watching, there is a lot to be learned from them.  I also enjoy their videos that aren't about cooking on a wood cookstove.


Friday, September 21, 2018

The Beginning of the Full-Time Cookstove Firing Season 2018-2019

Well, today was the day.  Yesterday (and for several days before that), our high temperature was in the nineties.  After a terrific rain storm last night, a cold front went through, and today our high was in the sixties.  With lows in the forties tonight, tomorrow is not supposed to reach seventy degrees.  The long-range forecast has a few seventies in it, but nothing too terribly warm.  Thus, after Nancy's shower this morning, I turned off the electric hot water heater and our season of firing the wood cookstove every day has officially begun.  I do believe that September 21st is the earliest we have ever done this.

Supper tonight was just chips and fresh salsa, raisins, and apples, but while the fire was going to heat some dish and laundry water, I cooked some more red raspberries for jelly. 

Another cooking job that I had been saving was the sugar pot from our Monday Market baking.  When I turn out a pan of sticky rolls, we catch the caramel syrup that runs off them in jelly roll pans beneath the cooling racks.  That is then scraped into a stockpot, and at the end of the season I make pancake syrup out of it.  It is quite delicious, and this way the sugar is not wasted.

The first step in that process is to add water to the pot and bring the whole thing to a rapid boil.  Tomorrow I will skim the butter and cinnamon layer from the top, make sure it is the right consistency, bring it to a boil again, put it in canning jars, and seal them in a hot water bath.

The kettle of red raspberries on the back of the
firebox and the sugar pot at the front.
This was not the first fire we've had in the stove this season, but with the electric hot water heater turned off, we are now committed to daily fires.  I'm really looking forward to it!


Saturday, September 8, 2018

Marjorie Comes Out of Her Summer Retirement

Our weather has finally turned a little cooler; in fact, we are supposed to have lows in the upper 40s tonight.  The air is much drier than it has been too, so I couldn't resist starting a fire in Marjorie the Margin Gem cookstove.  I have not had a single fire in the stove since May 27th.  This is the longest stretch of time I've been away from cooking over wood since 2002!

First I swept the chimney, cleaned out the stovepipe, and cleaned out the oven flues.  I always kind of enjoy the first chimney cleaning at the end of the summer.  Since the stove has been unused for such a long time, much of the hard creosote has loosened, so I'm able to do the best job possible.

I've been really hungry for Popovers Fontaine for quite a while, so these were my supper.


The popovers coming out of the oven.  Doesn't
Marjorie look nice in this photo?  Her lovely
appearance is due to my uncle Glen and my
mother-in-law having given her a good shine
for our family reunion back in the first part of July.

I also used the fire to cook some wild plums for making jelly later.

Wild plums from the road ditch cooking on the Margin Gem.

The small, short fire created enough hot water to wash a load of tablecloths and do up a few dishes, too.  Gotta love the efficiency of a wood cookstove!

Nancy was worried that it would get too hot in the house, but the thermometer in the living room only topped out at 70ºF, so we were more than comfortable.

I'm excited because our forecast has very reasonable temperatures for the next several days.  I told Nancy tonight that my goal is to switch off the electric water heater on Sept. 18 this year.  That is the day after the last Monday Market (Monday Market days are really crazy baking days here, but the baking is now all done in electric and gas ovens in order to keep my help--our mothers--from revolting due to the temperature of the kitchen.).  The two things that will have the biggest effect on my goal are temperatures and fuel status.  I'll keep you all posted.

Monday, May 28, 2018

Waving the White Flag on the 2017-2018 Heating Season

Well, after having a fire in the Margin Gem every day since Sept. 27, 2017, which was when we turned the electric hot water heater off for the season, we finally decided to tie a bow on the 2017-2018 wood heating season this morning.

I know several of you just gasped and shook your head at the discovery that over the last few days we had still been using the wood cookstove daily when our temperatures have been soaring into the upper nineties, even reaching 100 on Saturday.  Other readers who know me just had their suspicions regarding my sanity confirmed with this revelation.

To use the cookstove exclusively for hot water from Sept. 27 - May 27th ties our record which was set during the 2013-2014 heating season. During this time, not only was all hot water heated with wood, but I think all but about five of the meals which were cooked at home were also cooked over wood heat.  One of those five meals was a regular meal a couple of days ago.  The others were just boiled eggs or frozen pizza.

Some of you may be wondering how we were able to use the stove for so long in such warm weather without suffering too much.  Many factors contributed to our endurance:

1) Our century-old farmhouse was designed to have a woodburning cookstove in the kitchen.  This is a major factor in our ability to use the stove in warm weather.  The kitchen has six doors that open into other areas of the house, but all of these except for the pantry doorway can be closed in order to keep the heat out of the rest of the house.  The large east windows are double-hung, so the top sashes can be lowered in order to facilitate heat escape.

The kitchen windows with the top sashes open.

Also, since it is a two-story house and the stairway opens into the kitchen, we can open the upstairs door and let a great deal of the heat escape up the stairs where a fan was positioned in a window at the top of the stairs blowing hot air out of the house.

When our kitchen re-model is finished, yet another way to exhaust heat from the stove will be restored, so stay tuned for another blog post about that.

2) Our house is surrounded by large old shade trees.  Our shade is not as dense as it once was, but we still have a lot of it, and this makes our house stay much cooler in general.

3) We don't have to have a long-running fire in order to have sufficient hot water to meet our needs.  A fire which burns briskly for less than an hour creates more than enough hot water for a good shower in the morning. This also means that I used small pieces of wood which burned hot but not long.

4) We closed the "hyper-heat" reservoir damper and often opened the oven damper so that the stove itself wasn't radiating so much heat into the kitchen.

The reservoir damper in the open position.  When it is closed,
it is in the vertical position.

5) I would also fill the teakettle and our 40-cup coffee pot and put them directly over the firebox while the fire was burning.  These, coupled with the water in the reservoir, supplemented the hot water in the boiler and provided enough hot water to wash dishes and do a little laundry when necessary.  Of course, water in the kettles and the reservoir was used in the wringer washer and in hand washed laundry only.  It would have been difficult to get it into the high-efficiency front-loader. Anyway, heating water in this way absorbed the majority of the BTU's which would have emanated into the house from the cooktop.


6) Though we had some extremely warm days, the nights were still getting cool, so we could pull all of the heat out of the house during the night. Then we would shut the windows in the morning before the outdoor temperature got warmer than the indoor temperature.

7) The weather we have been having has been extremely dry.  This is not a bit good for any of our crops, but it made it so that the high temperatures were more bearable than they usually are in our area of the country.

Q. So what changed between yesterday and today?

A. Last night the outdoor temperature did not fall as low as it has been.  It was 67º outside when I woke up a little before 6:30 a.m.  The living room temperature was still at 77º.  This was only four degrees lower than the high temperature that we observed yesterday afternoon.  I always kind of figure that 70º is roughly our breaking point for comfort.  If the outdoor temperature doesn't dip sufficiently below that during the night,  we are uncomfortable.

Thus, after draining the electric water heater and flushing it out (the water in it always sours), we are back to paying for hot water, and I even broke down and turned on the air conditioning.  I'm feeling pretty weak today, but I'm comfortable!

Now, don't think I won't have anything to blog about over the next few months.  My goal is to get the summer kitchen moved from the end of the driveway up to the north side of the house within the month (we'll see if that happens), and I have a raft of wood cookstove literature to review, too, so check in frequently.  We'll be in touch!

Tuesday, November 7, 2017

Green Tomato Pie


A couple of weeks ago, we had our first hard freeze, so I spent the two days before that madly scurrying to get the last of the vegetables out of the garden.  Since then, I've been pickling beets, making cole slaw, and otherwise putting food into storage as I've had time.  I've still got dishpans and baskets full of apples, peppers, and green tomatoes to take care of.

The dishpan of bell peppers and tomatoes that I picked before the freeze.
Years ago, when I worked in our local bank (which was between full-time teaching stints), we had a customer named Fern.  I can't remember Fern's last name, but I remember that she was from Denison, Iowa, so she had about an hour's drive in order to get to our little town.  When she came to the bank, she almost always brought us some of her baked goods, and once she brought us a green tomato pie.  I was fascinated and asked for the recipe.  In the fifteen years that I've had Fern's recipe, I've never made it, but with this year's garden having been so bountiful right up until the end, I've now made three of these pies in the Margin Gem cookstove.  The Margin Gem does a beautiful job of baking pies--better than our gas oven, I think, because there is less humidity in the oven.

To make a green tomato pie, you want to have green tomatoes that are freshly picked and have not had any time to begin to ripen.  If the tomatoes have even the slightest tinge of orange or softness to them, the result will be much more like a ketchup pie than green tomato pie.  For this reason, the first green tomato pie I made this year was superior than the two that you see in these pictures.  If your tomatoes are firm and very green, you'll have a hard time distinguishing between this and an apple pie.

You will need the following ingredients:

      • Prepared pastry dough for a double-crust pie
      • Enough green tomatoes for a nine-inch pie (The original recipe says 4 or 5 tomatoes, but I used Romas, so it took more like ten.  I don't measure the fruit for pie filling.  I do like my grandma Marian taught me and use the green  2 1/2-quart bowl from my multi-colored vintage Pyrex set, and stop peeling/paring when I know I've reached the right amount by how it looks in the bowl.  Sorry!)
      • 1/4 cup flour
      • 1 cup white sugar
      • 1 TBLSP. white vinegar (The original recipe called for 2 TBLSP. of vinegar, but I've changed the second tablespoon to orange juice to help avoid the ketchupy taste.) 
      • 1 TBLSP. orange juice  
      • cinnamon to taste (You could use whatever spices you would ordinarily reach for to flavor your apple pie.)
Directions:

1. Build your fire so that you have a hot oven.  Because our cookstove is being fired constantly now, this process is a little different than it would be if I was starting the fire from scratch just to bake a pie.  Last night, for example, the fire was keeping the oven right around 300-325 degrees.  To get it as hot as I wanted it for when the pies first go into the oven, I put in several pieces of wood that I would ordinarily have used as kindling. These brought the oven up to the temperature that I wanted and kept it nice and hot for the full hour of baking time.

2. Cut the tomatoes into small chunks as you would with apples.


The right amount of green tomatoes in the green Pyrex bowl.
3. Add the flour, sugar, vinegar, orange juice, and cinnamon.

The green tomatoes with the flour, sugar, vinegar, orange juice
and cinnamon.
4. Stir all together.

The filling ingredients all stirred together.

5. Assemble your pie, being sure to vent the top crust.

6. Place in a hot oven (400-425 F) so that the crust cooks quickly.  After ten or fifteen minutes, let the fire cool down to moderate heat (350-375 F) to finish cooking the filling.  The pie should be in the oven for approximately an hour.
Two green tomato pies in the oven of the Margin Gem. I put tin
foil under them to make sure that they don't run over onto the
bottom of the oven.
7. Remove the pies from the oven to cool.


The finished product.

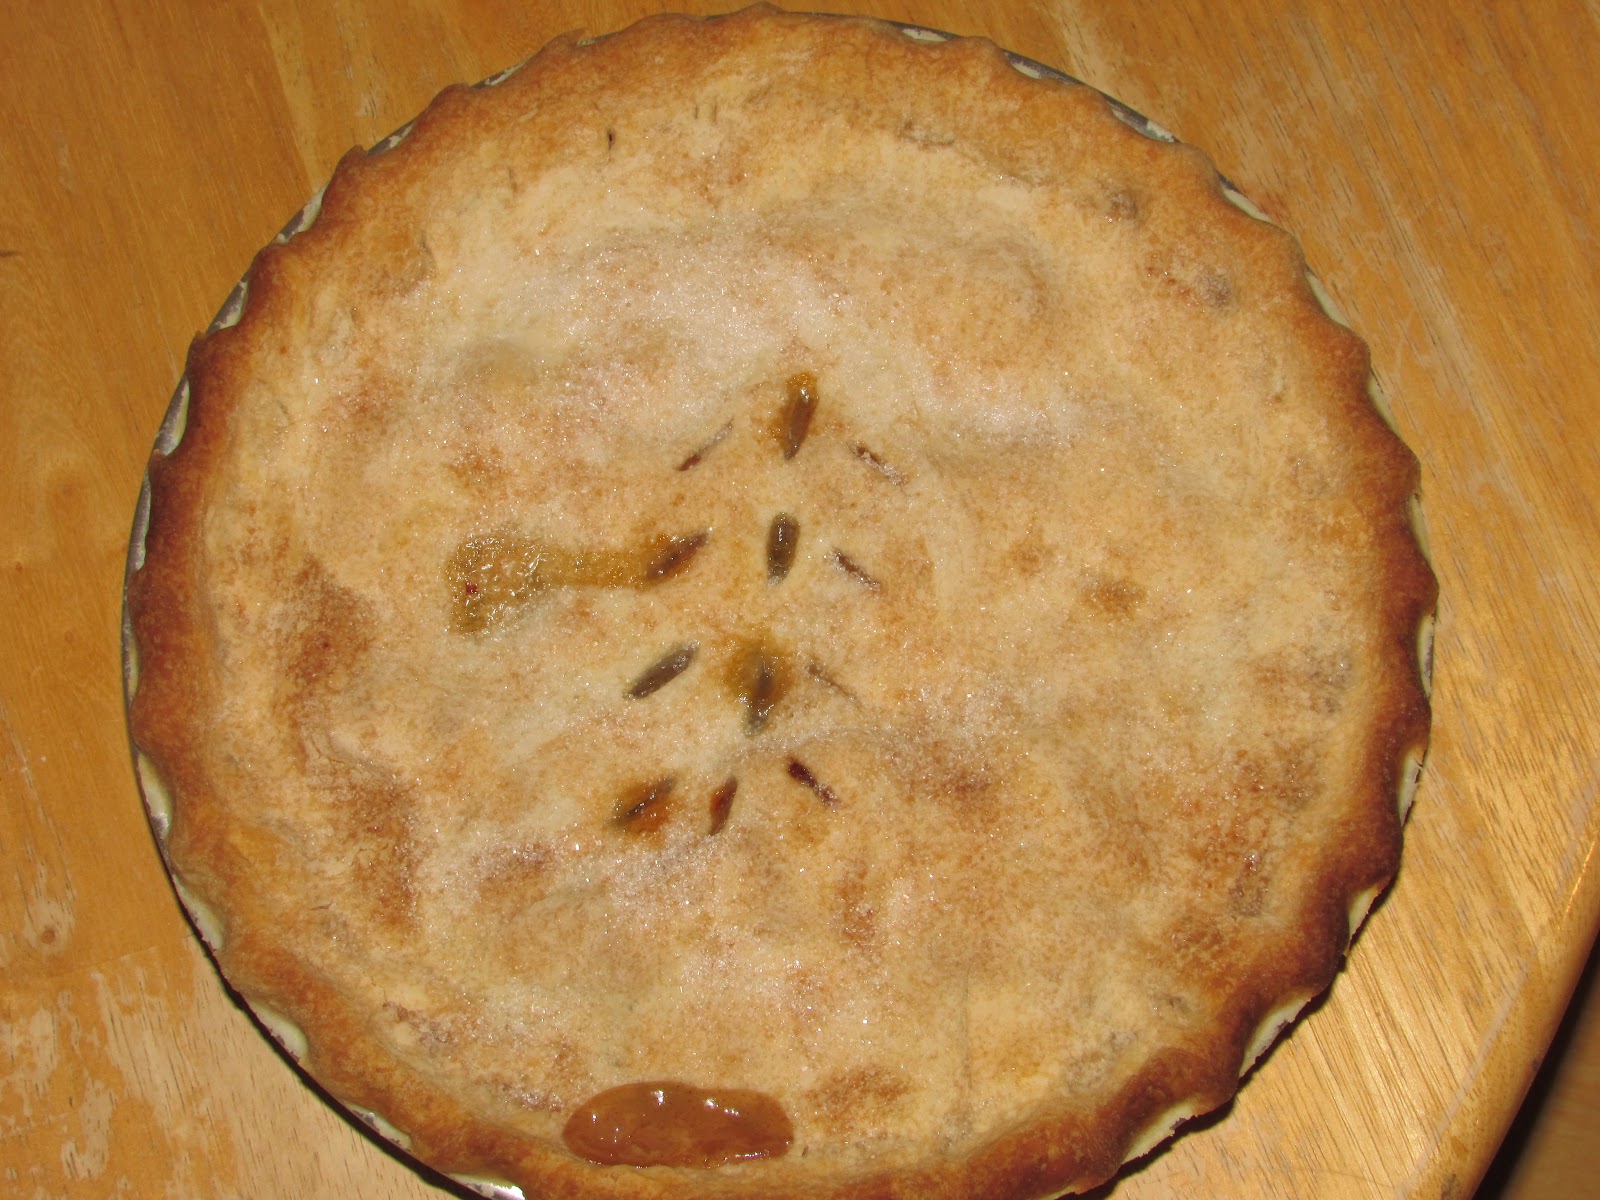
A slice of green tomato pie.
The first green tomato pie that I made was a huge hit with my family.  My sister-in-law, an excellent baker herself but not a tomato lover, liked it, and so did my brother.  My grandmother, who was a superior baker in her day, thought it was delicious too, but none of them would have guessed that it was made out of green tomatoes.

The second pies were made with tomatoes that were a little riper, so they had a slight tomato flavor.  People at school liked them, though, and you can't imagine what fun it is to have people guess what the pie is made of.  I think Fern would be proud!