Showing posts with label vegetable recipes. Show all posts

Thursday, November 26, 2020

Vintage Recipe: Grandma Ruth's Escalloped Corn

Well, Marjorie the Margin Gem's complete Thanksgiving meal count is now officially two.  Last year, I blogged about the first entire Thanksgiving meal that was cooked on her.  This year, because of Covid-19 gathering size restrictions, Nancy and I elected to celebrate Thanksgiving at home.  Nancy's parents had elected to do the same, and since we were going to cook a full dinner anyway, we called them when the meal was ready.  We plated enough for them and slid it all into the back of their van so they could take it home to eat.  Thus, we cooked Thanksgiving dinner for only four people so we didn't have to use the stovetop oven like last year.  Though you can't see all four dishes in the oven, here is a shot of the cookstove with all of the food ready:

The Margin Gem with all of the hot dishes for Thanksgiving Dinner ready.
From the top left, our 10 lb. turkey and the roaster bottom full of gravy. On
the stovetop is the kettle of mashed potatoes.  In the oven, the top rack holds
the dressing in the front with the sweet potato souffle' behind it.  The bottom
oven rack holds the green bean casserole, and behind that is the escalloped
corn.  (The Magnalite pan on the reservoir is empty.)

The recipe that I want to share today is for my great-grandma Ruth's escalloped corn.  This is a very simple and economical old-fashioned dish that has been a staple on my family's dinner tables since my grandfather was a boy.  I'm sure my great-grandmother originally made this in her woodburning cookstove, and it cooks beautifully in mine every time, too.  What's also nice is that it seems to bake equally well on the floor of the oven or up on the middle rack, making it particularly easy to cook with other things in the oven at the same time. 

For a single batch, start by beating two eggs. 


To the eggs, add 2 Tablespoons of sugar, a 1/2 teaspoon of salt, and a dash of pepper.


Then beat in 3/4 cup of saltine cracker crumbs, 1/2 cup milk, and 1/2 cup cream.


Lastly, add one can of cream style corn.  Mix well and pour into a greased casserole dish.


Bake in a moderate oven for 30 - 45 minutes.  During the last ten minutes of baking, sprinkle buttered cracker crumbs over the top.


Hints and Remarks:
  • If you don't want to spring for the cream, you can omit it and increase the milk to 3/4 c.  The texture of the final product won't be quite so fluffy, but you won't notice any difference in the flavor.
  • The reason for the huge range in baking time is because how long this needs to bake is dependent on upon the depth of the corn in the dish you chose to use--the deeper the corn, the longer the baking time will need to be.
  • You can tell that this is done baking when the whole thing is slightly mounded in the center and it doesn't jiggle anymore when you shake the pan.
  • If you crush one sleeve of saltine crackers, you will have the perfect amount for the 3/4 c. in the corn as well as the buttered crumbs on the top.
  • If you want to reduce the carbs in this recipe, feel free to omit the crumbs on the top.  You will never miss them.  
  • This recipe serves about six.  If you double it, it fits well in a 9x13 dish.
And here is the recipe in a little more accessible form:

2 eggs
2 T. sugar
1/2 tsp. salt
dash pepper
3/4 c. saltine cracker crumbs
1/2 c. milk
1/2 c. cream
1 15 oz. can cream style corn

Bake 30-45 minutes at 350ºF in greased casserole dish, sprinkling buttered
cracker crumbs on the top during the last ten minutes.

Hope you all had a Happy Thanksgiving!

Friday, November 22, 2019

Cauliflower Parmesan on the Wood Cookstove

I have come up with a new method of cooking cauliflower that Nancy and I both love.  The recipe is light but flavorful, and it is extremely easy.

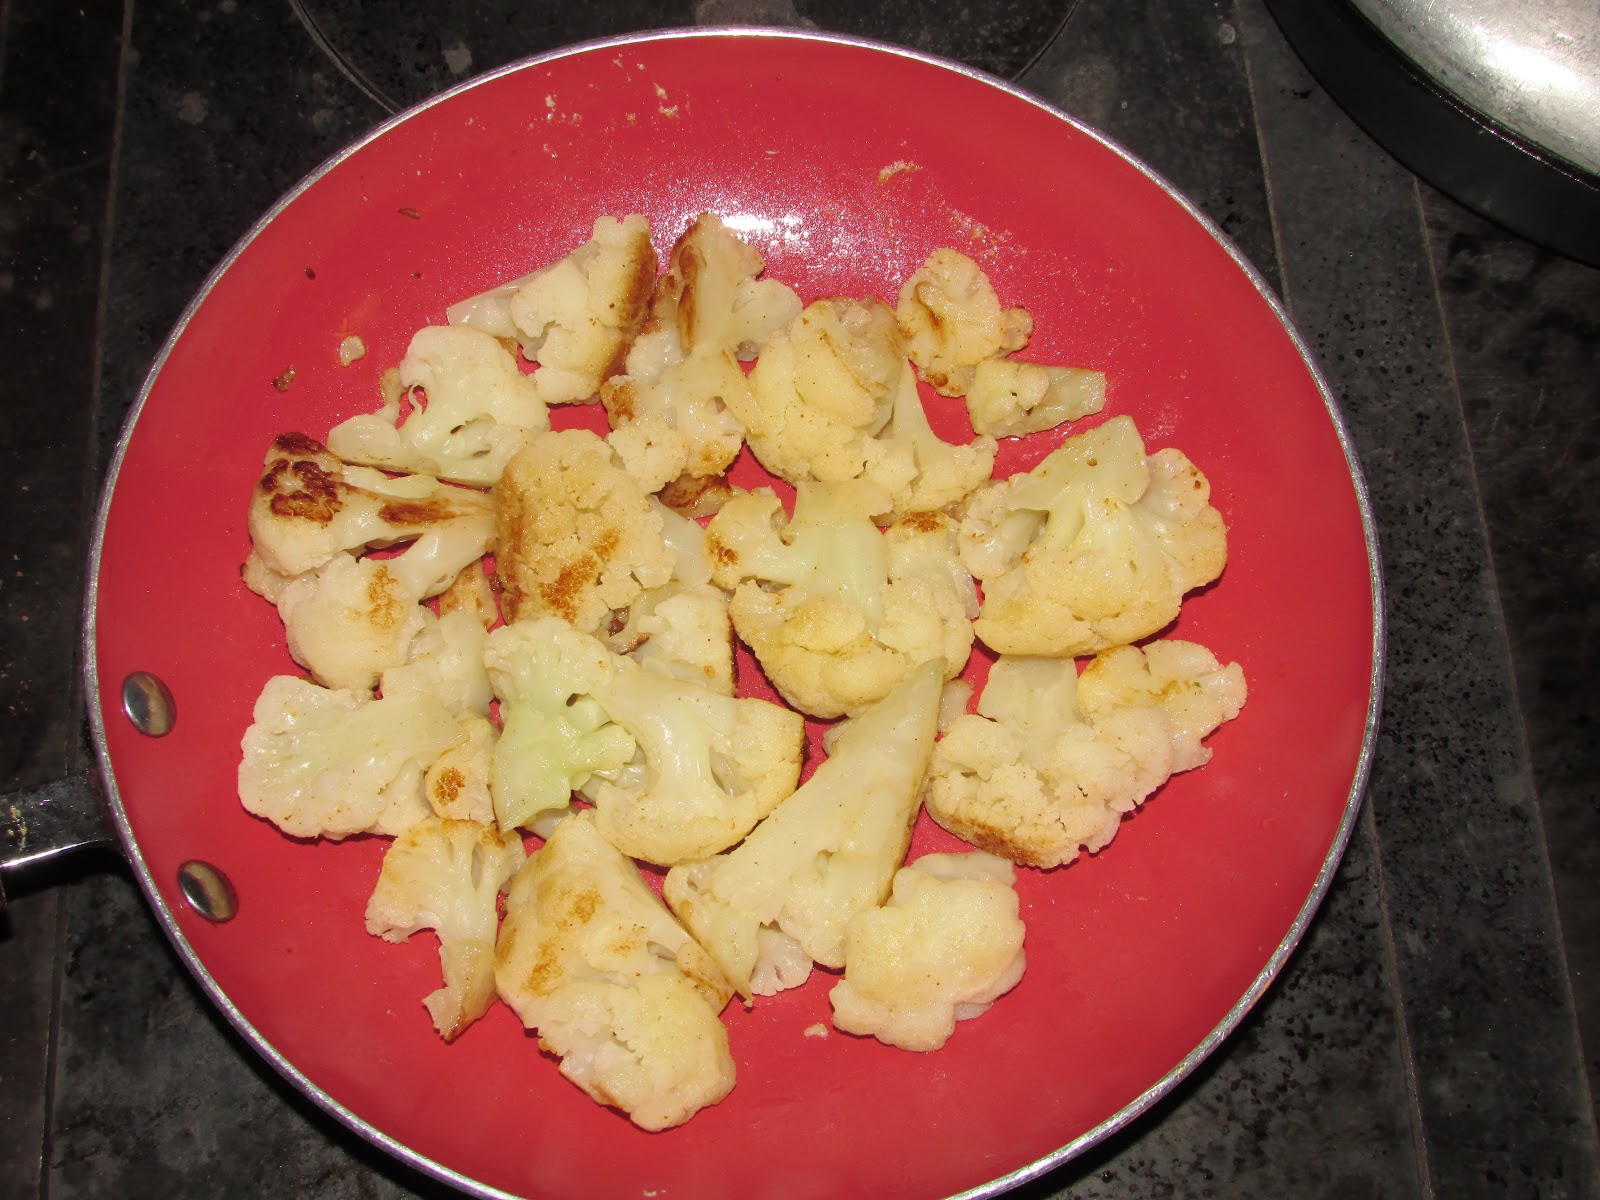
First, you need a good hot cooking fire.  Directly over the firebox of the stove, melt a tablespoon of butter in a non-stick pan.  I used my el-cheapo red ceramic frying pan purchased a few years ago from our now-defunct Kmart store.


Once the butter is melted and hot, put as much frozen cauliflower in the pan as you like.  Add a VERY LIGHT sprinkling of seasoned salt.  I would be surprised if in total I added an 1/8 tsp. of Lawry's.


Cook the cauliflower briskly and turn frequently as the florets begin to brown on the bottom.  Continue this process until each piece of cauliflower has browned on several sides.


Once the cauliflower has browned on several sides, sprinkle grated parmesan cheese over it.  I would say that I added no more than a quarter cup over this particular batch, but you can put as much as you want on. Stir the cheese and cauliflower around until all of the cheese has stuck onto the cauliflower.


You can serve immediately, or I have discovered that this holds very well if transferred to a serving dish and placed in the warming oven until the rest of the meal is ready.


With pork chops (which were cooking in the cast iron frying pan with the aluminum lid on it in the pictures above) and macaroni, cauliflower cooked this way made a delicious but simple supper last night.  This was the third time I've made cauliflower this way, and it has been well-received each time.  

Long-time blog readers will remember that I also posted a recipe for oven-roasted cauliflower about six years ago.  The end product of the two recipes is not dissimilar, but this one is much simpler and faster, and can be made with frozen cauliflower.  I hope you enjoy it!

Friday, October 18, 2019

Fried Cabbage on the Wood Cookstove

Well, we are back into the wood cookstove season here.  We didn't start daily firing until Friday, October 11, which is the latest we've ever begun the wood cookstove season.  It wasn't due to the temperature, either.  It was due to the fact that we've had such a wet autumn that keeping dry fuel around has been quite a challenge.

Now we're in full cookstove swing, though, and each meal we've eaten at home has been cooked exclusively on the Margin Gem.  A couple days ago, I made a vegetable dish that I had never prepared before: fried cabbage.

I had heard of fried cabbage, but it wasn't until last month that I finally got to try some.  You see, we were invited to the fourteenth birthday party for a lovely set of twin girls who belong to my friend Leah and her husband Jason.  The girls chose the majority of the supper menu, which was all very delicious.  Whether the fried cabbage was their choice or their mother's, I don't know, but I was excited to try it.

Now, it is important to note that Leah and I come from very different culinary backgrounds.  My family's food traditions are usually carbohydrate-laden dishes leftover from the days before central heating and highly automated farming.  Leah, on the other hand, grew up with a sister who is a Type 1 diabetic, so she is naturally a much more health-conscious cook than I have ever been.  Thus, while I am usually the one in our relationship who introduces Leah to things like aebleskiver, she would be the one to introduce me to a new vegetable dish.

Unfortunately, I wasn't in the kitchen at the birthday party to see what magic Leah worked to create her version of fried cabbage, but I really liked the result and decided that I would strike out on my own sometime in the near future.

Well, the future arrived this week.  Here is what I did:

1) In a non-stick ceramic skillet, I fried a little bacon.  I had cut the strips in half and wanted to use up what was left of a pound that had been open for a while, so I don't remember how much bacon I actually had.  Three strips would have been more than sufficient for a whole head of cabbage, though.

2) Once the bacon was cooked to near crispy, remove it from the skillet and put it in the warming oven to drain on a paper towel-covered plate.

3) While the bacon was frying, I sliced a head of cabbage.  It was a large cabbage, and there are only the two of us, so I only used about half of it.  I cut it into slices that were a little less than a half-inch wide.

4) The next step is to pour the bacon grease out of the pan, reserving a tablespoon or less.  If you want to skip the bacon, I would recommend using a tablespoon of butter to help facilitate the browning of the cabbage. You don't need much fat at all.

5) I returned the skillet to the fire and laid the cabbage slices down in the dab of bacon grease.  I think this part should be done over a pretty hot fire because the taste and texture will be better if this part is done in a hurry. Stir and turn the cabbage frequently to encourage uniform browning.

6) While the cabbage was beginning to fry, I seasoned it with just a light dusting of seasoned salt and a whisper of pepper.  Because things seemed to be pretty dry, I also added perhaps a tablespoon of hot water from the teakettle.  Let the cabbage cook until it shrinks down in the pan before going on to the next steps.

7) I removed the bacon from the warming oven and crumbled it into the cabbage, and then I added a half handful of dried cranberries and a half handful of raisins.  (I know, I know.  That was basically the same as adding sugar, but old habits are hard to break.)  I think I will cut back on the amount of dried fruit next time.  It was a little much.

8) Cook all together until it reaches the desired brownness or limpness you want and serve immediately.  It is delicious!


Once again, I forgot to take pictures of the process.  This is actually
a photo of the leftovers being re-warmed on the Margin Gem a
few days later.  Even the leftovers were fantastic!


Friday, November 30, 2018

Acorn Squash Pie Baked in the Wood Cookstove

I'm so behind in my posting for November!  Don't worry, though.  The woodburning cookstove has been very busy.  Aside from using the gas oven for baking-for-sale days and a bread baking class; the broiler on the electric stove in the basement for making garlic toast; and the crockpot for a day when I wasn't home, Marjorie the Margin Gem has done all of our cooking since September 21st.  The poor girl is in desperate need of a bath from all of her labors too, but she is so rarely cold enough to accomplish that task that it keeps getting put off.

A month ago today, I wrote a blogpost about how I prepare acorn squash in the wood cookstove.  I still have a lot of squash to deal with, and I also have WAY TOO MANY CANS of sweetened condensed milk on hand (this I cannot explain because I'm not sure how it happened).  Thus, I dug out a recipe that I devised when I lived in the little house--over twenty years ago now!  Really, this is a recipe for pumpkin pie using canned pumpkin, but cooked acorn squash works just fine in it with a little tweaking.

Since canned pumpkin is sold by weight, I had to weigh the squash pulp to figure out how much twenty-nine ounces would be.  I think a safe bet would be two and a half to three cups of UNSWEETENED squash pulp. Do take the time to run it through the blender so that you don't end up with stringy custard.


To the squash, add one and a half cans (22.5 oz total) of sweetened condensed milk.  

You can do all sorts of fun things with the remaining half-can of this gooey stuff.  I made hot fudge sauce out of it this time.

Squash puree and sweetened condensed milk.

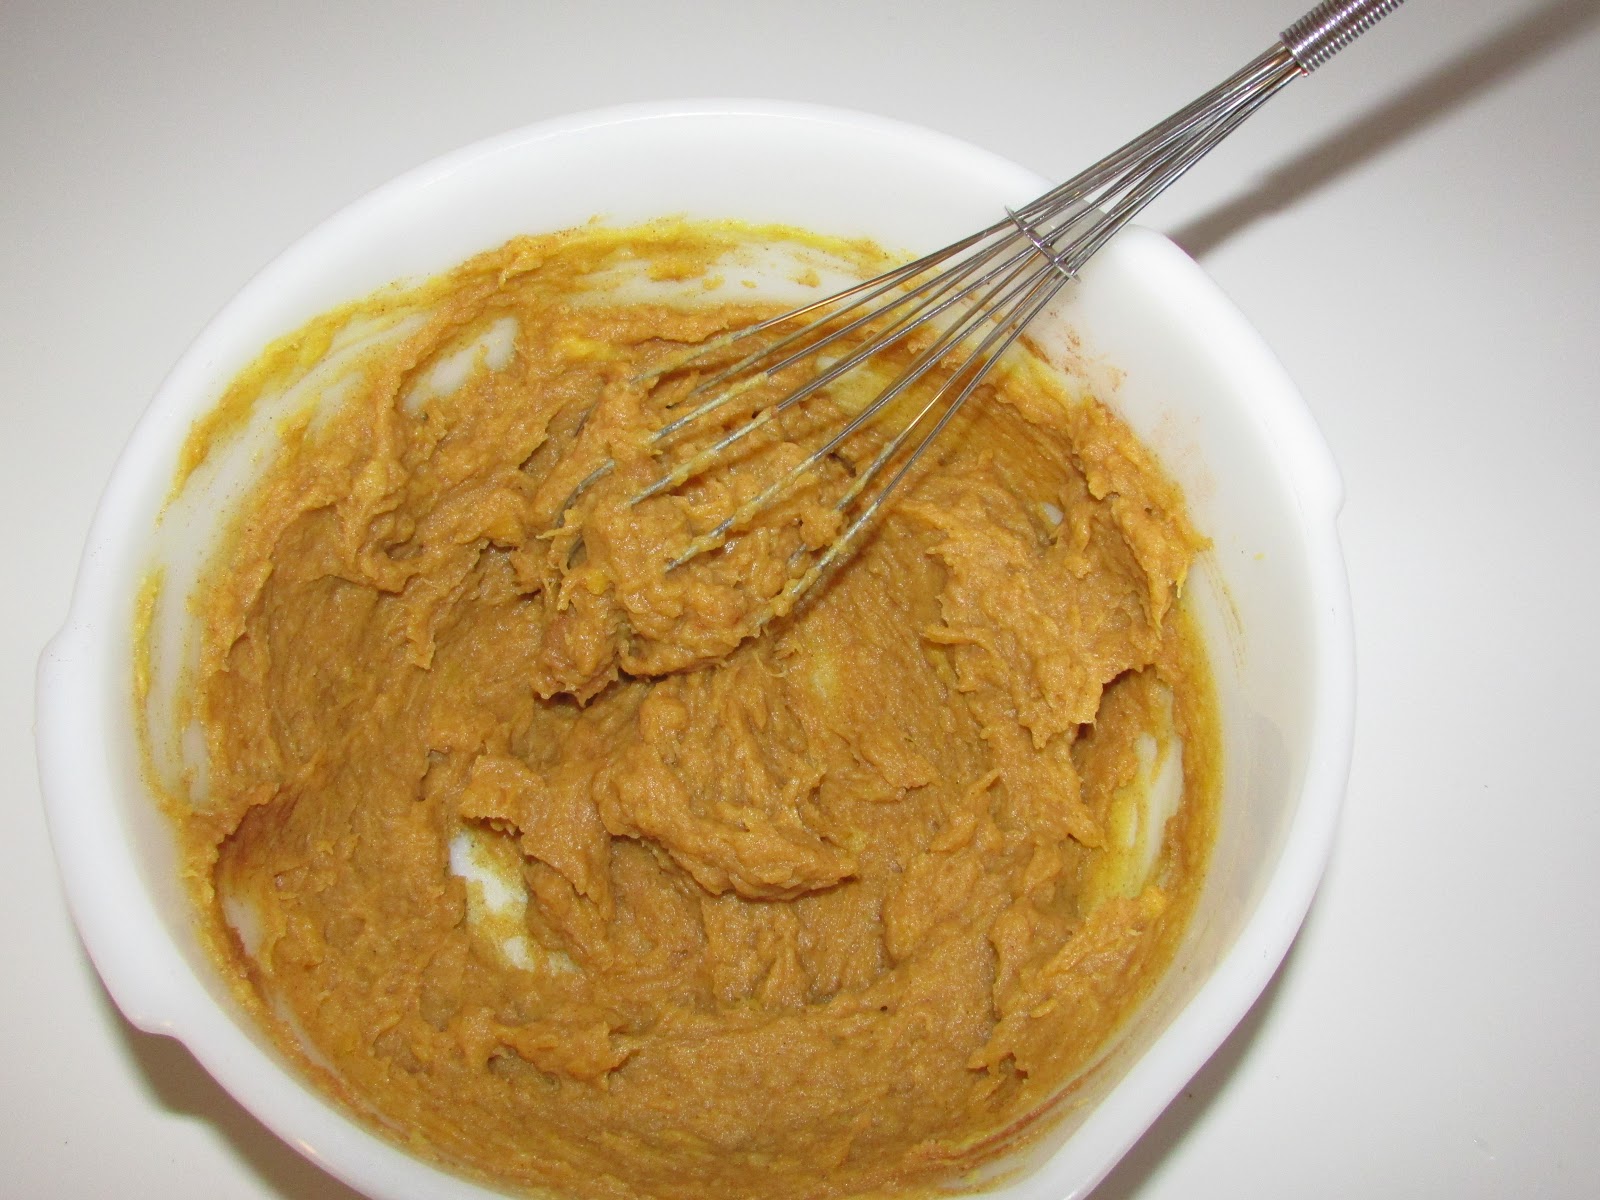
Into 3 TBLS of molasses, mix 2 tsp. of cinnamon, 1 tsp. of nutmeg, and 1 tsp. of ginger.  Pour this molasses spice mixture into the squash/milk mixture and add a scant teaspoon of salt (omit the salt when using canned pumpkin) and 4 eggs.

All the ingredients in the custard waiting to be beaten together.

Beat all of the custard ingredients until well blended.

The custard once it was completely mixed.

The mixture will be pretty thin as you can see from the drips running down the side of the bowl in the picture below.  Divide the mixture in half and pour each part into a 9" unbaked pie crust.  For the piecrust recipe that I use, you can visit my post about apple pie here.

Squash pies ready to go into the oven.

Place the pies in a hot oven (about 400ºF or more).  Bake for ten to fifteen minutes at this high temperature, and then let your fire cool to a more moderate oven for another 35-45 minutes or until the custard is completely puffed up and does not appear to jiggle in the middle.  Another reliable way to test this sort of pie is to insert a table knife into the custard half way between the edge and the center.  The knife will come out completely clean if the pie is done.

When you bake in a woodburning cookstove, it is very important to know what signs foods exhibit when they are properly and thoroughly cooked rather than relying on a certain amount of time to have elapsed at a certain temperature.  Actually, I feel like knowing these signs is important even when baking in a modern oven.  I am absolutely convinced that if we were aware of how much the temperature in a modern oven truly fluctuates, we would be quite surprised.

Pardon my soapbox, but while I'm on the subject of modern ovens, I would also like to say that I find it quite amusing when I hear people complain about there being hot spots in wood cookstove ovens.  In both our new gas oven (2012) and my parents' high-end electric oven (2011), even with the convection fan on, these modern ovens have hot spots.  You can easily detect them in a pan of our Roadhouse Dinner Rolls or baking powder biscuits.  This situation was the same in a commercial oven I used earlier this year, too.  Uneven oven heating seems to me to just be a fact of life, and we cooks just have to learn to deal with it.

Sorry, but I feel better now.

The pies just after they had been put in the Margin Gem's oven.

When the pies are done, remove them to a rack to cool.  The custard will fall shortly after this, and they will look like you expect pumpkin pie to look.


Of course, a pie like this is not complete without some whipped cream on the top.


The tweaking that I mentioned earlier in the post is the addition of the salt. Originally, there was no salt in this recipe, but the squash really needed it. I consulted a can of pumpkin and discovered that while salt was not on the ingredient list, a serving of canned pumpkin provided 10% of your recommended daily allowance of sodium.  I'm sure that this is why this recipe didn't taste as good to me as I would have liked.  

I took one of the two pies shown above to some friends of ours, and when they added their own homemade whipped cream, they put additional salt in it because I told them that I thought the pie needed it.  They all found the pie much tastier than I did, so if you make this recipe with squash, be sure to add that half teaspoon of salt.

I'm sure I could have used pureed acorn squash in the pumpkin pie recipe that I normally use, which you can find in this post from 2012.  As I said, though, I was trying to use up an over-abundance of sweetened condensed milk.  I hope you enjoy this one!

Wednesday, November 7, 2018

Awesome Roasted Bacon-Wrapped Maple Pecan Carrots in the Wood Cookstove

So, our Sunday dinner last weekend was really good even if I do say so myself.

The meat dish was a pork roast that I cooked in the Margin Gem using this method.  The roast was frozen solid when it went into the oven at 9:00 a.m. as we were leaving for church.  When we arrived back home at 11:30, it wasn't quite finished yet, but I needed a hotter oven for a new carrot recipe that I wanted to try, so I set one of my stove top ovens on the cooktop and transferred the roast to it.  This way, I could add a lot of biscuit wood to the fire in order to raise the temperature of the Margin Gem's oven but continue gently cooking the roast by moving the tin oven across the stovetop to the appropriate coolness.

Originally, the carrot recipe came from Hey Grill, Hey by Susie Bulloch, a website devoted to recipes for grilling a variety of foods.  Of course, I had to put my own spin on it and convert it for use on the wood cookstove, but she deserves all of the credit for the fabulous original idea.  You should go see her original post with links to a video because you will better understand what I did after you see what inspired me.

We had a wonderful carrot crop this year.  The carrots have had excellent flavor and texture, but they are shorter and thicker than what you usually see in the grocery store, so to make the cooking time in this recipe work for them, I had to halve or quarter some of them after they were scraped and pared at either end in order to make them cook uniformly.

Each peeled carrot (or half or quarter carrot) was wrapped with a slice of bacon.  Some of the carrots were small enough that only part of a slice was needed.

I then placed them on the top of a broiler pan (this was the first time I had ever used a broiler pan--a distinctly modern cooking utensil--inside a wood cookstove!).  I sprinkled them with a little bit of coarse sea salt and a little freshly ground pepper.  Go easy on the sea salt or feel free to omit it altogether; the bacon has plenty of salt in it.

The next step was to slide the carrots into a hot oven (around 400ºF) and let them roast for about 20 minutes.

Taken at the end of the process, this photo shows
the carrots roasting in the Margin Gem's oven, the
pork roast finishing in the stovetop oven, and the
mashed potatoes boiling over the firebox.

Now, this next part is where I went off script a bit.  We had a "baking for sale" day two weeks ago.  We had enough customers at our local farmers' market who asked us if we would be baking during the off season that we have scheduled one day a month on which I do some custom baking.  One of the most popular items that people request is our sweet rolls, and I had a number of orders for them with caramel pecan topping.

When we turn out a pan of these rolls (we often just call them sticky rolls), we put them onto a cooling rack which has been placed inside a jelly roll pan.  This allows us to catch all of the syrup that runs off the rolls.  All through the summer, we scrape this extra syrup into a sauce pan, save it, and then make it into pancake syrup, which is then water bath canned.

Well, for our baking day in October, we had a lot of pecan roll orders.  We try to make sure that as much of the pecan chunks stay on the rolls as possible, but some invariably land beneath the cooling rack, so my collection of syrup drips was very nutty.  To the saucepan of this mixture of pecan pieces, brown sugar, dark corn syrup, and butter, I added some hot water from the teakettle and brought the whole thing to a boil, stirring occasionally until the syrup no longer had any lumps in it.  When I took it off the fire, I added a little over an 1/8 tsp. of Mapleine.

After the first twenty minutes of roasting time had elapsed, I pulled the broiler pan of bacon-wrapped carrots out of the oven and spooned a little of the hot pecan syrup over each of them, taking care that as many pecan pieces remained on the top of the carrots as possible.

The pan of carrots was returned to the hot oven for another five minutes, at which point I removed it again and spooned onto them what remained of the pecan syrup.  The carrots were returned to the oven for another five minutes, which resulted in the pecans being beautifully toasted.  Of course, the vast majority of the syrup dripped down into the bottom of the broiler pan, but enough remained on the carrots to give them a mildly sweet taste.

With the pork roast and mashed potatoes, these carrots were AWESOME! Really, they were so good that I think they could be made as an hors d'oeuvre.

A scrumptious Sunday dinner.  You can see a jar of my
homemade Heinz ketchup at the top left corner, but everything
was so good that I didn't use any of it.

Now, if you aren't making a boat load of pecan rolls like we are, you could easily make a small batch of my homemade pancake syrup, using all brown sugar and reducing the water a little.  The result would be the same, and you could add a few pecans to it.  You can find that recipe here; just scroll down a little in the post to find it since it is about water bath canning on a wood cookstove.


Tuesday, October 30, 2018

Cooking Acorn Squash in the Wood Cookstove

We've been cooking with wood almost exclusively since turning off the electric water heater on September 21st.  The only exceptions have been a frozen pizza which I baked in the electric oven in the basement, and cakes and rolls were baked in the propane oven for our baked-goods-for-sale day last Thursday.  The wood cookstove oven was in use simultaneously that day, though, as there was such a large amount of baking to be done.  Now, I just need to get caught up with blogging!

One of the common themes among my posts about cooking on a wood cookstove is that I like to use it for foods that have long cooking times. Acorn squash is one of those foods that is particularly well suited to long cooking in a wood cookstove, and we had a large crop of them this year--all of which were volunteer!

A fraction of the acorn squash that grew in our garden this year.

Of course, there are as many ways to prepare acorn squash as there are cooks who do so, but I'm going to just show you what I do.

In the pictures below, I'm going to prepare two different sets of squash to be cooked at the same time: one set for eating, and one set for use in making other dishes.

Starting at least a couple hours before I want to have the squash ready to eat, I build my fire so that I will have a moderate oven--between 325º and 350ºF.

The next step is to wash the outside of the squashes thoroughly and cut them in half from side to side.


Then, using a strong metal spoon with a fairly sharp edge, I scoop out the seeds and pulp.


Next, I arrange the halves cut side up in glass or ceramic baking dishes.

Into those I am planning on eating right away, I place maybe a tablespoon of brown sugar in the cavity where the pulp was.  Then, I put around a teaspoon of salted butter on top of the brown sugar.  For the squash that I'm going to use for other things, I omitted the butter and brown sugar.


Without covering, put them in the oven to bake.  Baking time will depend on the size and ripeness of the squash, but I've never had a time when they took less than an hour and a half, and I've never seen them get too done.

I put the pan of squash that would be for our supper
in the oven first so that they would be ready in time.

Later, I moved the first pan of squash to the top rack and put the pan of squash
to be cooked for later applications on the bottom one.

When you can insert a fork in the fleshy part and it feels soft, remove them from the oven.


Now, I don't care for the stringy texture of acorn squash, so this is what I do to prevent having to deal with it.  Pour the brown sugar/butter syrup into the blender, cut them in halves again and use the same spoon that you took the seeds out with to scrape the flesh away from the peel.


Put the flesh into the blender and blend it with the brown sugar/butter syrup until it is all smooth.  If it is too dry, you can add any number of things; maple syrup, cream, and butter come to mind, but I just added some boiling water from the teakettle.

The squash pulp in the blender.  You don't have to have a
blender as cool as a vintage Osterizer Imperial handed
down to me from my grandmother, but it helps make it
more fun!

Once it is completely blended, you could put it into a slightly greased casserole dish and pop it in the oven if it has cooled off too much, but it was more than sufficient to slide this small bit into the warming oven while I finished the preparations for the rest of the meal.

Below is a picture of what the final product looks like on the plate.  You don't have to tell me how ugly it is; Nancy has already taken care of that job.  She said it looked like baby food.  She's right; however, when I look at it, the first thing that comes to mind is the 1970s gold insulated drapes that my mom and both of my grandmothers had hanging in our living rooms when I was little.


Acorn squash tastes much better than drapes, though.  When prepared this way, I serve it instead of a potato.  Except for the fish, each of the foods here was raised on our farm.  I love meals like that!

Use the comments section below to tell me how you like acorn squash cooked.  Bon appetit!


Tuesday, May 22, 2018

Cheating with Your Wood Cookstove: Broccoli Rice Casserole

I'm totally embarrassed by the recipe that I'm sharing with you today.

It is not healthy.

It is not original.

It is not from scratch.

It is not one made from all homegrown foods.

You've probably all seen it before.

But .  .  .

It tastes SOOO good!

This 1970s-era recipe was one of only two casseroles that my mom could get the three of us kids to eat while I was growing up.  We all loved it, and it was frequently requested on our birthdays when we got to choose what we ate for all three meals that day.  I still really enjoy it, and because of the cooking method, it is extremely well suited to being made on a wood cookstove.

You are going to need the following ingredients:

1/4 cup butter (I usually reduce this to 1 or 2 TBSP.)
1/2 cup chopped celery
1/2 cup chopped onion
1 can cream of mushroom soup
An 8 oz. jar of Cheez Whiz (GASP! I'll talk more about this later.)
10 oz. frozen broccoli
1 cup instant rice

Here is what you do:

1) Build your fire so that eventually you will have a moderate oven.


2) While the oven is heating, gently sauté the onion and celery in the butter in a very large frying pan.  I like to use my Magnalite chicken fryer for this because it has much taller sides, and that prevents spillage on the cooktop. I usually add a sprinkling of pepper to this mixture, too.


3) Once the onion is translucent, add the rest of the ingredients in the order given, stirring after each addition.  You may need to add a little water if the mixture doesn't flow freely, but don't do this until the broccoli has thawed so you know how much moisture it will release.


4) After the mixture has started to bubble a little, pour it into a greased 7" x 12" casserole dish.

5) By this time, the oven should be running at about 350º.  Pop the casserole into the oven for about a half hour.  It should be bubbly around the edges and beginning to brown a little on the top.


6) Remove from the oven and serve.


My mom always served this with our homemade applesauce, and I think this is an excellent combination.  When I was little, Mom would always make hamburgers (sans bun; we never had hamburgers with buns) to go with this as our meat.  Later on, she began to put a pound of cubed ham into the casserole.  This adds a lot of flavor to this and makes it a one-dish meal.  That is my favorite way to make it, but I didn't have any ham to put in it this evening.  If you do put the ham in it, you'll need a bigger casserole dish.  I often use a 9" x 13" dish then.

I have made this casserole with home-canned broccoli quite successfully.  It is a good way to use up a vegetable that many don't find very good when canned.

Now, about that Cheez Whiz.  You can substitute other cheeses or other cheese sauces here as you see fit and your taste permits.  You could also make your own mushroom white sauce and parboil regular rice, and then this recipe is no longer cheating.  It's still a great cookstove recipe, though, because you take advantage of the hot cooktop while your oven is heating to bake the casserole.

And since I'm so embarrassed that I like this dish so much, let's just agree to not talk about it anymore. 

Thanks.  I knew you'd understand.


Tuesday, November 7, 2017

Green Tomato Pie


A couple of weeks ago, we had our first hard freeze, so I spent the two days before that madly scurrying to get the last of the vegetables out of the garden.  Since then, I've been pickling beets, making cole slaw, and otherwise putting food into storage as I've had time.  I've still got dishpans and baskets full of apples, peppers, and green tomatoes to take care of.

The dishpan of bell peppers and tomatoes that I picked before the freeze.
Years ago, when I worked in our local bank (which was between full-time teaching stints), we had a customer named Fern.  I can't remember Fern's last name, but I remember that she was from Denison, Iowa, so she had about an hour's drive in order to get to our little town.  When she came to the bank, she almost always brought us some of her baked goods, and once she brought us a green tomato pie.  I was fascinated and asked for the recipe.  In the fifteen years that I've had Fern's recipe, I've never made it, but with this year's garden having been so bountiful right up until the end, I've now made three of these pies in the Margin Gem cookstove.  The Margin Gem does a beautiful job of baking pies--better than our gas oven, I think, because there is less humidity in the oven.

To make a green tomato pie, you want to have green tomatoes that are freshly picked and have not had any time to begin to ripen.  If the tomatoes have even the slightest tinge of orange or softness to them, the result will be much more like a ketchup pie than green tomato pie.  For this reason, the first green tomato pie I made this year was superior than the two that you see in these pictures.  If your tomatoes are firm and very green, you'll have a hard time distinguishing between this and an apple pie.

You will need the following ingredients:

      • Prepared pastry dough for a double-crust pie
      • Enough green tomatoes for a nine-inch pie (The original recipe says 4 or 5 tomatoes, but I used Romas, so it took more like ten.  I don't measure the fruit for pie filling.  I do like my grandma Marian taught me and use the green  2 1/2-quart bowl from my multi-colored vintage Pyrex set, and stop peeling/paring when I know I've reached the right amount by how it looks in the bowl.  Sorry!)
      • 1/4 cup flour
      • 1 cup white sugar
      • 1 TBLSP. white vinegar (The original recipe called for 2 TBLSP. of vinegar, but I've changed the second tablespoon to orange juice to help avoid the ketchupy taste.) 
      • 1 TBLSP. orange juice  
      • cinnamon to taste (You could use whatever spices you would ordinarily reach for to flavor your apple pie.)
Directions:

1. Build your fire so that you have a hot oven.  Because our cookstove is being fired constantly now, this process is a little different than it would be if I was starting the fire from scratch just to bake a pie.  Last night, for example, the fire was keeping the oven right around 300-325 degrees.  To get it as hot as I wanted it for when the pies first go into the oven, I put in several pieces of wood that I would ordinarily have used as kindling. These brought the oven up to the temperature that I wanted and kept it nice and hot for the full hour of baking time.

2. Cut the tomatoes into small chunks as you would with apples.


The right amount of green tomatoes in the green Pyrex bowl.
3. Add the flour, sugar, vinegar, orange juice, and cinnamon.

The green tomatoes with the flour, sugar, vinegar, orange juice
and cinnamon.
4. Stir all together.

The filling ingredients all stirred together.

5. Assemble your pie, being sure to vent the top crust.

6. Place in a hot oven (400-425 F) so that the crust cooks quickly.  After ten or fifteen minutes, let the fire cool down to moderate heat (350-375 F) to finish cooking the filling.  The pie should be in the oven for approximately an hour.
Two green tomato pies in the oven of the Margin Gem. I put tin
foil under them to make sure that they don't run over onto the
bottom of the oven.
7. Remove the pies from the oven to cool.


The finished product.

A slice of green tomato pie.
The first green tomato pie that I made was a huge hit with my family.  My sister-in-law, an excellent baker herself but not a tomato lover, liked it, and so did my brother.  My grandmother, who was a superior baker in her day, thought it was delicious too, but none of them would have guessed that it was made out of green tomatoes.

The second pies were made with tomatoes that were a little riper, so they had a slight tomato flavor.  People at school liked them, though, and you can't imagine what fun it is to have people guess what the pie is made of.  I think Fern would be proud!

Thursday, August 31, 2017

Life Changes Update and a "Mild-Mouthed Midwesterner" Recipe for Creamed Peas and New Potatoes

Hello, my long-neglected blog readers!  It's been a long time since my last post, and I've got so much to tell you that I'd better jump right in.

First and foremost, I resigned from full-time teaching at the end of the school year this spring.  It was a decision that was a long time coming, and a lot of thought went into it.  I want to make it abundantly clear that the students were not the reason for my resignation.  I was still very much enjoying the kids, and I still love English.  However, I realized that I was no longer interested in becoming a better teacher than I was, and I felt that it was unfair to the kids for me to continue teaching.  So, after twelve years in the classroom and a total of fourteen years in education, I have now changed my role to that of a substitute teacher, and so far I am ridiculously happy.

This summer hasn't felt much different than any of the other summers between school years.  Notable exceptions have been that Nancy had her left knee replaced on June 5th (her right one is scheduled for Sept. 11).  After the operation, the surgeon told her parents and me that she had the knees of a seventy-year-old.  That is bad news for a person who is only in her mid-forties!  As a result, I've learned a lot about nursing, and we've both learned a lot about physical therapy.  The recovery process has been slow and agonizing for her at times, but at least there is marked improvement.

The other big exception has been that I've taken the time to raise a beautiful vegetable garden this summer.  Historically, I've always planted a garden (there is something in my genetic makeup which compels me to plant each spring), but I haven't usually taken the time to maintain it as well as I ought.  This year, I've spent a great deal of time actually taking care of the garden, and my efforts have been rewarded.  I'm even more excited about next year's gardening season because I will be able to plant in a more timely fashion because I won't be so distracted by full-time school responsibilities.

With the beginning of the school year, I've felt the change in careers more keenly, but I'm even more convinced that God led me to the right decision.  I have started substitute teaching, which I've enjoyed very much so far.  Subbing has afforded me the opportunity to keep up with the students in whose lives I feel quite invested.

Of course, substitute teaching will not necessarily be an everyday occurrence for me, and that is good because I would like to eventually be able to make my contribution to our household finances through freelance writing and editing.  Toward that end, I've done a little freelance editing through Upwork, and I have a monologue suitable for speech contest use available for sale here at Brooklyn Publishers. 

I also hope to be able to do a great deal more blogging.  Those of you who are longtime blog readers have heard me say this before and then have gone for long stretches of time without seeing posts.  You must help me remain accountable, please.  You will notice (I hope) that I have also "monetized" my blog in order to try to use it to supplement my income.  We'll see how that goes.

Enough with all of that; let's get to the recipe! 

The August weather in Southwest Iowa has been beautiful, so I'm back to cooking on wood (not exclusively yet, but I'm hoping for next week).  The recipe that I'd like to share tonight is one that comes from Nancy's grandma Ruth.  Nancy has been telling me for thirteen years that the only way she likes to eat peas is the way her grandmother fixed them in Creamed Peas and New Potatoes.  I really think that Ruth probably served this side dish in June when the garden peas are typically ready here, but this is a good recipe to help you use up those little potatoes that are always found when the fall potato digging takes place.  The way the recipe was actually written calls for frozen peas anyway, so this is really a dish that you can serve any time you have small potatoes which are freshly dug.

This is how the recipe appeared in Ruth's cookbook when I copied it down way back in February of 2005:

Creamed Peas and New Potatoes
 
12 cooked whole pared new potatoes
2 c. frozen peas
 
Sauce:
4 TBLS. margarine
3 TBLS. flour
2 cups milk
salt and pepper to taste
 
First what you do is peel your potatoes.  Because of the way the recipe read, I wasn't sure whether the potatoes were peeled or not.  To me, "pared" simply means that any dark spots are cut out of them but the peeling remains.  However, the skin on new spring potatoes is always very thin and can often just be rubbed off with the fingers, so I asked Nancy, and she confirmed that the potatoes were always peeled.
 
Now, the recipe says to use 12 potatoes, but I wanted to use up a bunch of really tiny potatoes, and so I used more, and there was no problem in doing so. 
 
Boil the new potatoes and boil the peas in separate saucepans on the stove.  Just before they are done cooking, make the sauce.  To do that you . . .
 
a) Melt the margarine in a saucepan.
 
b) Stir in flour, salt, and pepper until smooth.
 
c) Add the milk gradually, stirring constantly.
 
d) Cook until thick and smooth.
 

In this picture, you can see the potatoes cooking in the Saladmaster
kettle on the back right by the teakettle.  The sauce is in the pan on
the front of the firebox, and the peas are on the cooler right side of
range because they had already come to a boil and were just remaining
warm.  We had boneless pork chops cooked in just a small splash of
olive oil for our meat.  The green canner with the hot pad on the top
and the other pot with the purple stuff in it are part of the preparations
that I was making in order to cook a batch of jelly after supper that
evening.
The last thing to do is drain the cooked potatoes and peas, pour them into the white sauce, and heat everything through.

When we sat down to eat, I carefully watched Nancy's face to see if I had succeeded because the whole dish seemed rather boring and unappealing to me. 

After a moment of silence, she said whimsically, "I'm a little girl back in Grandma's kitchen."

Success!

As I began to eat my portion of this, at first I wasn't very excited about it.  It really is extremely bland by today's standards for food; however, I'll admit that it grew on me quite a bit while we were eating it.  During the whole supper, I kept thinking of the phrase that my brother-in-law (he is part Hispanic) uses when anyone complains of food being too spicy.  He accuses them of being a "Mild-Mouthed Midwesterner."

Guilty as charged!  I always say that I don't like any food that bites me back.

However, I think that the next time I make this, I'm going to use garlic salt instead of plain salt because I think that would add just enough flavor to take this out of the boring category.  Don't tell Nancy, please.

Also, I'm going to try making it with butter instead of margarine.  I usually use butter in cooking except for very rare occasions and with specific reasons.  In fact, I thought about using butter in this recipe to begin with, but then I remembered that Ruth was never one to spend any money unnecessarily and knew instantly that she wouldn't have sprung for butter when margarine is so much cheaper.  And since I was trying to recreate Nancy's memory for her, I went ahead with the margarine this time and am glad I did.


Our finished supper.  

P.S. One last thing I should have mentioned above:

THANKS to all of my readers who have kept this blog so busy over the summer!  I'm continually amazed at how any hits I receive on a daily basis even when it is not wood cookstove season.  I'm excited to see how well this blog will do when I post more frequently!


Sunday, July 17, 2016

Caramelized Onions on the Wood Cookstove

It's been a hot summer here, in my opinion.  Really hot.  The last fire that we had in the cookstove was on May 6th, but we had a cool day last Friday, and I couldn't resist the urge to cook on wood again.

We have a beautiful row of Walla Walla onions in the garden, and Nancy loves bratwurst, so it seemed a good idea to have brats with caramelized onions.  Making good caramelized onions involves quite a long cooking time, so it is a great side dish to make on a wood cookstove.

Start with about two teaspoons of olive oil.  For this, I like to use a non-stick frying pan.  To start the onions cooking, place your pan directly over the fire. 

I apologize for the quality of this photo.  I didn't have the flash on the camera turned on.

The olive oil heating over the firebox.
Add onions that have been sliced about a quarter inch wide.

I took advantage of the fire by cooking several things at once
to be refrigerated for later.
 
Stir the onions around a bit to get the oil distributed, then cover the pan right away to begin cooking them quickly.


Keep an eye on the onions, stirring them occasionally.  Once they have become limp, remove the lid.  Also move them to an area of lower heat.


Stir occasionally until they are fairly evenly browned.  This can take quite a bit of time.  These onions cooked for a total of about an hour.  Because it is summer and I didn't want the fire to last a long time, I was letting it die down, so I ended up moving the onions back over to the fire.  Once they are all brown, add a scant teaspoon of sugar. 

 
Continue cooking gently for a while until the onions are reduced to a delicious-smelling, but slimy-looking, mess.

 
Serve very warm over bratwurst on a bun.  Delicious!