Showing posts with label baking pies. Show all posts

Friday, April 9, 2021

Chicken Pot Pie Baked in a Wood Cookstove

This is a picture of an earlier chicken pot pie which
was baked in the Margin Gem; it's not the one you
will see in the photos below.

One thing Nancy and I both love is good chicken pot pie, and we're pretty happy with the version that I make.  Pulling a meat pie out of the oven of a woodburning cookstove gives one a feeling of satisfaction that is a close second to that of a beautifully browned turkey or a golden loaf of bread.

As always with any wood coookstove dish that is going to be baked, the first thing you have to do is to build your fire and heat the oven.  You need a "hot" oven for baking a pot pie, so build your fire so that your oven will run at about 425ºF.

I think the second step to making a really good chicken pot pie is making the right crust, and I'm excited to share the recipe that I use.  It originated from my reprint of the 1950 Betty Crocker Picture Cookbook (Wiley Publishing, Inc. and General Mills, Inc.), and it was labeled "English Pastry."  For a meat pie, especially a chicken pot pie, I think people generally are looking for a thicker, richer crust than one might find on a homemade fruit pie, for example.  As always, I've tweaked the recipe a bit, and now it's exactly what I'm looking for.

The ingredient list for the crust is as follows:

2 cups sifted all-purpose flour

2 tsp. baking powder

1 tsp. salt

2/3 cup butter flavor Crisco

1/2 c. hot water

1 Tablespoon lemon juice

1 egg yolk

1 egg white

1 Tablespoon cold water

Here is what you do:

1. Sift the flour, baking powder, and salt together.


2. Measure the butter flavor Crisco and pour the half cup of hot water over it from the teakettle.  Obviously, this will soften the shortening significantly.

3. Add the tablespoon of lemon juice to the shortening/hot water mixture and stir around a little.

4. While stirring the above mixture vigorously, add the egg yolk.  You've got to stir while doing this so that the egg yolk doesn't cook.


5. Combine the wet ingredients with the dry, stirring until no lumps of shortening are visible.


6. Pop the crust mixture into the freezer to chill while you mix and cook the filling.  If you're not going to be assembling this pie immediately, just put the pastry dough into the fridge.

Now, in the pictures that you see below, I used a quart of chicken breast meat that I had canned on the Margin Gem last fall.  When I can chicken, I fill the jar loosely with pieces of meat, and then I fill the jar to an inch from the top with hot water and add a bouillon cube or two.  After the meat has been processed in the pressure canner, the chicken usually condenses down to a little over a pint of meat swimming in about that much broth.

Here is what I did for the filling.  I'm sorry that there aren't any hard and fast measurements for any of this; it is always just by guess and by golly.

7. Drain the quart of canned chicken, putting the broth in a tall-sided frying pan.  I use my Magnalite chicken fryer.  To the broth I added one bouillon cube and a teaspoon of chicken base.  Put that directly over the firebox to come to a good boil.

8. While that was heating, I poured about a 1/2 cup of heavy cream into it along with the juice from a six-ounce can of mushrooms.

9. Add a half teaspoon of paprika, a dash of pepper, and a sprinkling of seasoned salt.

10. I beat about six tablespoons of all-purpose flour into a cup of cold milk until it was smooth.  

11. While stirring the hot mixture constantly, I added the milk and flour mixture. 

12. Once the flour and milk is added, stir constantly with a fork until everything comes to a boil and begins to thicken.  Once that happens, add the canned chicken, the canned mushrooms, a tablespoon of onion flakes, and a cup or two of mixed vegetables.  Bring everything to a boil again, stirring quite frequently.


13. Move the filling mixture as far away from the fire as possible so that it will just simmer very gently while you work on the crust.


14. Whisk the egg white and cold water from the crust ingredients until they're a little frothy on top.


15. Remove the pastry dough from wherever you had it chilling.  Pat 3/4 of the dough into the bottom and up the sides of a deep dish pie pan.  I find that our Pampered Chef deep dish stoneware pie plate is perfect for this.


16. Roll out the remaining pastry dough until it is just large enough to fit over the top of the pie.  I didn't stop quite soon enough in the picture below.


17. Pour the hot filling into the bottom crust, leaving about a half-inch of space at the top so that the pie won't boil over in your oven.


18. Put the top crust on the pie, pinching the edges together to seal.  (I'm embarrassed at the looks of this one as I didn't center the crust right and had to go back and patch it.)

19. Poke holes in the top crust to vent the pie; then brush the egg white/water mixture over the top.


20. Slide the pie into the hot oven and bake for about 25 minutes or until the pastry is a beautiful brown.


I took a picture of the oven thermometer while the pie was in the oven.  If you look closely, you can tell that the thermometer doesn't indicate that the oven is anywhere close to 425ºF, but experience tells me that it is.  If the thermometer on your wood cookstove's oven is not accurate, that doesn't mean that it's not useful.  For example, after almost a decade of baking in the Margin Gem, I don't pay any attention to the numbers on the thermometer.  Instead, it is more helpful to think of the thermometer like a clock face.  If the needle is pointing to 10:00, the oven is at 350º.  Eleven o'clock is 375º; noon is 400º; one o'clock is 425ºF.  If the needle goes past three o'clock, I need to open the oven door! 


After three or four attempts at photographing what the fire looks like in order to maintain a hot oven in the Margin Gem, I settled on this one.


Watch the pie carefully during the last few minutes.  When you're baking at an oven temperature this high, you don't want to let the crust burn.

Doesn't the egg white wash make a nice looking
crust?


I took this picture because I wanted to show that when this crust
is baked in a stone pie plate, it pulls away from the edges once
it's done (as long as you've done a good job of sealing the edges
and none of the filling has boiled down between the crust and
and the pan). You can see it particularly well at the lower left side.

21. After you remove the chicken pot pie from the oven, let it cool for a few minutes before you cut into it.  That will let the filling thicken even more, and it will be easier to neatly remove a piece.  

A piece of the finished chicken pot pie.

We find that this version of chicken pot pie reheats into very tasty leftovers.  In this household, that is a very high recommendation for any recipe!


The picture below is of the pie in the picture at the beginning of this post before it was baked.  I included it to prove that I can actually make a top crust that doesn't have to be patched!


Friday, November 30, 2018

Acorn Squash Pie Baked in the Wood Cookstove

I'm so behind in my posting for November!  Don't worry, though.  The woodburning cookstove has been very busy.  Aside from using the gas oven for baking-for-sale days and a bread baking class; the broiler on the electric stove in the basement for making garlic toast; and the crockpot for a day when I wasn't home, Marjorie the Margin Gem has done all of our cooking since September 21st.  The poor girl is in desperate need of a bath from all of her labors too, but she is so rarely cold enough to accomplish that task that it keeps getting put off.

A month ago today, I wrote a blogpost about how I prepare acorn squash in the wood cookstove.  I still have a lot of squash to deal with, and I also have WAY TOO MANY CANS of sweetened condensed milk on hand (this I cannot explain because I'm not sure how it happened).  Thus, I dug out a recipe that I devised when I lived in the little house--over twenty years ago now!  Really, this is a recipe for pumpkin pie using canned pumpkin, but cooked acorn squash works just fine in it with a little tweaking.

Since canned pumpkin is sold by weight, I had to weigh the squash pulp to figure out how much twenty-nine ounces would be.  I think a safe bet would be two and a half to three cups of UNSWEETENED squash pulp. Do take the time to run it through the blender so that you don't end up with stringy custard.


To the squash, add one and a half cans (22.5 oz total) of sweetened condensed milk.  

You can do all sorts of fun things with the remaining half-can of this gooey stuff.  I made hot fudge sauce out of it this time.

Squash puree and sweetened condensed milk.

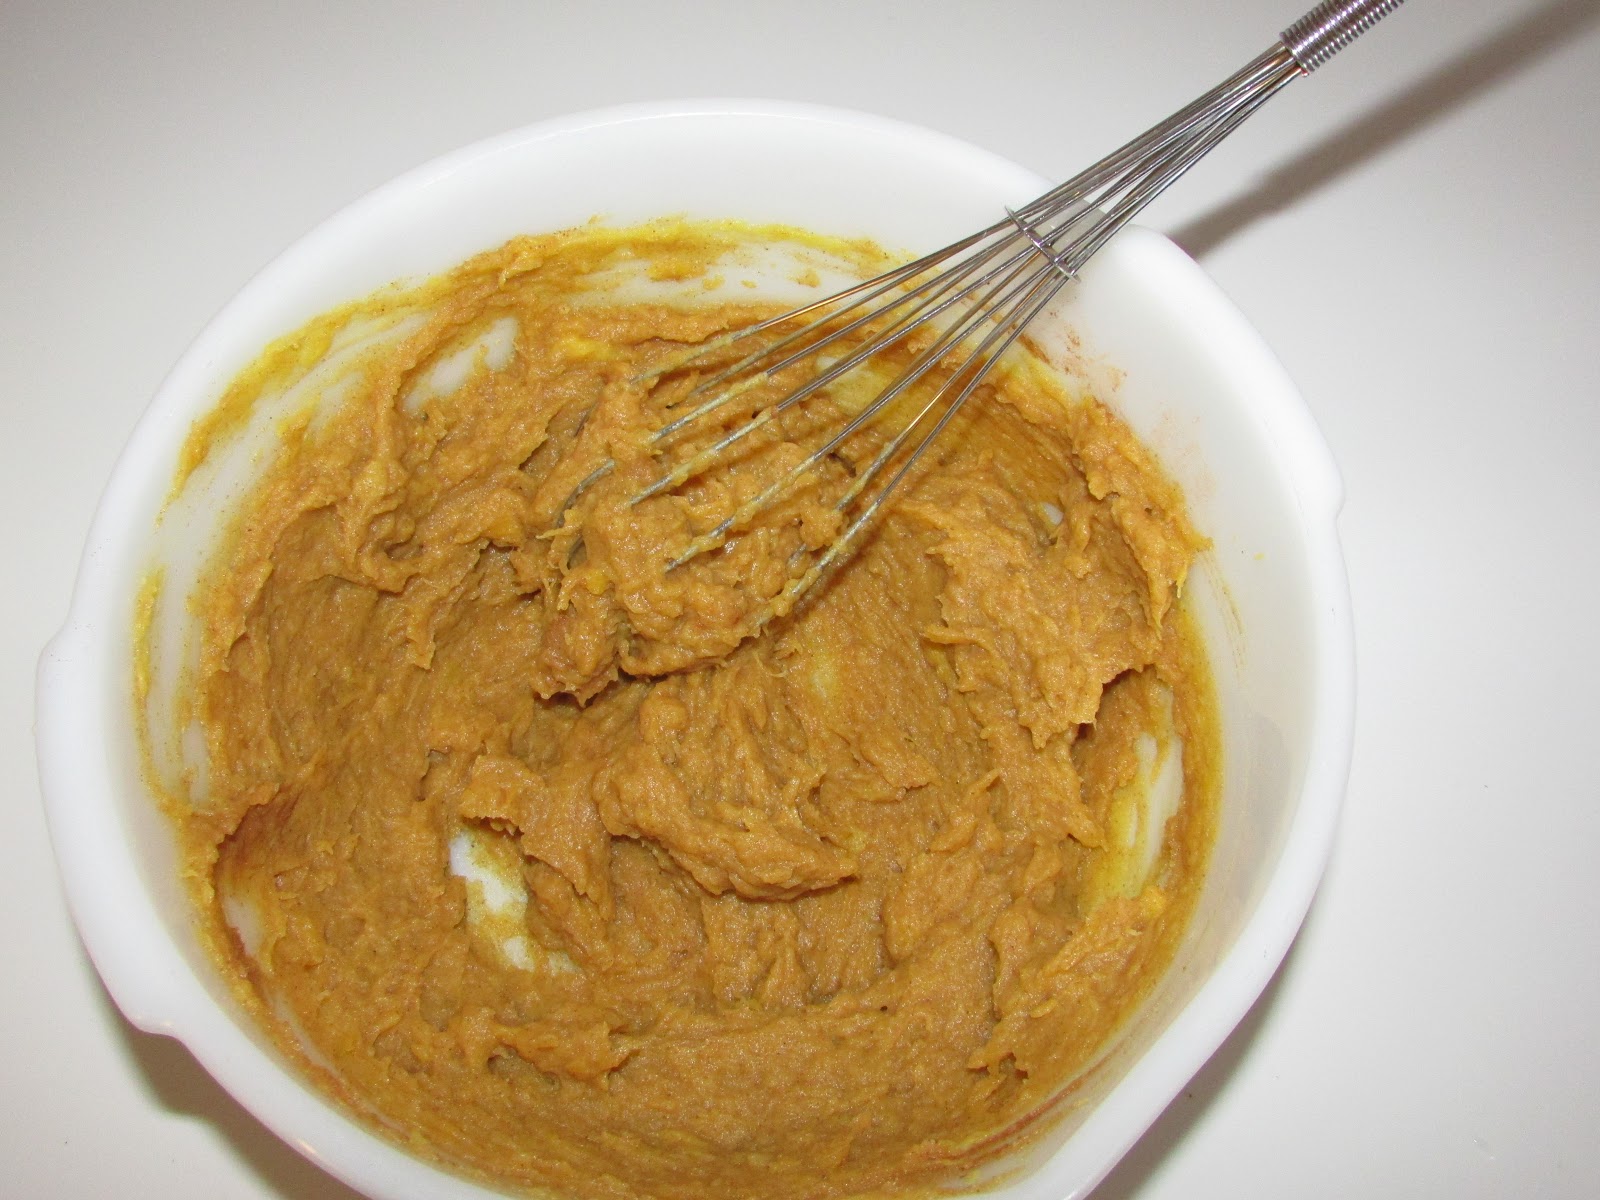
Into 3 TBLS of molasses, mix 2 tsp. of cinnamon, 1 tsp. of nutmeg, and 1 tsp. of ginger.  Pour this molasses spice mixture into the squash/milk mixture and add a scant teaspoon of salt (omit the salt when using canned pumpkin) and 4 eggs.

All the ingredients in the custard waiting to be beaten together.

Beat all of the custard ingredients until well blended.

The custard once it was completely mixed.

The mixture will be pretty thin as you can see from the drips running down the side of the bowl in the picture below.  Divide the mixture in half and pour each part into a 9" unbaked pie crust.  For the piecrust recipe that I use, you can visit my post about apple pie here.

Squash pies ready to go into the oven.

Place the pies in a hot oven (about 400ºF or more).  Bake for ten to fifteen minutes at this high temperature, and then let your fire cool to a more moderate oven for another 35-45 minutes or until the custard is completely puffed up and does not appear to jiggle in the middle.  Another reliable way to test this sort of pie is to insert a table knife into the custard half way between the edge and the center.  The knife will come out completely clean if the pie is done.

When you bake in a woodburning cookstove, it is very important to know what signs foods exhibit when they are properly and thoroughly cooked rather than relying on a certain amount of time to have elapsed at a certain temperature.  Actually, I feel like knowing these signs is important even when baking in a modern oven.  I am absolutely convinced that if we were aware of how much the temperature in a modern oven truly fluctuates, we would be quite surprised.

Pardon my soapbox, but while I'm on the subject of modern ovens, I would also like to say that I find it quite amusing when I hear people complain about there being hot spots in wood cookstove ovens.  In both our new gas oven (2012) and my parents' high-end electric oven (2011), even with the convection fan on, these modern ovens have hot spots.  You can easily detect them in a pan of our Roadhouse Dinner Rolls or baking powder biscuits.  This situation was the same in a commercial oven I used earlier this year, too.  Uneven oven heating seems to me to just be a fact of life, and we cooks just have to learn to deal with it.

Sorry, but I feel better now.

The pies just after they had been put in the Margin Gem's oven.

When the pies are done, remove them to a rack to cool.  The custard will fall shortly after this, and they will look like you expect pumpkin pie to look.


Of course, a pie like this is not complete without some whipped cream on the top.


The tweaking that I mentioned earlier in the post is the addition of the salt. Originally, there was no salt in this recipe, but the squash really needed it. I consulted a can of pumpkin and discovered that while salt was not on the ingredient list, a serving of canned pumpkin provided 10% of your recommended daily allowance of sodium.  I'm sure that this is why this recipe didn't taste as good to me as I would have liked.  

I took one of the two pies shown above to some friends of ours, and when they added their own homemade whipped cream, they put additional salt in it because I told them that I thought the pie needed it.  They all found the pie much tastier than I did, so if you make this recipe with squash, be sure to add that half teaspoon of salt.

I'm sure I could have used pureed acorn squash in the pumpkin pie recipe that I normally use, which you can find in this post from 2012.  As I said, though, I was trying to use up an over-abundance of sweetened condensed milk.  I hope you enjoy this one!

Tuesday, November 7, 2017

Green Tomato Pie


A couple of weeks ago, we had our first hard freeze, so I spent the two days before that madly scurrying to get the last of the vegetables out of the garden.  Since then, I've been pickling beets, making cole slaw, and otherwise putting food into storage as I've had time.  I've still got dishpans and baskets full of apples, peppers, and green tomatoes to take care of.

The dishpan of bell peppers and tomatoes that I picked before the freeze.
Years ago, when I worked in our local bank (which was between full-time teaching stints), we had a customer named Fern.  I can't remember Fern's last name, but I remember that she was from Denison, Iowa, so she had about an hour's drive in order to get to our little town.  When she came to the bank, she almost always brought us some of her baked goods, and once she brought us a green tomato pie.  I was fascinated and asked for the recipe.  In the fifteen years that I've had Fern's recipe, I've never made it, but with this year's garden having been so bountiful right up until the end, I've now made three of these pies in the Margin Gem cookstove.  The Margin Gem does a beautiful job of baking pies--better than our gas oven, I think, because there is less humidity in the oven.

To make a green tomato pie, you want to have green tomatoes that are freshly picked and have not had any time to begin to ripen.  If the tomatoes have even the slightest tinge of orange or softness to them, the result will be much more like a ketchup pie than green tomato pie.  For this reason, the first green tomato pie I made this year was superior than the two that you see in these pictures.  If your tomatoes are firm and very green, you'll have a hard time distinguishing between this and an apple pie.

You will need the following ingredients:

      • Prepared pastry dough for a double-crust pie
      • Enough green tomatoes for a nine-inch pie (The original recipe says 4 or 5 tomatoes, but I used Romas, so it took more like ten.  I don't measure the fruit for pie filling.  I do like my grandma Marian taught me and use the green  2 1/2-quart bowl from my multi-colored vintage Pyrex set, and stop peeling/paring when I know I've reached the right amount by how it looks in the bowl.  Sorry!)
      • 1/4 cup flour
      • 1 cup white sugar
      • 1 TBLSP. white vinegar (The original recipe called for 2 TBLSP. of vinegar, but I've changed the second tablespoon to orange juice to help avoid the ketchupy taste.) 
      • 1 TBLSP. orange juice  
      • cinnamon to taste (You could use whatever spices you would ordinarily reach for to flavor your apple pie.)
Directions:

1. Build your fire so that you have a hot oven.  Because our cookstove is being fired constantly now, this process is a little different than it would be if I was starting the fire from scratch just to bake a pie.  Last night, for example, the fire was keeping the oven right around 300-325 degrees.  To get it as hot as I wanted it for when the pies first go into the oven, I put in several pieces of wood that I would ordinarily have used as kindling. These brought the oven up to the temperature that I wanted and kept it nice and hot for the full hour of baking time.

2. Cut the tomatoes into small chunks as you would with apples.


The right amount of green tomatoes in the green Pyrex bowl.
3. Add the flour, sugar, vinegar, orange juice, and cinnamon.

The green tomatoes with the flour, sugar, vinegar, orange juice
and cinnamon.
4. Stir all together.

The filling ingredients all stirred together.

5. Assemble your pie, being sure to vent the top crust.

6. Place in a hot oven (400-425 F) so that the crust cooks quickly.  After ten or fifteen minutes, let the fire cool down to moderate heat (350-375 F) to finish cooking the filling.  The pie should be in the oven for approximately an hour.
Two green tomato pies in the oven of the Margin Gem. I put tin
foil under them to make sure that they don't run over onto the
bottom of the oven.
7. Remove the pies from the oven to cool.


The finished product.

A slice of green tomato pie.
The first green tomato pie that I made was a huge hit with my family.  My sister-in-law, an excellent baker herself but not a tomato lover, liked it, and so did my brother.  My grandmother, who was a superior baker in her day, thought it was delicious too, but none of them would have guessed that it was made out of green tomatoes.

The second pies were made with tomatoes that were a little riper, so they had a slight tomato flavor.  People at school liked them, though, and you can't imagine what fun it is to have people guess what the pie is made of.  I think Fern would be proud!

Monday, November 30, 2015

Pecan Pie Baked in a Wood Cookstove

I hope all of you had a wonderful Thanksgiving holiday.  The Midwest watched winter storm Cara travel through our area of the country on Thanksgiving, giving us a thin layer of ice and making travel rather iffy, so we moved our family's celebration to Friday.  This allowed me some extra time to complete the Thanksgiving baking.  School was canceled today due to winter storm Delphi which delivered ice and wet snow today, making everything messy, but giving me time to check papers all day and blog tonight.

I wanted to share the pecan pie recipe that I use.  I copied this recipe out of my paternal grandmother's recipe box when I was in college.  I think she may have gotten it from my aunt Marlene, but I don't know that for sure.  Truthfully, I don't remember Granny ever making this pie, but my mother does, and Mom was the one who told me that it was very good.  I talked about this recipe way back in my first post about baking pies, and I showed a picture of the one that I dropped on the floor of the summer kitchen. 


That was very depressing, but this year everything worked extremely well.

This recipe has proportions for both 8" and 9" pies, so the first thing you need to do is to line the pie pan of your choice with an unbaked crust.  You can find the recipe that I use for pie crust here.

 
For an 8" pie, you will need:
2 eggs
1/2 cup sugar
1/4 tsp. salt
1/4 cup melted butter
3/4 cup dark corn syrup
3/4 cup pecan pieces or halves
 
 
For a 9" pie, you will need:
3 eggs
2/3 c. sugar
1/3 tsp. salt
1/3 cup melted butter
1 cup dark corn syrup
1 cup pecan pieces or halves
 
The first thing that I do is put the butter in the mixing bowl and put it in the warming oven to melt.  At this point, you should be managing your fire in such a way that you will soon have a moderately hot oven (375 degrees). 
 
Please pardon the quality of this photograph.  This is the butter
melting in the warming oven.
Next, beat the granulated sugar, salt, and eggs together.  I used three duck eggs, and the quality of the pie was excellent.
 
The granulated sugar, salt, and butter.
 
The eggs ready to be beaten into the butter/sugar mixture and the
dark corn syrup measured and ready.
 
Add the corn syrup and the pecans and beat again.
 

Pour the custard mixture into your pastry-lined pie plate.

Another poor picture.  I need to hire a photographer.

Bake in a moderately hot oven (375 degrees Fahrenheit) until the custard is set and the pastry is nicely browned.  This usually takes about 40 - 50 minutes.  The custard will mound up in the center, and a knife inserted halfway between the edge and the center should come out clean.

 
Once the pie comes out of the oven, the custard will fall in the center, and the pie will take on the customary pecan pie shape.  After it is cool, I think it is best when served with whipped cream.  Since it is a custard pie, we always refrigerate it.
 
You know, I've baked several pecan pies over the years, but I don't think that I have ever baked one in a modern oven.  Hmmm.
 
God has richly blessed us this year, and I hope He has done the same for you.


Friday, May 31, 2013

Double-crusted Strawberry Pie: An Old-Fashioned June Dessert

The weather has been pretty wet in our part of Iowa over the last several weeks.  After last year's drought, most everyone around here is quite thankful, though it would be nice if it would be dry long enough to finish planting.

At any rate, our strawberry beds have been really enjoying the abundant moisture, and it looks like we'll have a nice little strawberry crop if everything continues as it has been.  I've mentioned before that homegrown, vine-ripened strawberries were quite abundant in my childhood.  During that glorious first month of summer vacation, it seemed like they were everywhere, and many family members got together to pick and preserve them.  Each year, there were also strawberry pies.  I can remember Grandma Marian, Meme, and Mom all making them, but theirs were always the fresh-strawberry kind with a cooked gelatin/cornstarch glaze poured over the top--certainly very tasty in their own right.

I, however, have a weakness for cooked fruit, and when I saw the historians serving a double-crusted strawberry pie on the 1900 Farm at Living History Farms in Urbandale one summer, I set out to find a recipe.  I looked through my recipe boxes.  I looked through my recipe clippings.  I looked through my cookbooks (if you saw the embarrassingly large collection of cookbooks around here, you'd know how impressive this undertaking really was), and found nothing.  Nothing!  Well, that's not quite true; a vague recipe for "Berry Pie" appeared in one of the vintage cookbooks, but it seemed far more suited to raspberries and the like rather than strawberries.  So, I finally had to turn to the Internet. 

I know, I know.  Many of you reading this will think that I should have started with the World Wide Web, but you have to understand me.  I live in a world with rotary phones, for goodness' sake!  When it comes to food, my first instinct is not to turn to the Internet yet; it is still to begin poring through pages of real, hold-it-in-your-hand paper.

The Internet came through for me, however.  I found this recipe at allrecipes.com, and it fit the bill.  I changed it slightly for what I was looking for, and I am happy with the results.  I saw strawberries on sale at a nearby supermarket for $.99 per pound and couldn't wait for our own strawberries to make this pie again, so on Monday (Memorial Day) I threw one together.

When I bake a pie with fresh fruit, I always start by mixing the crust.  You can see how I make pie crust by looking at the recent post about apple pie.  I mix the crust first because I don't want the filling mixture to sit too long so that a lot of the juice is pulled out of the fruit before the pie is in the oven.

The first time I made this pie, I used the flour as the filling thickener as the recipe says.  However, it resulted in a cloudy and somewhat runny filling that wasn't quite what I had envisioned.  I had read somewhere that cornstarch has twice the thickening power as flour, and that is what I have used in place of the flour ever since.

I also scanted the sugar and the cinnamon.  I really don't think that the 1 1/4 cups of sugar is too sweet, but as I stated before, one of the para-educators at school is inspiring me to be a little more health conscious.  I scanted the cinnamon just because I like to taste the fruit in a fruit pie rather than the spices.  Altogether then, the changes to the filling recipe are as follows:

Instead of 1/3 cup all-purpose flour, 1 1/4 cups sugar, and 1/2 tsp. cinnamon, I used 1/3 cup cornstarch, 1 cup sugar, and cinnamon to taste.  Oh, and I omitted the butter, too.  I don't have anything against butter, but I haven't been able to tell the difference in the flavor of the filling with or without it, so I figure I don't need the extra fat.  Aren't you proud of me, Mrs. B.?

After that, I assembled the pie as you see me do in other posts and baked it in a hot oven until the crust was nicely browned and I could see that the filling was boiling nicely.  With the fire that we had going on Monday, that took somewhere between forty-five minutes and an hour.

The filling ingredients all together in the famous green Pyrex bowl.


The filling after everything was stirred together.


I like baking this pie in the woodburning cookstove because it feels old-fashioned.  I'm sure that this, along with strawberry-rhubarb pies, was one of the first fruit pies of the summer season for our ancestors who lived in the days before readily available strawberry gelatin changed the Midwestern dinner table forever.  I hope you enjoy it as much as I do! 


Saturday, April 13, 2013

Grandma Ruth's Apple Pie

I've mentioned my great-grandma Ruth in an earlier blog post, saying that even though she has been dead for over twenty-five years, she is still regarded as an excellent cook by those family members who knew her.  Our recipe boxes have several of her signature recipes in them, and I don't recall a Thanksgiving where her version of escalloped corn was not on the menu.

Grandma Marian credits Great-Grandma Ruth (Grandma Marian's mother-in-law) with having taught her to cook.  Grandma Marian always has said that when she was growing up, she was not interested in watching her own mother cook.  Thus, she says that when she got married, her repertoire in the kitchen was pretty limited.  However, upon her marriage, Grandma Marian and Great-Grandma Ruth became next door neighbors, so there were plenty of opportunities for Grandma Marian to study under Grandma Ruth's expert tutelage.

Grandma Ruth's method for making apple pie is our standard go-to recipe for this American favorite.  My sister won the grand champion spot with this recipe at our county fair, and it has been a request of my students at school, too.  There is really very little to it, and as Grandma Marian points out, one of the advantages of baking a double-crusted fruit pie is that once it is assembled and put into the oven, the work is done.  You don't have the tedious, labor intensive work of baking several pans of cookies, and you don't have to frost it as you would with a cake. 

As with any wood cookstove cooking or baking, the first thing that you want to do is to begin heating your oven.  Our stove is being fired constantly right now, so heating the oven for pie baking merely involved shutting the oven door and adding small pieces of fuel to bring the oven up to around 400 degrees or a little more.  You can find more information about managing your wood cookstove oven for pie baking in my first pie baking post here.

Next comes mixing the pie crust.  I've read lots of different recipes for pie crusts, but I must confess that I haven't tried any other recipe than what is below.  Grandma Marian has preached to me for years that a good pie crust is thin and flaky, and she has been quite vocal about what a travesty the thick crusts of bakery and restaurant pies are.  Not too long after Nancy and I were married, we took a pie down to her grandparents' home for a family dinner.  After tasting a piece of the pie, Nancy's grandma asked me what I used for a crust recipe.  I recited the recipe, and Ruth's response was, "And to think, I've been wasting my time with an egg in my pie crust all these years."  I took that to mean that she thought my crust was good.  This is a pretty common recipe, but here is what my family does:

Pie Crust
 
1 1/2 cups all-purpose flour
1/2 cup vegetable shortening
1/2 tsp. salt
4-5 Tblsp. cold water
 
1. Cut the shortening into the flour and salt using a pastry blender.  Grandma Ruth's original instructions to my mother stated that you were to cut the shortening and the flour/salt mixture together until "it is the size of small peas."
 
2. Add the water, and combine to form a ball of dough.  I usually stir it with a soup spoon.  The key is that you don't want to overwork the dough at this point.
 
The flour, salt, and shortening ready to be blended together.
 
What the flour, salt, and shortening mixture looks like when it
is ready for the water to be added.
The water has been added, and the dough is now ready to be divided in half.

At this point, I divide the dough in half and roll out the bottom crust and put it in the pie tin.  Then I roll out the top crust, putting some kind of design in the center of it to serve as a vent to let the steam from the filling escape.
 
It is only fair to tell you that I pretty much guess on the measurements for all of the ingredients in the pie crust, but the recipe seems pretty forgiving.  The measurements for the pie filling are even more vague.  Grandma, Mom, and I all have a set of the multi-colored Pyrex bowls that were popular in the late 1940s.  Grandma and Grandpa were married in 1947, and Grandma received two sets as wedding gifts.  She kept them both and uses them to this day.  I remember that when I was first learning to bake apple pie, she and I were discussing how many apples to use for filling.  I'll never forget what she said:
 
"I don't know how many apples I use.  It has always depended on what size the apples are and what kind of shape they are in.  I just know what looks right in my green bowl from that Pyrex set." 
 
As an inexperienced cook, that was not the helpful advice that I was looking for at the time, but now I know exactly what she means.  Now I always use the green bowl for any kind of fruit pie filling that is not cooked before it is put into the pie shell, because I too know "what looks right."  For the 9" pie
in the pictures below, I used four large Granny Smith apples which were uniform store-bought apples.  If you enlarge the pictures, you can see that I like to slice the apples pretty thinly.  This is because all of my female pie-baking ancestors preached about the cardinal sin of baking an apple pie in which the apples are not fully cooked.

A side note about apples: Often, we make apple pie out of our own homegrown apples.  Since we do not spray, the quality and size can vary widely and can also be dependent on how long they have been in storage.  As I noted above, I used Granny Smith apples for the pie in the pictures.  When my sister won grand champion apple pie at our county fair, however, she used Yellow Transparent apples from the tree in our orchard.  A Yellow Transparent is a sour green apple which ripens in early July here in southwestern Iowa (the name comes from the fact that when it is overly ripe, the skin becomes yellow and transparent).  It is certainly our family's preference for this pie, but they are difficult to come by.  My other favorite apple to cook with is the Jonathan.  Basically, you want to use an apple that is in the tart to sour range which has a firm flesh--in other words, the very opposite of the common Red Delicious apple.

 
The peeled, cored, and sliced apples.
To the peeled, sliced apples, add anywhere from one to two cups sugar depending on how sour the apples are.  I added only one cup of sugar to the apples in the picture because one of the para-educators at school has been inspiring me to experiment with cutting back on the amount of sugar in dessert recipes.  Unfortunately, that ended up being a little severe for these apples, and the filling was pretty tart.  Another quarter of a cup of sugar would have been better.  Had I used Jonathan apples, I probably could have gotten away with the single cup of sugar.  If I had been using Yellow Transparent apples, I would have put two cups of sugar in and not thought twice about it.

To thicken the filling, Grandma Ruth always added two- three tablespoons of flour.  That is all I've ever added, and as long as I have baked the pie for a sufficient time to get the filling to bubble, it is sufficient.  (Incidentally, I've never messed around with tapioca as a fruit pie thickening.  I love tapioca pudding, but I think that it adds a character all its own to pie filling and detracts from the fruit.)

Now, I know that many people like to add various spices to their pie filling, but Grandma Ruth and Grandma Marian were always adamant that the fruit should be what you taste in a pie, not the spices.  For that reason, we only add a sprinkling of cinnamon to apple pie filling--nothing else!


The sugar, flour, and cinnamon atop the apples, ready to be
stirred together.
At this point, as long as your crust is ready (or close to ready), you may stir the apples, sugar, flour,
and cinnamon together so that the apples are evenly coated.  The reason that I say that your crust must be ready before stirring the filling is that the sugar will immediately begin to draw the juice out of the apples, and if they are allowed to sit for any length of time, they can become quite soupy and result in a bottom crust that is of poor quality.


The apples, sugar, flour, and cinnamon once they are stirred together.
Put the apples in the bottom crust (which is already in the pie tin).  Then, put the top crust on, centering whatever you are using for a vent in the top crust.  Then, gather the edges of extra crust, pinch together to seal edges, and do whatever you want to flute them.  I just pinch them between my thumb and first finger.  Trim any excess crust away from the edge of the pan.  Sprinkle the top of the pie with a little sugar.

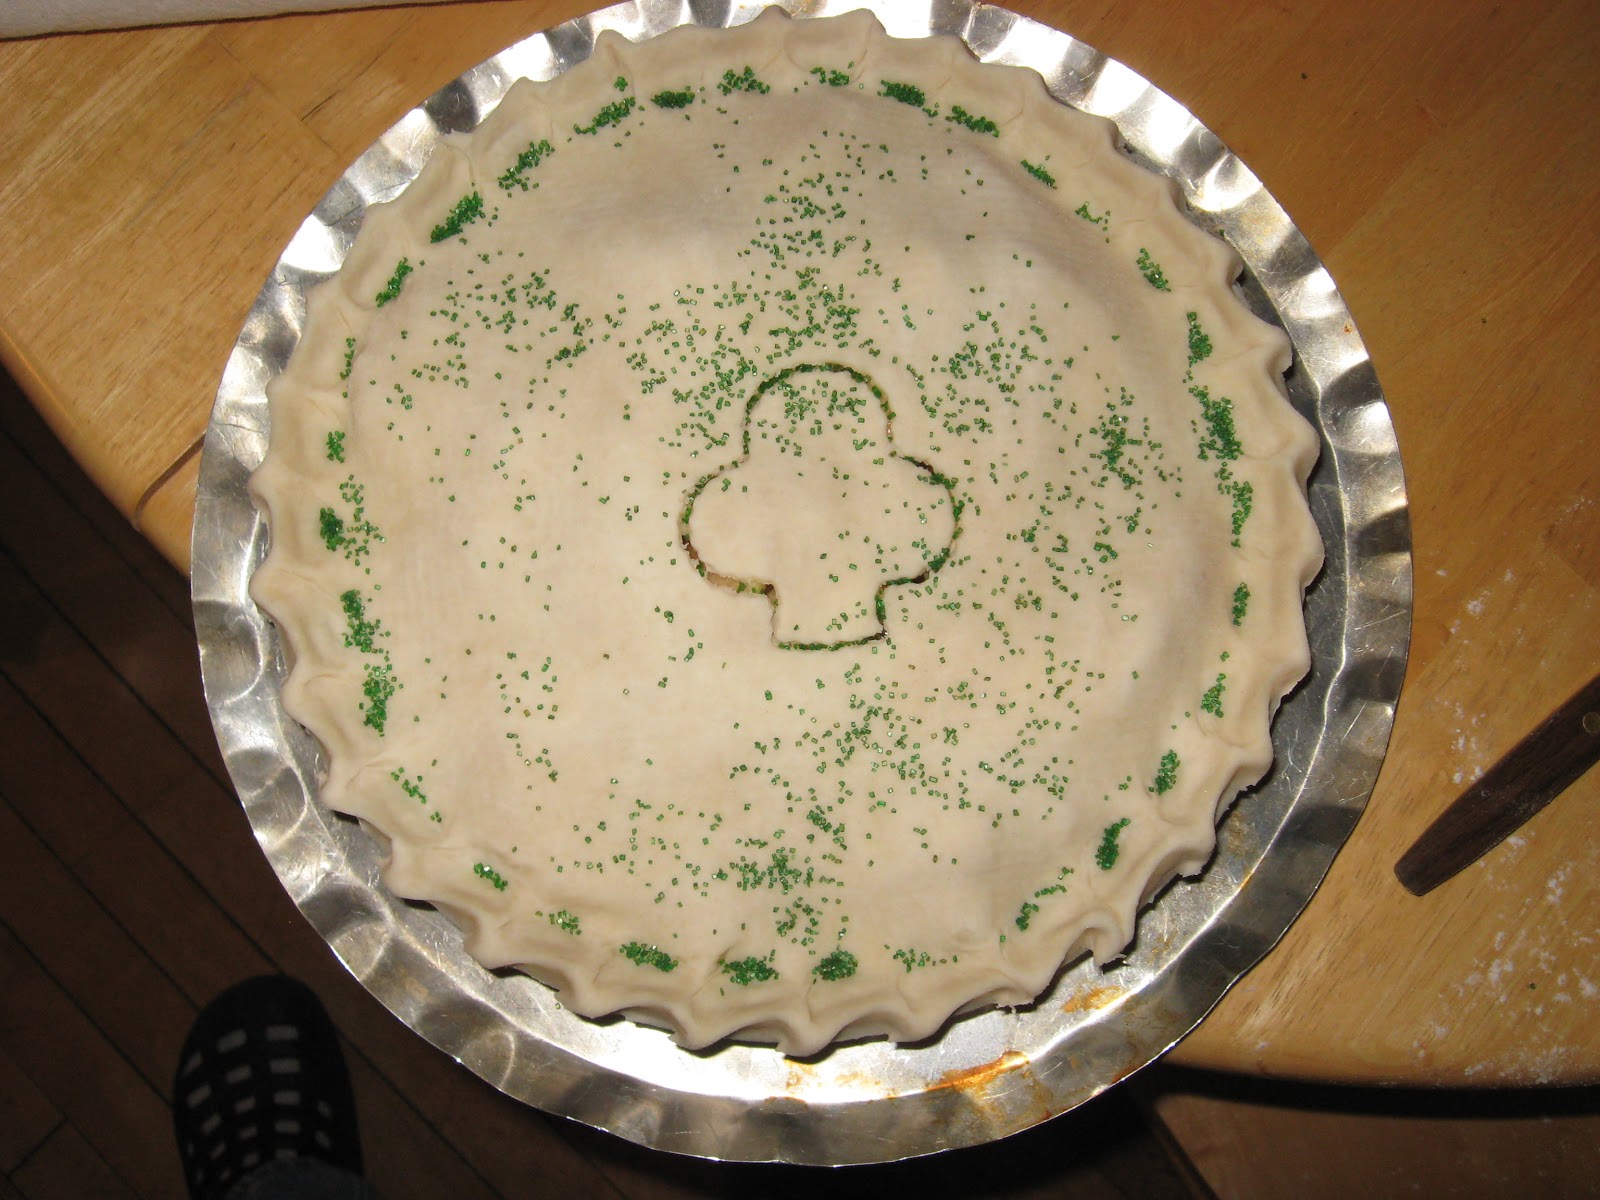
The assembled apple pie.  This pie was taken to a church potluck
which happened to be on St. Patrick's Day this year (hence the clover-
shaped vent and green sanding sugar).  Hmm.  You'd think I'd have
the sense to not photograph my own foot, wouldn't you?
I like to bake fruit pies on a drip guard as you see here.  Cleaning the oven of a wood cookstove is probably easier than cleaning the oven of a modern stove, but cleaning the bottom of any oven is really not fun.  Furthermore, since our stove has been fired almost constantly since sometime last fall, there has been virtually no time when the oven has been cool enough to clean it any more than quickly wiping the dust off the bottom.

As with any double crusted fruit pie, this pie should be put into a hot oven for the first ten-fifteen minutes of the baking time.  The oven heat can then be permitted to cool to moderate heat until sufficient time has passed to cook the filling (about forty-five minutes).  As I've written before,
another method which I have used successfully is to bake the pie for around an hour between 375 and 400 degrees.  I'm sure many cooks wouldn't agree, but it seems to me that very little about cooking is an exact science.  What you absolutely have to be sure of is that the filling is boiling and looks as though it has thickened before you take it out of the oven.  I like to see a nicely browned crust, also.


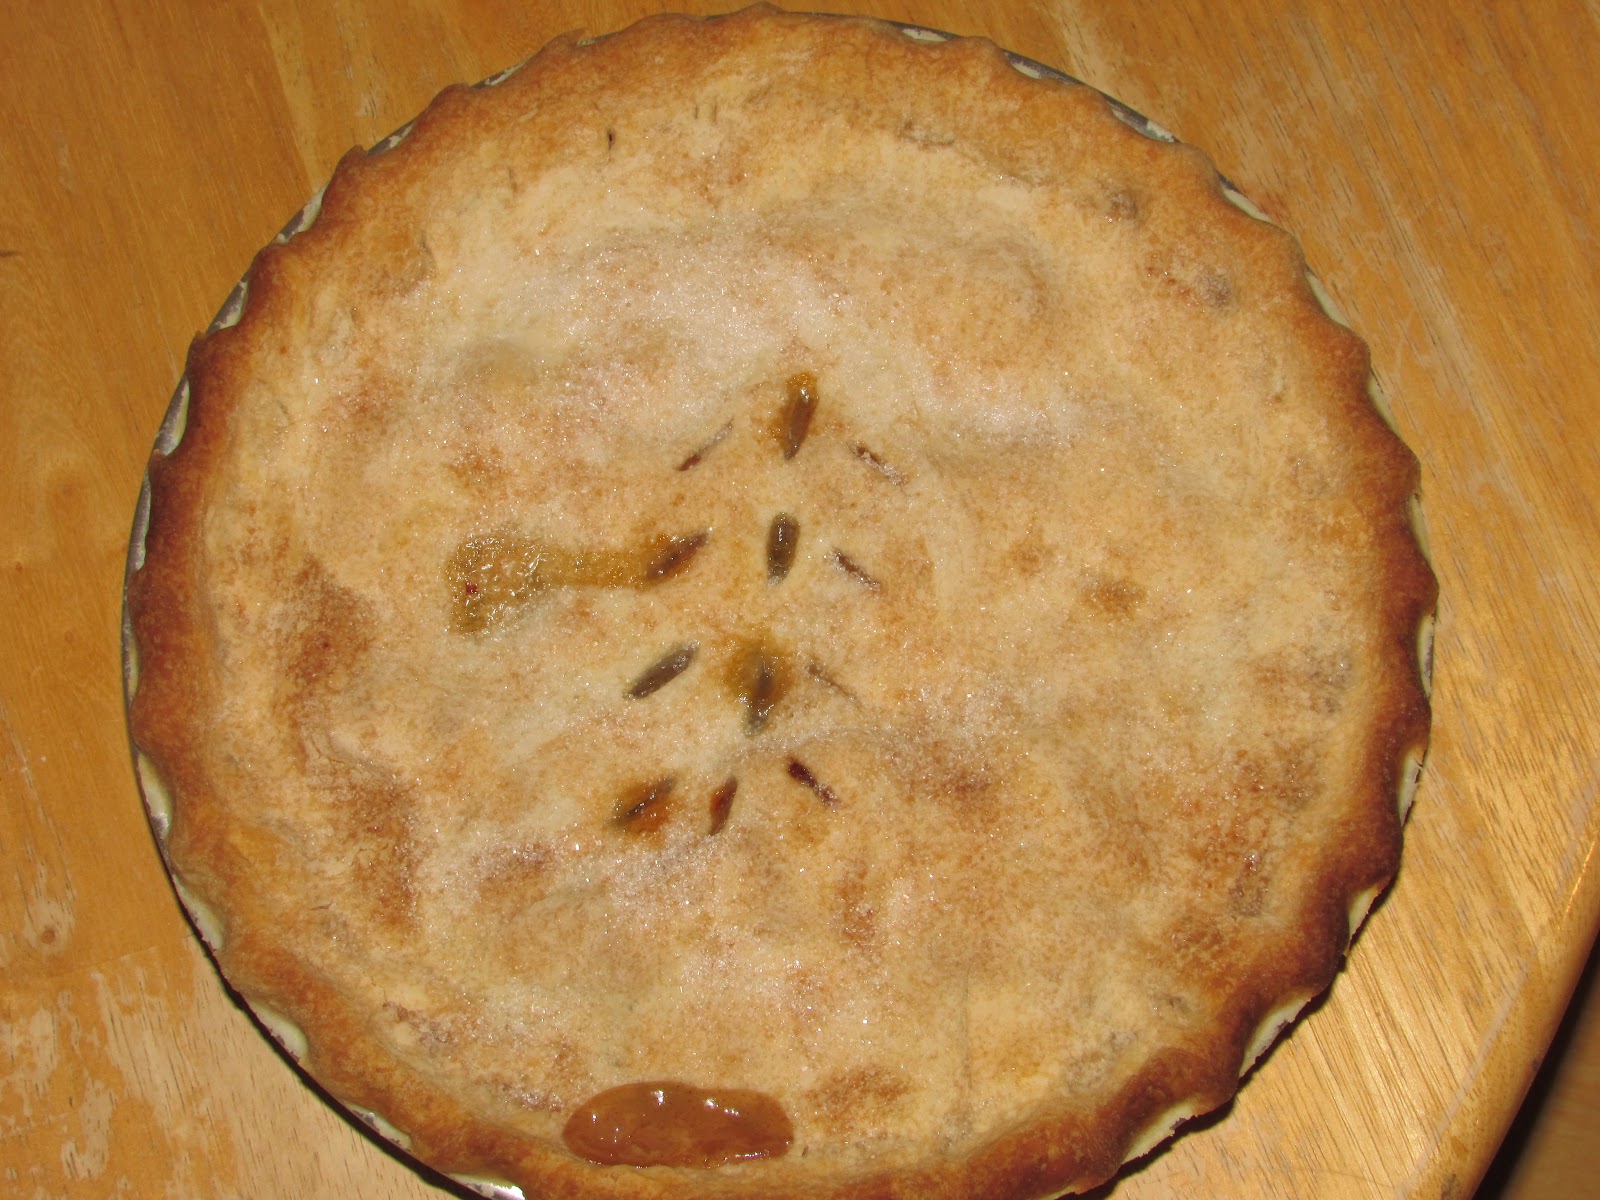
The finished apple pie.  I did rotate it about a quarter of a turn
during baking.  You can see that the left side of the pie is a little
darker than the right since the firebox side of our cookstove is
on the left.

As always, feel free to add your thoughts and questions in the comments fields below.  I like to hear from readers!