Sunday, November 24, 2019

Globe Cookstove at Jamie's Coffee Mill and Deli in Mount Ayr, Iowa

When we visit Mt. Ayr, Iowa, one of my favorite places to eat is at Jamie's Coffee Mill and Deli, which is located in the old creamery at 118 West Adams Street.  The food is always delicious, the place is extremely busy, and the decor includes a vintage wood cookstove!


I wish the pictures of this stove did it justice and allowed me to better show you how petite this little baby is.  Her art deco lines and handles indicate that she is a late 1920s/early1930s model.


You can see from the picture that the cooktop is the width of two bus tubs (about 36 inches), and then the water reservoir hangs on the right side.  I have no idea what its internal condition is, and I also don't know if they still have the boot for the back where the stovepipe would have been attached.


The oven thermometer tells me that the stove is a Globe.  I've heard of Globe brand cookstoves before, but this is the first of that brand that I have seen in person.  This prompted me to do a little research.

The Globe Stove and Range Company in Kokomo, Indiana, began in 1902 after the company took over Fisher Steel Ranges.  In just ten short years, the company had expanded to offering eighteen different cooking ranges and six different models of baseburners.  During World War One, "the company manufactured mortar shells rather than stoves and almost went bankrupt," but the company was saved by an investment team and new manager Mark Brown (100 Objects, 2018).  The company reached its peak in 1922 with over 400 workers and expanded to produce electric ranges as well.

During the 1930s, Globe Stove and Range Company merged with American Steel Products to become Globe American Corp., and they began to shift from manufacturing solid fuel cookstoves to gas stoves, pioneering a new steel gas range called the Dutch oven.  Does that sound familiar to you vintage stove enthusiasts?  It ought to because just before WWII, during which the company built steel lifeboats, Globe struck an agreement with the Maytag Corporation and began manufacturing the Maytag Dutch Oven Range, many of which are still in use today.

Eventually, the Globe American Corp. was sold to outside interests and permanently closed down in 1957.

Interesting what you can find with a little digging!


Works Cited

“100 Objects: 13. Globe Stove and Range Co.” Kokomo Tribune, 21 Apr. 
        2018, https://www.kokomotribune.com/news/objects-globe-stove-
        and-range-co/article_eeca7c52-44bc-11e8-b65f-9ba127d1f4fc.html.

Hamilton, Barb and Tom. “Remembering Globe American Co.” Kokomo
        Perspective, 7 Oct. 2010, http://kokomoperspective.com/lifestyles/
        columnists/remembering-globe-american-co/article_d10a4ea6-d18
        b-11df-9cf6-001cc4c03286.html.


Friday, November 22, 2019

Cauliflower Parmesan on the Wood Cookstove

I have come up with a new method of cooking cauliflower that Nancy and I both love.  The recipe is light but flavorful, and it is extremely easy.

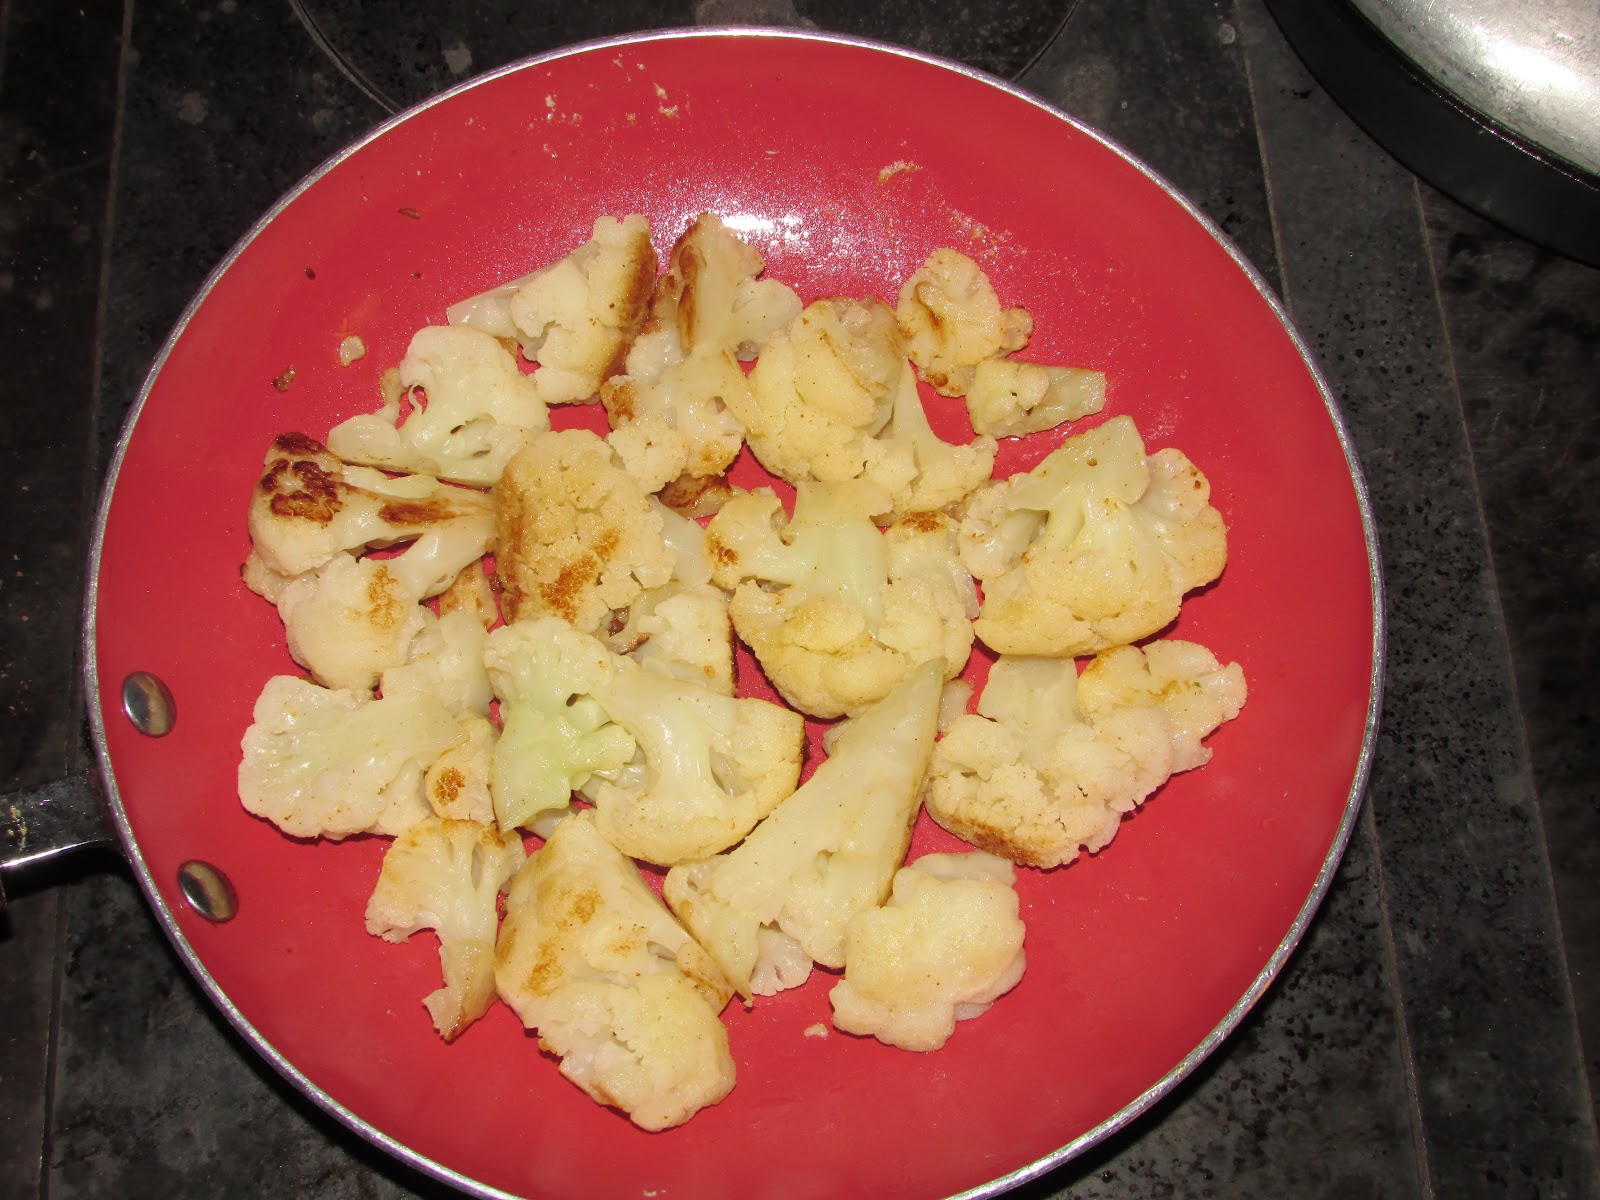
First, you need a good hot cooking fire.  Directly over the firebox of the stove, melt a tablespoon of butter in a non-stick pan.  I used my el-cheapo red ceramic frying pan purchased a few years ago from our now-defunct Kmart store.


Once the butter is melted and hot, put as much frozen cauliflower in the pan as you like.  Add a VERY LIGHT sprinkling of seasoned salt.  I would be surprised if in total I added an 1/8 tsp. of Lawry's.


Cook the cauliflower briskly and turn frequently as the florets begin to brown on the bottom.  Continue this process until each piece of cauliflower has browned on several sides.


Once the cauliflower has browned on several sides, sprinkle grated parmesan cheese over it.  I would say that I added no more than a quarter cup over this particular batch, but you can put as much as you want on. Stir the cheese and cauliflower around until all of the cheese has stuck onto the cauliflower.


You can serve immediately, or I have discovered that this holds very well if transferred to a serving dish and placed in the warming oven until the rest of the meal is ready.


With pork chops (which were cooking in the cast iron frying pan with the aluminum lid on it in the pictures above) and macaroni, cauliflower cooked this way made a delicious but simple supper last night.  This was the third time I've made cauliflower this way, and it has been well-received each time.  

Long-time blog readers will remember that I also posted a recipe for oven-roasted cauliflower about six years ago.  The end product of the two recipes is not dissimilar, but this one is much simpler and faster, and can be made with frozen cauliflower.  I hope you enjoy it!

Friday, October 18, 2019

Fried Cabbage on the Wood Cookstove

Well, we are back into the wood cookstove season here.  We didn't start daily firing until Friday, October 11, which is the latest we've ever begun the wood cookstove season.  It wasn't due to the temperature, either.  It was due to the fact that we've had such a wet autumn that keeping dry fuel around has been quite a challenge.

Now we're in full cookstove swing, though, and each meal we've eaten at home has been cooked exclusively on the Margin Gem.  A couple days ago, I made a vegetable dish that I had never prepared before: fried cabbage.

I had heard of fried cabbage, but it wasn't until last month that I finally got to try some.  You see, we were invited to the fourteenth birthday party for a lovely set of twin girls who belong to my friend Leah and her husband Jason.  The girls chose the majority of the supper menu, which was all very delicious.  Whether the fried cabbage was their choice or their mother's, I don't know, but I was excited to try it.

Now, it is important to note that Leah and I come from very different culinary backgrounds.  My family's food traditions are usually carbohydrate-laden dishes leftover from the days before central heating and highly automated farming.  Leah, on the other hand, grew up with a sister who is a Type 1 diabetic, so she is naturally a much more health-conscious cook than I have ever been.  Thus, while I am usually the one in our relationship who introduces Leah to things like aebleskiver, she would be the one to introduce me to a new vegetable dish.

Unfortunately, I wasn't in the kitchen at the birthday party to see what magic Leah worked to create her version of fried cabbage, but I really liked the result and decided that I would strike out on my own sometime in the near future.

Well, the future arrived this week.  Here is what I did:

1) In a non-stick ceramic skillet, I fried a little bacon.  I had cut the strips in half and wanted to use up what was left of a pound that had been open for a while, so I don't remember how much bacon I actually had.  Three strips would have been more than sufficient for a whole head of cabbage, though.

2) Once the bacon was cooked to near crispy, remove it from the skillet and put it in the warming oven to drain on a paper towel-covered plate.

3) While the bacon was frying, I sliced a head of cabbage.  It was a large cabbage, and there are only the two of us, so I only used about half of it.  I cut it into slices that were a little less than a half-inch wide.

4) The next step is to pour the bacon grease out of the pan, reserving a tablespoon or less.  If you want to skip the bacon, I would recommend using a tablespoon of butter to help facilitate the browning of the cabbage. You don't need much fat at all.

5) I returned the skillet to the fire and laid the cabbage slices down in the dab of bacon grease.  I think this part should be done over a pretty hot fire because the taste and texture will be better if this part is done in a hurry. Stir and turn the cabbage frequently to encourage uniform browning.

6) While the cabbage was beginning to fry, I seasoned it with just a light dusting of seasoned salt and a whisper of pepper.  Because things seemed to be pretty dry, I also added perhaps a tablespoon of hot water from the teakettle.  Let the cabbage cook until it shrinks down in the pan before going on to the next steps.

7) I removed the bacon from the warming oven and crumbled it into the cabbage, and then I added a half handful of dried cranberries and a half handful of raisins.  (I know, I know.  That was basically the same as adding sugar, but old habits are hard to break.)  I think I will cut back on the amount of dried fruit next time.  It was a little much.

8) Cook all together until it reaches the desired brownness or limpness you want and serve immediately.  It is delicious!


Once again, I forgot to take pictures of the process.  This is actually
a photo of the leftovers being re-warmed on the Margin Gem a
few days later.  Even the leftovers were fantastic!


Thursday, September 19, 2019

Answer to Request for a Diagram of the Cookstove Hot Water System

Yesterday, I received a request for a diagram of our hot water system from a reader who is installing a similar system.  I apologize for my extremely poor artistic ability, but here it is.  I put together two views since the plumbing is divided up that way.  Below the diagrams, you will see a key to the red letters in case the words on the diagrams are too difficult to read. The scan is long, though, so you'll have to scroll down through quite a bit of white space in order to see the key.


A. Temperature Pressure Relief (TPR) Valves
B. Hot Water Line which exits the top of the waterfront on the cookstove, carrying hot water into the top portion of the boiler.
C. Check Valve which allows cool water from the bottom of the boiler to only flow toward the stove, not vice versa.
D. Cool Water Line through which cool water from the bottom of the boiler flows into the bottom of the waterfront on the cookstove.
E. (left side diagram) All TPR valves are connected to a common drain pipe which empties toward the floor drain in the basement.

E. (right side diagram, sorry!) Hot Water Pipe exiting the top of the boiler.
F. Tempering Valve-Hot water from the top pipe enters this valve and is mixed with cold water from the supply line in order to have control over the temperature of the water in the household system.
G. Cold water enters the boiler at the mid point opening.
H. Hot Water Line to household system.
I. Cold Water Supply Line

Here are some actual pictures of the system:


I hope this answer's the reader's question.  If not, let me know in the comments what more I could help with.  The system certainly works well!

Thursday, September 12, 2019

Some Vintage Instructions for Roasting Beef in a Wood Cookstove

I'm beginning to feel the itch to cook on the wood cookstove.  I had hoped that I would get the Riverside Bakewell, the Hayes-Custer, or even my brother's Montgomery Ward hooked up in the summer kitchen over the last few months, but this whole being a new author thing has taken up far more time than I imagined (very excited about it, though).

It is too warm and humid to fire up the Margin Gem, and the forecast for the next few days looks like that trend is going to continue.  However, on my way to school the last couple of days, I've been watching fields of corn and soybeans that are beginning to turn, so my mind is looking ahead to the days when a fire will be burning in the kitchen stove once again.

As I was thinking about this, I ran across a recipe from 1872 that I copied from the Anita, Iowa, centennial cookbook late last school year.  Really, I wouldn't call it a recipe so much as it is directions for how to cook a roast in a wood cookstove, and even at that, the directions are pretty sparse.  What I do think it shows well is how efficient cooks thought of ways to stretch the meat and how one might have handled the lack of refrigeration in the early 1870s.  I've been told before that beef was the early cook's friend because of its relative shelf stability compared to other meats.

These directions were shared by Mrs. William A. Suplee.

To roast in a cooking stove, the fire must have careful attention lest the meat should burn.  Lay it, well floured and seasoned, into a dripping pan, with rather more than enough water to cover the bottom.  Turn the pan around often, that all parts may be equally roasted, and baste frequently.  The oven should be quite hot when the beef is first put in that the outside may cook quickly and thus retain the juices.  A large roast of 8 or 10 pounds is much better and more economical than a small one, even in a small family.  The first day it can be served rare; that which is near the outside will be well enough done for anyone.  It can be re-roasted the next day.  If much remains, serve cold on the next, or cut in very thin slices, dip each one in flour, then chop 2 onions fine.  Place a layer of meat in a baking dish and sprinkle with salt, pepper and onion.  Above this, place a layer of sliced or canned tomatoes.  Alternate layers until the dish is nearly full, moistening with the gravy.  Place a layer of tomatoes upon the top.  Fill with boiling water, cover with a plate, and bake 2 hours.

I don't think I'll be trying to stretch one roast over three days like this because Nancy isn't fond of leftovers, and the method of serving it the third day doesn't appeal to me because I'm not that fond of tomatoes cooked like that.  Thus, I'll stick to my method of roasting beef in the cookstove, which you can find at this link, but it is fun to read vintage pieces of kitchen advice.

Tuesday, August 6, 2019

Big News! But It Doesn't Have Much to Do with Cookstoves

I have hinted to some of you that I haven't been posting on this blog as regularly as I liked because I was spending all of my writing time working on a different extensive writing project that I would share with you all later. Well, it is later!

I have written and published a novel, and it is now available for sale. Published through WestBow Press, it will be available in bookstores soon, but it is already available online in hardcover, paperback, and e-book formats.  Copies can be purchased at the following links:

https://www.westbowpress.com/Bookstore/BookDetail.aspx?BookId=SKU-001235728

https://www.amazon.com/dp/1973670461/ref=tmm_pap_swatch_0?_encoding=UTF8&qid=1565101746&sr=8-1

Here is the back text:

On the run after committing a crime and deserting the Civilian Conservation Corp in 1935, Harlan Jensen has been riding the rails and living in fear that someone will recognize him. Hunger causes him to jump off a train at the Meyer farm in rural West Pottawattamie County, Iowa, where he plans to work just long enough to earn a square meal and then be on his way. Elsie Meyer, the farmwife who feeds him, knows more about God's plan for his life than he does, though. Harlan is the answer to her prayers. Just before harvest, her husband suffered a stroke which left him paralyzed and mute, so the Meyers had asked God to send a farmhand. Harlan is surprised to discover a family's love, an unexpected romance, and the grace of Jesus. But everything in his life changes as he learns the truth of Proverbs 28:13: "He that covereth his sins shall not prosper."

The cover looks like this:


As it is set on an Iowa farm in 1935, I do mention the woodburning cookstove a couple of times because I couldn't resist, of course.  However, it is certainly not the main focus of the novel.

We will be having the formal book launch on Monday evening, Sept. 9, at the Underwood Monday Market, which runs from 6:00 - 7:30 p.m. south of UMBA Hall in Underwood, Iowa.  Copies will be available for purchase there, but if you can't wait that long to get yours, just bring your copy to the market and I will be glad to sign it then if you wish.

I apologize to any of my readers who may be offended that I used this post as a shameless plug rather than writing about wood cookstoves, but I promise that more on-topic posts are coming!

Sunday, July 14, 2019

Roast Lamb Grandma Marian Style

When I was little, my grandparents on my mom's side raised sheep.  Cattle were always their main focus, but they still had sheep around from when my aunt Cheri raised them during her 4-H career.  We even got in on it one spring when they had a bottle lamb that my grandparents thought we kids would enjoy taking care of.  "Linda the Lamb" came to live with us in a big cardboard box in the basement garage of the little house, and eventually she moved to a pen to the west of the driveway where a second garage now sits.

I raised sheep when I was in 4-H, too, and in fact, I didn't get rid of them until shortly after Nancy and I were married.  Thus, at various points in my life, lamb has been a common item on the menu.  

Grandma Marian was a fantastic cook in her day, as I've mentioned several times on this blog, and when she served lamb, no one ever turned their nose up at it.  It was always delicious!  Of course, she wasn't using a wood cookstove by the time I came along, but that would have only improved the flavor.

Here is what she did:

1. Place the lamb roast in an enamel roaster that has a lid.  If you want, you can brown the roast in a little bit of butter over a brisk fire to begin with. Sometimes Grandma did this, and other times she did not.  When I cooked the roast in the pictures for this post, I did not brown it before putting it in the oven.

2. Season the roast with salt and pepper, being a little less generous with the salt and more generous with the pepper.

3. (This was one of her secrets.)  Sprinkle the roast with marjoram leaves. Whenever she cooked any kind of lamb, she insisted it ALWAYS be seasoned with marjoram.

4. On top of the marjoram, place several bay leaves.  She would always put bay leaves on a beef roast, too.

5. Then, she would drape the lamb roast in slices of bacon.  The bacon is the reason that one can get away with using less salt in step two above.  I operate under the premise that "Bacon and butter make everything better," and it certainly holds true in this case.  As my own addition, I sprinkle a little pepper over it all once more because I am very fond of peppered bacon.


6. Put the lid on the roaster and put it in a moderately slow oven (about 325ºF) until it reaches the doneness you desire.  I prefer lamb roast to be well done.  In the picture below, I baked potatoes in the same oven for the same amount of time, and everything was cooked in a little over an hour and a half.


The roast and potatoes were accompanied with the broccoli that you see over the firebox at the left in the photo below.  The roast was very good, but the bacon was awesome!