Saturday, October 3, 2020

Crawford Ranges from the Walker & Pratt Company

I am fascinated by the fact that American wood and coal cookstove construction varied so much by geographical region.  As I scroll through the various antique ranges that are for sale on eBay (something I spend too much time doing), I can pretty much tell at a glance whether the stove was made in the Northeast, the South, or the Midwest.

One of the giveaway traits of cookstoves made in the Northeast is that they continued to make 100% cast iron stoves long after the strategic incorporation of steel infiltrated stove construction in other parts of the country.  I've been told that all-cast iron ranges last longer and are easier to repair than their partly steel contemporaries, and my personal observation is that they seem to have greater longevity as well.

The Walker & Pratt Manufacturing Company of Boston, Massachusetts, is one of those northeastern companies whose ranges are still commonly found today.  Try as I might, I am unable to find definite dates for when the Walker & Pratt Company began and ended their manufacture of stoves.  One thing that everyone who talks about them likes to mention, though, is that the company manufactured cannon balls and other ammunition during the Civil War.  Once again, no date is present anywhere in this circular, but judging from the women's fashion depicted, the print fonts used, and the styles of ranges advertised, my best guess is that it was printed circa 1910.  

I actually had the opportunity to see two Crawford Ranges in person at Living History Farms in Urbandale, Iowa.  You can read about them in this post.  The stoves shown in the circular below are considerably younger than those at Living History Farms, however.


Gabriel and Sarah Chrisman of Port Townsend, Washington, have a restored Crawford Range in use in their Victorian home.  You can read about the stove and watch a video of Sarah baking cookies in it at this link.

Someday, I hope to get the opportunity to cook on one of these fine ranges.  Until then, if any of my readers are Crawford Range owners and operators, by all means please fill up the comments with your thoughts about these beauties!  Any additional information about the Walker & Pratt Manufacturing Company would also be greatly appreciated.

Wednesday, September 23, 2020

Vintage Recipe: Never Fail Sour Cream Cake

One of the things I've been doing during the Covid-19 stay-at-home time is trying recipes from my entirely-too-large collection of cookbooks and recipe boxes.  In our daily meals, I've tried not to duplicate dishes very often.  At one point, Nancy actually asked, "Couldn't we just have tried-and-true foods during this time?"  We've had a lot of that too, but I'm having a great time experimenting.  Several times, I've found recipes that are excellent, but there have been some not-so-good ones too.

A recipe that I'm really pleased with comes from my 1926 West Pottawattamie County Farm Bureau Women's Cookbook.  Longtime blog readers will remember me mentioning this cookbook before in this post. I've been making sure that we have always had some kind of home-baked sweet on hand during our extended stay-at-home time.  Neither of us needs the extra calories, but if a nice homemade cookie or piece of cake isn't available, we have a bad habit of eating even worse things in order to satisfy the sweet tooth we both have.

I'm excited to bring you this recipe because it has truly lived up to its name, and it is simple and fast but also quite flexible.  For those readers who are off-grid, it's very easy to mix this cake by hand, and it's made of things that are readily found in most kitchens.  The only thing that some people may not always have on hand is the sour cream.  However, that is a staple in our refrigerator. 

This recipe was contributed to the cookbook by a Mrs. Belle Sharp, and she attached this note: "This is an excellent cake recipe for a busy farmer's wife who wants a hurry-up cake."

Here are the required ingredients:

1 egg
1 cup sugar
1 cup sour cream
1/2 tsp. baking soda
1/4 tsp. salt
flavoring to taste
1 1/2 cups flour

The procedure is as follows:

a) Beat the egg.


b) Beat in the sugar.

I beat the egg and the sugar together until they are what my
great-grandmother called "lemon-colored."  It doesn't take long.

c) Beat in the sour cream.


d) Add the remaining dry ingredients and the flavoring.  Beating for only a little while after the flour has been added.

I used cake flour (a tad more than 1 1/2 cups) instead of all-purpose for this plain yellow cake version, and I added about a 1/2 tsp. vanilla, a 1/2 teaspoon lemon flavoring, and a 1/2 tsp. almond extract.  I know that sounds like an odd combination, but that is what my great-grandma Ruth used to flavor yellow cakes, and, trust me, it is surprisingly delicious.


e) There were no instructions on how large a cake pan to use, but judging from the amount of batter I had, I greased a 9" square baking tin, and it was perfect.


Now, the pictures that you see here are actually of the second time that I baked this cake, and it so happened that this was during the week that my brother's Ward's Economy Cookstove was here in our summer kitchen in early June.  Thus, you see it baking in that stove in the pictures below.


There were no instructions for how long to bake this cake, but cake baking is pretty straightforward stuff.  If you blow up the picture above, you can see that the oven thermometer is registering 350ºF.  A moderate oven until the cake tested done did the job beautifully.


I frosted this one with a white buttercream icing that was flavored with vanilla and almond.

For the Spice Cake Version:

The original directions on this recipe say, "If wanted, add 1/2 cup raisins, 1/2 teaspoon each cinnamon, cloves, and nutmeg."  I confessed above that the pictures you just saw were of the second time I baked this cake.  The first time I baked it, I added the raisins and spices, and then I frosted it with browned butter frosting.  I should confess that I didn't add a whole half teaspoon of cloves; it was more like a quarter teaspoon.  My Grandma Marian taught me to be cautious about cloves because they are so powerful.  The cake was very good, but I took no pictures.

I used all purpose flour in this version of the cake, and the texture was nearly identical to the yellow cake version above that was actually made second.  This cake was baked in the Margin Gem back in May.

To Make a Chocolate Cake:

With two successes under my belt, I thought, "You know, I bet this could be made as a chocolate cake."  I was right!  I reduced the flour to 1 and 1/4 cups (plus a little more since I used cake flour) and added a 1/4 cup unsweetened baking cocoa.  I still put a little vanilla flavoring in, too.  Frosted with a little chocolate frosting, it was superb.
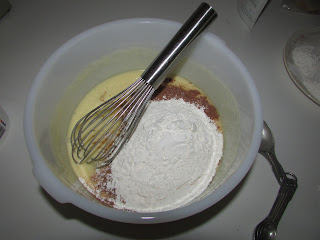
The cocoa and the flour going into the chocolate
version of the cake.

The chocolate version was baked out in the Hayes-Custer
cookstove in the summer kitchen.

The finished chocolate cake.

Now, each of the three cakes listed above were good.  They were all eaten with no problems and no complaints, and we shared them with others, too.  To be completely honest, though, I felt like their texture was just slightly chewy.

As I was preparing to write this post back in June, I was reflecting on the age of the recipe and figured that especially with the note that was attached to it about being a great recipe for "a busy farmwife," this was probably originally made with "country" sour cream.  "Country" sour cream is an old-timey cookbook term which denoted cream which had soured naturally.  It is an entirely different product from "commercial" sour cream, which is the cultured dairy product that is sold in the plastic tubs.  The Kitchen Klatter Cookbook that I have frequently mentioned on this blog is always careful to denote which kind of sour cream is used in its recipes, for example.

During the ten-plus years that I kept a family cow (How I wish my dairy cow had freshened this year!), it seemed like I could never keep up with the churning, and I always had "country" sour cream in the fridge.  Truthfully, I am embarrassed by the amount of sour cream I just plain threw out during those years.  I figured farmwives in the 1920s would have been much more likely to have "country" sour cream and decided to try it.

Well, I had to wait a long time before my pasteurized, store-bought cream soured.  I know I could have hastened the process with some vinegar, but I wanted to hold out for the naturally occurring product.  It was well worth the wait!  Again, I apologize for the lack of pictures--you'll just have to take my word for it--but this cake was perfect in volume and texture.  It was not a bit chewy but was exactly what we all think of when we hear the word "cake."  I attribute this to the higher fat content of "country" sour cream.

What was strange about it, though, was that each time I opened the cellophane that covered it, I got a definite whiff of "country" sour cream.  I could never taste that, though.  I only mention it because I know it may turn some people off.  If that is the case, I would recommend making the spice cake or chocolate versions.  If you have cream that has soured, this cake is a perfect way to keep from wasting it.

You can see that this recipe has truly never failed in the four different times and different ways (and three different cookstoves) I have made it.  It is extremely easy to mix, is made with common ingredients, and comes together quickly.  Try it, and I know you'll want to add it to your recipe box. 

Update 10/3/20:
I've now made this cake two more times and wanted to add that souring heavy whipping cream with a little lemon juice has worked very well, too.  The last two times, I've made the spice cake version, and I really like the combination of 1/2 tsp. cinnamon, 1/2 tsp. nutmeg, and 1/4 tsp. ground cloves.  This is perfect with browned butter frosting.

Monday, August 31, 2020

Round Oak Stove Brochure

Honestly, I don't remember where I got this brochure, and to tell the truth, there is not a lot of information in it, but it is a neat little bit of history.

Mr. Philo D. Beckwith founded the Round Oak Stove Company in 1871 after about four years of building cast iron heating stoves.  Located in Dowagiac, Michigan, the company added cookstoves to its repertoire around 1900, reaching its peak ten years later.

No dates are present anywhere in this brochure, but from the fonts, the illustrations, and the stove styles, my guess is that the brochure dates from about 1910 - 1915.  It is written in the style of an advertising circular with the end of each stove description urging the reader to write the company and request their full catalog.  These little endings are unique examples of creative writing since they are all slightly different ways of saying the same thing.

"May we send you the large, illustrated Range Book?  It's free for the asking."
"May we send you the large, illustrated book?  It's free."
"The subject demands detailed proof.  May we supply it?  Sent free on your request."

Another interesting feature is that the front and back covers are equipped with pictures of animals with a sheet of tracing paper over them, and some aspiring artist in history has tried his hand at tracing them.  The ones in the front of the book are shown in the first scan below.

After a string of heating stove advertisements, the first picture of a range is shown below.  Each advertisement features a bit of heating stove history with an engraving and a blurb at the top.


I think the rectangular motif in the top corners, on the teapot shelves, and on the front of the firebox and reservoir give these stoves a very durable appearance.  They look like they were built to be workhorses, don't they?


The Round Oak Stove Company (also known as the Estate of P. D. Beckwith, Inc.) closed its doors in 1946, but several of their stoves are still in service today. 


Wednesday, August 12, 2020

Vintage Recipe: Prune Soup


This recipe is...well...this recipe is...different.  But I really like it!  Don't let the name fool you; this is a "dessert soup" and a rare gem indeed.

I copied this recipe from the Anita, Iowa, Centennial Cookbook over a year ago and finally got around to trying it last week.  The recipe caught my eye because I love raisins--a point I've mentioned before.  I even like raisins in gravy!  And prunes?  Hmmm.  Prunes are just overgrown, slimy raisins, right?  That's what I tell myself, at least.

I'm game to try anything that I think might be good once, so I made this after our Sunday dinner a couple weekends ago.  I found it in the section of the cookbook dedicated to historic recipes, and it was labeled as a Swedish dish.  The recipe was contributed by Mrs. Nolan Stockham who put the following note with it. 

"Anyone whoever ate a meal in the home of Mr. and Mrs. Frank Osen was probably offered this dish.  Mrs. Osen kept it on hand constantly."

I don't have a drop of Swedish blood in me, but if prune soup and their meatballs are representative examples of traditional Swedish cooking, I'm interested in learning more!

Here is what you'll need:

water
1/3 cup large pearl tapioca
1 lb. prunes
1 lb. seedless raisins
1 1/2 cups sugar
1 Tablespoon vinegar or lemon juice
dash salt
1 tsp. vanilla

First, soak the pearl tapioca in water overnight.  My personal practice when a recipe calls for soaking pearl tapioca overnight is to actually soak it longer than that.  I have a strong dislike of tapioca pearls that are crunchy in the center.  I put the pearls in a quart jar and filled it nearly to the top with water.

The pearl tapioca after it had soaked in water for over 12 hours.

The next day, cover the prunes and raisins with water and cook until soft.  The fire from cooking our noon dinner out on the Hayes-Custer in the summer kitchen had nearly died, so I added a couple of small split pieces of wood and put the kettle of prunes, raisins, and water directly over the firebox.  In this picture, I tried to capture the flames, but I find it very difficult to photograph fire.

Astute observers will note that the front lid over the firebox was not a part of the original photos of the Hayes-Custer in this post.  It is one of those that has three concentric lids all in one and was purchased at the antique store in Corley, Iowa.  It fits both the Qualified Range and the Hayes-Custer, so I'm excited to have it.


After the prunes and raisins have had time to simmer and plump up--which only takes a few minutes-- the next step is to add the soaked tapioca, sugar, vinegar or lemon juice, salt and vanilla.  Because I was cooking this out in the summer kitchen, I combined them all in a bowl in the pantry first.  Also, I used lemon juice rather than vinegar because I don't like the combination of vinegar and raisins.


All of the ingredients now mixed together in the pot on the stove.

Cook, stirring frequently, until tapioca is done.  It will begin to look mostly transparent, and the soup itself will have begun to thicken.  It took about fifteen minutes over a low fire.

The prune soup simmering nicely over a low fire right over the firebox.

Remove from the fire.

The freshly-made prune soup cooling on the counter in the summer kitchen.

Cool and serve with whipped cream.

A sauce dish of the finished prune soup.  It's oh-so-GOOD!

Some notes:

This soup is very sweet.  I did not sweeten the whipped cream, and I was very glad that I had not.  I am going to reduce the sugar next time by at least a fourth cup and see what happens.

My preference would be to make this with two pounds of raisins and omit the prunes altogether.  I'll have to rename it, of course.

To all of my prepper readers, in my opinion, this is a great recipe to have on hand for a disaster.  All of the ingredients are extremely shelf stable, and it didn't take much fuel at all to prepare it.  It would also be easy to cut in half or to double without any adverse effects.  I wouldn't necessarily call it economical, however.

Even though Nancy said "Prunes will not cross my lips," this was a hit with my mom and Phyllis, the lady who helps us with our market baking on Mondays, so I'm not the only one who thinks it's good.


Tuesday, August 11, 2020

How to Can with Antique Zinc Canning Lids


My upfront disclaimer:

I am NOT recommending that anyone can with zinc lids.  The safest way to can foods at home is to use the flat metal dome lids that have the sealing compound attached to the outer rim.  I find that kind of lid to be extremely convenient and reliable, and the "ping" that you hear as they seal is one of the most rewarding sounds that I know.  They are definitely my favorite canning lids to use.

After I started writing my last post about canning with glass lids, I had to do my Covid-altered grocery run, and Nancy and I made a trip to our closest formerly-Amish stores.  I've talked to a few others too, and the current canning lid shortage is confirmed.  In fact, one of our friends told us that her canning lid supplier--a very fascinating Mennonite store named The Dutchman in Cantril, Iowa--called her and told her that they would not be able to get canning lids until September!  My thinking is, with the way 2020 has gone so far, what's to say they will even be able to get them then?

And so, while I'm not advocating canning with anything other than new dome lids, it seems like knowing how to can using other types of canning lids might be a prudent skill to have right now.  Plus, friends, zinc lids seem to be EVERYWHERE.  You frequently see them at antique stores, second-hand stores, and estate sales; and, if you're like us and living in a farmhouse that has been in the same family for generations, there is likely a stack of these in your basement.  If you can't find them in these places, never fear; Ebay has a ton of them too.

You will also need rubber sealing rings.  These don't seem to be as plentiful as the lids, but that's all right because they are still available new.  I see them in Amish stores, and Lehman Hardware currently carries them, too. You can buy them here: https://www.lehmans.com/product/standard-old-style-canning-jar-rubbers/  They also carry wide-mouth ones.  The rubber rings used with zinc lids come in two styles: with a tab and without a tab.  I see the ones with a tab far more often.

The kicker with zinc lids, though, is that you need to have older canning jars.  Whereas nowadays the sealing edge is the top lip of the jar, it used to be down on the shoulder.  The new style canning jars don't have a sufficiently wide shoulder to create a seal.

Two Kerr canning jars.  This is not the best example, but the one on the left is older and has
the wider shoulder.  The jar on the right is newer, and you can see that the shoulder
has been reduced.

Before using zinc lids, inspect them carefully.  Zinc is a pretty malleable metal, so these lids can be a bit susceptible to damage--especially after decades of use.  They should not bulge up in the center, and when you lay them right side up on a flat surface, the bottom edge of the lid should sit flat all the way around.  Also, look on the underside of the lid and make sure that the white piece of milk glass is present.  I don't know how it could fall out, but apparently it happens.


This is an example of a lid that is in good shape.  Notice how the edge sits
on the counter all the way around.

A view showing the milk glass on the inside of a zinc lid.

To prepare zinc lids for canning, both the lids and the rubber rings need to be thoroughly washed and then scalded.  They are to remain in hot water until used.  Some vintage canning books recommend the lids (not the rubber rings) actually be boiled for anywhere between ten and thirty minutes before use, and with this sort of lid, that would be fine, too.

A zinc lid and rubber ring sitting in scalding water on the Margin Gem.  It 
was so cool here a week ago today (Aug. 4) that I fired up the Margin Gem
and did the day's canning in the house.


Once your jars are packed with whatever you are canning, the first step is to stretch a rubber ring over the top of the jar and seat it down on the shoulder.  


Screw the zinc lid down as firmly as you are able; then unscrew the lid a quarter inch.  


Place the jar in the canner and process according to what is required for the food you are canning.

Immediately upon removal from the canner (you shouldn't let jars remain in a pressure canner to cool once the pressure has gone down), tighten the lid down as much as you can.  


Testing to see whether you have a good seal is not all that easy with zinc lids.  This is probably why they fell out of favor.  The top of the lid should have a slightly concave shape.  Once the jar is completely cool, you can also turn the jar upside down or on its side to check for leaks.  If it leaks, you definitely don't have a good seal and need to start the whole canning process over.


I canned a jar of food using zinc lids with my grandma Marian once.  When she had first started canning on her own, these were the lids of choice, so she knew what she was doing.  She reminisced about her own mother using them, saying that Grandma Gladys kept a small hammer in the kitchen and tapped around the edges of the lids once the jars were cool to make sure they had a good seal.  I can't think that this was at all helpful. 

To open the jar when you are ready to eat its contents, you can pull the tab to break the seal and then unscrew the lid, or you can just unscrew the lid.  I would advise listening for that telltale sign of a good, safe vacuum which is the sound of air rushing into the jar when you open it.

Again, I wouldn't advise canning with zinc lids if you don't have to.  But if you have to, it's best to know how to do it properly.

Friday, July 31, 2020

How to Can Using Glass Canning Lids and Top-Seal Rubber Rings

First of all, let me say right up front that I am NOT recommending that anyone can with glass lids.  The safest way to can foods at home is to use the flat metal dome lids that have the sealing compound attached to the outer rim.  I find that kind of lid to be extremely convenient and reliable, and the "ping" that you hear as they seal is one of the most rewarding sounds that I know.  They are definitely my favorite canning lids to use.

However, from what I read online and what I see in stores around here, we are currently in a nationwide shortage of that type of canning lid.  Our experiences so far in 2020 have taught us that supply lines can certainly become unreliable, so I think it is anybody's guess as to when canning lids will be readily available again.  And surely Nancy and I are not the only people in whose basement rest boxes of antique canning supplies which have been passed down from generation to generation simply because no one took the time to throw them out!

Now, part of this blog's purpose is the preservation of the nearly lost skill of cooking on a woodburning cookstove, and let's be honest: its tone is unmistakeable.  I am a huge proponent of using wood cookstoves.

This post is different, though.  This is not a ringing endorsement for the use of glass canning lids; it is merely an educational post so that information about another nearly lost skill is out there and available for others.  I'm afraid it could come in quite handy in the near future.

Enough with the disclaimers and onto the meat of the post:

The data that I'm going to share with you comes from my 1937 Ball Blue Book, my 1946 Kerr Canning Home Canning manual, and my 1953 Ball Blue Book.  While I wouldn't consider the canning time tables and the instructions for oven and open kettle canning pertinent anymore, the information on how to operate the canning hardware itself is still accurate for these vintage lids.

The equipment that you will need is unique to this type of jar closure.  Of course, the first necessity is the actual glass lid itself.  To be clear, there were two types of glass canning lid marketed in the first half of the twentieth century.  One type was for the bail-type jars and had a niche in the top in order to accommodate the upper wire bail which held it in place. These are larger in diameter and have a convex shape.

The lids that I'm talking about here are the same diameter as today's dome lids and fit over the opening of the jar just like they do.  They have a lip on the bottom side which fits down inside the jar.

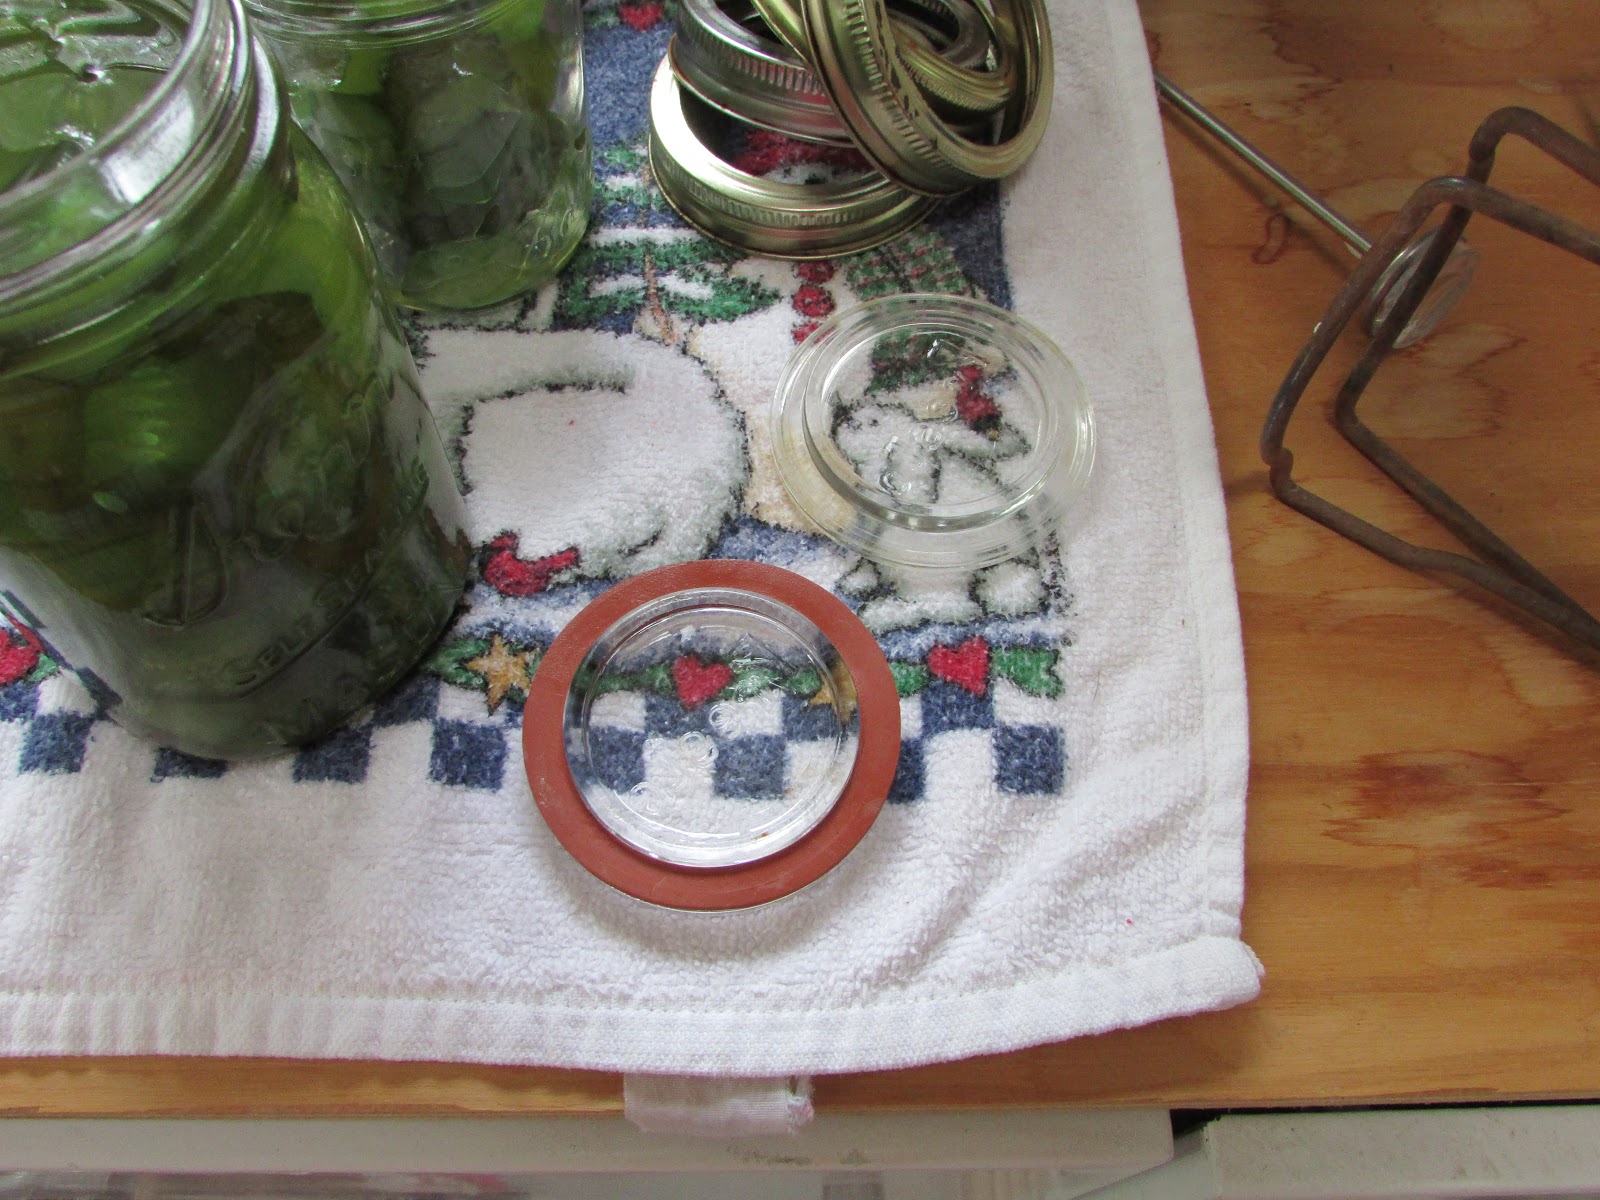
A picture of a Presto brand glass canning lid.
These lids can only be used with metal bands that are specifically made for them.  I have two different styles of bands; one has the hour-glass shaped opening in the top, and the other looks like a standard canning jar ring.


The picture below is of a canning ring for glass lids on the left and a standard ring for dome lids on the right.  You can see that the ring for the glass lids is taller than what is used today.  That is because the glass lid and the rubber ring are much taller than the sealing edge that a dome lid has.


To use glass lids, you also have to have a "top-seal" rubber ring.  These are entirely different than the rubber rings that are used with the old zinc canning lids; they are smaller in diameter and never have a tab.

When you are going to use them for canning, the rings must be softened and hydrated.  This is accomplished by scalding them and leaving them in hot water until you are ready to put them on the jar.  You can also boil them for five minutes.


Once your jars are packed with the food to be canned, fit the rubber ring around the outside of the bottom of the glass lid.  


Place the lid and rubber ring on the top of the jar.


The next step is to screw the ring onto the jar firmly tight.  Then unscrew the ring one quarter inch.


Process the food in whatever method you would ordinarily use for what you are canning.  In these pictures, I was canning Grammer's Sweet Pickles ("Grammer" is our name for my paternal great-grandmother who was the first woman to live in our house).


At the end of the processing time, remove the jar from the canner and set it on a towel.


Immediately tighten the ring that quarter of an inch that you backed it off before processing.


After the jar is completely cooled, you can check whether the jar has sealed by lifting the jar by the glass lid.  If you can lift it by the lid only, the jar is sealed.


To open the jar, insert the tip of a paring knife between the rubber ring and the lip of the jar.

I've read that glass lids are still popular with some home canners for extremely high acid foods like pickles because the food doesn't touch any metal.

Obviously, this kind of canning lid can be reused indefinitely.  Vintage instructions indicate that new rubber rings should be used, but rings were very often used multiple times.  I have used both new (unused old stock) and used rings with equal success so far.  I don't know whether the rubber rings available for use with the new Tattler lids would work for this type of lid, but I suspect not, due to the fact that their width is not the same.

One can usually purchase new old stock rubber rings on Ebay.  Be sure that they are labeled "Top Seal."  Common brands are Top Flite, Ball, Cuppers, and Bulldog.

Again, this is not a recommendation to use this type of lid, but who knows what skills we may need to revive in the future?

Let me know in the comments what you think.  Have you used this type of lid before?  Should I write a post about using the old zinc lids too?

Be safe, everyone!