Sunday, January 30, 2022

Bread Pudding Baked in the Wood Cookstove

I try very hard to control food waste around here.  With a farm dog, a pile of barn cats, and a flock of chickens, there isn't much beyond a few vegetable scraps that doesn't get consumed by someone or something.  However, I think of feeding leftovers to our animals as wasting them, so I am always on the lookout for ways to turn leftovers into something different for their second appearance on our table.  Bread pudding is one of those wonderful comfort foods that I really enjoy, and it is a great way to convert stale bread or rolls into something new.

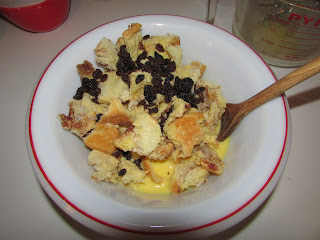
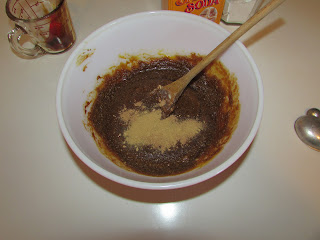
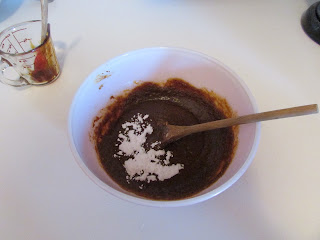
I like bread pudding best when it is made with old cinnamon rolls, and that is what you will see in the pictures below.  The best bread pudding is made with sticky rolls or rolls that had maple frosting on them. About six 3" x 3" cinnamon rolls torn into shreds are shown in the red and white bowl, two of them were sticky rolls.  Set them aside for a minute while you take care of the wet ingredients.


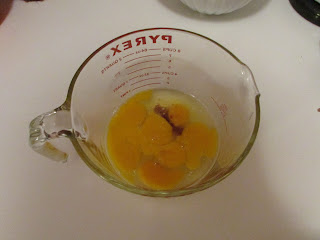
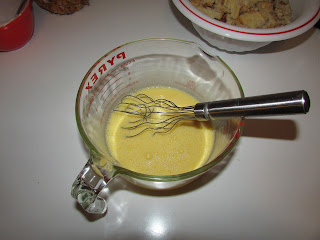
I always use seven eggs and start with about 3/4 cup milk and a splash of vanilla.


Beat the eggs and milk and vanilla together until well combined.


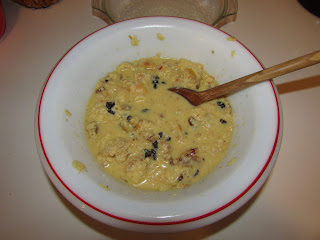
I pour the egg and milk mixture over the dry shredded rolls, add a couple handfuls of raisins and begin gently mixing it all together.


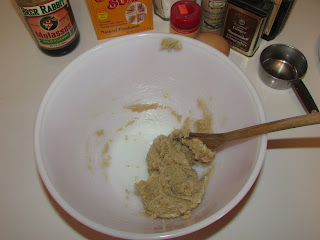
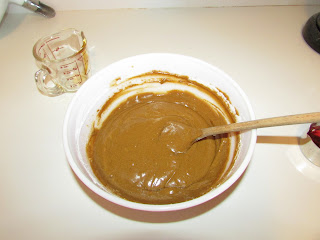
I add milk until the mixture is wet enough to be as soupy as what you see in the picture below.


Next, I transfer all of it to a greased baking dish.


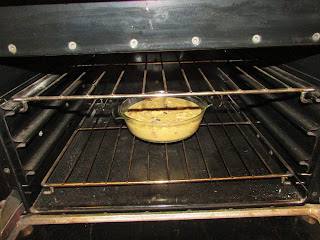
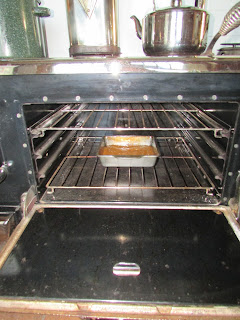
Slide the dish into a moderately slow oven (about 300 to 325 degrees F).  Don't let your fire get too brisk.  My mother-in-law bakes her bread pudding in a bain-marie, and one could certainly do that for this pudding too. 


Bake until the middle of the pudding is set and a table knife inserted near the middle comes out clean.


You will note that except for the topping on the two sticky rolls, there was no sugar added to this pudding.  Therefore, when it was still warm from the oven, I poured a couple tablespoons of leftover frosting on the top, and then just before serving, a little leftover caramel rum sauce which had been using up valuable real estate in the refrigerator for months was drizzled on top.


In my opinion, this is a dessert that is fit for a king, and the main ingredient is something that could have just been thrown to the chickens.  Let me know in the comments how you make your bread pudding!


Sunday, January 9, 2022

Iowa State University's Minnesota Wild Rice Soup

When I was a student at Iowa State University back in the mid-1990s, the school's food service system in the dormitories was outstanding.  The food was truly excellent, and most of it was made onsite at the various dormitory complexes.  In retrospect, the variety available to us was amazing, too.

At that time, any student who ate at the dining hall could request any of the recipes for the foods we were served.  After eating this soup for two years and loving it from the start, I marched myself into the kitchen one day and asked for the recipe.  I'm so glad I did!  I have a niece and nephew who have been part of the dormitory system at ISU within the last two years, and they tell me that this soup is no longer served there.  I find that very sad because this is my favorite soup of all time.

The recipe that the food service people gave me was in huge quantities, of course, but I gave the recipe to my aunt Ellen, who is a fabulous cook, and she reduced it to proportions that are manageable in a home kitchen.  However, as always, I have altered the recipe since then to make it a little simpler and easier to make; however, the flavor is exactly the same as what we ate at ISU.  Here is what you need to do:

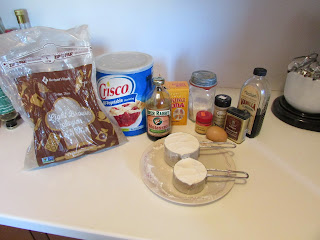
1. Bring four cups of chicken broth to a boil directly over the firebox.  I've used homemade broth, store-bought canned broth, and broth made from bouillon paste or cubes.  In the pictures below, you see four cups of water with four Herb Ox chicken bouillon cubes in them.


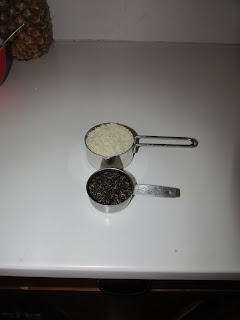
2. To the boiling broth, add 1/2 cup white rice and two or three tablespoons of wild rice.  I used three in this batch, and I prefer that amount.


3. Cover the broth and rice mixture with a tight-fitting lid.  

4. While the rice and broth are boiling over the firebox, chop a scant cup of onion, a stalk of celery, and a carrot into small pieces.


4. Add the onion, celery, and carrot to the rice and broth.  By this time, some of the liquid will have cooked off and been absorbed by the rice, and you need to begin watching the soup kettle carefully.  Keep your teakettle of boiling water handy because I have never made this soup but what I've had to supplement the liquid with water from the teakettle.  You can see in the picture below that I also had to move the kettle away from the fire.  Stir this occasionally, adding water as needed to keep it from sticking to the bottom of the soup kettle.

5. While the rice and vegetables are cooking, melt four tablespoons of butter over a cool part of the cooktop.


6. Sift six tablespoons of all-purpose flour (1/2 cup minus 2 tablespoons).


7. Move the melted butter directly over the firebox, add the flour to it, and cook it into a roux.


8. I didn't get any pictures of this, but once you have cooked the roux, remove it from the heat.  Measure 3 3/4 cups of milk.  Stir enough of this milk into the roux to make it into a white sauce.  When the carrots are soft, add the remaining milk and the white sauce to the rice, broth, and vegetable mixture.  

9. At this point, add two tablespoons of slivered almonds and 1 1/2 cups of cubed ham.  (I just add a whole one-pound package of ham because the few pieces of ham that are left always spoil in the refrigerator before I get them used.)  The ham and the almonds add a surprising amount of flavor, and the almonds add a nice crunch to the soup.


10. Move the soup kettle back over the firebox and return everything to a boil while stirring constantly to prevent it from scorching.

11. At this point, season the soup with a dash of pepper, a couple dashes of celery salt, and a couple dashes of garlic salt.  Be very careful about not over salting as there can be quite a bit of salt in the chicken broth depending on what kind you used, and the ham adds salt, too.


12. Once the completed soup comes to a full boil again, it will have thickened too, and it is ready to serve.

Since our stovetop was cluttered with our teakettle and another pot of water to add humidity to the air in the house, I put the soup kettle up on a trivet to keep it hot while I made some toast to serve with the soup.

You can see the finished soup in the picture below.  It is fantastic!  As you can tell from the description, the person cooking this soup is constantly occupied with the process for a good forty minutes or so, and with the ham, wild rice, and almonds, I wouldn't call this an economical dish, either.  Thus, I don't make it often, but when I do, it is worth every bit of time and money.  


Friday, December 31, 2021

Grandma Ruth's Gingerbread

I am not dead.

I can understand why my faithful readers may have thought so over the few months since there has been radio silence from me on this blog since July.  To sum up the events which have happened since then, we hosted a family reunion in early August (such a privilege to be able to do that), I returned to full-time teaching later that month (nobody's more surprised than I am), both Nancy and I contracted Covid-19 (despite being vaccinated), and I feel like I've been chasing my tail ever since.

As a matter of record keeping, we didn't start daily firing of the wood cook stove until the latter half of October of this year.  We'd had a few fires here and there as temperatures in the house and our cooking needs dictated, but it wasn't until the weather became regularly chilly that we made the commitment to shutting off the electric water heater and having a wood fire every day.  That was a full month and a half later than it was in 2020.

From then until a couple of days ago, Marjorie the Margin Gem was embarrassingly filthy, and she would not have stood to have her picture taken for blogging.  She finally got her long-overdue bath last Tuesday and with the exception of the interior of her oven, she is ready to pose for the camera once more.
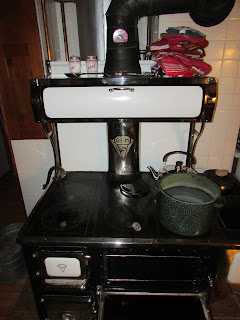
A picture of Marjorie snapped this evening.
She looked even better before Nancy and I
fried bacon on her this morning.

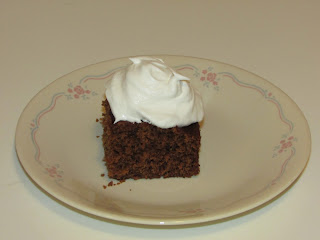
With the extremely busy schedule we've been keeping, I haven't cooked anything very interesting or that hasn't already landed on this blog in some way or another.  We were invited to supper at my best-friend-since-second-grade's house last night, though, and when I asked what we could bring, "Dessert" was the answer.  Thus, I pulled out an ancient recipe that I haven't made for at least eighteen years because Nancy had never had it: Grandma Ruth's Gingerbread.

I think it is interesting how certain members of the family will always be known for the special foods they make.  My dad, for example, will be forever known as the creator of the "Super Duper" a microwaved sandwich whose genesis in the early 1980s went completely unnoticed in the culinary world, but whose presence on our supper plates during that decade was a fairly regular occurrence.  Mom was the family donut maker, and Granny's mashed potatoes were the smoothest and fluffiest (she credited them to her powerful arms which she swore were the result of milking cows for so many years).  Meme was known for her cinnamon rolls, her old-fashioned candies, and the endless flow of cookies that came from her oven.  

My grandma Marian was probably the best all-around cook in my family, but she would always say that her mother-in-law, Grandma Ruth, was who taught her to cook.  Born in 1897, Grandma Ruth was the second of nine children in a prosperous farming family south of Council Bluffs, Iowa.  Her older sister Olive preferred to work outside in the barns or garden, so Grandma Ruth was employed in the kitchen with her mother and a hired girl named Olga.  

With eleven members of the family, Olga, and at least two hired men, preparing all of the food for fourteen every day caused Grandma Ruth to become a good cook in short order.  I consider Grandma Ruth our family's first "foodie."  Once she had her own kitchen, my grandpa remembered her as a person who often tried new recipes.  However, she didn't like making food that she considered sub-par.  Grandpa specifically remembered her making a new recipe for some kind of fruity ice cream that he and his father just loved.  "But she didn't like it, and we never saw it again," Grandpa lamented.  

Grandma Ruth was known for her cakes and pies.  One of the recipes that I associate with Grandma Ruth is gingerbread.  Her gingerbread is of the cake variety, not the cookie type.  In today's world, it seems like desserts run toward chocolate more often than anything with fruits being a close second, but in years past, spices were what cooks relied on to keep things interesting, and brown sugar and molasses were more affordable sweeteners than white sugar.  The age of this recipe is shown by its use of these ingredients along with its half cup of boiling water from the wood cookstove's ever-present teakettle.  In addition to the boiling water, here is what is needed to make this old-fashioned dessert:


1/3 cup brown sugar
1/3 cup shortening
1 egg
1/3 cup molasses (I think mild flavored is best for this.)
3/4 teaspoon nutmeg
3/4 teaspoon cloves (I scant this)
1/4 teaspoon ginger
dash vanilla
3/4 teaspoon baking powder
3/4 teaspoon baking soda
1 1/2 cups sifted flour

Of course, as is so often the case with Grandma Ruth's recipes, the instructions for this recipe are sparse.  They simply say, "If mixing by hand, be sure to alternate flour and water."  I'll be a little more specific than that for all of you.

If baking this in a wood cookstove, build your fire such that you will have a moderate oven (350ºF).  Grease an 8" x 8" square cake pan.

1. Cream the brown sugar and shortening.


2. Add the egg and molasses and beat them in.

3. Add the nutmeg, cloves, ginger, and vanilla.


4. Beat in the baking soda and the baking powder next.


5. Alternately add the sifted flour and the half cup boiling water by starting with a half cup flour, then a quarter cup of the water, another half cup of flour, the rest of the boiling water, and the remaining half cup of flour.  The batter will become fluffy as the boiling water reacts with the leavening agents.


6. Pour the batter into your prepared pan and bake in a moderate oven until it tests done.  Mine took 23 minutes.


7. In my family, gingerbread is always served with sweetened whipped cream on top.

This recipe has what I would call "old world flavor."  The molasses and spices hearken back to a time when people's tastes in desserts were entirely different from what we are used to now, and with each forkful my imagination runs wild with what my great-great grandparents might have been thinking as they enjoyed this same recipe over a century ago.

Tuesday, July 6, 2021

Recreating One of My Favorite School Lunches on the Wood Cookstove

You would never have caught me saying that I loved school lunches when I was growing up.  The food that my mom, grandmothers, and aunts made at home was far superior to anything that was served to us at school.  There were a couple of meals, however, that I did really like.  One was maidrites (or sloppy joes or taverns--whatever you call them) and the other was beans and wieners.  I know, I know.  I suspect that most of the other kids thought what you're thinking because by the time I was in high school, we never had them anymore.

Beans and wieners were always served with a piece of delicious cornbread and a helping of canned pineapple.  This combination never changed, and that was fine with me.  These days, this is a meal that I make on one wood cookstove or another at least once a year using foods that I have canned on a wood cookstove.

In my previous post, I wrote about how to make homemade cornbread in a wood cookstove.  While that is baking, I use the heat of the stovetop to make my beans and wieners.  

In the picture below, you can see a home-canned jar of pork and beans processed on the Margin Gem last year that I wrote about in this post.  The half-pint jar is extra tomato sauce from when we canned Homemade Heinz Ketchup last summer.  You can read about that recipe at this post.  The jar on the right is a pint of home-canned pineapple.  I blogged about that here.  If you've ever had home-canned pineapple, you'll never want to buy a can of it in a grocery store again.  It is SO GOOD!  

Of course, the remaining item in the picture is the package of hot dogs.  I have to admit that, in my opinion anyway, the cheaper the hot dogs, the better the beans and wieners taste.  I don't even want to think about why.


For this batch of beans and wieners, I mixed the jar of beans and the jar of tomato sauce with a little extra brown sugar and a dash of dry mustard and cinnamon and the tiniest sprinkling of ground cloves.  These are the spices that go in the homemade ketchup recipe.  Under ordinary circumstances, I would have just added some homemade ketchup to the jar of beans.  However, the beans in that batch were extremely dry, so I knew I needed more liquid than normal, and the half-pint of tomato sauce fit the bill perfectly.

I sliced maybe four hot dogs into the mixture, stirred it all together, and took it out to the Hayes-Custer cookstove in the summer kitchen.


Since you have to have a pretty hot oven to bake the cornbread, cooking the beans and wieners directly over the firebox is not a good idea because they will almost certainly scorch.  Thus, I had them in the middle of the cooktop.  I stir them frequently until they have come to a boil and the hot dogs are heated through.


By the time the beans and wieners are cooked, the cornbread should be done.


Now at school, of course, this meal was served on putrid-green lunch trays with all the divided compartments to keep the foods from running together.  Those trays were a source of particular frustration to me on Beans and Wieners Day because I discovered early on that the cornbread and the beans and wieners are best eaten together.  I used to labor diligently to make sure that each forkful had a piece of cornbread and a dollop of beans and wieners on it.

Now that I'm grown up and can serve this the way I want, I pour the beans and wieners right on top of the slab of cornbread.  Delicious!  It's definitely my favorite way to eat cornbread since it's a lot less work to make sure that each forkful has some of both.  

The home-canned pineapple sends this meal over the top, and I don't know why I don't make it more often.

Wednesday, June 30, 2021

Baking Cornbread in a Wood Cookstove

When I was growing up, I could take or leave cornbread.  My mom used the same recipe that her mother Grandma Marian used.  Maybe the recipe was even Grandma Gladys's or from further back in our family than that.  I don't know.  While it was just fine, it wasn't my favorite recipe for cornbread.

I remember enjoying the cornbread that was served in school lunch, though, and I mentioned that to Phyllis, a family friend and now one of the ladies who comes in to help with the Monday Market baking here in the summer.  Years ago, Phyllis invited me over for supper on a night when she was serving her family cornbread, and her recipe was just what I was looking for!

Phyllis has graduated to a cornbread recipe that she says is even better than this one, but I'm sticking with this version--which I've changed a little from the original version.  Here is what I do:

In a medium-sized bowl, place 1 cup all-purpose flour, 1 cup cornmeal, 1/3 cup sugar, 4 teaspoons baking powder, and 1/2 tsp. salt.


Whisk all of these dry ingredients together.


Into a glass measuring cup, put 1 and 1/4 cups buttermilk, 1/3 cup salad oil, and 1 egg.


Beat these wet ingredients together until well blended.


Add the wet mixture to the dry ingredient mixture and stir only until well combines.  You don't want to over mix at this step because that will make your cornbread tough.  Pour all into a greased 8" x 8" dark square pan.  


Bake in a moderately hot oven (400ºF) until edges are slightly brown and have begun to pull away from the pan and the center tests done when a toothpick comes out clean.


I find that pulling a pan of cornbread out of the oven of a woodburning cookstove feels somehow--what is the word? "nostalgic" maybe?--since we know that this was a staple on the supper tables of history.  I notice that our local Fareway sells cornbread alongside the other bakery goods, but I haven't dared try it.  For one thing, I know that homemade cornbread does not keep well at all, so I figure there must be all manner of preservatives in what they sell at the grocery store.  Besides, this is not a difficult recipe, and I don't think anything could come close to the flavor of it fresh out of the oven.  

When I was growing up, cornbread was served with white corn syrup or molasses.  This is not my preferred method of serving it, however.  Stay tuned for the next post to see how I like to eat mine!

Sunday, June 20, 2021

Cherry Bars Baked in the Hayes-Custer

In my last post, I said that I would be bringing a series of posts to you about cooking out in the summer kitchen.  I've started those, but this isn't one of them.  

We have five sour cherry trees here on our farm.  Three are courtesy of my grandparents, and the other two are volunteer children of our venerated Montmorency cherry tree.  The Montmorency cherries are my favorite, but they aren't quite ready yet.  Nancy and I did pick from the other two dwarf cherry trees yesterday, though, and as she is not a pie lover, I made cherry bars.  I've seen this recipe in several places, but we first had these in the early 80s after my aunt Rhonda Jo made them.  Now, they are a recipe that I will forever associate with her.

I think Rhonda Jo probably made them with canned cherry pie filling, but since we are starting with fresh fruit, the first thing we had to do is convert the cherries into pie filling.  To do that we use an old Kitchen Klatter recipe that my Great-Grandma Ruth very likely copied down as she was listening to the radio.  

For one batch of cherry pie filling, you need the following:

4 cups of fresh cherries

1 to 1 1/2 cups cherry juice (the juice from the cherries should be sufficient)

1 cup sugar

3 to 4 Tablespoons cornstarch

1/2 teaspoon almond flavoring

This avocado green plastic colander belonged to Granny,
my paternal grandmother, and I've been picking cherries
into it for almost forty years.

Of course, you first have to pit the cherries, saving as much of the juice as you can.  The process of pitting cherries by hand is messy and not an appropriate place for a camera, so there are no pictures of that step.  Sorry.  

Both of my grandmothers, Meme, and my mom were all very thrifty cooks, and very little of the produce that we grew here at home went to waste.  I grew up watching this team of women work for hours over dishpans of wormy apples just to save whatever they could for human consumption.  Hence, Granny always made us save the pits as we processed cherries.  She would then put just the tiniest bit of water on them in a saucepan and bring them to a boil on the stove to get as much of the cherry juice as possible.  I don't know whether this is necessary or not, but this is what she always did, so I continue the tradition.
  
The cherry pits and a splash of water coming to
a boil over a freshly started fire in the Hayes-Custer
in the summer kitchen.

The boiling cherry pits.

Once you have all of the juice drained off the pits, place the four cups of cherries, the juice, one cup of sugar and 3 to 4 Tablespoons of cornstarch in a heavy-bottomed saucepan.  

Start cooking this mixture directly over the firebox, but when it begins to thicken, move it to the middle of the cooktop to continue cooking until the desired thickness is reached.

Hint: This step can be a bit tricky.  Sometimes (often), this has not wanted to thicken for me.  I discovered that if you strain the cherries from the juice and cook just the juice, sugar, and cornstarch directly over the fire, once it reaches a good boil, it will thicken when you add the cherries back into the hot mixture.

It has been extremely dry around here this spring, though, and we had a hard time getting much juice to come out of the cherries at all.  Thus, yesterday, I actually had to add a little boiling water from the teakettle in order to thin the mixture to an appropriate consistency.  You just have to watch and be careful!


Remove the cherry mixture from the stove and stir in a 1/2 tsp. almond flavoring.  Set aside.

For the batter, you will need 1 cup of very soft butter (no substitutes) and 1 3/4 cups of sugar.  

Please pardon my avocado green Sunbeam Mixmaster.
It is uglier than sin.  It belonged to Granny, and when I 
inherited it 26 years ago, I thought I would just use it
until it died.  The thing has to be near to fifty years old now
and shows no sign of dying anytime soon.  How I wish she'd
bought a white one!

Cream the butter and the sugar together until smooth.


Add four eggs to the butter and sugar mixture.


To the above, beat in 1 tsp. vanilla, 1/2 tsp. salt, and 1 1/4 tsp. baking powder.


Stir in 3 cups of sifted all-purpose flour.  Good luck trying to keep from tasting the batter at this point.  It is SO GOOD!

Spread two-thirds of the batter into the bottom of a greased jelly roll pan.


Spread the cherry filling over the bottom layer of batter, and then dollop the remaining batter on the top.


Bake in a moderate oven for about a half hour until it begins to pull away from the edges and is golden brown.

Doesn't the Hayes-Custer do a nice job
of baking?

Notes:

If you want to freeze sour cherries for later use in pie filling, pour the cherry juice from cooking the pits, the four cups of cherries, and the cup of sugar into a freezer container and freeze.  When ready for use, thaw, drain the sweetened juice off, add the starch and cook.  Add the cherries once the juice and starch have come to a boil and thickened.

If you were going to make a cherry pie with the filling, I would recommend adding a dash of cinnamon to it along with the almond flavoring.  JUST a dash, though.

These bars can be made with any type of canned pie filling.  Strawberry is one that I've seen fairly frequently.

Some people drizzle a little vanilla icing over these bars.  Now, I love frosting and put it only lots of things, however, I will admit to thinking that these are sweet enough without it.  You do what you want, though.