Sunday, October 14, 2012

"Pot-au-feu"

I've just finished eating one of the best suppers I've had in a very long time.  The quality of the supper was directly correlated to our use of a woodburning cookstove, so I feel it necessary to blog about it.

Since both of us are gone during the winter days, and since we had never had an airtight cookstove that would hold a fire all day or all night, we've never tried using a stock pot to make pot-au-feu.  Literally translated, "pot-au-feu" means "pot on the fire."  This traditional French dish usually involves cheaper cuts of beef, which need long cooking times to become tender, and vegetables cooked together.  The pot would be left on the fire at all times, vegetable and meat scraps would be added as they became available, the grease skimmed from the top occasionally, and a quick supper of a once-in-a-lifetime soup could be had when desired.

Now that it has gotten colder and the stove is being fired daily, I decided to try my hand at this interesting dish.  About two weeks ago, I had grilled T-bone steaks (the last from our home-grown steer).  The bones from these steaks had a little bit of meat left on them, and they formed the base of our first pot-au-feu.  I put them in the eight quart stock pot and filled it about half full of water.  We had a half of an onion in the refrigerator that was beginning to look a little tired around the edges, so I cut it up and put it into the kettle with the beef bones.

Over the course of the next several days, all manner of leftovers were put into the kettle: pieces of tomato left from chicken veggie wraps, bones from pork steaks, an odd scrap of bacon that escaped repackaging when we were dividing up the pile of it which we purchased on a bulk meat sale, and even the bones left from fried chicken. 

During the first week, we were experiencing chilly weather, so the pot stayed on the stove all of the time.  I had read somewhere that as long as the pot was brought to a brisk boil each day, the broth wouldn't spoil, and so that is what I did.  The weather last week was a bit warmer, so we were not banking the fire to last throughout the day.  I removed the kettle from the stove and refrigerated it.  This gave me the opportunity to skim the small amount of fat which congealed on the top.  I put the pot back on the stove yesterday morning, knowing that the stove would be fired all day for other cooking purposes.  In fact, that is when I put the chicken bones in.  I was a bit nervous about that, by the way.  It seemed rather strange to be putting fried chicken remains into a pot of boiling water, and I had read that you should be careful about putting poultry pieces into pot-au-feu because of the very small bones that can present a hazard.  However, I did it anyway, and you cannot imagine what a delicious aroma issued forth from the stockpot after that!

All of this brings us to this afternoon.  I strained the broth, picked the meat off the bones and returned it and the tomato and onion chunks to the broth.  The broth was horribly bland, so I seasoned it with salt and pepper, garlic salt, dried parsley, a couple of bay leaves, and a handful of dried onion flakes.  I cocked the lid of the kettle so that it could reduce for awhile.  It simmered for a about an hour, and then I emptied a baggie of leftover homemade angel hair pasta into it.

While that cooked, I whipped up some buttermilk biscuits, using a new mixing method that a friend sent to me over a year ago via e-mail.  Instead of cutting the shortening into the flour, you melt the shortening and then beat it into the cold buttermilk or milk.  The result is that the shortening is evenly distributed.  It worked splendidly.

At any rate, by the time the biscuits were done, the soup had reduced to about half of its original volume of liquid, and it was wonderful.  As I see it, the best part of the whole thing was that we had an amazing soup which cost us nothing more than a tiny bit of seasoning, and the making of the soup actually reduced our food waste.  Pot-au-feu is definitely not a dish that one would attempt with a modern stove, but it is ideally suited to the wood cookstove, and I have a hunch that we will be enjoying quite a few of these over the next few months.

Our first bowl of "pot-au-feu."

Saturday, October 6, 2012

Winterizing a Cookstove

I received a comment yesterday asking for my suggestions about what to do to protect an outdoor cookstove during the winter.  Since our weather has gotten colder, I need to get down to our summer kitchen to winterize our Riverside Bakewell.  Though the Riverside is not technically an outdoor stove, it is exposed to freezing temperatures, and snow frequently sifts into the summer kitchen via the air vents near the ceiling and lands across the stovetop.  Therefore, we have a ritual that we perform every fall to protect the cookstove from the elements.

Here is what we do:

1) Drain the reservoir and wipe it dry with a terry cloth towel.

2) Clean the stovetop with a grill brick as you can see us do to the Margin Gem a couple of posts ago in  Cleaning a Woodburning Cookstove.  We then coat the stovetop with vegetable oil.  The only exposed cast iron on the Riverside Bakewell is the cooktop.  The rest of the stove is enameled, so there is no need to protect the other surfaces.

Side Notes: This step may vary depending on the type of stove that one has.  If a stove has surfaces that are not enameled, or if it is likely that a stove needs additional protection, I would put a layer of stove black on all of the surfaces that are not otherwise protected.  After the stove black is worked into the metal and well buffed, I would apply the layer of vegetable oil.  I've used three different kinds of stove black, and my preference is certainly a semi-paste called William's Stove Polish.  If your local hardware store does not carry it, it is widely available online.  If you choose to black your cooktop, be warned: in my experience, stove black has a habit of attaching itself to things that you'd rather it didn't.  If a stove is to reside outdoors, though, skipping the stove black seems risky.

I would not coat any enameled part of a stove with oil.  If you do, you'll want to completely remove the oil from the enamel before firing the stove again, and I imagine that this will not be an easy task.

3. I then start a small fire in the stove with little sticks or corncobs.  This fire is not intended to last long or be very hot.  The intent is just to give the new layer of vegetable oil a chance to seal, and to thoroughly dry the reservoir.  Under ordinary circumstances, a stove should NEVER be fired with an empty water reservoir.

4. Once the fire is out, remove all ashes and soot from the stove.  (Don't forget that a bit of fly ash frequently lands inside the oven, too.)  When wood ash combines with water in any form, potash lye results, and this can be very corrosive to metals.

These steps are sufficient for our Riverside Bakewell.  But all situations are different.  In her book Woodstove Cookery: At Home on the Range, Jane Cooper writes the following:

"If you plan to store the stove in a garage or shed, it will also be necessary to coat the stove's metal with oil, grease or petroleum jelly--anything without salt which retards rust.  Don't, however, think of this as a way to recycle old crankcase oil or motor oil because they will do nasty things to your house when the stove is finally re-fired."

Of course, if the cookstove is going to be fired outdoors, the issue of what will happen to the burning layer of oil may be considered somewhat less of a concern.  Just remember that whatever was applied to the stove is unlikely to burn off entirely except for on the part of the cooktop that is over the center of the firebox.  Furthermore, it would certainly be folly to coat the inside of the oven with anything other than stove black and an edible oil or shortening.  Even that will have to be burned off enough that it will not impart its own flavor to whatever is being cooked in the oven once the stove is put back into regular use.

The bottom line is that moisture is the enemy of the unused cookstove, so any steps which can be taken to keep the stove dry are advisable.

If anyone reading this has something else that they would advise, please make good use of the comments field to help a fellow wood cookstove cook.

Tuesday, October 2, 2012

Answer to a "Grate" Question

New blog follower "Return to Basics" asked a question about the firebox grates in the Qualified Range via a comment on the post about cleaning a cookstove.  Here is the answer.

The grates in our Qualified Range are what are called duplex grates.  This style of grate was very popular on old style ranges, but is not so common on the modern woodburning range.  Duplex grates consist of two, two-sided grate bars which lie horizontally on the bottom of the firebox.  These two grate bars have gears called grate cogs on the front of them so that when the grate shaker is attached to the left one, both rotate about a quarter turn to shake ashes down to the ash drawer.

Truthfully, the grates from the Qualified are what I miss the most about that cookstove.  While I wouldn't trade the new Margin Gem, ash removal is more difficult with its poker grate since I was used to a couple swings of the grate shaker resulting in a completely empty firebox.

The operating instructions that came with the Qualified state the following:

"If you are using wood for fuel, turn the grates so the holes are turned up, using the grate shaker provided with your unit.  If you use coal as a fuel, turn the solid side of the grates up."

The Monarch Range which belonged to my great-great grandmother (which my grandparents still had in their possession until some band of reprobates stole it while I was in college) actually had a little sign on the front that said "wood" when its duplex grates were turned with the holes up and "coal" when the solid side was up.  From what I have seen on the Internet, many models of the Monarch Range made in the 1920's had this feature.

A picture of the firebox in the Qualified Range.
This picture is taken while standing at the front of the
range, so the drafts are on the left, and the oven is
on the right.  Here, the grates are in the position to
burn wood.

Here the grates are turned to the coal-burning position.
A picture of the front door of the firebox, which
is only accessible once the front enameled surface
door is opened. 

Here the grate shaker is attached to the grate bolt.

The Riverside Bakewell down in the summer kitchen is equipped with duplex grates also.  The solid side of them is slightly different than the solid side of the grates in the Qualified because they have small perforations to let some air up to the fire.

While I like the convenience of duplex grates because they make emptying the firebox so efficient, their main purpose was to facilitate the burning of coal.  A coal fire needs to be shaken every so often so that the ash falls away from the burned edges of the coals and oxygen is permitted to get to the inner part of the coal where combustion is then taking place.

An interesting note about the Qualified Range is that the pattern for the range has actually been owned by several different companies over the years.  I have seen pictures of Qualified Ranges that were manufactured in the 1920s or 1930s, and the similarities to the stove that I purchased nearly seventy years later are remarkable.  My Qualified was manufactured in January of 1997.  At that time Qualified Ranges were made by Hitzer Inc. in Berne, Indiana.  By 2000, Hitzer had quit making the Qualified Range.  I was told that Hitzer subcontracted the porcelain enamel work and were having difficulty finding a company who could get the enamel to stick to the steel well enough for their standards, and for this reason they halted production of the Qualified Range. 

I have the list of repair part numbers that came with my Qualified and would be happy to share part numbers if anybody needs them.  The Hitzer company is still in business and perhaps they would either carry repair parts or know where one could find them.  You can find their information at this website: www.hitzer.com.  As always, if anyone has any further questions, I welcome them and will do my best to answer.

Tuesday, September 25, 2012

Cleaning a Woodburning Cookstove

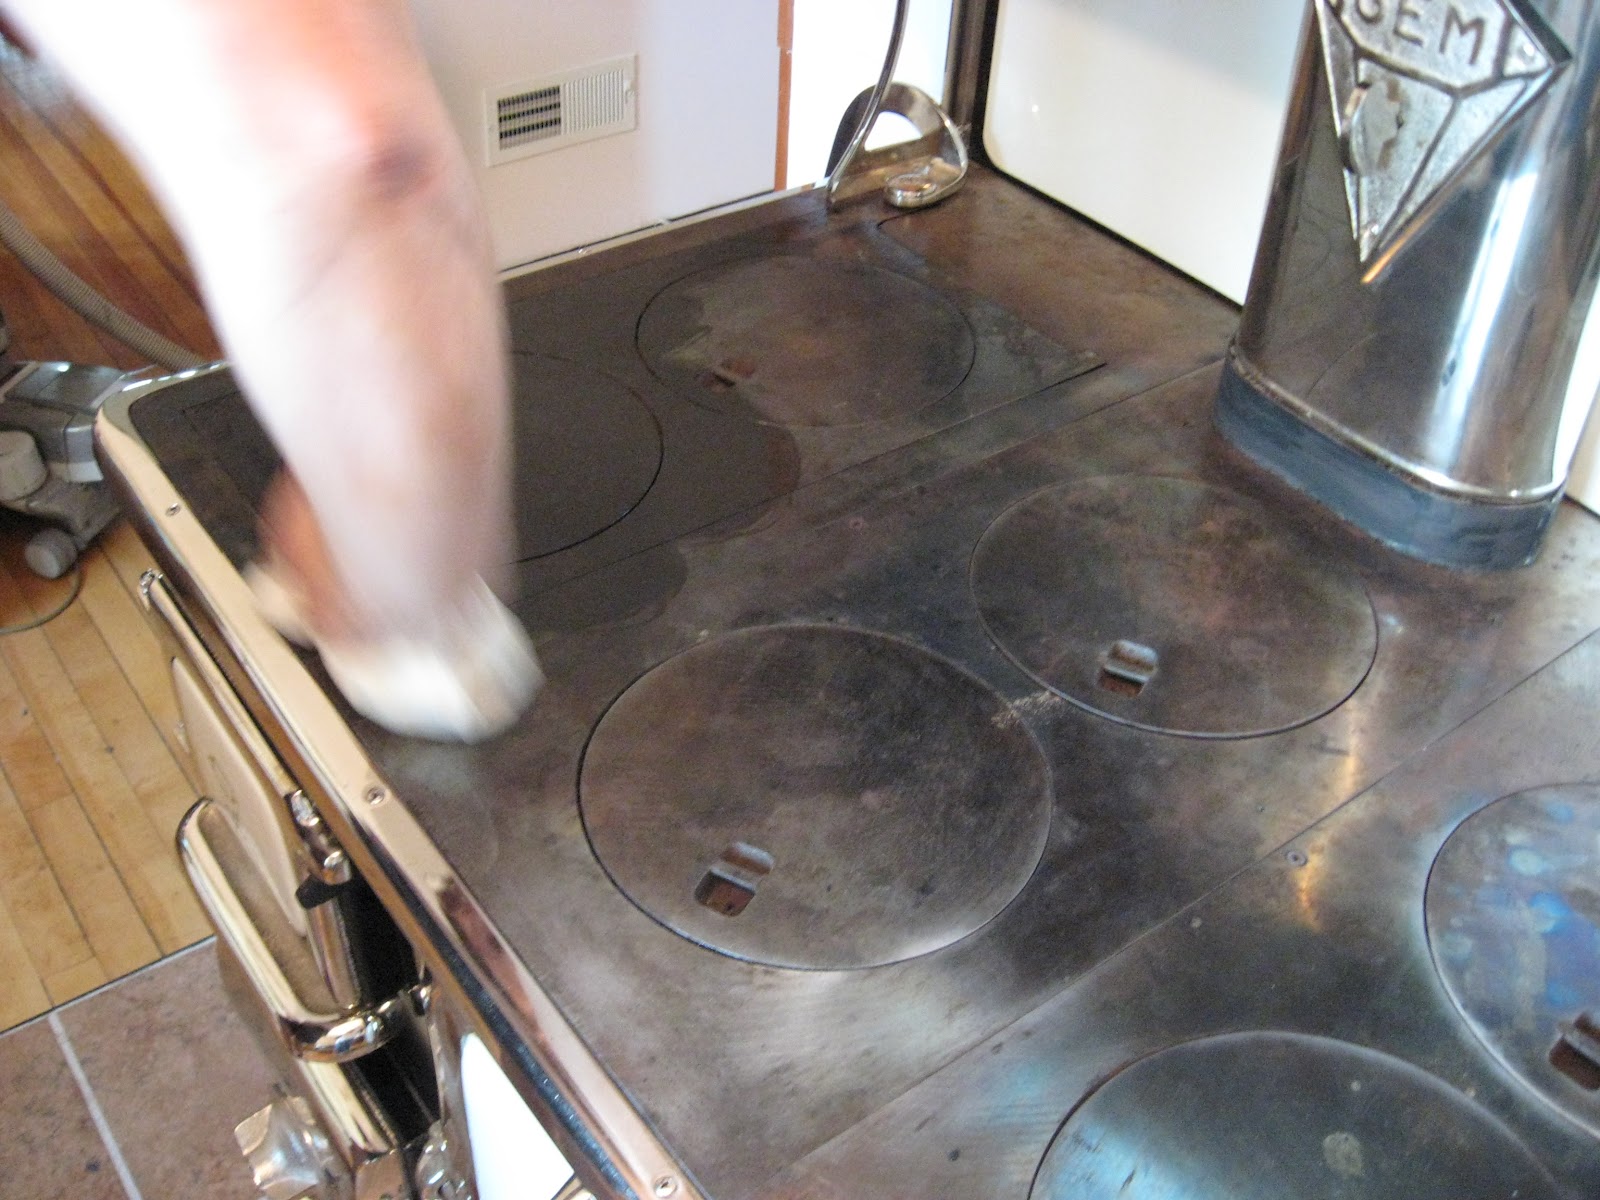
After some unfortunate incidents with the caramel from sticky rolls boiling over on top of the stove, a rather large splash of oil while frying chicken, and a gurgle of ketchup which managed to even hit the ceiling, the time had come to clean the cookstove.  Marjorie needed a bath.

If you click on this picture, you can get a better glimpse
of how dirty Marjorie the Margin Gem had gotten.

Her cooktop was particularly unbecoming.

Grease from frying chicken had cooked onto the stainless steel trim
that surrounds the cooktop.
The light-colored square on the top of the water reservoir
is the outline of my breakfast griddle.  I had left it on the reservoir
but didn't realize that it was covering the holes which are on the left.
Those holes are steam vents for the water reservoir, and when I
realized what had happened, the griddle was sitting in a puddle of
water.  Not only did the bottom of the griddle have to be re-seasoned,
but the top of the reservoir had retained its autograph.

I started out with a stainless steel soap pad on the top of the reservoir. 


The soap pad and I were soon good friends.  We spent a lot of time together.

The soap pad skittered across the stainless steel cooktop trim,
followed closely by a damp rag.  Then, the soap pad waltzed all
over the backsplach and stainless steel section of stovepipe.

In the picture above, please note how rusty the stove collar is at the base of the stainless steel stovepipe.  When Marjorie arrived last year, like all new cookstoves, her highly polished cast iron cooktop had been coated with a thin layer of some type of petroleum product in order to keep it from rusting before it was put into use.  Unfortunately, whoever had applied this coat of oil, missed putting it on the collar.  Hence, the collar began to rust even before we had installed the stove in March, but I hadn't done anything about it yet.

The next thing that I did was begin working on the cooktop.  I rub a grill brick all over the cast iron.  This effectively removes any food and grease that has cooked onto the stove.  It also smells very strongly of sulfur.


The grill brick leaves all manner of sand in its wake.  I remove this with the vaccuum cleaner.  Next, I was on to soot and ash removal.  I removed the short length of stovepipe which connects the stove to the chimney, then began cleaning the flue which stretches up from the bottom of the back of the stove to the top of the warming oven.
A view down the stovepipe from the top of the warming oven
before cleaning.
The next step was to remove fly ash from the top of the oven and creosote which had accumulated along its right side and beneath it.  New cookstoves are generally shipped with a handy little tool called a soot rake which is made for this task.

The soot rake scraping across the top of the oven.
The manufacturer's identification plate masks the
oven clean out door.  The soot rake is pulling
creosote from beneath the oven.
After that, I drained the reservoir and began working on cleaning it out.  You can learn more about that in the previous post.

 
After the stovepipe had been cleaned outdoors and re-attached, the next job was to coat the newly scrubbed cooktop with vegetable oil.  I also put a layer of stove black on the collar.


All other surfaces were wiped clean and parts replaced, and the ashes which had missed falling in the ash pan were also scooped out.  The water reservoir was refilled, and a new fire lit.  As the coat of vegetable oil burned onto the stovetop, the kitchen took on the scent of a large hot breakfast griddle, and Marjorie was once again a gleaming beauty gracing our kitchen.


Tuesday, September 18, 2012

A Rag and a Rock in My Reservoir

Grandpa Doc, my great-grandfather, had a favorite cousin by the name of Bessie.  By the time I came to know Bessie, she was a little antique lady who lived in a little antique house on the edge of a Southwestern Iowa town which was not our own.  She was the sort of person who had several reasons to feel sorry for herself, but who couldn't find the resources of personality or the asset of extra time in order to have a pity party.  Instead, her outlook was always bright and humorous, and the result was that I now wish that I could have spent many more hours listening to her reminisce than the few with which I was blessed.

She was once telling my grandmother and me about the summer that she and her husband had lived in the mountains of Colorado at some sort of mining or logging or oil drilling post.  Conditions had been primitive at best, even by the standards of seventy or eighty years ago, and the reason that they only stayed for the summer was because choosing to stay into the fall was the same as committing oneself to stay until the next summer because the roads became impassible with snow earlier than in most other places.

I had recently purchased the Qualified Range when Grandma and I went to visit Bessie, and Grandma is fond of bringing my woodburning cookstove penchant into conversations with people whom she feels might be suitably impressed, curious, or horrified at this bit of knowledge about me.  (I have to admit that with the right crowd it can be quite a diversion in an otherwise humdrum discourse.)  When Grandma brought up the woodburning cookstove that day, it was sufficient kindling to launch Bessie into a detailed memoir about her Colorado summer because it was there in that camp that she had had the most experience with a woodburning cookstove.

Bessie's husband's job (I'm sorry that I don't remember what it was) was of the sort that resulted in him coming home filthy every night.  Fortunately, her husband valued good personal hygeine.  Unfortunately, the cabin where they made their home did not have running water.  Thus, his nightly bath water had to be pumped from a well some yards away, lugged to the cabin, heated on the woodburning cookstove, and poured into a portable bathtub before the grime that Bessie's husband's person had accumulated could be removed.

As Bessie recalled the toil that bathing involved, she said, "And the water that we had up there was so hard that a cat couldn't scratch it."  Both my grandma and I dissolved into giggles at that Bessieism.

Lovely story, Jim, but why are you sharing it here?  you may ask.  What does this have to do with woodburning cookstoves?  I'm getting to that.

I tell the Bessie story because our well water here at our farm is also hard.  I do believe that a cat could scratch it, but it is full of minerals nonetheless.  Therefore, I am learning about how to handle hard water in the reservoir of a wood cookstove.  As I have stated before, reservoirs were traditionally used to heat rainwater when it was available, and rainwater is naturally soft.  Not everyone had the luxury of a rainwater cistern, though, and so one occasionally does come across advice from our ancestors about how to minimize the build up of lime on the inner lining of the reservoir.

My brother bought Mildred Armstrong Kalish's book Little Heathens: Hard Times and High Spirits on and Iowa Farm during the Great Depression in an airport on one of his many travels on behalf of the Iowa Corn Growers' Association.  He lent it to me, saying that he figured I'd get around to reading it before he would.  Two years later, I proved him correct and discovered that Ms. Kalish had included quite a bit of information about cooking on a woodburning cookstove amongst her memoirs of growing up during the Great Depression.*  One such memory dealt with hard water in cookstove reservoirs.  She said that what her family used to do was to tie a piece of cloth around a clean rock and place it in the reservoir.  The cloth would collect the lime deposits rather than the sides of the reservoir.

I was immediately skeptical, but I've seen (and scrubbed) the inside of our teakettle, and I knew that we didn't want that kind of mess in our reservoir, so I decided I'd give it a whirl.  Nancy and I sacrificed a portion of an old cotton tea towel, and she tied it around a rock which had endured a thorough bath.  Into the reservoir it went, and there it stayed from March until last Sunday afternoon.

The rock in the rag in the reservoir.  Ahh, I love alliteration.

Last Sunday afternoon, I decided that it was high time to thoroughly clean the whole stove (stay tuned for an entire post about that process), including the reservoir.  As you can see in the picture above, the reservoir has accumulated lime deposits on the side and bottom of the copper lining, so I was not impressed with the effectiveness of the rock-in-the-rag technique--until I removed the rock.  I was AMAZED at how much lime had truly accumulated in the cotton around the rock.  The material literally felt like it had been saturated with sand, and it had to be put through a wash cycle to get it all out. 

Needless to say, once the cloth was dry, it was re-tied around the rock and submerged in the reservoir again.  I'm going to try to remove and clean the cloth more frequently and see if that helps reduce the rate at which limescale is building up in the reservoir.  Indeed, there is a rock and a rag in my reservoir.

*The book was very interesting insofar as its content about the Great Depression, but I wouldn't recommend it because of the sprinkling of unbiblical theology which it included.

Saturday, September 1, 2012

Homemade "Heinz" Ketchup

One of life's unfortunate circumstances is that the season for canning tomatoes does not coincide with the bitter cold of December. If it weren't for the fact that it is usually blistering hot weather when tomatoes begin to produce in earnest, tomatoes and wood cookstoves would be the perfect match. After all, it seems like every tomato canning recipe necessitates the use of one's largest kettles in addition to the water bath canner, and the recipes often involve long stretches of gentle cooking--all of which are easiest to do on the wood cookstove. Making ketchup is no exception.

I'm a ketchup lover.  I'll admit it.  I am not ashamed.  And because I love ketchup so much, I started several years ago to attempt to make homemade ketchup that was palatable.  I studied recipes and studied recipes, and then I cooked and stirred and cooked and stirred.  Some of what I made was all right, and on a good day it might have been considered palatable, but a sizeable portion of what I produced made its way back to the garden in a dark, brownish red, and thoroughly unappetizing new version of compost.  I was sort of in a quest-for-the-Holy-Grail-of-ketchup-recipes mode during each tomato season that amounted to anything.

Enter sister-in-law Susan, who keeps me supplied with a steady stream of fascinating, unique, and often unconventional cookbooks.  Susan gave me a copy of Cooking with the Horse and Buggy People, the first in a pair of cookbooks by that name (ISBN 1-890050-16-4).  In it I found a recipe entitled "Heinz Catsup" which was submitted by a Mrs. Henry M. Troyer.  Despite the fact that spelling the word "ketchup" c-a-t-s-u-p is one of my biggest pet peeves, I gave the recipe a try, and my search for the perfect homemade ketchup recipe came to a happy end.  I'll be the first to say that the end product is not exactly like the beautiful crimson nectar that pours forth from the Heinz bottle, but it's close enough for me.

The recipe calls for a peck of tomatoes and three large onions.  I don't have a peck basket, but I have found that if I fill my 16-quart stock pot with tomatoes and then slice the three large onions into it, everything comes out just fine.  I have used several different varieties of tomatoes, but my preference is Romas.  Gently cook the tomatoes and onions until the onions are soft.  We find that this process takes over an hour.  Stir frequently to make sure that it is not scorching; it is particularly vulnerable to doing so at the beginning of the cooking time.


Tomatoes and onions beginning to cook.  I added some more tomatoes
after this picture was snapped.  Also, please note that the pot was not left
directly over the firebox for very long.  It was moved to the right
 shortly after this picture was taken as this mixture can scorch very easily
even though the bottom of this stockpot is very thick.
Once the tomatoes and onions are cooked, run them through a food mill.

Running the cooked tomato and onion mixture through the mill.

Press as much of the pulp from the tomatoes and onions through
the mill as possible because that is the part that you end up saving.

When you are finished running the tomato mixture through the food mill, you will have a large bowl of thin tomato juice.


At this point, you want to line another large bowl with a cloth bag.  We use an old t-shirt of mine.  The neck and sleeves have been cut off, and we tie the cut end shut with cooking twine.  You then poor the tomato juice into the bag.

Only the first few scoops of tomatoe juice are in the bag in this picture.
Once all of the juice has been put in the bag, tie the bag at the top.  Then, suspend the bag in such a way that the pulp can drain for two hours.  I've read ketchup recipes that say that you should discard the tomato juice.  This seems wasteful to me, so we often can it for use as soup base.

The bag of tomato juice hanging from the clothes line
which is above our Jotul heating stove.  We used to be
able to hang the bag in the kitchen, but our remodeling job
prevents that at the moment.

Drained tomato and onion pulp.  It looks a lot like raw hamburger,
doesn't it?

To the drained pulp, you now add the following:

4 C. white sugar
1 tablespoon salt
1 pint of vinegar
 
In a small square of cloth (in our case a piece of the shoulder from the t-shirt) you tie the following mixture of spices:
 
1/2 tsp. ground cloves
1/2 tsp. cinnamon
1/2 tsp. dry mustard
 
Put all of this together in a heavy-bottomed stockpot and return it to the stove.  Bring it to a boil and let it boil for ten minutes.  Be warned that this step can get pretty messy.  As the ketchup boils, it has the ability to splash a long way.  You also want to stir pretty frequently during this step because the mixture is very thick and easily scorches.
 
The ketchup coming to a boil with the cloth bag of spices in it.
Once the ketchup has boiled for the ten minutes, remove the spice bag.  Poor the ketchup into jars, adjust lids, and water bath can.  We can ours in quart jars, and I process them for twenty minutes.


The recipe as given yields two quarts.  We put two batches of pulp together; double the sugar, vinegar, and salt; and then put two spice bags in the mixture while it is coming to a boil. 

Two batches of ketchup boiling away in the water
bath canner.  Note the splashes of ketchup on the
warming oven.  This is why I mentioned that it can
be a bit messy.
Side notes:
I pushed the pencil on this recipe a few years ago to see whether it was at all economical to make your own ketchup.  The result was that the cost to make the ketchup was so close to the cost of purchasing ketchup that if I didn't economize on canning lids by using two quart jars instead of four pint jars, my homemade ketchup was more expensive.  Of course, many people would say that there is a great deal of value in knowing exactly what went into your bottle of ketchup, so the penny pinching becomes less important.

As always, I have to point out the efficiency of using a woodburning cookstove.  While a pot of the tomato and onion mixture was boiling on the cookstove, we were also cooking a batch of salsa and baking a chicken casserole as well as heating water in the boiler and the reservoir.  One small fire can do so much when you have a cookstove!  With conventional appliances, we would have had four heating elements or gas burners going to accomplish these tasks.  As it was, we had energy to spare.

Ketchup, salsa, and a casserole cooking on Marjorie the Margin Gem
while she also heats our domestic hot water.