Okay. I'll admit that sometimes I use this blog to help me remember different things that I've done with the woodburning cookstove, and I definitely want to remember tonight's supper. It was AWESOME! So awesome that I once again neglected to get pictures, confound it anyway.
At about 2:00 this afternoon, I put a small pork loin in our little blue enamel roaster in order to make Boiled Cider Glazed Pork Loin. Only it is so very cold today that I just couldn't bear to close the oven door, so I decided to cook the pork loin using this method for slow cooking, putting the roaster directly on the oven floor in the back left corner with the oven door left open.
When I got home from speech practice (yes, I'm coaching again even though I'm no longer teaching full time) and finished chores, I roasted some small homegrown red potatoes--in the electric oven in the basement to try to get some heat down there to prevent frozen water pipes--and made candied carrots on the cookstove top.
The pork loin was the most tender one I've ever cooked, was quite succulent, and was great in combination with the potatoes and carrots. So now I sit blogging in the warm glow of the antique Rayo oil lamp with a full and satisfied belly, listening to the wind howl outside and shivering at the knowledge that at the last examination of the outdoor thermometer the red line had shrunk down to -12ºF.
Thank you, Lord, for your blessings!

This is a blog about cooking on a woodburning cookstove. Here you will find recipes, methods, other uses, and miscellaneous information about using a woodburning range. I've searched the net for any and all information about cooking on one of these amazing appliances, and I've found a lot of interesting things, but none of them have been what I've been looking for. Therefore, this is my attempt at creating what I've been in search of.
Tuesday, January 29, 2019

Friday, January 11, 2019
Link to a Great Wood Cookstove Article
This morning, blog reader Gigi reminded me of one of the reasons I enjoy maintaining this blog: my loyal readers who feel like friends.
Gigi sent me a link to an article which appeared this week on the CBC news because she knew I would enjoy it, and she was exactly right. The article is about Marie Morrissey, a Prince Edward Island resident, who is still cooking on the woodburning range that her husband purchased in the early 1950s. Her family purchased a new electric stove for her, but she is not at all interested in using it--instead confirming everything I have ever said in this blog about the joys of cooking on a woodburning range.
Take a look at the link below. It is a quick read with some great pictures of her Enterprise, which reminds me of our Qualified.
Gigi sent me a link to an article which appeared this week on the CBC news because she knew I would enjoy it, and she was exactly right. The article is about Marie Morrissey, a Prince Edward Island resident, who is still cooking on the woodburning range that her husband purchased in the early 1950s. Her family purchased a new electric stove for her, but she is not at all interested in using it--instead confirming everything I have ever said in this blog about the joys of cooking on a woodburning range.
Take a look at the link below. It is a quick read with some great pictures of her Enterprise, which reminds me of our Qualified.
A big thanks to Gigi for sharing this great confirmation that we wood cookstove lovers are not alone!
Thursday, December 6, 2018
Corn Cob Jelly: A Great Wood Cookstove Recipe
Just about a year ago, I wrote a post about using corn cobs as fuel in a woodburning cookstove. I wrote then that the corn harvest was finished in our area. This year, we had a really wet October, a relatively dry and cold November, and then winter storm Carter hit us hard last weekend. Most of the corn has been harvested, but not everyone is finished yet, and we've got several inches of snow on the ground. Next week is supposed to be warmer, though, so maybe the harvest will be finished then.
At any rate, I wanted to share with you another use for corn cobs today. This is the recipe that I use for corn cob jelly. I don't much care for it, but some people like it, and it is certainly unique. Corn cob jelly is also a particularly efficient thing to make on a wood cookstove because of the long cooking time and the fact that you can burn the by-products from this process in your stove later on.
This recipe was given to me by Marsha S. from Carson, Iowa, and if I remember right, it belonged to her mother. We worked together sometimes during my banking days, and I quite enjoyed talking to her about food--actually, I enjoy talking to anybody about food.
The first step in making corn cob jelly is to choose a dozen corn cobs. Look for cobs that are relatively clean and are as dark red as possible because they will tint your finished jelly a prettier color.
The rest of the ingredients that you will need are as follows:
Once the mixture has come to a full boil, add the three cups of sugar. Return to a full rolling boil as quickly as possible and let the mixture boil for exactly three minutes. (Yes, this is correct. In fruit jellies this is usually just one minute.)
Remove the entire kettle from the fire, skim any foam, and pour immediately into the hot canning jars from the warming oven. Seal and process in the hot water bath for 10 minutes.
For me, this recipe yields four 8 oz. jars and one 4 oz. jar of jelly. You can see the amber color that this batch turned out to have. Sometimes, it is slightly more pink than this.

I threw the boiled cobs out onto the cement patio to dry in the sun and had burned a few of them as kindling before the snow covered them over.
It feels strange to share a recipe on this blog that I don't like, but I feel this is a good recipe because the end product tastes exactly like some professionally made corn cob jelly that I was once given as a gift. It does add a nice color to the jelly shelf, and for those who like the taste of field corn or do not have enough exposure to it to reckon it as a barnyard taste and smell, this could be quite enjoyable.
Fill up the comments with your own version of this distinctive condiment or your thoughts thereon. Thanks for reading, and may your wood fires be burning brightly!
At any rate, I wanted to share with you another use for corn cobs today. This is the recipe that I use for corn cob jelly. I don't much care for it, but some people like it, and it is certainly unique. Corn cob jelly is also a particularly efficient thing to make on a wood cookstove because of the long cooking time and the fact that you can burn the by-products from this process in your stove later on.
This recipe was given to me by Marsha S. from Carson, Iowa, and if I remember right, it belonged to her mother. We worked together sometimes during my banking days, and I quite enjoyed talking to her about food--actually, I enjoy talking to anybody about food.
The first step in making corn cob jelly is to choose a dozen corn cobs. Look for cobs that are relatively clean and are as dark red as possible because they will tint your finished jelly a prettier color.
 |
| Some corn cobs in a five-gallon bucket on the kitchen floor. |
Wash and drain the corn cobs and break them into small pieces. The washing and draining isn't difficult, but I find that breaking them into small pieces can be challenging. I used a knife to aid this process, but it was still on the difficult side.
Put the clean broken corn cob pieces into a large kettle and add three pints of water. Place the pot of corn cobs directly over the fire and boil the cobs for a half hour with the lid on the kettle.
 |
| The broken corn cobs in the three pints of water coming to a boil over the firebox. |
If you are going to be water-bath canning this jelly on the wood cookstove, I would suggest that you start heating your canner of water while the corn cobs are boiling. This would also be a good time to get your jars washed and inverted on clean towels in the warming oven and your canning lids down in hot water.
Once the half hour has elapsed, strain the juice from the corn cobs. I accomplish this by putting an old piece of cotton tea-towel in a colander over a glass measuring cup. Don't get lazy and skip the cloth; you don't want corn chaff in the liquid.
 |
| Straining the juice off the cooked corn cobs. |
You will find that your three pints of liquid has reduced to about half the volume that you started with, and this is perfect because you want three cups of corn cob liquid. If you have a little more or a little less, either discard the extra or add hot water to make up the difference.
 |
| Three cups of the corn cob liquid. |
The rest of the ingredients that you will need are as follows:
- the juice of one lemon
- one box pectin (5 1/2 to 6 Tbsp. if you buy it in bulk)
- 3 cups granulated sugar, measured and ready in a separate bowl
 |
| All of the ingredients that go into corn cob jelly. I believe the glass juicer on the right belonged to my great-grandmother who was the first woman to live in our house. |
Combine the lemon juice and the pectin with the corn cob liquid and put them in a heavy-bottomed stock pot. Place the pot directly over the hottest part of the cooktop and bring to a boil as rapidly as possible. For this step, you need to have a raging fire going, and I find it is best accomplished with sticks of a one- to two-inch diameter.
 |
| A shot of the raging fire needed for making jelly. |
 |
| In this picture, you can see the pre-measured sugar on top of warming oven to the left, the hot jelly jars inverted on the right side of the warming oven, the cob/lemon/pectin mixture over the firebox, the canner nearby, and the pan of hot water and lids to the far right of the cooktop. Of course, the ever- present teakettle is ready with hot water in case I missed my guess on how much water was needed in the canner. |
Once the mixture has come to a full boil, add the three cups of sugar. Return to a full rolling boil as quickly as possible and let the mixture boil for exactly three minutes. (Yes, this is correct. In fruit jellies this is usually just one minute.)
Remove the entire kettle from the fire, skim any foam, and pour immediately into the hot canning jars from the warming oven. Seal and process in the hot water bath for 10 minutes.
 |
| You can see the fire still running hot while the jars of jelly are processing directly above the firebox. |
For me, this recipe yields four 8 oz. jars and one 4 oz. jar of jelly. You can see the amber color that this batch turned out to have. Sometimes, it is slightly more pink than this.

I threw the boiled cobs out onto the cement patio to dry in the sun and had burned a few of them as kindling before the snow covered them over.
It feels strange to share a recipe on this blog that I don't like, but I feel this is a good recipe because the end product tastes exactly like some professionally made corn cob jelly that I was once given as a gift. It does add a nice color to the jelly shelf, and for those who like the taste of field corn or do not have enough exposure to it to reckon it as a barnyard taste and smell, this could be quite enjoyable.
Fill up the comments with your own version of this distinctive condiment or your thoughts thereon. Thanks for reading, and may your wood fires be burning brightly!
Friday, November 30, 2018
Acorn Squash Pie Baked in the Wood Cookstove
I'm so behind in my posting for November! Don't worry, though. The woodburning cookstove has been very busy. Aside from using the gas oven for baking-for-sale days and a bread baking class; the broiler on the electric stove in the basement for making garlic toast; and the crockpot for a day when I wasn't home, Marjorie the Margin Gem has done all of our cooking since September 21st. The poor girl is in desperate need of a bath from all of her labors too, but she is so rarely cold enough to accomplish that task that it keeps getting put off.
A month ago today, I wrote a blogpost about how I prepare acorn squash in the wood cookstove. I still have a lot of squash to deal with, and I also have WAY TOO MANY CANS of sweetened condensed milk on hand (this I cannot explain because I'm not sure how it happened). Thus, I dug out a recipe that I devised when I lived in the little house--over twenty years ago now! Really, this is a recipe for pumpkin pie using canned pumpkin, but cooked acorn squash works just fine in it with a little tweaking.
Since canned pumpkin is sold by weight, I had to weigh the squash pulp to figure out how much twenty-nine ounces would be. I think a safe bet would be two and a half to three cups of UNSWEETENED squash pulp. Do take the time to run it through the blender so that you don't end up with stringy custard.

Place the pies in a hot oven (about 400ºF or more). Bake for ten to fifteen minutes at this high temperature, and then let your fire cool to a more moderate oven for another 35-45 minutes or until the custard is completely puffed up and does not appear to jiggle in the middle. Another reliable way to test this sort of pie is to insert a table knife into the custard half way between the edge and the center. The knife will come out completely clean if the pie is done.
When you bake in a woodburning cookstove, it is very important to know what signs foods exhibit when they are properly and thoroughly cooked rather than relying on a certain amount of time to have elapsed at a certain temperature. Actually, I feel like knowing these signs is important even when baking in a modern oven. I am absolutely convinced that if we were aware of how much the temperature in a modern oven truly fluctuates, we would be quite surprised.
Pardon my soapbox, but while I'm on the subject of modern ovens, I would also like to say that I find it quite amusing when I hear people complain about there being hot spots in wood cookstove ovens. In both our new gas oven (2012) and my parents' high-end electric oven (2011), even with the convection fan on, these modern ovens have hot spots. You can easily detect them in a pan of our Roadhouse Dinner Rolls or baking powder biscuits. This situation was the same in a commercial oven I used earlier this year, too. Uneven oven heating seems to me to just be a fact of life, and we cooks just have to learn to deal with it.
Sorry, but I feel better now.


A month ago today, I wrote a blogpost about how I prepare acorn squash in the wood cookstove. I still have a lot of squash to deal with, and I also have WAY TOO MANY CANS of sweetened condensed milk on hand (this I cannot explain because I'm not sure how it happened). Thus, I dug out a recipe that I devised when I lived in the little house--over twenty years ago now! Really, this is a recipe for pumpkin pie using canned pumpkin, but cooked acorn squash works just fine in it with a little tweaking.
Since canned pumpkin is sold by weight, I had to weigh the squash pulp to figure out how much twenty-nine ounces would be. I think a safe bet would be two and a half to three cups of UNSWEETENED squash pulp. Do take the time to run it through the blender so that you don't end up with stringy custard.

To the squash, add one and a half cans (22.5 oz total) of sweetened condensed milk.
You can do all sorts of fun things with the remaining half-can of this gooey stuff. I made hot fudge sauce out of it this time.
 |
| Squash puree and sweetened condensed milk. |
Into 3 TBLS of molasses, mix 2 tsp. of cinnamon, 1 tsp. of nutmeg, and 1 tsp. of ginger. Pour this molasses spice mixture into the squash/milk mixture and add a scant teaspoon of salt (omit the salt when using canned pumpkin) and 4 eggs.
 |
| All the ingredients in the custard waiting to be beaten together. |
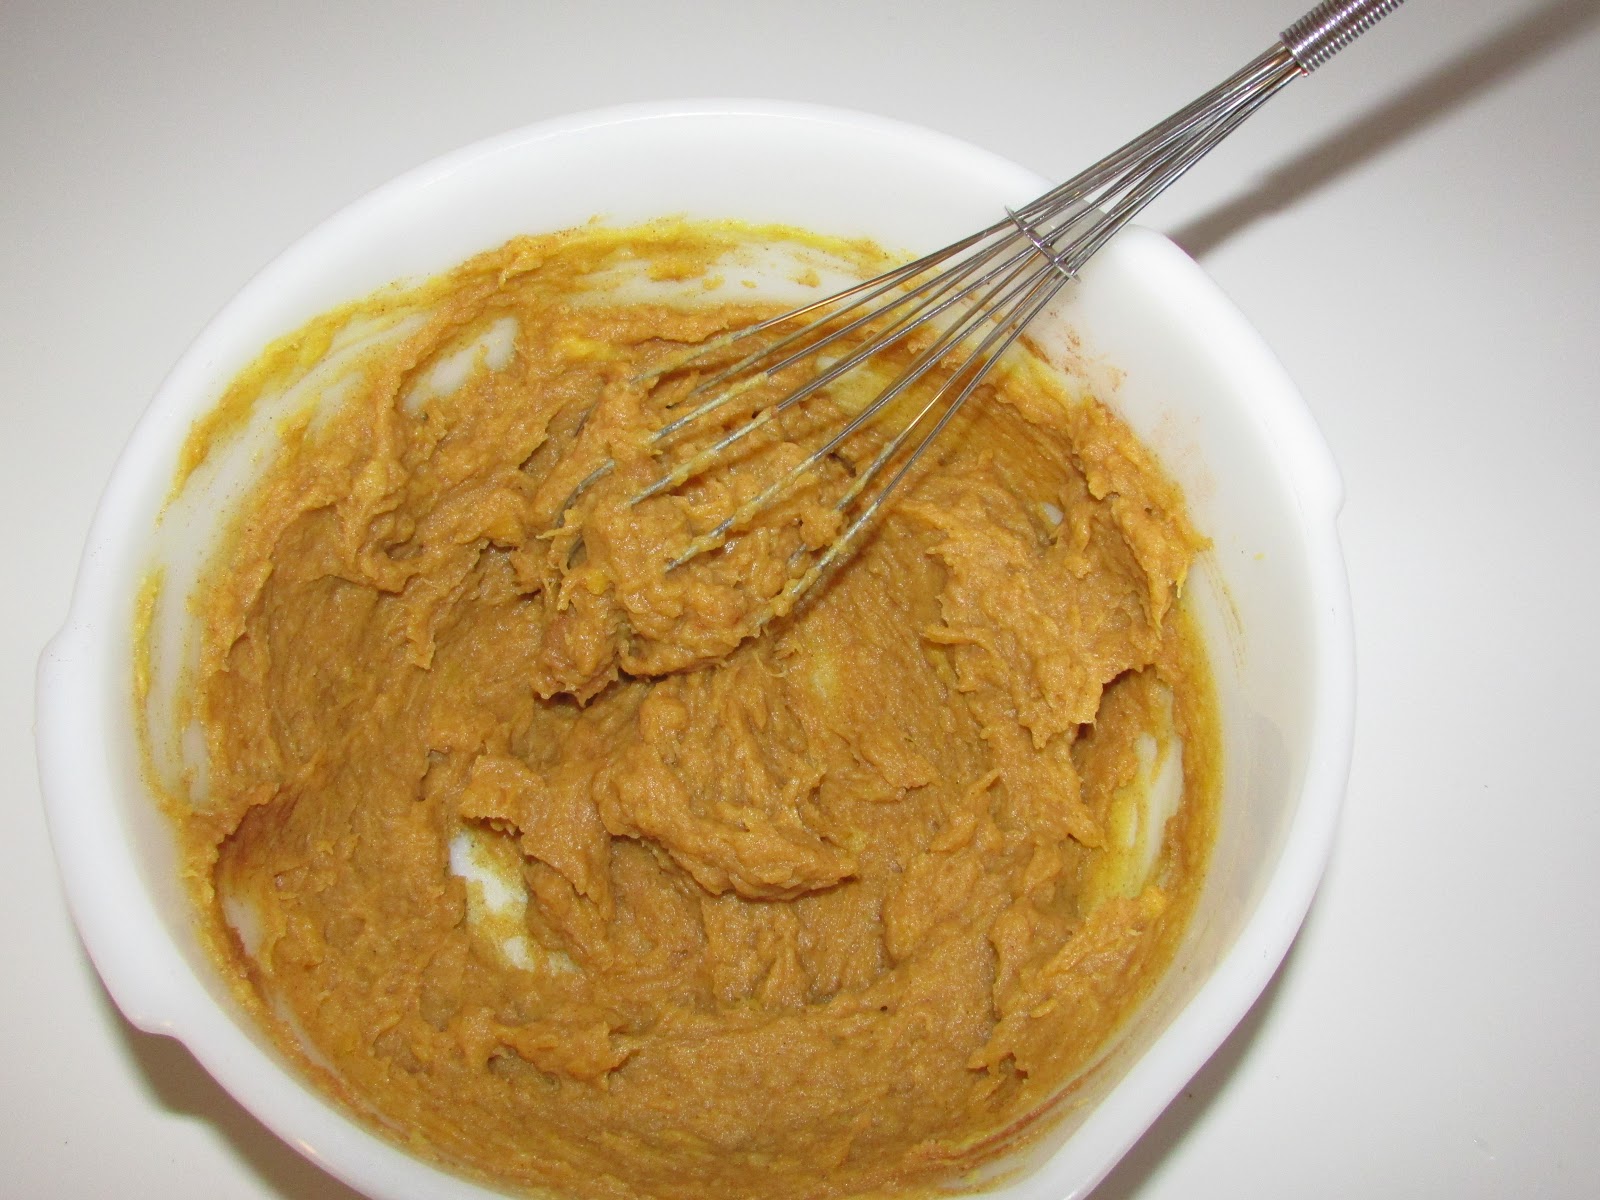
Beat all of the custard ingredients until well blended.
 |
| The custard once it was completely mixed. |
The mixture will be pretty thin as you can see from the drips running down the side of the bowl in the picture below. Divide the mixture in half and pour each part into a 9" unbaked pie crust. For the piecrust recipe that I use, you can visit my post about apple pie here.
 |
| Squash pies ready to go into the oven. |
Place the pies in a hot oven (about 400ºF or more). Bake for ten to fifteen minutes at this high temperature, and then let your fire cool to a more moderate oven for another 35-45 minutes or until the custard is completely puffed up and does not appear to jiggle in the middle. Another reliable way to test this sort of pie is to insert a table knife into the custard half way between the edge and the center. The knife will come out completely clean if the pie is done.
When you bake in a woodburning cookstove, it is very important to know what signs foods exhibit when they are properly and thoroughly cooked rather than relying on a certain amount of time to have elapsed at a certain temperature. Actually, I feel like knowing these signs is important even when baking in a modern oven. I am absolutely convinced that if we were aware of how much the temperature in a modern oven truly fluctuates, we would be quite surprised.
Pardon my soapbox, but while I'm on the subject of modern ovens, I would also like to say that I find it quite amusing when I hear people complain about there being hot spots in wood cookstove ovens. In both our new gas oven (2012) and my parents' high-end electric oven (2011), even with the convection fan on, these modern ovens have hot spots. You can easily detect them in a pan of our Roadhouse Dinner Rolls or baking powder biscuits. This situation was the same in a commercial oven I used earlier this year, too. Uneven oven heating seems to me to just be a fact of life, and we cooks just have to learn to deal with it.
Sorry, but I feel better now.
 |
| The pies just after they had been put in the Margin Gem's oven. |
When the pies are done, remove them to a rack to cool. The custard will fall shortly after this, and they will look like you expect pumpkin pie to look.

Of course, a pie like this is not complete without some whipped cream on the top.

The tweaking that I mentioned earlier in the post is the addition of the salt. Originally, there was no salt in this recipe, but the squash really needed it. I consulted a can of pumpkin and discovered that while salt was not on the ingredient list, a serving of canned pumpkin provided 10% of your recommended daily allowance of sodium. I'm sure that this is why this recipe didn't taste as good to me as I would have liked.
I took one of the two pies shown above to some friends of ours, and when they added their own homemade whipped cream, they put additional salt in it because I told them that I thought the pie needed it. They all found the pie much tastier than I did, so if you make this recipe with squash, be sure to add that half teaspoon of salt.
I'm sure I could have used pureed acorn squash in the pumpkin pie recipe that I normally use, which you can find in this post from 2012. As I said, though, I was trying to use up an over-abundance of sweetened condensed milk. I hope you enjoy this one!
Wednesday, November 7, 2018
Awesome Roasted Bacon-Wrapped Maple Pecan Carrots in the Wood Cookstove
So, our Sunday dinner last weekend was really good even if I do say so myself.
The meat dish was a pork roast that I cooked in the Margin Gem using this method. The roast was frozen solid when it went into the oven at 9:00 a.m. as we were leaving for church. When we arrived back home at 11:30, it wasn't quite finished yet, but I needed a hotter oven for a new carrot recipe that I wanted to try, so I set one of my stove top ovens on the cooktop and transferred the roast to it. This way, I could add a lot of biscuit wood to the fire in order to raise the temperature of the Margin Gem's oven but continue gently cooking the roast by moving the tin oven across the stovetop to the appropriate coolness.
Originally, the carrot recipe came from Hey Grill, Hey by Susie Bulloch, a website devoted to recipes for grilling a variety of foods. Of course, I had to put my own spin on it and convert it for use on the wood cookstove, but she deserves all of the credit for the fabulous original idea. You should go see her original post with links to a video because you will better understand what I did after you see what inspired me.
We had a wonderful carrot crop this year. The carrots have had excellent flavor and texture, but they are shorter and thicker than what you usually see in the grocery store, so to make the cooking time in this recipe work for them, I had to halve or quarter some of them after they were scraped and pared at either end in order to make them cook uniformly.
Each peeled carrot (or half or quarter carrot) was wrapped with a slice of bacon. Some of the carrots were small enough that only part of a slice was needed.
I then placed them on the top of a broiler pan (this was the first time I had ever used a broiler pan--a distinctly modern cooking utensil--inside a wood cookstove!). I sprinkled them with a little bit of coarse sea salt and a little freshly ground pepper. Go easy on the sea salt or feel free to omit it altogether; the bacon has plenty of salt in it.
The next step was to slide the carrots into a hot oven (around 400ºF) and let them roast for about 20 minutes.
Now, this next part is where I went off script a bit. We had a "baking for sale" day two weeks ago. We had enough customers at our local farmers' market who asked us if we would be baking during the off season that we have scheduled one day a month on which I do some custom baking. One of the most popular items that people request is our sweet rolls, and I had a number of orders for them with caramel pecan topping.
When we turn out a pan of these rolls (we often just call them sticky rolls), we put them onto a cooling rack which has been placed inside a jelly roll pan. This allows us to catch all of the syrup that runs off the rolls. All through the summer, we scrape this extra syrup into a sauce pan, save it, and then make it into pancake syrup, which is then water bath canned.
Well, for our baking day in October, we had a lot of pecan roll orders. We try to make sure that as much of the pecan chunks stay on the rolls as possible, but some invariably land beneath the cooling rack, so my collection of syrup drips was very nutty. To the saucepan of this mixture of pecan pieces, brown sugar, dark corn syrup, and butter, I added some hot water from the teakettle and brought the whole thing to a boil, stirring occasionally until the syrup no longer had any lumps in it. When I took it off the fire, I added a little over an 1/8 tsp. of Mapleine.
After the first twenty minutes of roasting time had elapsed, I pulled the broiler pan of bacon-wrapped carrots out of the oven and spooned a little of the hot pecan syrup over each of them, taking care that as many pecan pieces remained on the top of the carrots as possible.
The pan of carrots was returned to the hot oven for another five minutes, at which point I removed it again and spooned onto them what remained of the pecan syrup. The carrots were returned to the oven for another five minutes, which resulted in the pecans being beautifully toasted. Of course, the vast majority of the syrup dripped down into the bottom of the broiler pan, but enough remained on the carrots to give them a mildly sweet taste.
With the pork roast and mashed potatoes, these carrots were AWESOME! Really, they were so good that I think they could be made as an hors d'oeuvre.
Now, if you aren't making a boat load of pecan rolls like we are, you could easily make a small batch of my homemade pancake syrup, using all brown sugar and reducing the water a little. The result would be the same, and you could add a few pecans to it. You can find that recipe here; just scroll down a little in the post to find it since it is about water bath canning on a wood cookstove.
The meat dish was a pork roast that I cooked in the Margin Gem using this method. The roast was frozen solid when it went into the oven at 9:00 a.m. as we were leaving for church. When we arrived back home at 11:30, it wasn't quite finished yet, but I needed a hotter oven for a new carrot recipe that I wanted to try, so I set one of my stove top ovens on the cooktop and transferred the roast to it. This way, I could add a lot of biscuit wood to the fire in order to raise the temperature of the Margin Gem's oven but continue gently cooking the roast by moving the tin oven across the stovetop to the appropriate coolness.
Originally, the carrot recipe came from Hey Grill, Hey by Susie Bulloch, a website devoted to recipes for grilling a variety of foods. Of course, I had to put my own spin on it and convert it for use on the wood cookstove, but she deserves all of the credit for the fabulous original idea. You should go see her original post with links to a video because you will better understand what I did after you see what inspired me.
We had a wonderful carrot crop this year. The carrots have had excellent flavor and texture, but they are shorter and thicker than what you usually see in the grocery store, so to make the cooking time in this recipe work for them, I had to halve or quarter some of them after they were scraped and pared at either end in order to make them cook uniformly.
Each peeled carrot (or half or quarter carrot) was wrapped with a slice of bacon. Some of the carrots were small enough that only part of a slice was needed.
I then placed them on the top of a broiler pan (this was the first time I had ever used a broiler pan--a distinctly modern cooking utensil--inside a wood cookstove!). I sprinkled them with a little bit of coarse sea salt and a little freshly ground pepper. Go easy on the sea salt or feel free to omit it altogether; the bacon has plenty of salt in it.
The next step was to slide the carrots into a hot oven (around 400ºF) and let them roast for about 20 minutes.
 |
| Taken at the end of the process, this photo shows the carrots roasting in the Margin Gem's oven, the pork roast finishing in the stovetop oven, and the mashed potatoes boiling over the firebox. |
Now, this next part is where I went off script a bit. We had a "baking for sale" day two weeks ago. We had enough customers at our local farmers' market who asked us if we would be baking during the off season that we have scheduled one day a month on which I do some custom baking. One of the most popular items that people request is our sweet rolls, and I had a number of orders for them with caramel pecan topping.
When we turn out a pan of these rolls (we often just call them sticky rolls), we put them onto a cooling rack which has been placed inside a jelly roll pan. This allows us to catch all of the syrup that runs off the rolls. All through the summer, we scrape this extra syrup into a sauce pan, save it, and then make it into pancake syrup, which is then water bath canned.
Well, for our baking day in October, we had a lot of pecan roll orders. We try to make sure that as much of the pecan chunks stay on the rolls as possible, but some invariably land beneath the cooling rack, so my collection of syrup drips was very nutty. To the saucepan of this mixture of pecan pieces, brown sugar, dark corn syrup, and butter, I added some hot water from the teakettle and brought the whole thing to a boil, stirring occasionally until the syrup no longer had any lumps in it. When I took it off the fire, I added a little over an 1/8 tsp. of Mapleine.
After the first twenty minutes of roasting time had elapsed, I pulled the broiler pan of bacon-wrapped carrots out of the oven and spooned a little of the hot pecan syrup over each of them, taking care that as many pecan pieces remained on the top of the carrots as possible.
The pan of carrots was returned to the hot oven for another five minutes, at which point I removed it again and spooned onto them what remained of the pecan syrup. The carrots were returned to the oven for another five minutes, which resulted in the pecans being beautifully toasted. Of course, the vast majority of the syrup dripped down into the bottom of the broiler pan, but enough remained on the carrots to give them a mildly sweet taste.
With the pork roast and mashed potatoes, these carrots were AWESOME! Really, they were so good that I think they could be made as an hors d'oeuvre.
 |
| A scrumptious Sunday dinner. You can see a jar of my homemade Heinz ketchup at the top left corner, but everything was so good that I didn't use any of it. |
Now, if you aren't making a boat load of pecan rolls like we are, you could easily make a small batch of my homemade pancake syrup, using all brown sugar and reducing the water a little. The result would be the same, and you could add a few pecans to it. You can find that recipe here; just scroll down a little in the post to find it since it is about water bath canning on a wood cookstove.
Saturday, November 3, 2018
Easy Baked Fish in the Wood Cookstove
I've mentioned before on this blog that this land-locked Iowa boy prefers to eat meat that originally had fur or feathers on it, but I do occasionally enjoy fish. This method of baking fish is what my mother used to do when she cooked orange roughy for us when I was growing up. However, when I find orange roughy these days, it is horribly expensive, so I now use this same method with pollack and feel that it is almost as good. (In case you haven't followed this blog for very long, I'm all about dirt cheap cooking!)
I think that baking fish is particularly well-suited to the wood cookstove because it doesn't seem to me like it needs a certain oven temperature to be successful so long as your oven is at least above 250ºF. If you disagree, let me know in the comments section below.
Because I never worry about an exact oven temperature for baking fish, I don't have to build my fire in any particular way before I begin the preparations for it. I have also baked fish in both of my stovetop ovens quite successfully.
The first thing to do is to put your fish filets in a glass baking dish and sprinkle them with perhaps a tablespoon of lemon juice. The acidic nature of the lemon juice is why I use a glass dish rather than a metal pan.
I then sprinkle the fish with a little seasoned salt. I used Lawry's in the picture. Some regular salt and a little paprika would work, too. Then add a little bit of pepper. I've also used a sparing sprinkle of Mrs. Dash, but Nancy doesn't like that, so I just used a tiny bit of freshly ground pepper in the photo below.
Lastly, dot the top of the fish with a little bit of butter--you don't need much!
Pop all of this in the oven to bake uncovered until the fish flakes easily when you stick a fork into it. This occurs at an internal temperature of 145ºF. The cooking time simply depends on how hot your oven is. Obviously, the hotter it is, the faster it will bake.
So quick, so easy, so flexible for the wood cookstove, and so delicious!
I think that baking fish is particularly well-suited to the wood cookstove because it doesn't seem to me like it needs a certain oven temperature to be successful so long as your oven is at least above 250ºF. If you disagree, let me know in the comments section below.
Because I never worry about an exact oven temperature for baking fish, I don't have to build my fire in any particular way before I begin the preparations for it. I have also baked fish in both of my stovetop ovens quite successfully.
The first thing to do is to put your fish filets in a glass baking dish and sprinkle them with perhaps a tablespoon of lemon juice. The acidic nature of the lemon juice is why I use a glass dish rather than a metal pan.
I then sprinkle the fish with a little seasoned salt. I used Lawry's in the picture. Some regular salt and a little paprika would work, too. Then add a little bit of pepper. I've also used a sparing sprinkle of Mrs. Dash, but Nancy doesn't like that, so I just used a tiny bit of freshly ground pepper in the photo below.
Lastly, dot the top of the fish with a little bit of butter--you don't need much!
 |
| The fish is ready to go into the oven. |
Pop all of this in the oven to bake uncovered until the fish flakes easily when you stick a fork into it. This occurs at an internal temperature of 145ºF. The cooking time simply depends on how hot your oven is. Obviously, the hotter it is, the faster it will bake.
 |
| The fish is done because it flakes easily. |
So quick, so easy, so flexible for the wood cookstove, and so delicious!
 |
| The fish was the only part of this meal that did not come from our farm. I wrote about preparing the squash in this post last week. |
Wednesday, October 31, 2018
Using a Pressure Cooker on a Wood Cookstove
When I worked as a local banker, my boss was a lady from Carson, Iowa, who is a lot of fun to visit with. We enjoyed talking about food and cooking, and I'll never forget her telling me that she resisted getting a microwave oven for a long, long time when they became popular in the late 70s and early 80s. As I remember, she finally caved under a great deal of pressure from her mother-in-law, but only used the microwave to reheat leftovers.
"I didn't need a microwave," she insisted, "because I have a pressure cooker. I can cook things fast in it, which is why I call pressure cookers 'the poor man's microwave.'"
Microwaves are now standard equipment in the modern kitchen, but Instant Pots seem to be the current rage in countertop kitchen appliances, and one of their features is the ability to cook things quickly by using pressure. However, this is certainly not new technology; what is new about an Instant Pot are its safety features, automation, and some of its versatility.
Those of us who are cooking on a woodburning cookstove aren't exactly known for being the cooks who are taking advantage of the latest technological advances, though, are we? That said, a carefully used pressure cooker can help us speed things up a little when we feel like it and add some variety to our cooking. This was the case on Monday of this week when I had been out with a friend on a photography romp all afternoon and had nothing planned for supper when I returned home after 4:30.
I dug around in the freezer and found a package of country pork ribs. I put them in the microwave to defrost a little (only because they had been packaged with waxed paper between them and I couldn't get it free) and brought my smallest pressure cooker up from its basement abode. This pressure cooker was given to me by my aunt who had received it from one of my great-great aunts who had bought it sometime in the 1940s. It came to me with its original instruction booklet which includes several recipes--what a blessing!
When cooking with one of these pans, the first step is usually to establish the pressure. For the wood cookstove cook, this means that you are going to start the cooking process with the pan directly over the firebox. You can see in the picture below that for what I was going to do I also put the rack in the bottom and added about a 1/2 inch of water.

Next, I inserted a small old Pyrex pan (I think it was the precursor to the Visions Cookware line) that I got from Nancy's grandmother. Into that I put my three small pork ribs, which were still pretty frozen in the middle.

Over the ribs I poured barbecue sauce, which I made out of homemade ketchup and some barbecue sauce concentrate from Watkins. In hindsight, I should have seasoned the meat more before putting the barbecue sauce on it because it was plenty bland.

I then put the lid on the pan, set the weight on the petcock to ten pounds of pressure, and moved the pan to the hottest lid over the firebox and began waiting for the weight to jiggle.

The jiggling began in a surprisingly short time, and then "the dance" commenced. "The dance" is my tongue-in-cheek term for the movement of cooking vessels across the wood cookstove cooktop to adjust their cooking temperature. High heat is right over the firebox, and lower heats are further away. Instead of adjusting a dial, pushing a button, or tracing your finger over a fancy touch response induction range, you slide the pots and pans to the area of the cooktop which has the desired heat.
In a weighted-gauge pressure cooker, once the appropriate pressure has been reached (as announced by the jiggling weight), the heat needs to be reduced so that the weight jiggles a minimum of three to four times per minute but does not jiggle constantly. You can see in the picture above that I wasn't stoking a raging fire, so I didn't have to move the pressure cooker too far away from the firebox in order to maintain the correct number of jiggles per minute.
A quick word about safety: I wouldn't recommend leaving a pressure cooker unattended for long periods of time on any cooking device, not just a wood cookstove. The occasional short absence from the kitchen should be fine, however.

I'm sure the meat was cooked much earlier, but because I was busy with other things and because I knew that this cheap cut of meat would be made more tender by a longer cooking time, I let these cook for an hour, and then stuck a thermometer in them to be absolutely positive.
I don't know why I felt the need for the thermometer on Monday. I think it was due to the fact that it was resting above the warming oven from a different project. Usually, I would just have cut one open to make sure there was no longer any pink in the center.

The ribs were done, were fork tender, and we enjoyed them.
I should try using the pressure pan for more foods; usually I just use it for meats. One of my favorite things to cook in it is tongue. Let me know if you're interested in seeing that process! Also let me know whether you use a pressure pan, and if so, what you cook in it.
"I didn't need a microwave," she insisted, "because I have a pressure cooker. I can cook things fast in it, which is why I call pressure cookers 'the poor man's microwave.'"
Microwaves are now standard equipment in the modern kitchen, but Instant Pots seem to be the current rage in countertop kitchen appliances, and one of their features is the ability to cook things quickly by using pressure. However, this is certainly not new technology; what is new about an Instant Pot are its safety features, automation, and some of its versatility.
Those of us who are cooking on a woodburning cookstove aren't exactly known for being the cooks who are taking advantage of the latest technological advances, though, are we? That said, a carefully used pressure cooker can help us speed things up a little when we feel like it and add some variety to our cooking. This was the case on Monday of this week when I had been out with a friend on a photography romp all afternoon and had nothing planned for supper when I returned home after 4:30.
I dug around in the freezer and found a package of country pork ribs. I put them in the microwave to defrost a little (only because they had been packaged with waxed paper between them and I couldn't get it free) and brought my smallest pressure cooker up from its basement abode. This pressure cooker was given to me by my aunt who had received it from one of my great-great aunts who had bought it sometime in the 1940s. It came to me with its original instruction booklet which includes several recipes--what a blessing!
When cooking with one of these pans, the first step is usually to establish the pressure. For the wood cookstove cook, this means that you are going to start the cooking process with the pan directly over the firebox. You can see in the picture below that for what I was going to do I also put the rack in the bottom and added about a 1/2 inch of water.

Next, I inserted a small old Pyrex pan (I think it was the precursor to the Visions Cookware line) that I got from Nancy's grandmother. Into that I put my three small pork ribs, which were still pretty frozen in the middle.

Over the ribs I poured barbecue sauce, which I made out of homemade ketchup and some barbecue sauce concentrate from Watkins. In hindsight, I should have seasoned the meat more before putting the barbecue sauce on it because it was plenty bland.

I then put the lid on the pan, set the weight on the petcock to ten pounds of pressure, and moved the pan to the hottest lid over the firebox and began waiting for the weight to jiggle.

The jiggling began in a surprisingly short time, and then "the dance" commenced. "The dance" is my tongue-in-cheek term for the movement of cooking vessels across the wood cookstove cooktop to adjust their cooking temperature. High heat is right over the firebox, and lower heats are further away. Instead of adjusting a dial, pushing a button, or tracing your finger over a fancy touch response induction range, you slide the pots and pans to the area of the cooktop which has the desired heat.
In a weighted-gauge pressure cooker, once the appropriate pressure has been reached (as announced by the jiggling weight), the heat needs to be reduced so that the weight jiggles a minimum of three to four times per minute but does not jiggle constantly. You can see in the picture above that I wasn't stoking a raging fire, so I didn't have to move the pressure cooker too far away from the firebox in order to maintain the correct number of jiggles per minute.
A quick word about safety: I wouldn't recommend leaving a pressure cooker unattended for long periods of time on any cooking device, not just a wood cookstove. The occasional short absence from the kitchen should be fine, however.

I'm sure the meat was cooked much earlier, but because I was busy with other things and because I knew that this cheap cut of meat would be made more tender by a longer cooking time, I let these cook for an hour, and then stuck a thermometer in them to be absolutely positive.
I don't know why I felt the need for the thermometer on Monday. I think it was due to the fact that it was resting above the warming oven from a different project. Usually, I would just have cut one open to make sure there was no longer any pink in the center.

The ribs were done, were fork tender, and we enjoyed them.
I should try using the pressure pan for more foods; usually I just use it for meats. One of my favorite things to cook in it is tongue. Let me know if you're interested in seeing that process! Also let me know whether you use a pressure pan, and if so, what you cook in it.
Subscribe to:
Posts (Atom)