
Grandma Marian credits Great-Grandma Ruth (Grandma Marian's mother-in-law) with having taught her to cook. Grandma Marian always has said that when she was growing up, she was not interested in watching her own mother cook. Thus, she says that when she got married, her repertoire in the kitchen was pretty limited. However, upon her marriage, Grandma Marian and Great-Grandma Ruth became next door neighbors, so there were plenty of opportunities for Grandma Marian to study under Grandma Ruth's expert tutelage.
Grandma Ruth's method for making apple pie is our standard go-to recipe for this American favorite. My sister won the grand champion spot with this recipe at our county fair, and it has been a request of my students at school, too. There is really very little to it, and as Grandma Marian points out, one of the advantages of baking a double-crusted fruit pie is that once it is assembled and put into the oven, the work is done. You don't have the tedious, labor intensive work of baking several pans of cookies, and you don't have to frost it as you would with a cake.
As with any wood cookstove cooking or baking, the first thing that you want to do is to begin heating your oven. Our stove is being fired constantly right now, so heating the oven for pie baking merely involved shutting the oven door and adding small pieces of fuel to bring the oven up to around 400 degrees or a little more. You can find more information about managing your wood cookstove oven for pie baking in my first pie baking post here.
Next comes mixing the pie crust. I've read lots of different recipes for pie crusts, but I must confess that I haven't tried any other recipe than what is below. Grandma Marian has preached to me for years that a good pie crust is thin and flaky, and she has been quite vocal about what a travesty the thick crusts of bakery and restaurant pies are. Not too long after Nancy and I were married, we took a pie down to her grandparents' home for a family dinner. After tasting a piece of the pie, Nancy's grandma asked me what I used for a crust recipe. I recited the recipe, and Ruth's response was, "And to think, I've been wasting my time with an egg in my pie crust all these years." I took that to mean that she thought my crust was good. This is a pretty common recipe, but here is what my family does:
Pie Crust
1 1/2 cups all-purpose flour
1/2 cup vegetable shortening
1/2 tsp. salt
4-5 Tblsp. cold water
1. Cut the shortening into the flour and salt using a pastry blender. Grandma Ruth's original instructions to my mother stated that you were to cut the shortening and the flour/salt mixture together until "it is the size of small peas."
2. Add the water, and combine to form a ball of dough. I usually stir it with a soup spoon. The key is that you don't want to overwork the dough at this point.
 |
| The flour, salt, and shortening ready to be blended together. |
 |
| What the flour, salt, and shortening mixture looks like when it is ready for the water to be added. |
 |
| The water has been added, and the dough is now ready to be divided in half. |
At this point, I divide the dough in half and roll out the bottom crust and put it in the pie tin. Then I roll out the top crust, putting some kind of design in the center of it to serve as a vent to let the steam from the filling escape.
It is only fair to tell you that I pretty much guess on the measurements for all of the ingredients in the pie crust, but the recipe seems pretty forgiving. The measurements for the pie filling are even more vague. Grandma, Mom, and I all have a set of the multi-colored Pyrex bowls that were popular in the late 1940s. Grandma and Grandpa were married in 1947, and Grandma received two sets as wedding gifts. She kept them both and uses them to this day. I remember that when I was first learning to bake apple pie, she and I were discussing how many apples to use for filling. I'll never forget what she said:
"I don't know how many apples I use. It has always depended on what size the apples are and what kind of shape they are in. I just know what looks right in my green bowl from that Pyrex set."
As an inexperienced cook, that was not the helpful advice that I was looking for at the time, but now I know exactly what she means. Now I always use the green bowl for any kind of fruit pie filling that is not cooked before it is put into the pie shell, because I too know "what looks right." For the 9" pie
in the pictures below, I used four large Granny Smith apples which were uniform store-bought apples. If you enlarge the pictures, you can see that I like to slice the apples pretty thinly. This is because all of my female pie-baking ancestors preached about the cardinal sin of baking an apple pie in which the apples are not fully cooked.
A side note about apples: Often, we make apple pie out of our own homegrown apples. Since we do not spray, the quality and size can vary widely and can also be dependent on how long they have been in storage. As I noted above, I used Granny Smith apples for the pie in the pictures. When my sister won grand champion apple pie at our county fair, however, she used Yellow Transparent apples from the tree in our orchard. A Yellow Transparent is a sour green apple which ripens in early July here in southwestern Iowa (the name comes from the fact that when it is overly ripe, the skin becomes yellow and transparent). It is certainly our family's preference for this pie, but they are difficult to come by. My other favorite apple to cook with is the Jonathan. Basically, you want to use an apple that is in the tart to sour range which has a firm flesh--in other words, the very opposite of the common Red Delicious apple.
A side note about apples: Often, we make apple pie out of our own homegrown apples. Since we do not spray, the quality and size can vary widely and can also be dependent on how long they have been in storage. As I noted above, I used Granny Smith apples for the pie in the pictures. When my sister won grand champion apple pie at our county fair, however, she used Yellow Transparent apples from the tree in our orchard. A Yellow Transparent is a sour green apple which ripens in early July here in southwestern Iowa (the name comes from the fact that when it is overly ripe, the skin becomes yellow and transparent). It is certainly our family's preference for this pie, but they are difficult to come by. My other favorite apple to cook with is the Jonathan. Basically, you want to use an apple that is in the tart to sour range which has a firm flesh--in other words, the very opposite of the common Red Delicious apple.
 |
| The peeled, cored, and sliced apples. |
To thicken the filling, Grandma Ruth always added two- three tablespoons of flour. That is all I've ever added, and as long as I have baked the pie for a sufficient time to get the filling to bubble, it is sufficient. (Incidentally, I've never messed around with tapioca as a fruit pie thickening. I love tapioca pudding, but I think that it adds a character all its own to pie filling and detracts from the fruit.)
Now, I know that many people like to add various spices to their pie filling, but Grandma Ruth and Grandma Marian were always adamant that the fruit should be what you taste in a pie, not the spices. For that reason, we only add a sprinkling of cinnamon to apple pie filling--nothing else!
 |
| The sugar, flour, and cinnamon atop the apples, ready to be stirred together. |
and cinnamon together so that the apples are evenly coated. The reason that I say that your crust must be ready before stirring the filling is that the sugar will immediately begin to draw the juice out of the apples, and if they are allowed to sit for any length of time, they can become quite soupy and result in a bottom crust that is of poor quality.
 |
| The apples, sugar, flour, and cinnamon once they are stirred together. |
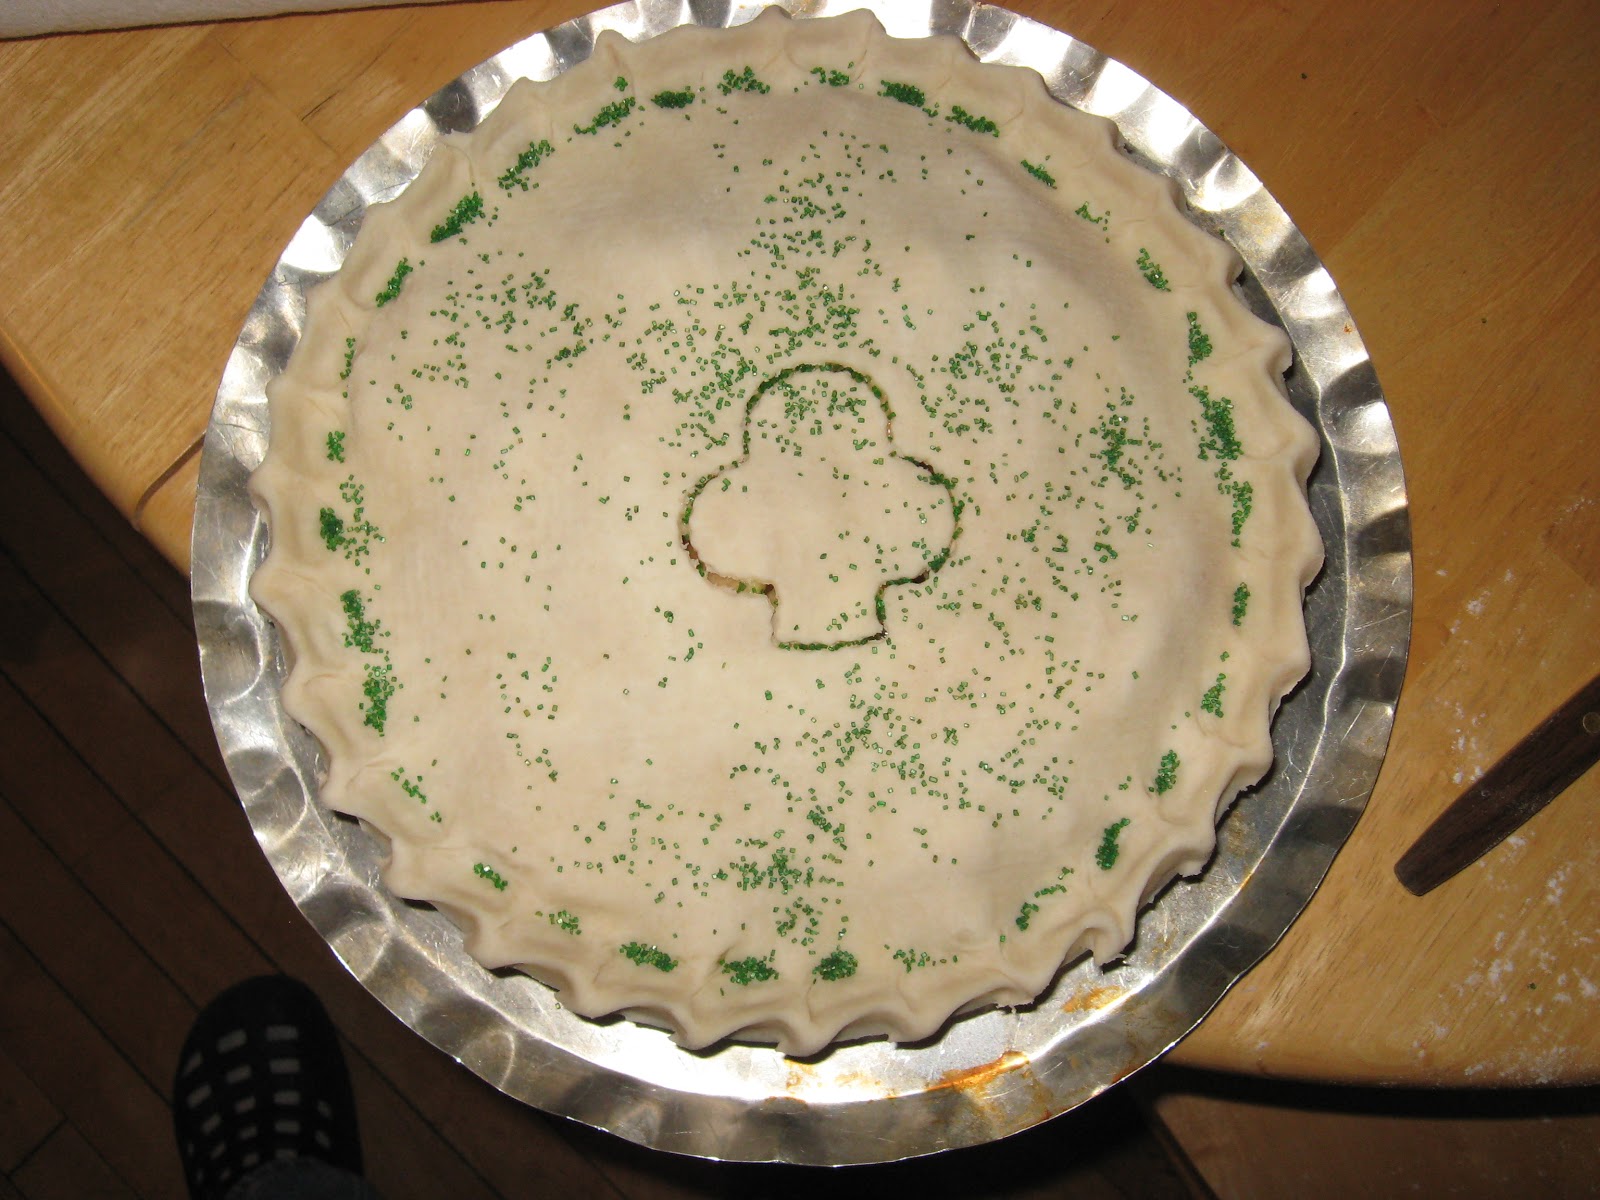 |
| The assembled apple pie. This pie was taken to a church potluck which happened to be on St. Patrick's Day this year (hence the clover- shaped vent and green sanding sugar). Hmm. You'd think I'd have the sense to not photograph my own foot, wouldn't you? |
As with any double crusted fruit pie, this pie should be put into a hot oven for the first ten-fifteen minutes of the baking time. The oven heat can then be permitted to cool to moderate heat until sufficient time has passed to cook the filling (about forty-five minutes). As I've written before,
another method which I have used successfully is to bake the pie for around an hour between 375 and 400 degrees. I'm sure many cooks wouldn't agree, but it seems to me that very little about cooking is an exact science. What you absolutely have to be sure of is that the filling is boiling and looks as though it has thickened before you take it out of the oven. I like to see a nicely browned crust, also.
 |
| The finished apple pie. I did rotate it about a quarter of a turn during baking. You can see that the left side of the pie is a little darker than the right since the firebox side of our cookstove is on the left. |
As always, feel free to add your thoughts and questions in the comments fields below. I like to hear from readers!
We've just been discussing pie crusts here. So glad to see your recipe. Thanks!
ReplyDeletelove this story also i use transparent apples thats what my mom used and yes you are right there hard to find but so good in a pie
ReplyDelete