Saturday, September 28, 2013

Making Jelly on a Wood Cookstove

I mentioned in an earlier post that a job that I would far rather do on a wood cookstove than a gas range is to make and can jelly.  I had never made jelly on a gas stove until I made a batch of strawberry jelly on the new gas range back in July.  The reason that I didn't like making jelly that way was because so much heat was traveling up the side of the pot that stirring it was a very uncomfortable experience.

A veteran gas stove user told me a couple of years ago that if a lot of heat was traveling up the outside of the cookware, the flame is too high, so I lowered the flame.  No dice.  I still nearly burned my arm trying to make the jelly.  In late August, we were over at my parents' house putting up sweet corn using the 1950s gas range in their basement, and I was surprised to note how little heat was traveling up the side of the pots.  I attribute the difference to a change in the structure of new gas ranges from old ones; the burner grates on our new range lift the pots a lot farther above the flame than the old style grates did.  That's the only way that I can account for the difference.

At any rate, here is how I go about making jelly on the wood cookstove:

1. The first thing to do is to build a very brisk fire.  I fill the water bath canner about half full of water and place it and the full teakettle directly over the firebox.  Once the water in the teakettle is hot, I pour a little of that over my canning lids and place them away from the fire over low heat.


A brisk fire in Marjorie the Margin Gem, getting ready to make jelly.
2. Next, I pour the measured fruit juice into the heavy-bottomed stockpot that I use for jelly making.  If I am using powdered pectin, I put the pectin into the fruit juice.  If I am using Certo, it is the measured sugar that is put into the fruit juice right away.

It is in this step that one has two options.  Most jelly recipes say that you are to bring the fruit juice mixture to a boil quickly.  I think that this is very important.  When I've had batches of jelly that I've brought to a boil too slowly, it seems that the firmness of the set is adversely affected.  Since the "high" heat over the firebox is usually not quite as hot as the "high" setting on a gas or electric range, what I've taken to doing is removing one of the lids over the firebox and boiling the jelly directly over the fire.  This speeds the time that it takes to bring the fruit juice to a boil.  However, some jelly recipes don't call for a lot of juice, so I've successfully made jelly without removing any of the lids in those situations.

The jelly kettle is moved slightly to the right just
for this photograph so that you can see that the lid
over the firebox is removed.

Marjorie is so embarrassed.  She needs a bath
really badly, but she's been busy doing a lot of
canning recently and hasn't been cold when we
had the time to give her one.
3. Once either the sugar or the Certo is added, bring the jelly back to a good rolling boil and boil it for one minute.

4. Remove the jelly from the fire.  Skim the foam and put the jelly into the jars.

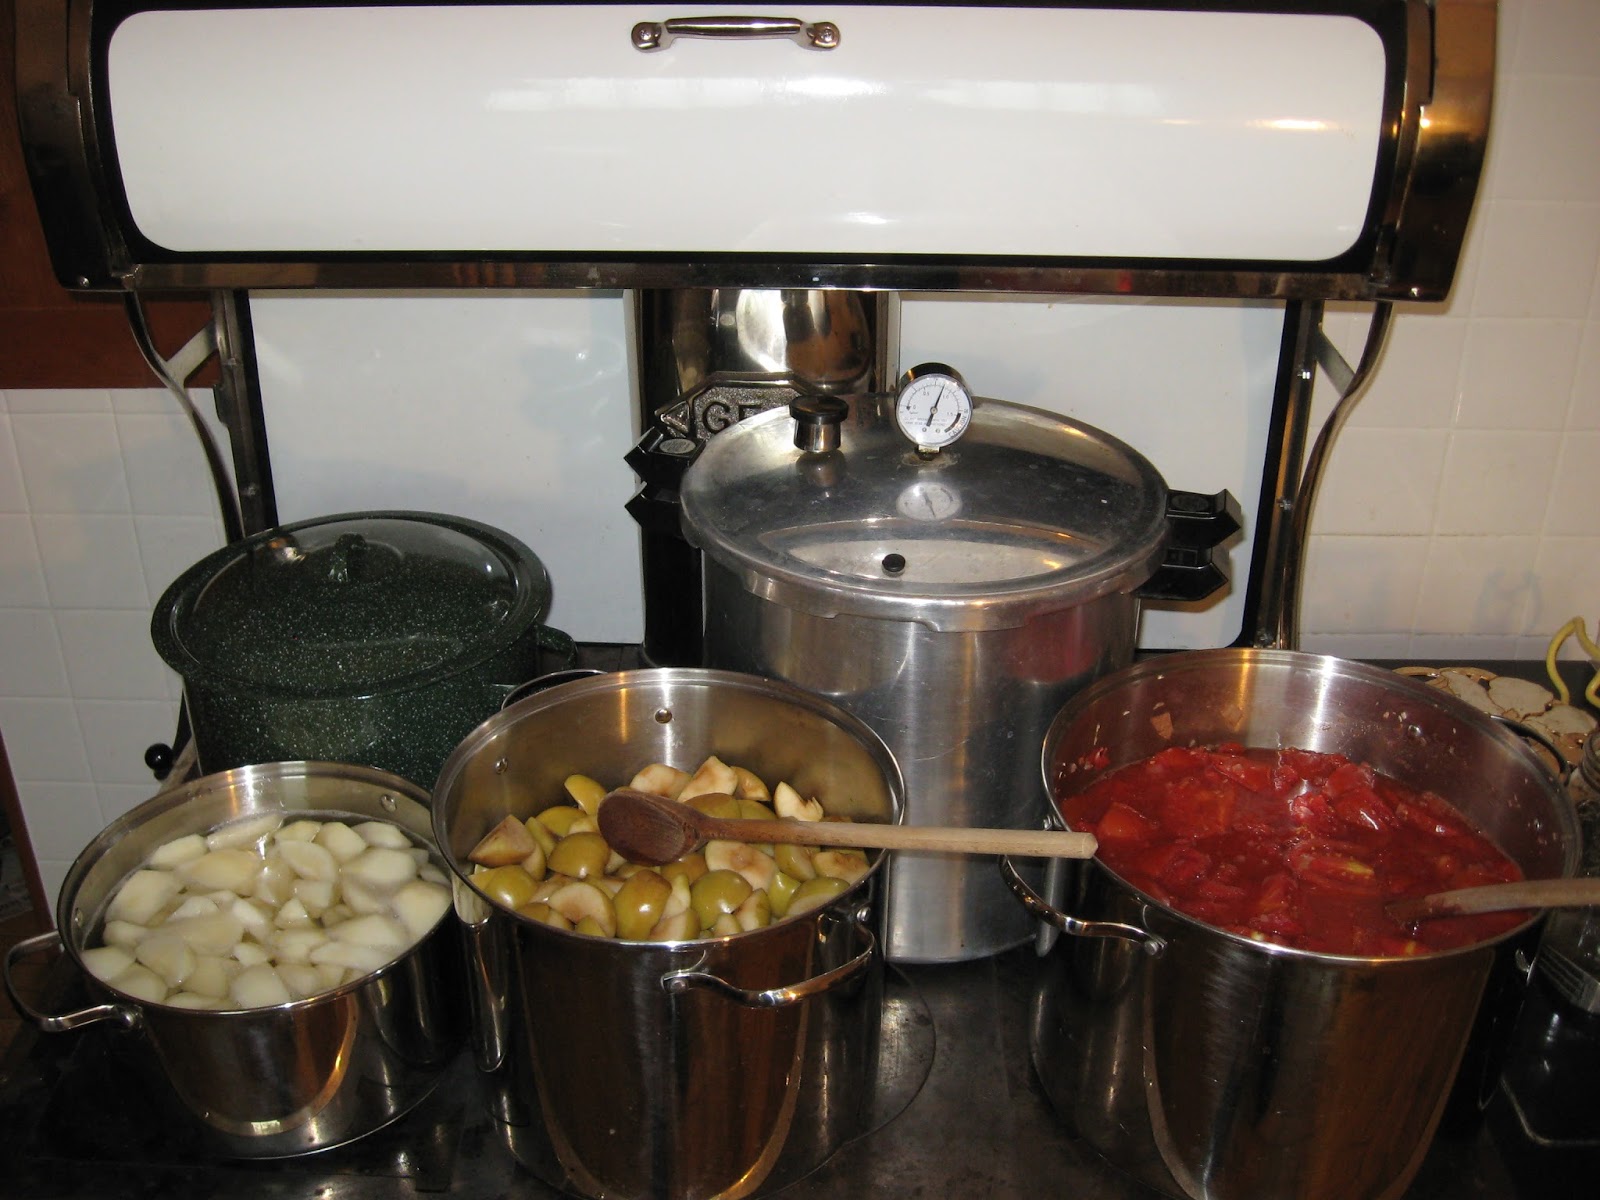
Now, according to what I read online from the USDA, canning jars do not need to be sterilized prior to canning if they are going to be used in a pressure canner or if they will be in a boiling water bath for longer than ten minutes.  I hate messing with hot jars, so even though many jelly recipes say to just water bath jellies for 10 minutes, I usually water bath jelly for 12-15 minutes, and I've never had a problem with the end product.

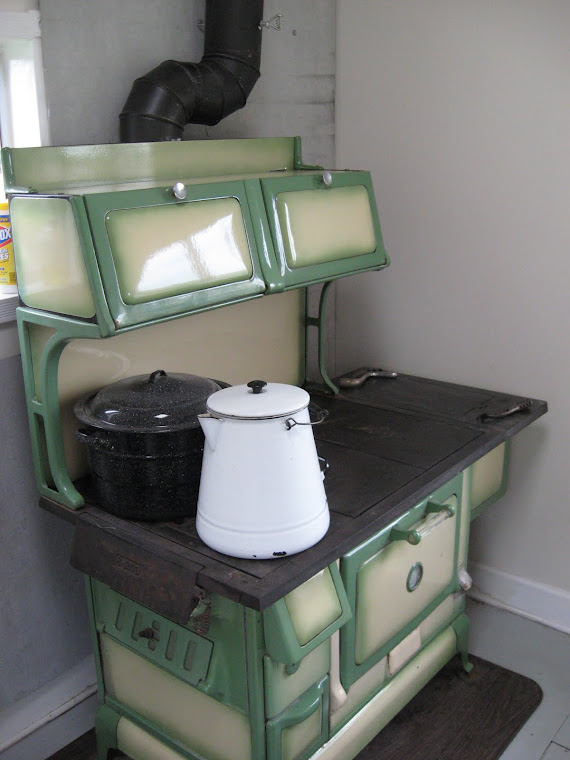
If you are worried about jars breaking when the hot jelly is poured into them while they are cold, the niftiest place to keep jars warm is in the warming oven.  When we made so many batches of peach jam on the Riverside Bakewell down in the summer kitchen last year, I kept all of the jars in there.

The warming oven of the Riverside Bakewell keeping
jelly jars warm and ready for peach jam back in 2012.
5. Fix the lids on the jelly jars and place them in the water bath for the required amount of time. 

This is where the teakettle comes in handy.  I am not good at guessing how much water needs to be in the canner to cover the jars sufficiently when they are all inside it.  Taking extra water out of the canner is a mess, so I find it much more convenient to have the teakettle of boiling water ready to put extra water into the canner if I need it.

6. After the processing time has elapsed, remove the jars of jelly to a towel in an area free of drafts so that the jelly will set and seal.

In the picture below, the canner is actually what is called a "sweet corn pot" which we purchased from Bomgaar's this year.  Our last kettle which was just like it had sprung a leak, so it would leave its autograph on the cooktop after we had used it.  I like to use "sweet corn pots" as small water bath canners because their bottoms are flat so they make good contact with the stovetop and facilitate efficient heat transfer.

Most real enamelware water bath canners have the familiar corrugated bottom of concentric circles.  This works just fine on gas stoves and is all right on an electric stove.  However, it is very inefficient on a wood cookstove because only about half of the bottom of the canner is making contact with the hot stovetop.  Removing the stove lid beneath one of these fixes that problem, so I have done a lot of water bath canning directly over the fire, too.

The jelly is now in the water bath canner, and you can see that
the fire doesn't have to be so brisk to keep it boiling.


Another added advantage of making jelly on a wood cookstove as opposed to making it on our gas stove is that on the gas stove, the only burner that is small enough to use for keeping the lids warm is the burner that is behind the biggest burner.  Thus, you always have to reach around either the canner or the jelly pot to reach the canning lids.  On a wood cookstove, the small pan with the canning lids is always to the side of the big kettles rather than behind them.

Well, there you have it. Making jelly on a wood cookstove is not really an involved process, but it does have some unique idiosyncrasies.  As always, if you are a wood cookstove user who makes jelly on his or her stove, please chime in by using the comments section and tell me what you find works best with your stove.


Thursday, September 19, 2013

A Blog Reader's Cookstove - II


Mark, a blog reader in Missouri, contacted me this week with a very nice comment on a recent post.  He wrote that he has recently begun learning to cook on a vintage Glenwood #8 cabinet style cookstove installed in the kitchen of the newly built home that he shares with his wife.  He gave the address of his blog, where he has posted a few pictures of this grand old lady in her new home.

Reader Mark at his Glenwood #8 cabinet style
cookstove.

You can visit Mark's blog to see more pictures of his stove and to read what he says about it by clicking on his posts at this link, this link, and this link.  Glenwood stoves were manufactured in Taunton, Massachusetts, and this stove was refurbished and sold by The Love Barn in Orland, Maine.  You can visit their website here.

I wanted to include pictures of Mark's cookstove here on my blog because I want people to see how Mark and his wife and their builder incorporated a working antique cookstove into a modern kitchen design.


As you look at the pictures of Mark's stove, several things are noteworthy:

a) To bring the stovetop up to a height that is even with the countertops, a steel base was custom-made for the stove to sit on.

b) Mark's builder made some clever modifications to the walls next to the stove to offer reduced clearances.  He gives more information about that in his blog posts.

c) This particular model Glenwood was chosen because it fit in the space that was available, and as I study the pictures, I notice that this model is doubly convenient for Mark's situation since the pouch feed is on the front of the firebox rather than on the left side.  The proximity of the wall to the left side of Mark's stove would have made a left-facing pouch feed pretty useless, so the front pouch feed is perfect.  Our Qualified Range was equipped with a pouch feed on the left side, and I used that quite frequently for refueling and poking the fire, and I miss that feature on the Margin Gem. 

d) The pouch feed door is equipped with what is called a check draft.  Once the fire has been burning for awhile and has become hot, the check draft can be opened to allow cool air to be drawn across the top of the fire.  In theory, this will slow the combustion of the fuel and lower the heat of the cooktop.  I'm anxious to hear from Mark about whether this works since I've never cooked on a stove that has  this feature.

e) Most of the surviving antique cookstoves in the Midwest have bodies which are made of part cast iron and part steel.  These stoves, such as Home Comfort, Monarch, Kalamazoo, and Majestic brands, were manufactured in Michigan, Wisconsin, or Missouri.  Most of the surviving antique stoves made in the New England states, though, were either completely cast iron or at the very least had a higher percentage of cast iron.  It looks to me like, with the exception of the backsplash and warming oven, this stove is completely cast iron.  I've read that this is supposed to make them better bakers because the oven temperatures will not fluctuate as much.

As always, it was great to hear from a fellow wood cookstove user, and I hope that Mark will feel free to comment on my blog to share a Glenwood cookstove user's point of view.


Tuesday, September 10, 2013

Marjorie's Busy Weekend

Last weekend was a very busy one.  Besides visiting Carstens Farm on Saturday and having a potluck brunch and church service in the park on Sunday morning, pretty much the rest of the weekend was taken up with canning and preserving.

Many different produce items are currently ripe in our corner of the world, so we had a wide variety of tasks to complete, and despite temperatures in the 90s and considerable humidity, we fired up Marjorie the Margin Gem to do the canning.  First, we quickly canned the small batch of sweet pickles that my mother had been working on for the last two weeks.  She used my great-grandmother's recipe, which all of my dad's side of the family is quite fond of.  While they were in the canner, we started making pectin out of the unripe Jonathan apples which we plucked from the broken branches of my favorite apple tree in our orchard.  We also put a kettle of Roma tomatoes from my mother-in-law on the stove to cook down for homemade ketchup.  Then, we canned green beans from my sister-in-law's garden, and began to work on canning the pears from the tree in our orchard.  All of this kept the Margin Gem's cooktop quite full.


A very busy Margin Gem cookstove pressure
canning and water bath canning at the same time.

Notice in these two photos that the Margin Gem is accommodating seven vessels.


A closer picture of the many pots on the cooktop.  Pears boiling
to be hot-packed are on the lower left.  The apples being cooked
for pectin are in the middle rear; the tomato and onion mixture is
in the right rear.  The two canners, the teakettle, and scalding lids
round out the picture.


Things had to move once the pressure canner reached the
appropriate point. 
On Sunday afternoon, the stovetop looked quite similar except that the pears were replaced with peaches.  The pectin was on its second cooking, and we filled the sixteen-quart kettle with a second batch of tomatoes.

I'm terrible at guessing quantities of food to be canned, and I frequently miss my guess when it comes to how much fruit it will take to fill the canner.  Therefore, one of the things that I really like about using the wood cookstove for water bath canning is the reservoir.  If I have more fruit prepared than I can actually fit in the canner, what I've taken to doing is going ahead and filling the extra jar with the fruit and boiling syrup, putting the lid on it, and then placing it in the hot water in the reservoir.  This way, the jar won't seal prematurely (like it would if you were open-kettling), and I'm quite sure that the high temperature of the reservoir prevents any bacteria growth in the short time before the jar of fruit is removed to the canner once the initial batch of jars is finished processing.

I have read that if your stove's water reservoir is capable of reaching the boiling point, you can just do your water bath canning in the reservoir.  So far, the water in the Margin Gem's reservoir has not gotten hot enough to boil.

The final products ready to be washed and carried down to the
fruit room.  It isn't a large number of total jars, and they don't
include the ketchup yet because we were not finished with it at
the time of the photo.
I am quite fascinated by the whole prospect of making our own pectin.  I found the method here on Pinterest while looking at one of the boards that someone else had pinned our blog to.  My great-great-aunt Meme, who is mentioned in the "About Me" section to the left, used to reminisce about making pectin when she was a young girl, and I had read some vague accounts of how it was done, but this was the first time that I had seen very much in the way of directions.  Because of two exceedingly long cooking times, making pectin is a process which is well suited to the wood cookstove.

Everything worked according to what I read at the site, but one thing puzzles me.  The pectin gelled like it was supposed to when I tested it in the rubbing alcohol, and when I put it in the jars, it poured like honey.  However, now that it has been canned and allowed to cool, it is almost as runny as water, so I'm a little concerned about it.  I also have no idea how to use it.  I was able to find directions for that at this link: http://www.pickyourown.org/makeyourownpectin.htm.  I think I'll start by using the proportions for Certo and see what happens.  I'd better make a batch of jelly with it as soon as possible in order to find out whether it is going to work.  If the jelly is successful, I'd like to make more because commercial pectin has become so expensive.  If any of my readers have experience with this and can offer advice, please do!

Another thing that I wondered about frequently during our weekend was energy efficiency.  While we had the cookstove fired, we had the kitchen shut off from the rest of the house, but we had the air conditioning going.  Of course, it ran nearly constantly after the stove had been going for a while.  So, would it have been more energy efficient to use the gas stove?  In some ways, I think the gas stove throws an equal amount of heat into the house, and there is no way that we could have had any more than four pots in use at once when using it.  Also, when the cookstove is being fired, it is heating lots of hot water for us.  I don't know how one would figure this out, but it is a question that intrigues me.

At any rate, the forecast for the next several days shows much, much cooler weather on the way.  It doesn't look like we'll be needing the air conditioning anymore in the foreseeable future, so there won't be any wondering which method of canning will be the most energy efficient.