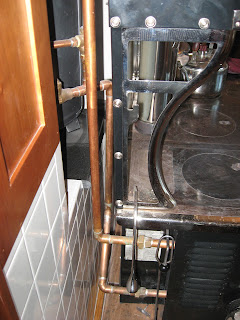
I'm beginning to feel the itch to cook on the wood cookstove. I had hoped that I would get the Riverside Bakewell, the Hayes-Custer, or even my brother's Montgomery Ward hooked up in the summer kitchen over the last few months, but this whole being a new author thing has taken up far more time than I imagined (very excited about it, though).
It is too warm and humid to fire up the Margin Gem, and the forecast for the next few days looks like that trend is going to continue. However, on my way to school the last couple of days, I've been watching fields of corn and soybeans that are beginning to turn, so my mind is looking ahead to the days when a fire will be burning in the kitchen stove once again.
As I was thinking about this, I ran across a recipe from 1872 that I copied from the Anita, Iowa, centennial cookbook late last school year. Really, I wouldn't call it a recipe so much as it is directions for how to cook a roast in a wood cookstove, and even at that, the directions are pretty sparse. What I do think it shows well is how efficient cooks thought of ways to stretch the meat and how one might have handled the lack of refrigeration in the early 1870s. I've been told before that beef was the early cook's friend because of its relative shelf stability compared to other meats.
These directions were shared by Mrs. William A. Suplee.
To roast in a cooking stove, the fire must have careful attention lest the meat should burn. Lay it, well floured and seasoned, into a dripping pan, with rather more than enough water to cover the bottom. Turn the pan around often, that all parts may be equally roasted, and baste frequently. The oven should be quite hot when the beef is first put in that the outside may cook quickly and thus retain the juices. A large roast of 8 or 10 pounds is much better and more economical than a small one, even in a small family. The first day it can be served rare; that which is near the outside will be well enough done for anyone. It can be re-roasted the next day. If much remains, serve cold on the next, or cut in very thin slices, dip each one in flour, then chop 2 onions fine. Place a layer of meat in a baking dish and sprinkle with salt, pepper and onion. Above this, place a layer of sliced or canned tomatoes. Alternate layers until the dish is nearly full, moistening with the gravy. Place a layer of tomatoes upon the top. Fill with boiling water, cover with a plate, and bake 2 hours.
I don't think I'll be trying to stretch one roast over three days like this because Nancy isn't fond of leftovers, and the method of serving it the third day doesn't appeal to me because I'm not that fond of tomatoes cooked like that. Thus, I'll stick to my method of roasting beef in the cookstove, which you can find at
this link, but it is fun to read vintage pieces of kitchen advice.


