Monday, December 29, 2014

Stovetop Potpourri

I hope that you all were able to enjoy celebrating the birth of Christ last week.  I feel a bit guilty about not writing a Christmas post like I have done over the last couple of years, but there just wasn't time.  This year, my school was still in session on the 23rd, and I barely had enough time to get our traditional candies and cookies made before Christmas, let alone have time to blog.

Anyway, many of you who read this post will undoubtedly have a "Well, duh!" reaction to its content.  To tell the truth, I'm having a "Well, duh!" reaction to my own ignorance.  Before I get too hard on myself, though, let me explain a couple of things: 1) My mother does not like home fragrances, air fresheners, potpourris, or perfumes of any kind.  They give her a headache, so I was raised in a home with unscented everything, and I, too, don't much care for overly scented things.  2) Nancy and I are not made of money, so while I believe we still spend too much in some areas of our lives, we try to avoid unnecessary expenses where we can.  Thus, air fresheners, potpourri, and Scentsy pots are not part of the regular housekeeping expenses here.

When we went to Nancy's parents' home (five miles away) for Christmas with that side of the family on December 26th, Nancy's sister Susan had put a little pot of things on the stove that looked like it was definitely not going to be a part of the Christmas dinner menu.  Since no pot of stuff on a stove may go undiscussed in my presence, I inquired as to what it was that I was looking at.  Susan explained that it was a pot of "stovetop potpourri," the recipe for which someone had found on Pinterest and which had become popular among the people she knows in her hometown.

"Turn it on and let it simmer," she said.

I did.  It smelled divine.  Nancy liked it, too.  I asked for the recipe.

We bought a new bag of cranberries the next day--we already had everything else--and Nancy remarks multiple times per day how much she enjoys the scent of this simmering on the stove.

Now see, I would never have thought about using a wood cookstove as a potpourri warmer, but I have to say that I think a cookstove is the perfect appliance for it for several reasons.  For one thing, the stove is going to be going anyway, so there is no added energy expense--which would have absolutely prevented me from doing this sort of thing on a gas or electric stove.  Also, I think that candles actually provide a greater fire hazard than a wood cookstove.

Here is the recipe:

1 orange, sliced
1/2 c. or so whole cranberries
1 Tablespoon whole cloves
3 cinnamon sticks
2 cups of water

Let this simmer on the stove indefinitely.  As the water steams away, add more.  You can use this as long as you are happy with the intensity of the aroma.  Our first batch has been sitting on the side of the range for three days now, and it still smells great.

The potpourri simmering on the side of the Margin Gem.


A quick peek at Pinterest revealed that there are many, many recipes for this sort of thing.  This particular combination (which smells just like expensive candles or bags of dry potpourri) is considered a "holiday scent," but Pinterest has many recipes for stovetop potpourri for different times of the year.  I bet this isn't the only recipe that we will have simmering on the stove over the next few months of constant winter firing!

Monday, December 22, 2014

Meme's Penuche Candy

A small piece of penuche on a dessert plate.

As is mentioned in the "About Me" section on the left, my great-great-aunt Meme is the person who taught me to cook.  She was also the one who unwittingly instilled in me a love for the woodburning cookstove.  She would be so embarrassed if she knew that I credited her with this aspect of my life, but it is true nonetheless.

Meme was the candy maker in our family for many years, and she taught me to make fudge and divinity.  I blogged about her fudge recipe last December, and in doing so mentioned penuche.  Penuche is basically a caramel fudge.  Meme had ceased making penuche before I began assisting her with the candy making in 1985, but she occasionally would talk about it.  She and her sister Pearl made all of their candy on the 1920s Monarch range that they had in the "big house" on the farm where my first cousin and his wife now have a new home (the old house having been destroyed by fire in the early 1960s).

It wasn't until the late 1990s that I finally got to taste penuche, and I fell in love with it immediately.  I looked up Meme's recipe for it and tried making it, but it was a complete failure--for the first many years that I made it.  Part of the problem was the recipe.  It read just as follows:

1 1/2 cup sugar
1 cup brown sugar
1/3 c. cream
1/3 c. milk
2 T. butter
1 t. vanilla

That was it.  Meme's recipes are just like many of those that belonged to great, experienced, from-scratch cooks: they didn't include any directions.  At first, I figured it was just me.  The next time I made it, I figured there was something that I didn't know.  I looked up other penuche recipes and found a variety of directions, but none of the recipes were exactly like Meme's either.

Fortunately, I have Meme's recipes (complete with the ancient panty-hose elastic that she used to keep them together in fifty-year-old shoeboxes), and I was digging through them for a different recipe when I found Meme's penuche recipe complete with directions.  What a find!

At this point, it seems fair to tell you that even though I've found directions, that doesn't mean that I've had success every time I've made this recipe.  Penuche, in my opinion, is tricky stuff to make, but it is so delicious that I haven't given up.

Here is what you do:

1. Combine sugar, brown sugar, cream, milk, and butter in a heavy-bottomed sauce pan.


2. Bring to a boil over the firebox, but then move the pan to a cooler part of the stove so that the boiling continues but not quite so briskly.


3. Cook to softball stage (238 degrees on a candy thermometer); don't take it off the fire a moment before, and don't leave it on the fire a moment longer!  I prefer to use the cold water test.  When you allow a few drops of the cooking mixture to fall from your spoon into a teacup of cold tap water, stir it around with your finger, and it forms a soft, chewy ball of candy, you have reached the soft ball stage.  Remove from the fire and allow to cool to lukewarm.

The penuche syrup as it appears after being dropped into the
cold water.

The penuche at the soft ball stage after I pushed it together into a
ball with my fingers.

4. When you can put your hand on the bottom of the saucepan without burning it, add the vanilla and begin beating.  The mixture will become a lighter color and will thicken.

5. At this point, you have two options.  I like to spread the candy in a buttered 8 x 8 cake pan to be cut into small squares later.  My mother remembers that Meme would drop the penuche from a teaspoon onto waxed paper and push a pecan half onto the top of each piece.  Just know that you have to work like wildfire at this point.  The candy will set up very, very quickly.


Either way, this old-fashioned candy is fantastic--when it turns out properly--and I hope that you'll enjoy it too.  Don't be turned off by the descriptions of my repeated failures.  I figure that one of the services that I can offer my blog readers is to suffer through the failures in order to deliver you a better chance of a successful final product on your first try.  Fill up the comments section with your findings, knowledge, and advice.  Good luck!

Note: The next time I make this, I'm going to try buttering the saucepan before cooking the penuche.  I think this might help keep it from turning grainy around the edges.

P.S. (12/23/14)  I forgot to mention that if you do have a batch that fails, don't discard it.  Doled out a couple of spoonfuls at a time, it makes a delicious sweetener for your bowl of hot breakfast cereal.

Wednesday, December 17, 2014

Link to Information Regarding Firing Coal

In reviewing where recent viewers of this blog have come from, I saw that several readers had arrived via a site called NEPACrossroads.com.  After investigation, I found out that this website is a HUMONGOUS discussion forum about home heating (and cooking) with coal.  I could spend an entire day reading and learning there.

While my blog is devoted to cooking with wood--a fact which appears to cause them to shake their heads a little--I do know that some people who burn wood during the day keep their fires going at night with coal because of its longer burn time.

I have only had two experiences with burning coal, both of which were in the Qualified Range because it was equipped to do so.  The first experience was after I had gone to visit Lehman Hardware in Kidron, Ohio, for the first time.  While in Amish country there, I purchased a small sack of coal at a lumber yard.  I brought it home and tried it out.  I suspicion that it was bituminous (soft) coal because it was a mess to burn.  The whole inside of the stove was quickly coated with feather-like appendages of soot that caused the stove to draw very poorly.  It was quite smoky, and the smoke smelled horrible.

The second time that I had a chance to burn coal in the Qualified was very different.  Nancy's grandparents broke up housekeeping in 2010, and in the cob bin in their summer kitchen, a few lumps of coal remained from the days some sixty years earlier when they were still heating with a combination of wood, cobs, and coal.  I picked through the decaying cobs and hauled home all of the coal that could be found.

I am quite sure that this coal was anthracite (hard) coal.  It burned with little odor and little smoke, and I would have to admit that I liked it--a lot.  I can definitely see the appeal: long burn time, no creosote worries, a more easily controlled fire, etc.  But alas, one has to burn what one has available, and even after a great deal of research, I know of no place where one could purchase nut or lump coal around here.  The other problem is that one little word which gets in the way: "purchase."  At this point, we burn wood not only because it is what we have available right here on our farm, but also because it doesn't cost us anything but chainsaw supplies and maintenance, exercise, and time.  Furthermore, we did not purchase the coal grates available for the Margin Gem, so burning coal in it right now is not really an option anyway.

At any rate, the people at NEPACrossroads said some very nice things about my blog and linked to it, so I want to return the favor.  Many of their discussion points are applicable to cooking on a wood fire, too, and the pictures of their vintage stoves are fun to look at.

That said, take a look if you feel like it, and should you decide to burn coal, be sure that your stove is properly equipped to do so.

You can visit the thread about cooking with coal at NEPACrossroads by clicking here.

Saturday, December 13, 2014

Making Toast on a Wood Cookstove

I find it interesting to read the many articles about how to make toast on a wood stove (heating stove or cookstove) which appear all over the internet, and I've decided to put my two cents in with this post.

To be completely honest from the outset, we do not make toast very often on our wood cookstove.  Our early 1950s Toastmaster toaster is just too convenient.  However, I know that many of the people who read this blog are interested in homesteading, preparedness, or increased self-sufficiency.  Furthermore, many people who cook on woodburning cookstoves live an off-grid lifestyle, and a conventional toaster can be quite a drag on alternate power sources.  Thus, it seems pertinent to include information about toasting on a cookstove here.

One can make toast on a wood cookstove in five different ways.  I think some are better than others, though, so I'll warn you right now that I will be editorializing along the way.  You're not a bit surprised, are you?

To make an accurate comparison of the toasting methods, I used purchased bread so that each slice would be as nearly uniform in size and composition as possible.  No matter how I slice homemade bread, I cannot get it to be perfectly even, and I didn't want the bread to be a variable which affected the results of my experiments.

Method 1: Using a stovetop--or "camp"--toaster.  These can be purchased all over the internet in the style you see below or in what is sometimes called the pyramid style, where a louvered pyramid directs the heat of the stove toward the toast that is resting parallel to the sides of the pyramid.  Mine happens to have been purchased from Lehman Hardware, but I do not know whether they still carry it.


I consider the stovetop toaster method quite unsatisfactory for a woodburning cookstove.  I had asked for this toaster as a Christmas gift from my in-laws several years ago, thinking that it would be the perfect thing to add to my collection of wood cookstove accessories.  To make a long story short, I could never get it to work right on the Qualified range, but thought it must have just been me.  It went to the basement for several years, but I decided I would try it out on the Margin Gem.
 
The bread that you see in the picture rested on the toaster for 30 minutes and did nothing but dry out.  Thinking that I might just as well get rid of the thing (Nancy is constantly pointing out that we have too much stuff in our house), I decided to give it a try on the gas range.  Within four minutes of having the thing over a pretty high flame, I had very respectable toast.  Thus, this toaster went back to the basement in case I need toast in the middle of a summer power outage, but it will not be used on the Margin Gem again.
 
Method 2: Laying the toast directly on the cooktop.   Of course, you first want to make sure that your cooktop is very clean--free of fly ash, wood dust, and any spilled food which might have cooked on and then carbonized.  Lay the piece of bread wherever you feel that the heat is appropriate.  I put mine directly over the firebox, but I think that at the time I was conducting this experiment, that place was perhaps a little too hot.
 
When you feel that the bread is toasted to your liking on the first side, turn it to toast the other side.  Watch it carefully because this method goes quite quickly.

A lady who lives in our small town and is a friend of my mother's once told me that the only toast that she ever had growing up was made this way.  She shared this memory because for some reason she and my mom were talking about burnt toast and how it can be salvaged by scraping the burnt parts with a table knife until all of the blackened crumbs have been scraped off.  She grew up thinking that scraping the burnt part was just a necessary step in the way everyone made toast, so you can see that this method can easily result in burning your bread rather than toasting it.


The aspect of method two that I don't much care for is that the toast always leaves its autograph on the stovetop.  If you've been following this blog for any length of time, you've seen picture proof that I'm not as fussy about the look of my stovetop as I probably should be, but still.

Method 3: Toasting bread on aluminum foil on the cooktop.  I didn't think of this one myself.  I found this one online here at this "toast post" on the Paratus Familia Blog.


Clearly, this method works--quickly, too--and I've made good toast this way before, but in the pictures above, I had the foil over a part of the stovetop that was a little too hot for toasting.  My main complaint with this method is that after you've used your toast foil for a while, it will need to be replaced.  That is why this is not my preferred method.

Method 4: (my preferred method) Toasting on a cast iron griddle.  I asked for this 11 1/4" breakfast griddle as a Christmas gift when I was in either junior high or early high school.  It is extremely well seasoned from frying pancakes and French toast, so things don't stick to it.  I put it over the hottest part of the stove and lay the bread on it.


Watch carefully and turn the bread when it is toasted according to your preferences.

Bread toasted using my preferred method of using the
cast iron griddle.  You'd think that I could at least keep
the camera strap out of the picture, wouldn't you?
You can see that this method results in good looking toast.  I can't tell any difference between the flavor of this toast and that which comes out of the electric toaster.  This method doesn't take much time after the griddle is hot.
 
Method 5: Now, if you are going to spread a layer of real butter on your toast anyway, an extremely delectable treat is made using this method which is similar to the fourth one.
 
Using soft butter, spread an extremely thin layer of it on only one side of the bread.  Lay the buttered side down on the hot griddle.  Again, watch closely and turn as soon as it has reached the desired shade of brown.  Turn it over to toast the unbuttered side.

The toasted buttered side.

The toasted un-buttered side.
Method five results in toast with an amazing flavor, but since I usually spread light tub margarine over my toast, I don't do this often.  It is quite a treat, though, and the less butter you use, the better the flavor, in my opinion.  You just have to be sure that the thin layer of butter covers the entire side of the bread; otherwise, it browns very unevenly.

Toast made with Method 5 and spread with Nancy's grandma's
recipe for pineapple-rhubarb jam.  Yum!
I guess I should say that there is a sixth method.  It involves putting the pieces of bread in an extremely hot oven (500 degrees or more) until it has reached the desired shade of brown, but I'm not going to try that because I slightly warped the steel bottom of the oven on the Qualified Range by getting the oven that hot, so now I try to avoid firing the stoves in that manner.

As with any cooking done on a wood cookstove, there are as many methods as there are cooks.  Please utilize the comments section below to share yours!


Tuesday, November 18, 2014

Homemade Cranberry Sauce for Thanksgiving Dinner

I'm one of those people who think that Thanksgiving dinner isn't complete without the cranberry sauce.  It seems that only a few of the members of our family feel this way, so usually I get plenty of it.  I put some on my turkey, next to my dressing, and often inside my dinner roll.

My family always has homemade cranberry sauce for our Thanksgiving Dinner, and we always use my great-grandma Ruth's recipe.  She has been gone for nearly thirty years, but she was a remarkable cook whose skills are still legendary in our family.  You can find her recipe for apple pie here, and her recipe for strawberry preserves is here.  Actually, making the cranberry sauce reminds me a lot of making the strawberry preserves, except that these cranberries are tart in spite of having two cups of sugar on them.

First, wash a 12-ounce package of cranberries.  Put them in a saucepan with two cups of water and bring them to a boil over the hottest part of the stove.  I find that this part goes faster if they are covered.

The cranberries and water beginning to cook directly over the fire.

Boil the cranberries and water together until the cranberries split open.  You can actually hear them pop, which makes this part kind of fun.

The cranberries had to be moved away from the fire after a while
(along with the soup kettle), which worked out well because
Nancy was frying bacon for the potato soup.

Run the cooked cranberries through a Foley food mill or press through a sieve.

Running the cooked cranberries through the Foley.

Add two cups of sugar to the strained cranberries and return all to a hot fire in a heavy-bottomed saucepan.


Bring the sugar and cranberry mixture to a boil, and let it boil until it looks glassy and coats a spoon. Stir occasionally to make sure that it is not scorching.  I also skimmed the foam from the top like I would when making jelly.

Cranberry, water, and sugar mixture boiling on the Margin Gem.

Pour cooked mixture into a glass dish (one that will be able to withstand the extreme heat of the sugary mixture) and refrigerate--without touching or jostling it at all--for twenty-four hours.  The mixture should set up fairly firmly.  If it doesn't gel, it wasn't cooked long enough or it was disturbed during the cooling period.  Don't despair, however, because it will taste just as good; it just will run all over your plate.

The finished cranberry sauce ready to be
refrigerated.

Side note: This recipe, of course, still leaves the tiny cranberry seeds in the sauce, so this would not work for diverticulitis sufferers.

This can be made quite a few days ahead of Thanksgiving dinner.  It will keep indefinitely in the refrigerator (it is really jelly after all), and getting it finished early takes one more job away from the long list of cooking for the holiday.  Simple and delicious.

Sunday, November 9, 2014

Browned Butter-Pecan Cookies: Another Kitchen Klatter Recipe

I feel guilty about the number of recipes for sweets that I include here on the blog.  Our cookstove is basically our sole means of cooking from October to May, and we cook and eat a lot more than just desserts and candy around here.  The problem is that I'm very much a meat-and-potatoes kind of guy; in fact, I'm not sure that I would ever get tired of that combination for the main meal of every day.

All of the cooks in my family always planned their meals around the "meat, starch, vegetable, fruit, and glass of milk" pattern, and to this day my favorite meals are like that.  The potatoes were usually mashed, sometimes baked or replaced with rice or noodles for infrequent variety.  The meat was seasoned nicely, cooked well done--but not overly so.  The vegetable was usually just boiled, occasionally buttered, and maybe lightly salted.  Fruits were fresh, in Jello, or home-canned.  That plan makes for balanced, economical eating (I bought a cookbook entitled something like Flat Out Dirt Cheap Cooking and was surprised that the recipes fell into two categories: "familiar" or "more expensive than what I was used to").  The only problem with that kind of menu is that it makes for rather uninteresting blogging.

I notice, though, that the majority of the cookbooks that I have are as unbalanced as my blog.  While proportionately I eat more nutritious foods than sweet foods, the vast majority of nearly every cookbook is spent on sweets of some variety.  Thus ends my apology for sharing another unhealthy recipe.

I recently spent some time going over my Kitchen Klatter Cookbook--the book I think of as the Southwest Iowa Kitchen Bible--looking for new ways to prepare round steak.  We tried a couple of good steak recipes, but nothing worth sharing yet.  Of course, I was distracted by the cookie section and marked a few recipes to try, and this one has been a real winner with us.  It also has been given good reviews by my family and co-workers.  Here is how they are made:

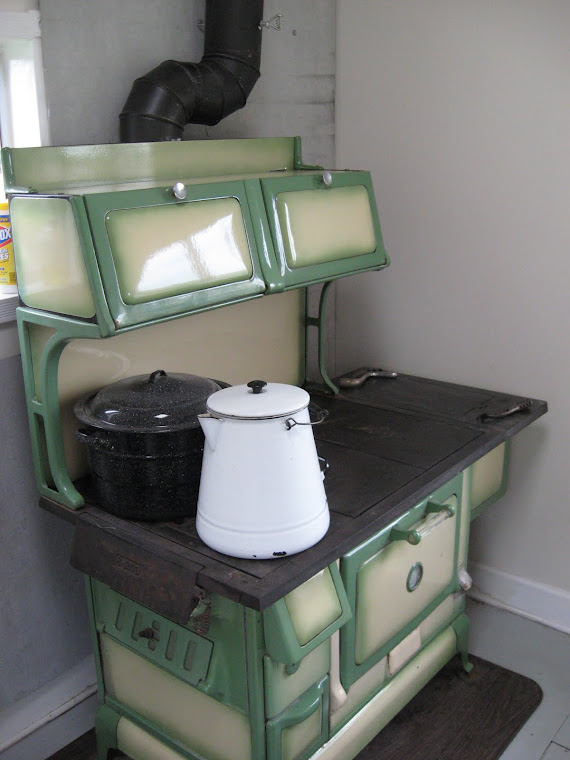
1. Brown one cup of butter over the fire.  Set aside.

Butter melting over the fire in the Margin Gem.

The same butter browning nicely.  I find that a larger pan works
best to brown large amounts of butter in.  If the pan is smaller and
the melted butter deeper, the butter tends to boil for a while before
it finally decides to get brown.

2. In a large mixing bowl, beat together two cups of brown sugar, two eggs, and a teaspoon of X-Tra-Touch maple flavoring.  If you don't have X-tra-Touch maple flavoring, you can order some here.  If you are going to use a different brand of maple flavoring, you might want to start with a 1/2 teaspoon and adjust from there.  For example, I use Mapleine for making homemade pancake syrup, and to quote my brother-in-law, "that stuff is high-octane."

The eggs, brown sugar, and maple flavoring ready to be beaten.

The same combination as above after it was beaten.

3. Pour the browned butter over the sugar, egg and flavoring mixture.  Beat together.  It surprises me how long it takes to incorporate the melted butter.

4. Stir in a 1 tsp. baking soda, a 1 tsp. cream of tartar.  You can add a 1/4 tsp. salt if you want to, but I omit this and don't miss it.

5. Stir in one cup of finely chopped pecans.


6. Then add three cups of sifted flour.


If you let your butter cool a little before you mixed it in, you should have a pretty stiff dough now.

7. Shape the dough into a roll and wrap it in waxed paper.  Chill the dough for at least twenty-four hours.


The roll of cookie dough ready to go into the refrigerator.

8. When you are ready to bake the cookies, you need to build your fire so that you have a moderately hot oven.  The recipe says to bake these at 375.

9. Slice thin (1/4 inch) cookies off the roll of dough, and place them on an ungreased cookie sheet.  Leave plenty of space between the cookies because they expand quite a bit while baking.


10. The recipe says to bake these for ten minutes at 375.  I say bake them however long you like.  Truthfully, I'm kind of entertained by recipes that have an exact baking time on them.  After having cooked with a wood cookstove for so long, I detect doneness by look, feel, and smell rather than minutes.  The temperature in a modern oven varies widely too according to when the element or burner cycles on and off, so a range of minutes seems more realistic to me.  Cookies like this that are sliced or rolled and cut can also need more or less baking time depending on how thick they are.

If you like a chewy cookie like Nancy and I do, take them out of the oven when they have completely risen and are just starting to brown around the edges.  If you like a really crispy cookie, leave them in the oven until they are a uniform caramel color but have not yet fallen.  Aunt Meme used to always tell me that you can tell that a cookie is sufficiently baked if you can remove it from the cookie sheet easily.

These are done enough for Nancy and me.  My mom would
say that they're not any good yet.

11. Remove from cookie sheet to whatever you usually cool your cookies on.  I like to use a layer of paper toweling on the enamel countertop of our vintage Sellers cupboard because that is what Meme taught me to do many years ago.  Cooling cookies this way results in a chewier cookie than cooling them on a rack does.

The first sheet of finished cookies.
A hint: The first time I baked these cookies, I didn't let the browned butter cool at all before I poured it over the egg and sugar mixture.  Of course, you have to beat quickly then so that your butter doesn't cook your eggs.  The dough was also quite warm then, and while it was easier to stir in the flour since the dough was so soft, I had a terrible time getting the dough shaped into a roll.

The second time I baked these, I had a phone call in the middle of the process, so the butter got a chance to cool quite a bit before I poured it on top of the sugar and egg mixture.  I had to work a little harder to get the flour stirred in, but I think that the extra effort was worth it because I was able to make the neat, uniform roll that you see in the pictures here.

Here is the recipe the way that it appears on page 438 of the Kitchen Klatter Cookbook:

Browned Butter-Pecan Cookies
 
1 cup butter, browned
2 cups brown sugar
2 beaten eggs
1 tsp. Kitchen-Klatter [X-tra-Touch] maple flavoring
1 cup finely chopped pecans
2 cups flour
1 tsp. baking soda
1 tsp. cream of tartar
1/4 tsp. salt
 
Melt butter and brown nicely.  Pour over brown sugar, eggs and flavoring.  Add pecans.  Add dry ingredients which have been sifted.  Form into rolls and chill for 24 hours.  Slice thin and bake for 10 minutes in a 375-degree oven.
 
 
Trust me; these are delicious!


Friday, October 31, 2014

Maximizing the Heat from Your Wood Cookstove

This is my 100th blog post!
Sorry.  I just had to point that out.

As the weather has definitely decided to become chilly, it seems timely to talk about how one can get the most room heat from a wood cookstove.

Let me first just say that I have often read in older information about cookstoves that they should not be required to do double duty as a heating stove.  I think the intention was to prevent people from over-firing their cookstoves, causing undue wear and damage.  In addition, the small fireboxes of vintage cookstoves did not lend themselves to fires large enough to heat much more than a few rooms in fairly temperate winter weather.  However, the expectation to not rely on the cookstove as a heater was probably almost always unrealistic.  History is replete with accounts of early households for which the only source of heat in the winter was the kitchen stove, and I have also read (and know from the stories from my family) that even homes with furnaces or additional heating stoves counted on the heat from the kitchen stove to keep at least part of the house livable during winter weather.

It is my guess that most of the people who currently use a wood cookstove also rely on theirs for at least part of their home heating.  Present-day stove manufacturers certainly know this and have thus equipped modern cookstoves with far larger fireboxes than their predecessors had in order to meet that need.  Large modern firebox or small vintage firebox aside, there are a few steps that a cookstove operator can take that will result in the maximum amount of heat being radiated into the room.

The main theme of this discussion then focuses around surface area.  More surface area of the stove being heated and more surface area being exposed to the room results in more heat radiating from the stove.  On all of the cookstoves that I have looked at, the most effective thing to do then is to close the oven damper.

The oven damper in the closed or baking position.
Yeesh!  I just hate how I can't see the dust on
Marjorie in normal light, but a camera flash creates
a horror show.

This results in the heat of the fire having to travel over more area of the stove before it can escape up the chimney.  When the oven damper is open, some of the heat goes around the oven, but quite a lot can simply travel to the great outdoors in short order.

The next step would be to open the oven door.  This drastically increases the surface area which is radiating heat into the room.  As long as we are not baking something, the oven door on our cookstove is open nearly all winter long.

The open oven door.

The Margin Gem cookstove is equipped with a lever which, when in the open position, diverts some of the heat and smoke traveling around the oven so that it travels under the reservoir tank in order to get the reservoir water hotter than if it were just absorbing the head from the side of the stove.  Opening this lever causes the reservoir side of the stove to radiate more heat into the room because the reservoir itself reaches a higher temperature.

The lever in the open position to let the smoke and heat reach the
bottom of the reservoir.  Hmmm . . . Marjorie needs polishing too.

Lastly, when you have a fine draft (our kitchen chimney is superb in this regard) keep the stovepipe damper partially closed to retain more of the heat from the fire rather than just letting it rush up the chimney to the great outdoors.

The stovepipe damper on the Margin Gem is in
the length of stainless steel pipe (which comes
with the stove) between the cooktop and the
warming oven.

If you are a wood cookstove user, what do you do to get the most heat out of your stove?  Let us know by utilizing the comments field below.  Hope you are all keeping warm!

Friday, October 24, 2014

Danish Apple Bars with Brown Butter Frosting

Our apple crop this year has not been nearly so large as last year, and the quality of the apples is lesser also.  However, we have taken the opportunity to make a couple of these Danish Apple Bars. This is a perfect seasonal recipe for autumn when apples can seem to be multiplying before your very eyes and while the chickens begin to respond to the waning daylight by slackening off on their laying.

The first step is to cut 1 cup of vegetable shortening into 2 1/2 c. all-purpose flour and a scant teaspoon of salt.  I always use a pastry blender for this job.

Shortening, flour, and salt blended together.
Next, place an egg yolk in a measuring cup.  Add a little vanilla and enough water or milk to make 2/3 c. of wet ingredients.  Beat the mixture until well combined.

The egg yolk, vanilla, and milk combined to make 2/3 cup.
Add wet ingredients to the dry ingredients and combine.  Do not over beat!  This is a pastry after all.
The completed pastry dough.
Divide the dough in half and roll one half into a 10x15-inch rectangle.  Line the bottom of a 10x15 jelly roll pan with this bottom crust.
 
The bottom crust in the jelly roll pan.
Next, peel eight to ten small baking apples and slice them thin as for pie.  Spread these on top of the bottom crust.  On top of the apples, sprinkle two handfuls of corn flakes (to absorb some of the moisture from the apples), one cup sugar, and one teaspoon of cinnamon.  I also added some raisins because I love them--in everything.  


The apple, corn flake, sugar, cinnamon, (and raisin) mixture.
Roll out the other half of the crust and put it on top of the fruit mixture.  Seal the edges.  Beat the egg white and brush it over the top of the upper crust.

The Danish Apple Bars ready to go into the oven.  My second
one of these of the season looked a lot better.
Bake in a moderately hot oven for 45-60 minutes.  The recipe says to bake it at 400 degrees for that amount of time, but I think that an oven closer to 375 degrees for about forty minutes seems better.  You be the judge based on how brown you want the crust to be and how thickly you have sliced the apples.
Danish Apple Bars baking in the oven of Marjorie, the Margin
Gem cookstove.

The finished bars.  The second batch of these was not so dark,
partly because I didn't put the egg white on top.

And now for my favorite part of the whole thing: the frosting!

Some of you may recall that I had written about the Applishus booths at the Iowa State Fair and how wonderful I consider their frosting.  This recipe is so similar to what they use that it may be the very same recipe.  I found it on page 339 of the 463-page Kitchen Klatter cookbook, a wonderful collection of recipes that I sometimes call "the southwest Iowa kitchen bible."  This was a very popular cookbook in our area in the middle of the last century, and it remains so popular that they are very hard to come by.

For the frosting, melt 1/4 cup of butter.
 

A half stick of butter melting over the fire.

Gently brown the butter.


Add the browned butter to two cups of powdered sugar.  Add 2 Tbls. cream, 2 Tbls. hot water, and 1 1/2 tsp. vanilla.  Beat until smooth.


The finished frosting.
Drizzle frosting over the pastry.


Here are the same recipes in a little more accessible form:
 
 
Danish Apple Bars
 
Pastry:
 
2 1/2 c. flour
1 tsp. salt
1 c. vegetable shortening
1 egg yolk
1/2 tsp. vanilla
enough water or milk with the above to ingredients to make 2/3 c.
 
Directions: Mix as for pie crust.  Roll out half to cover the bottom of a 10x15 inch jelly roll pan.
 
Filling:
 
8-10 medium baking apples
1 c. sugar
2 handfuls corn flakes
1 tsp. cinnamon
 
Directions: 1. Peel and core apples, slice thin. 
2. Spread apples and rest of filling ingredients on bottom crust.
3. Roll out top crust and place over apple filling.  Seal edges.
4. Beat egg white and brush over top crust if desired.
5. Bake at 400 degrees for 45-60 minutes until apples are done.  (See what I think about this above.)
 
 Brown Butter Frosting
 
(p. 339 of the Kitchen Klatter Cookbook, The Prairie Press, 17th Printing, March 1978)
 
1/4 c. butter or margarine, melted
2 cups powdered sugar
2 Tbls. cream
2 Tbls. hot water
1 1/2 tsp. Kitchen Klatter vanilla flavoring
 
Melt butter or margarine over a low flame until golden brown.  Remove from fire and add sugar, cream, water and vanilla.  Beat until smooth and creamy.
 
 
I have also used this recipe for making apple strudel.  Instead of making the pastry into bars that will be cut into squares, I roll the pastry out, put the apple filling along one side, then start rolling the fruit up in the pastry.  It works pretty slick.  I hope you enjoy this recipe as much as I do.