I just wanted to share a quick bit of information about one of the major differences between the Margin Gem cookstove and the other two cookstoves that I have worked with extensively. When the Qualified range was in our house kitchen, you could always count on it taking around 45 minutes from the time that a fire was lit to the time when the oven reached 350 degrees. The Riverside Bakewell in the summer kitchen usually takes about the same amount of time, but it is less consistent--an issue that I attribute to the considerably poorer draw in the short chimney down there.
The Margin Gem is entirely different. Tonight, I started with a completely cold stove, lit the fire, and had a 400 degree oven in 15 minutes! This is the second time that I have managed this. I had heard that the Flameview Cookstove (another model manufactured by Margin Stoves) could do this, and I am pleased to find out that the Margin Gem is also capable. In my view, this feature goes a long way toward making cooking on a woodburning cookstove a more convenient experience and certainly less of an adjustment for those who trade in their gas and electric models for this more old-fashioned method of cooking.

This is a blog about cooking on a woodburning cookstove. Here you will find recipes, methods, other uses, and miscellaneous information about using a woodburning range. I've searched the net for any and all information about cooking on one of these amazing appliances, and I've found a lot of interesting things, but none of them have been what I've been looking for. Therefore, this is my attempt at creating what I've been in search of.
Tuesday, April 24, 2012
Monday, April 16, 2012
Apricot Bars in the Wood Cookstove
After this last weekend, I think I'm finally beginning to understand Marjorie the Margin Gem Cookstove better. As I baked these bars tonight, I felt like the two of us were much more "in tandem" than we have been so far. Jane Cooper, in her book Woodstove Cookery: At Home on the Range hits the nail on the head when she writes "You are as much responsible for the final product as the stove; rather than being your slave, it's a partner. You learn to cook together." Tonight, I'm happy to announce that I feel like Marjorie and I are finally coming to an understanding.
I promise a long post about how to operate the Margin Gem later when I feel like I've become an expert. The purpose of this post is to share with you all an excellent wood cookstove recipe that I found.
For my readers who are from outside my area of the Midwest, I need to first give a little background information. I found this recipe for Apricot Bars in the April 1974 issue of Kitchen Klatter Magazine. Kitchen Klatter was the longest running radio homemaker show in America. Broadcast from Shenandoah, Iowa, to several radio stations throughout the Midwest, Leanna Driftmier (and later her daughters) had a huge following among the homemakers of America's Heartland. The popularity of the radio show led to the publishing of a monthly magazine, the development of a line of flavorings and salad dressings, and then to the manufacture of some high quality cleaning products. The brand is now known as X-tra Touch and is still widely sold in our area of the Midwest.
This recipe is a great wood cookstove recipe because it takes advantage of the heat of the cooktop while using the oven, too. Of course, the deliciousness of the end product makes it a good recipe for any stove, but I always think that any recipe which would have meant turning on an extra burner or heating element in a modern stove is particularly well suited to the wood cookstove since that extra heat is already available from the same fire.
Keep in mind that I doubled the recipe, so the pictures below are going to show a larger version than what the captions indicate. Here is what to do:

And now a word from our sponsors: X-tra Touch almond flavoring really is the best almond flavoring on the market.*
*I did not receive any remuneration or other consideration from the kind people at X-tra Touch for my endorsement of their product. They know that I exist, but they are, at this writing, unaware that I am giving them free advertising on my blog. While I'm on this jag, by the way, I'd like to mention that their butter flavoring is really quite good, too. Oh, and did I mention that their laundry detergent is superior to anything else I've ever tried? I didn't? Then let me also just say that their laundry detergent is superior to anything else that I've tried. Their color-safe bleach has salvaged many a garment around here, as well. Oh, no! I totally forgot to mention their Honey Dijon Dressing--OUT OF THIS WORLD!

I promise a long post about how to operate the Margin Gem later when I feel like I've become an expert. The purpose of this post is to share with you all an excellent wood cookstove recipe that I found.
For my readers who are from outside my area of the Midwest, I need to first give a little background information. I found this recipe for Apricot Bars in the April 1974 issue of Kitchen Klatter Magazine. Kitchen Klatter was the longest running radio homemaker show in America. Broadcast from Shenandoah, Iowa, to several radio stations throughout the Midwest, Leanna Driftmier (and later her daughters) had a huge following among the homemakers of America's Heartland. The popularity of the radio show led to the publishing of a monthly magazine, the development of a line of flavorings and salad dressings, and then to the manufacture of some high quality cleaning products. The brand is now known as X-tra Touch and is still widely sold in our area of the Midwest.
 |
| The April 1974 edition of Kitchen Klatter Magazine. Leanna Driftmier, founder, is seated at left. |
Keep in mind that I doubled the recipe, so the pictures below are going to show a larger version than what the captions indicate. Here is what to do:
 |
 |
| Cut 1/2 cup butter, 1/4 sugar, 1 cup sifted flour, and 1/4 tsp. butter flavoring together with a pastry blender. |
 |
| Press into the bottom of a lightly greased pan. Pop this mixture into a moderate oven for approximately 25 minutes or until it begins to brown very lightly around the edges. |
 |
| The recipe says to use 2/3 cup dried apricots, but I think that a full cup is better. Put 3 tablespoons of water on the apricots in a saucepan. I put a splash of X-tra Touch apricot flavoring in too in order to freshen their flavor a bit. |
 |
| While the bottom crust is in the oven, simmer the dried apricots, watching to make sure that they don't boil dry. |

 |
| While the crust is baking and the apricots are simmering, beat two eggs. Beat in 1 cup brown sugar, 1/3 cup sifted flour, 1/2 tsp. baking powder, 1/4 tsp. salt, 1/2 tsp. vanilla (I used more), and 1/4 tsp. almond flavoring. |
*I did not receive any remuneration or other consideration from the kind people at X-tra Touch for my endorsement of their product. They know that I exist, but they are, at this writing, unaware that I am giving them free advertising on my blog. While I'm on this jag, by the way, I'd like to mention that their butter flavoring is really quite good, too. Oh, and did I mention that their laundry detergent is superior to anything else I've ever tried? I didn't? Then let me also just say that their laundry detergent is superior to anything else that I've tried. Their color-safe bleach has salvaged many a garment around here, as well. Oh, no! I totally forgot to mention their Honey Dijon Dressing--OUT OF THIS WORLD!

 |
| Drain any remaining simmering water from the apricots and add them to the brown sugar and egg mixture. |
 |
| Poor the brown sugar/egg/apricot mixture over the hot crust. |
 |
| Make sure that the apricots are evenly distributed. |
 |
| Pop it all back in a moderate oven for about 25 minutes or until it is a deep golden brown. |
 |
| When it is ready to come out, it will look puffy on the top. |
 |
| As it cools, the brown sugar/egg mixture falls and creates a gooey, yummy caramel layer. |
 |
| Sprinkle the top with a little powdered sugar once they have cooled quite a bit. I'm sorry that the picture is of such a small piece, but the rest are going to school tomorrow. This piece didn't even make it to the room where our computer is. |
Here is the recipe the way it appeared in the 1974 magazine:
Apricot Bars
1/2 cup butter or margarine
1/4 cup sugar
1 cup sifted flour
1/4 tsp. Kitchen-Klatter (now X-tra Touch) butter flavoring
2/3 cup dried apricots
2 to 3 Tbls. water
2 eggs, beaten
1 cup brown sugar
1/3 cup sifted flour
1/2 tsp. baking powder
1/4 tsp. salt
1/2 tsp. Kitchen-Klatter vanilla flavoring
1/4 tsp. Kitchen-Klatter almond flavoring
Combine butter or margarine, sugar, 1 cup flour and butter flavoring. Pat into a greased 8-inch square pan. Bake 25 minutes at 350 degrees. While this is baking, combine apricots and water and simmer until soft. (Add a bit more water if needed, but use as little as possible.) Beat eggs and combine with brown sugar, 1/3 cup flour, baking powder and salt. When blended and beaten smooth, add remaining flavorings and apricots. Spread on top of baked crust. Nuts may be sprinkled over the top if desired. Bake in 350-degree oven until golden on top, about 25 minutes. Remove from oven and cut in squares while warm. Sprinkle the top with powdered sugar.
As you can see, these bars are neither healthy nor economical, but I hope you enjoy these as much as I do!
Sunday, April 8, 2012
Little Things Mean a Lot
Happy Easter! We've had a wonderful day celebrating the resurrection of our Lord and Savior Jesus Christ with our church and our family, and now Nancy and I have finally gotten a little time to ourselves this evening. I just wanted to write a few notes about how things are progressing as we get to know Marjorie the Margin Gem cookstove. Tomorrow will mark one month that she has been installed, and with the exception of a couple of days when I was away for the All-State Speech Festival at the University of Northern Iowa, Marjorie has been fired every day. We haven't necessarily cooked something every day, but except for those two days that I was away, she has been faithfully heating our hot water.
First, I need to say right up front that all of the food that has been cooked on the Margin Gem has been good, and I haven't ruined anything yet. However, I'm still getting used to cooking on Marjorie, and I am a ways from being able to write a blog post which would give an expert set of instructions on how to manage her. Significant differences exist between how I operated our Qualified range and how Marjorie responds to those same tactics, and I am still learning. What I would like to address in this blog post is how some small aspects of the Margin Gem's design make it a much nicer stove than I have ever dealt with before.
One of the first things that I noticed about the Margin Gem was how clean the floor around her stays. The floor just beneath the left side of the Qualified range always had a little pile of ashes on it. Sweeping and vacuuming would only clean this mess up temporarily. Each opening of the white enamel door that covers the front feed and the ash drawer always sucked a few ashes out onto the floor, and each time the grates would be shaken, a few ashes would dribble out onto the floor, and when you pulled the drawer out in order to empty it, quite a few ashes would be dragged out onto the floor. The bottom of the ash drawer slid along the floor of the stove, which was part of the problem. As you can see in the picture below, the other part of the problem was that the bottom of the opening for the ash drawer was level with the floor of the stove
The Riverside Bakewell in the summer kitchen is constructed in much the same way except that it doesn't have the long front door which covers the access to the front feed and the ash drawer to suck out ashes each time that it is opened. Thus, it doesn't usually have quite as many ashes on the floor in front of it as the Qualified did.
The Margin Gem is constructed so that the ash drawer still sits on the floor of the stove, but a lip on the ash door fixes it so that the ash drawer actually sits about 3/4" lower than the opening of the door. This allows one to pick up the ash drawer and--at the very least--slide the bottom of the drawer across the lip to remove any ashes which are stuck to the bottom of the drawer and leave them in the bottom of the stove. Furthermore, if any ashes do drop as the drawer is removed, a small shelf is in place to catch them. This has made a drastic difference in how difficult it is to keep the hearth clean.
Another significant difference is the reservoir. The Qualified did not have a water reservoir at all, so my only experience with a water reservoir has been with the water reservoir on the Riverside Bakewell in the summer kitchen. The Riverside's reservoir is the conventional type in which a side of the copper water tank sits against the side wall of the stove. While this is certainly effective at getting water hot, it can take quite a while for the water to get hot, and recovery time is not very quick. Also, once the water is heated in that reservoir, it has to be dipped back out through the top for use.
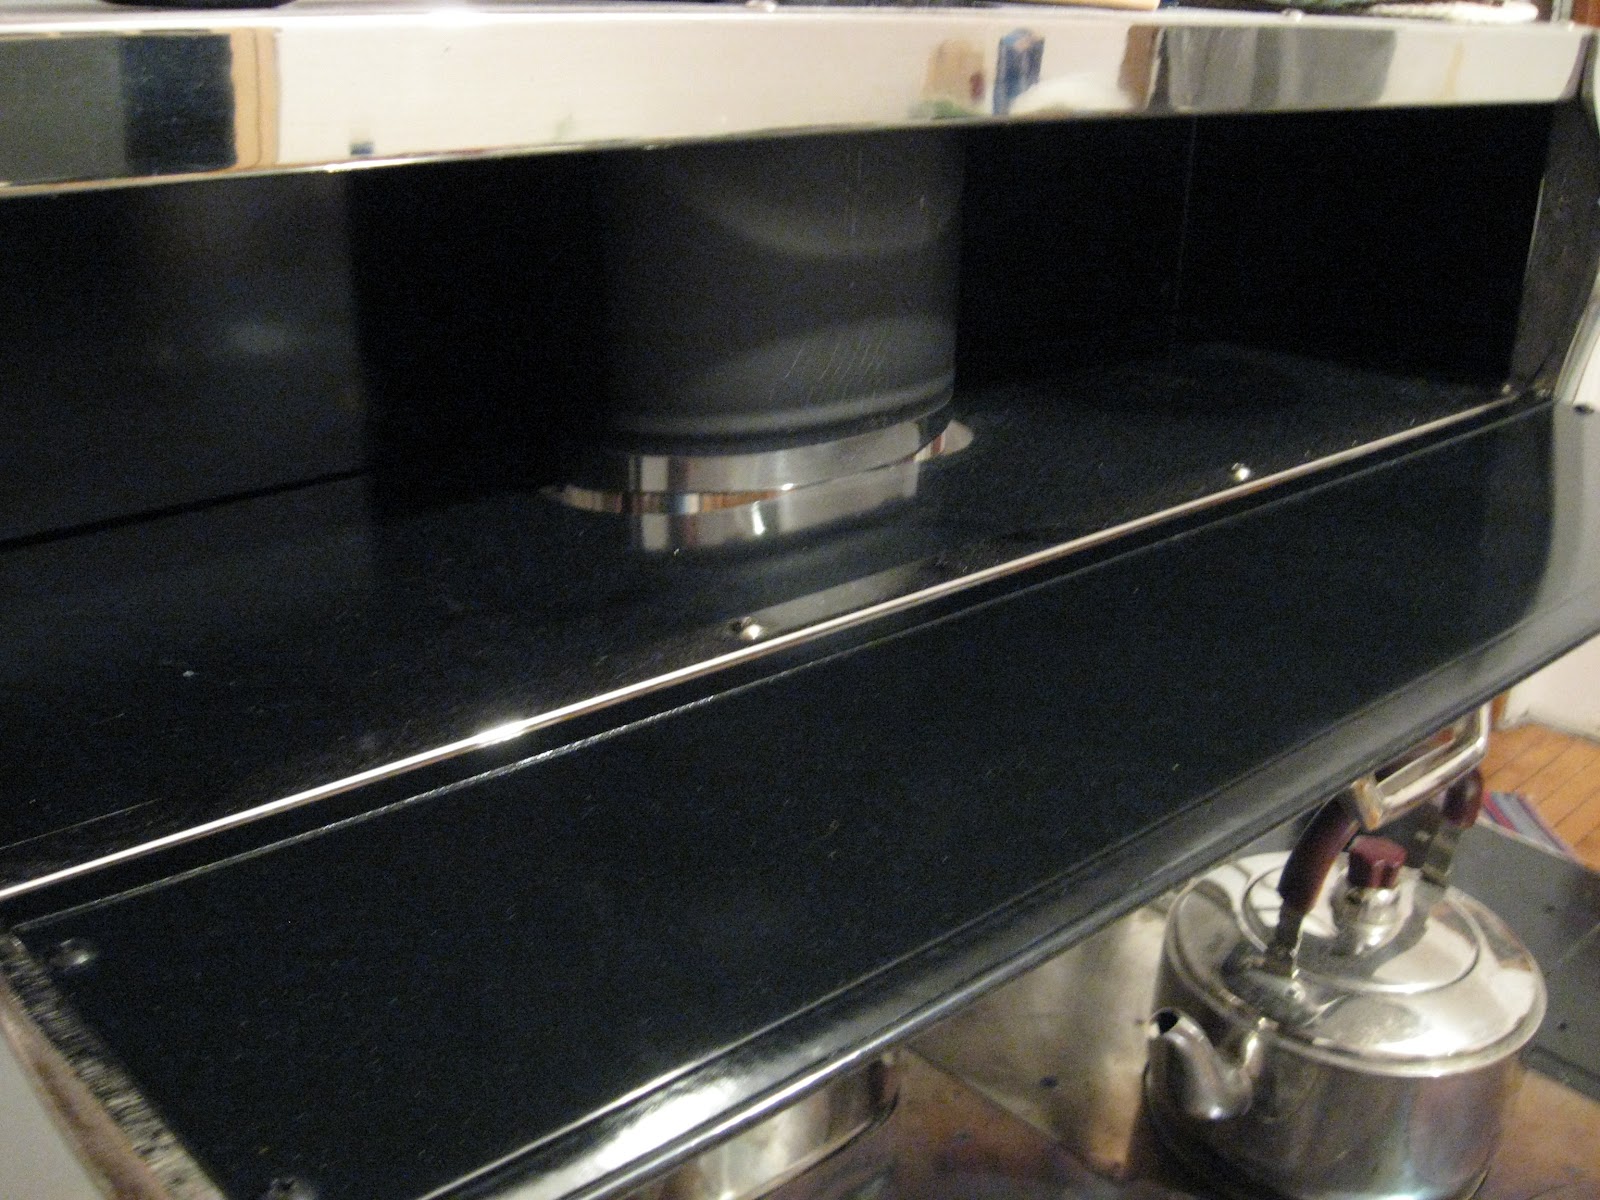
The Margin Gem's reservoir has what its competitor calls a "hyper-heat" reservoir. By turning a lever at the bottom of the reservoir to the right as shown in the picture below, a baffle in the stove diverts some of the smoke and heat from the fire so that it travels along the bottom of the reservoir before traveling under the oven and out the chimney. This enables the water to get quite a bit hotter than the conventional water reservoir design and also improves recovery time. The spigot, as shown in the second picture, allows the water to be drawn off the reservoir without having to go through the time-consuming and messy process of dipping it back out by hand.
Some of you may wonder why we chose the additional expense and bulk of having a reservoir when we also have the water jacket to heat our hot running water. The answer is simple: at some point, I would like to have our rainwater cistern back in operation, so I wanted to have a way to heat rainwater with the cookstove, and the reservoir was the only logical option. Until we are able to use rainwater, we will keep filling the reservoir with well water, thus increasing the hot water heating capacity of the stove.
The next feature of the Margin Gem that I like is the warming oven. The Qualified simply had a high shelf, but the Riverside has a warming oven. I cooked on the Qualified for twelve years before we hooked the Riverside up in the summer kitchen, and after getting a taste of what a warming oven can do, I wasn't going to purchase another stove that didn't have one. The uses for this ingenious contraption deserve their own blog post someday, but for now, let me just tell you that Susan Fenoff from Stoves and More Online, the company that we purchased the stove from, calls her warming oven her "Amish microwave." As my students used to say, " 'Nuff said."
The firebox on the Margin Gem is huge! I'm amazed at the size of log that fits in that thing.
Another thing that I find amazing about the Margin Gem is what an even baker it is. In the first picture below, you can see four loaves of bread which were all baked at the same time, and they were never turned! Furthermore, the bottoms of the loaves of bread were thoroughly cooked also, and I didn't have to do anything special. In the Qualified, I always kept a layer of fly ash on the top of the oven box just under the cooktop, AND the top rack of the stove was always in the very top position with a sheet of aluminum foil over it to keep the tops of things from cooking before the bottoms were done. I baked with the other rack resting on the floor of the oven so that whatever was cooking was only about a quarter of an inch from the oven floor. Furthermore, when baking breads and rolls, I would remove the bottom rack for the last five minutes of the baking time and finish baking them directly on the oven floor.
In the Riverside, I always put the baked goods on the stovetop for a few minutes to cook the bottoms thoroughly. You can see this in a picture below. Obviously, the Margin Gem has solved all of these problems for me.
I do have one complaint to share, and that is that the oven thermometer in the Margin Gem is dreadfully unreliable. The oven thermometer on the Qualified was spot on all the time, and I got spoiled. I have a small oven thermometer placed inside the oven of the Margin Gem to help me get this thing figured out, but I sure do miss being able to just glance at the oven door and know what was going on within. This seems to be something that everyone agrees about because one site even runs the disclaimer that the oven thermometer on the Margin Gems is for decorative use only. It's a small inconvenience in the grand scheme of things, though.
First, I need to say right up front that all of the food that has been cooked on the Margin Gem has been good, and I haven't ruined anything yet. However, I'm still getting used to cooking on Marjorie, and I am a ways from being able to write a blog post which would give an expert set of instructions on how to manage her. Significant differences exist between how I operated our Qualified range and how Marjorie responds to those same tactics, and I am still learning. What I would like to address in this blog post is how some small aspects of the Margin Gem's design make it a much nicer stove than I have ever dealt with before.
One of the first things that I noticed about the Margin Gem was how clean the floor around her stays. The floor just beneath the left side of the Qualified range always had a little pile of ashes on it. Sweeping and vacuuming would only clean this mess up temporarily. Each opening of the white enamel door that covers the front feed and the ash drawer always sucked a few ashes out onto the floor, and each time the grates would be shaken, a few ashes would dribble out onto the floor, and when you pulled the drawer out in order to empty it, quite a few ashes would be dragged out onto the floor. The bottom of the ash drawer slid along the floor of the stove, which was part of the problem. As you can see in the picture below, the other part of the problem was that the bottom of the opening for the ash drawer was level with the floor of the stove
 |
| A photo of the ash drawer of the Qualified range pulled partly out of its slot under the firebox. You can see that the bottom of the drawer rests on the bottom of the stove. Even at rest and in a state of disassembly in the utility room, you can see that a few ashes have collected on the lip of the bottom of the stove. |
 |
| The ash drawer on the Riverside Bakewell pulled out a little way. |
 |
| A closeup of the open ash door in an attempt to show how helpful the lip and shelf are in keeping the floor around the stove clean. |
The Margin Gem's reservoir has what its competitor calls a "hyper-heat" reservoir. By turning a lever at the bottom of the reservoir to the right as shown in the picture below, a baffle in the stove diverts some of the smoke and heat from the fire so that it travels along the bottom of the reservoir before traveling under the oven and out the chimney. This enables the water to get quite a bit hotter than the conventional water reservoir design and also improves recovery time. The spigot, as shown in the second picture, allows the water to be drawn off the reservoir without having to go through the time-consuming and messy process of dipping it back out by hand.
Some of you may wonder why we chose the additional expense and bulk of having a reservoir when we also have the water jacket to heat our hot running water. The answer is simple: at some point, I would like to have our rainwater cistern back in operation, so I wanted to have a way to heat rainwater with the cookstove, and the reservoir was the only logical option. Until we are able to use rainwater, we will keep filling the reservoir with well water, thus increasing the hot water heating capacity of the stove.
 |
| The lever on the reservoir turned to divert heat from the fire to the bottom of the reservoir. |
 |
| The spigot on the side of the reservoir. |
 |
| The Margin Gem's warming oven. |
 |
| A poor picture to demonstrate how large the Margin Gem's firebox is. |
In the Riverside, I always put the baked goods on the stovetop for a few minutes to cook the bottoms thoroughly. You can see this in a picture below. Obviously, the Margin Gem has solved all of these problems for me.
 |
| Four loaves of bread in the Margin Gem oven. They were not turned at all during baking, but cooked very evenly. |
 |
| You can see that the bottoms of the loaves were perfectly browned, and I had nothing to do with it! |
 |
| The first four loaves from the Riverside cookstove oven browning their bottoms on the cooktop while the next two loaves begin baking. |
Subscribe to:
Posts (Atom)