Saturday, June 13, 2015

Caramel Cheesecake Baked in a Woodburning Cookstove


When I was growing up, I was not a huge cheese lover, and I can remember my cousins being quite aghast when I declared that I did not like cheesecake.  Truthfully, I think that I had never had cheesecake at the time that I made that declaration, and I probably believed that it would have been made with cheddar or American cheese.  Thankfully, their mother, my aunt Ellen (a fantastic cook), educated me, and now cheesecake ranks among my favorite desserts.

The recipe that I'm going to share with you in this post is one that I developed after reading and trying caramel cheesecake recipes from the Internet.  I first made this for my family's Easter dinner, and it was a big hit.  I've made a few adjustments from that first try, and I'm very happy with the results.  This is one of the more complicated recipes that I have shared here on the blog, but the results are SOOO worth the effort.

Before you can make this cheesecake, you must have previously baked the Browned Butter-Pecan Cookies that I blogged about last November.  You'll need enough of these to make 1 1/2 cups of cookie crumbs when crushed.  The other ingredients you will need are as follows:

5 Tbsp. butter, divided
1 cup + 2 Tbsp. brown sugar, divided
4 eight-ounce packages of cream cheese
5 eggs
2 tsp. vanilla
1 tsp. burnt sugar flavoring
1/2 tsp. butterscotch flavoring
1 1/2 cups granulated sugar
1/4 cup water
1/2 tsp. fresh lemon juice
1 cup heavy cream
pecans for decoration

As with any wood cookstove baking recipe, the first thing that you must do is build or maintain your fire in such a way as to get the desired temperature for whatever you are cooking.  You will need a moderate oven (350 degrees) for both of the baking steps in this recipe, so plan accordingly.

Also, you are going to need a teakettle of boiling water when the cheesecake is ready to be baked, so place your teakettle over the firebox until it comes to a boil.  You can move it to a cooler spot on the cooktop later if it is boiling too hard while you are finishing the cheesecake preparations.

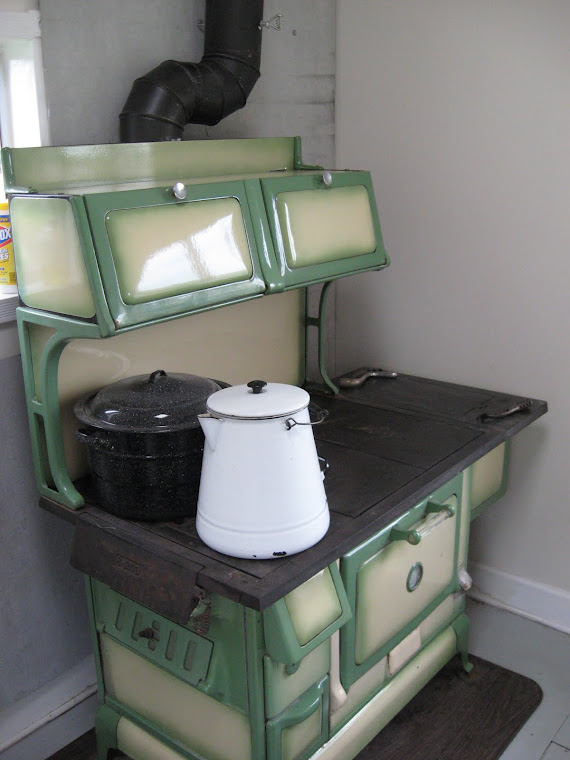
If you haven't had the foresight to let your cream cheese come to room temperature by letting it set out for several hours (this happens to me all the time), the thing to do is unwrap the cream cheese, put it in a glass mixing bowl and set it either in the warming oven or on the back of the reservoir.  I chose the reservoir, and it softened the cream cheese perfectly.
The cream cheese softening on the back of the reservoir.

While your oven is heating, you need to prepare your crust.  Start by greasing just the bottom of a 9-inch springform pan.  To the 1 1/2 cups of crushed Browned-Butter Pecan Cookies that I mentioned above, add 3 Tbls. of very soft butter and 2 Tbls. of brown sugar.

The cookie crumbs, soft butter, and brown sugar ready to be blended.
Combine the cookie crumbs, butter, and brown sugar with a fork.

The cookie crumb mixture ready to be patted into the bottom of
the springform pan.
Once you've mixed the crust, pat the crumbly mixture into the bottom of the springform pan.  Place the pan on a wide, heavy duty piece of foil and pull the edges of the foil up around the pan.  Bake the crust in your moderate oven for about 13 minutes until it begins to turn a rich dark brown.


Remove it from the oven to cool a little while you mix the cheesecake layer.

A few words about mixing a good cheesecake:

  • Use only a spoon, never a whisk, because you don't want to beat air into cheesecake batter.
  • Start by beating the sugar and the cream cheese very thoroughly.  I always think that it is best if you can no longer feel the grittiness of the sugar when you are done.
  • Add eggs one at a time, mixing thoroughly after each, but being careful not to "whip" them in.

So, to mix the cheesecake layer, beat 1 cup of brown sugar into the four eight-ounce blocks of softened cream cheese.  Add two tablespoons of melted butter.


The cup of brown sugar ready to be beaten into the cream cheese.

Add the five eggs, one at a time, incorporating thoroughly but not beating hard.

The three flavorings to help create the caramel taste.
Add the two tsp. of vanilla, 1 tsp. of burnt sugar flavoring, and 1/2 tsp. of butterscotch flavoring.  Pour the batter onto the baked and slightly cooled crust.

The cheesecake ready to be baked.

The cheesecake is going to be baked in a bain marie.  This is the official culinary name for a hot water bath.  What I do is use the liner from an electric roaster.  Place the foil-wrapped springform pan inside the roaster liner; then add enough boiling water from the teakettle to come about halfway up the side of the cheesecake pan.

Adding boiling water to the roasting pan to create the bain marie.
The cheesecake in the bain marie in the oven of the Margin Gem.
Bake the cheesecake for approximately 70 minutes in a moderate oven.  Of course, this is all relative in a wood cookstove, so you are looking for the cheesecake to look puffy but still jiggle a little bit in the center.  It may begin to brown a little on the top, too.  Usually, I recommend baking with smaller pieces of wood so that you have more control over the fire, but since the baking time for this cheesecake is so long, and since you need only one oven temperature, larger pieces of wood work just fine.

I find that the large roaster liner and the tall foil seem to effect the thermometer in the oven door of the Margin Gem.  It appears that they tend to make the thermometer register a little cooler than the oven actually is.
The baked cheesecake.  You can see that I
probably should have turned this one mid-baking
because the firebox side is clearly a little darker
than the reservoir side.  It didn't have any ill
effect, though.
Place the hot cheesecake in the refrigerator until thoroughly cooled or over night.  This will make your refrigerator work hard and draw more electricity than usual, so maybe this is a dessert that you'd rather bake in the wintertime when you can put the cheesecake on an enclosed back porch or something like that.

Once the cheesecake is cool, it is time to make the caramel topping.  In a saucepan, combine the one and half cups of white sugar with the quarter cup of water and the 1/2 tsp. lemon juice.  Over a hot fire, cook this mixture until it becomes a light brown.  Don't get excited about stirring this too much.


The cooked sugar, water, and lemon juice just before the cream is added.
When the sugar, water, and lemon juice have cooked sufficiently to look like the picture above, add the cup of heavy cream.  Be aware that when you do this, the mixture will bubble furiously, and you may see the sugar solidify for a little while.  Don't be afraid!  It will become liquid again as it heats up once more.  Boil the caramel sauce for several more minutes until it is obviously getting thicker.  I test it using the cold water method that I talked about for making caramels.  Don't cook it until you get to the soft ball stage, though.  You want to remove it from the heat a little before that.

Once you have determined that the caramel sauce has cooked enough, remove it from the fire and put it in the fridge (or on the cold porch) for about a quarter of an hour until it gets to the point where it has thickened but can still be poured.

Removed the sides from the springform pan so that the cheesecake is on only the bottom.  Put the cheesecake on whatever plate or stand you plan to serve it from and then spread the caramel sauce over the top of the cheesecake.  Decorate the edges with pecan halves.

The finished caramel cheesecake.
I hope you enjoy this as much as we have.  The one in the pictures above was taken to a church potluck on May 31st where we honored our pastor on his retirement.  I hope it was good; it was gone by the time I got to the desserts, but that was okay because I had an excellent lemon cake instead.

Thursday, June 11, 2015

First Time Cooking in the Summer Kitchen in 2015

I know I'm an odd duck.  I'm used to it, and I'm fine with it, so please don't point it out. 

We had started the electric water heater in the early days of May, and I started whining to Nancy about how much I missed the wood cookstove after only one day of cooking on gas, so we've had Margery the Margin Gem cookstove going intermittently.   On May 30th and 31st, for example, I had a lot of cooking to do and so had fired her up.  One of the things that I cooked on those days was a caramel cheesecake--stay tuned for the upcoming post!  However, I had been cooking mostly on the gas stove since then.

Sorry, but I feel the need to vent a little about our propane range.  You see, I was raised in a home with an electric stove; in fact, the only person on both sides of my family to have a gas stove is my aunt Cheri, who has simply had gas stoves at various times during her many travels and moves.  Nancy, on the other hand, was raised with a gas stove, and her grandmother also had one.  Thus, since I got the wood cookstove that I wanted, the modern gas range next to it is the compromise that proves my love for my wife.

Of course, my opinions weighed heavily in our choice of the gas range, and I think we chose well.  I'm just surprised and frustrated by a couple of the characteristics of today's gas range.  I've cooked on only four gas ranges: the tiny, ancient, unbranded one in our church basement, the 1950s Crown in my parents' basement that we use to freeze sweet corn, the new one in our kitchen now, and the old Hardwick that my grandparents installed in our basement years ago in case of an extended power outage (used twice in my recollections of growing up here).  When we gutted our kitchen in 2011, I cooked on the Hardwick for about a year.  I don't mind cooking on old gas ranges, but our new stove (and every gas stove that is available on the market now) has the cooking vessels sitting so far above the gas burners that the amount of heat that escapes up the sides of the pots is just unreal.  Also, I'm continually surprised at how much heat comes out of the oven vent!

All of this is to say that in the 95 degree heat that we had on Tuesday, I was not excited about cooking supper in the house, even though the air conditioning was on.  The thought of all the heat that comes into the room from the gas range was enough to make me want to have just a bowl of cold cereal for supper, but our nephews were here, so we had to be more responsible and balanced in our meal choice.  Hence, the boys and I trooped down to the summer kitchen and started the Riverside Bakewell.

"But, Jim, wasn't it already 95 degrees in the summer kitchen before you even started the stove?" most sane observers would ask.

Well, yes.  It was already hot in there, and we made it hotter.  I already told you that I know I'm crazy.

We cooked some marinated chicken and macaroni and cheese (which with carrot sticks and fresh strawberries constituted our supper), and then I baked banana bars down there afterward.


Supper cooking on the Riverside Bakewell cookstove.

So yes, it was hot down there, and yes, the summer kitchen is a full 75 paces away from the house kitchen, but cooking on a woodburning cookstove just feels right.  If I could explain it any better, I would.  Surely some of you loyal readers who have your own cookstoves know what I'm talking about and could agree with me in the comments section below so that I don't have to feel quite so weird, right?

I don't know the history of the Riverside Bakewell cookstove as I bought it on an estate auction, but when I'm cooking a meal on it, I can't help but wonder how many meals it turned out before it was put out to pasture for a time.  How many Thanksgiving dinners did it cook?  Did it help keep a family from freezing to death in the notorious winter of 1936?  How many corncobs has it consumed in its lifetime?  As you can see, I have an overactive imagination.  Anyway, add one more meal to the count!