Sunday, October 28, 2012

Adventures: First Time Pressure Canning on the Margin Gem and First Time Using Tattler Lids

A dishpan of broccoli from our garden.

Even though we've had a couple of hard freezes, the broccoli plants in our garden have begun to produce in earnest since we've had several nice rains lately.  We both love broccoli cooked, raw, or in casseroles, so we're happy for the late harvest.

We've canned broccoli before.  While it isn't the prettiest canned vegetable to look at, it is quite convenient to be able to open a quart jar, drain the water off, and have broccoli that is already defrosted and ready to be stirred into a couple of our favorite 70's era casserole recipes.  Thus, we decided that we would pick what is very likely the last broccoli of the 2012 growing season and try pressure canning on the Marjorie the Margin Gem for the first time. 

I also decided to take this opportunity to try using Tattler reusable canning lids for the first time.  We had bought a trial box of these lids when we were at The Dutchman store in Cantril, Iowa, back in June, but I had completely forgotten about them while we were canning during the summer.  We buy our canning lids in bulk sleeves from the Amish stores down in Redding, Iowa, at very reasonable prices, but if we could reuse them indefinitely, that would be quite a savings in the long run.

After picking the broccoli, we soaked it in salt water to wash it and draw off any insects.  Surprisingly, a few tiny bugs did surface despite the chilly weather.

 
Then, I placed the canner over the fire and scalded the Tattler lids.

Tattler reusable canning lids waiting in hot water.  (Forgive
the looks of the teakettle.  It has a date with a scouring pad
scheduled in the near future.)
We trimmed the broccoli and cut it into the size pieces that we want; then, we packed it fairly tightly into quart jars.

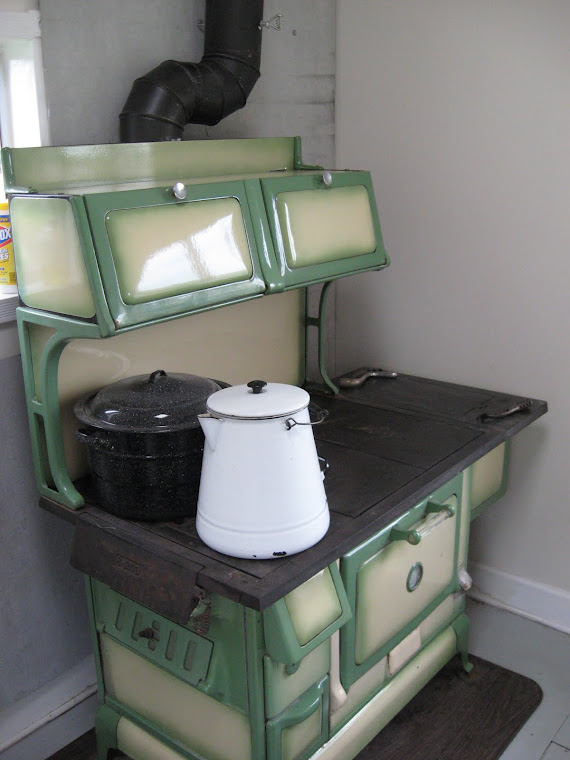
Broccoli waiting in quart jars on top of the reservoir.  The
teakettle has been moved closer to the fire to boil briskly again.
We put the lids on the jars, loaded them into the canner, and put the lid on.  The canner exhausted for approximately ten minutes.  I covered the petcock with the weight, and "the dance" began.  The following pictures are posted in chronological order, showing how many different positions the canner had to be in in order to reach and maintain the approriate amount of pressure for the appropriate amount of time.


A little too much pressure showing on this one.  I moved it back
toward the right for a little while next.


There were a few other positions that I didn't snap a picture of, but these pictures show the general progression.  I did not fuel the fire while the canner was maintaining pressure, but it would have been best to have added only small pieces of wood so as not to run the risk of cooling the fire too much while waiting for a large log to ignite.

Once the processing time was finished, the trivet that you see resting on the reservoir in the pictures above was moved to the ledge on the kitchen cupboard, and the canner was placed there to cool.  Remember, a pressure canner has to be completely removed from a woodburning range in order for the pressure and temperature to drop at the correct speed.

As you can see, the canner had to be moved around a lot more in this canning session than in the one that I photographed for my original post about pressure canning on a wood cookstove.  Keep in mind that there were several differences, though: six pints/seven quarts, different canner, different stove, different processing time, and different weather conditions.  Even with the increased movement of the canner in order to maintain constant pressure, I don't really think that I adjusted the canner's placement any more frequently than I would have adjusted an electric or gas burner.

All went well, and every jar sealed.  I'm anxious to see how well the seal holds and how difficult they are to get into without damaging the rubber ring.

The blue jar on the left shows what a Tattler lid looks like after
the metal band has been removed.

Notes:

A) The directions on the Tattler box simply say: "When jars have cooled, remove metal band and determine by feel if lids are securely sealed."  Tattler lids don't make that familiar "ping" sound when they seal.  However, before sealing, the lids have an obviously convex curve to them.  When they are sealed, they are noticeably concave.

B) Nancy finds the odor produced while canning broccoli particularly offensive and likens it to the odor of dead mice.  I have to admit that it isn't the most pleasant smell, so consider yourself fairly warned that this may not be an activity you would want to complete before having a house full of company--unless, of course, you don't particularly like the company that is coming and hope that they'll either leave in a hurry or think twice before coming again. 

Tuesday, October 23, 2012

In Hot Water, Part III

Wow!  The posts about heating water with a wood cookstove have generated a great deal of interest over the past few days, and I've received some great questions. 

I'm going to do something a little different with this post.  I've spent an embarrassing amount of time reading information about how to heat the domestic hot water supply with a wood cookstove, but it was because of my research that we were able to make what I think were wise decisions regarding our system.  What I'd like to do here is share the reference materials that we used so that others can benefit from them, too. 

1) "Hot Water from Your Woodstove" --booklet written by Jay Lehman and sold by Lehman Hardware.  Available for purchase online here.

Includes diagrams and information about various styles of systems.

2) "Heat Water while Heating Your Home" --article by Tim King in the March/April 2011 issue of Countryside magazine.

Pictures and article about a Waterford cookstove connected to a boiler in tandem with an electric water heater.

3) "Free Hot Water from Your Wood Cookstove" --article by Patricia Greene in the January/February 2010 issue of Countryside magazine.

Pictures and article about an Oval cookstove connected to a salvaged modern water heater for the tank.  This article is available online at www.countrysidemag.com

4) "Get Tanked!  Keep Hot Water Flowing on Your Homestead" --article by Ned Wood in the July/August 2011 issue of Countryside magazine.

Pictures and article about a different Waterford cookstove hot water heating system used in conjunction with a solar system.

5) I don't even know what to call this last one.  On a Google image search using the phrase "hot water from a cookstove," I ran across a picture of a beautiful blue Oval cookstove which was connected to a boiler.  When I clicked on it, it took me here to see more detailed pictures of the Oval and boiler.  This system has an electric circulating pump connected to it.

I know that this post about hot water is pretty "dry" reading, but I hope that these materials can be of as much assistance to others as they were to me.

Saturday, October 20, 2012

In Hot Water, Part II

A couple of days ago, I received a comment on the post called In Hot Water from a reader asking for more information about our Margin Gem and hot water system.  Her questions were quite good, and I felt they deserved their own blog post.

As we are entering the heating season, our Margin Gem has been fired pretty regularly.  In fact, we've only had a handful of days in the last month when we've had our electric hot water heater going.  There have been days when we've intentionally fueled the fire in such a way as to keep the stove heating while we are gone during the day, and it has almost always had a fire in it overnight.  However, we still haven't been firing the cookstove at full tilt like we will when our weather is truly cold. 

While the stove is in use, we are quite happy with the amount of hot water that we have--and unless there are unforeseen circumstances (on one night, a log didn't burn the way I had expected that it would), the water that we do have is HOT! 

Below is a picture of the firebox of the Margin Gem taken while standing in front of the stove.  I let the fire die down enough this afternoon so that we could remove the piece of the stove top that covers the firebox in order to snap the picture.  The pieces of metal in the corners and in the middle of the right side are the air jets for Margin's Air Jet re-burn design.  At times when you open a top lid, you can see flames curling from those holes.  At the top, the right side, and the lower half of the bottom, the light gray panels are firebrick.  The entire left side of the firebox is the waterfront. 

Top view of the Margin Gem's firebox with water-
front on the left.
Just like hot air, hot water rises.  Thus, cooler water from the bottom of the range boiler flows into the bottom of the water jacket.  There, it is heated by the fire and then flows up out of the top of the water jacket to the top of the range boiler. 


The pipes carrying water to and from the waterjacket.
(Ughh!  I hate how a camera flash makes dust that, in
normal light, is imperceptible to the naked eye
 suddenly appear unduly tragic!)
The Vaughn range boiler behind the Margin Gem. 
In the picture above, the pipe which enters the tank on the left side is the one which carries the hot water into the boiler.  The two pipes coming out of the top of the tank are both exits.  The one on the left has a temperature pressure relief (TPR) valve on it for the tank and is connected to the other two TPR valves in the lines going to and from the waterfront and is plumbed into the basement to exhaust near a floor drain.  The pipe coming out of the top right side of the tank is the hot water which serves the house.  When we open a hot water tap in the house, the hot water flows out of the top of the tank and down to a mixing valve which is located where the cold water enters the right middle side of the boiler.

The mixing valve which allows us to temper the hot water before
circulating throughout the house.

The end of the pipe that is attached to the TPR valves.
The above picture shows the end of the pipe which is attached to the TPR valves.  It is located in the basement and is aimed toward a floor drain which is a few feet away.  The dark stain on the concrete below the opening is from a few drips of water which leaked out during the Margin Gem's first firing.  No noticeable moisture has occurred since then.  Originally, I thought that this pipe should have been plumbed directly to the sump pit in the basement, but the plumber felt that this was unnecessary.  I was concerned about this because I was afraid that if a valve should release, there was a chance that someone could be standing in the way of the hot water coming out of the end of this pipe.  However, the only time that anyone would be standing there would be if he or she was using the shower or the wringer washer.  As it turns out then, the plumber was right because both of these activities would use enough hot water and release enough pressure to preclude the valves from releasing.

To date, the TPR valves have not released.  I'm surprised at this because some of the things that I have read seemed to indicate that this could happen on a fairly regular basis, and if it does, each TPR valve is supposed to be replaced after it has released three times.  These valves were purchased from Lehman Hardware and are supposed to release at 210 degrees or a pressure rating of 125 PSI.  We do bear in mind, though, that as I said earlier, we have not yet been operating the cookstove at its peak output for long periods of time, so we'll see what happens when it is truly cold outside.  The one thing that we also know is that colder outdoor weather will also mean that the water entering the system will be much colder, too.  This may be sufficient to offset the additional heating capacity of the hotter fire.

One thing that is different about heating water with the cookstove as opposed to electricity or gas is that as the water heats, if no hot water has been used for awhile, the first time that a hot water tap is turned on there is noticeably more water pressure for a second or two while the pent up pressure in the system releases through the faucet.  This pressure is neither dangerous nor excessive, and might not even be noticed by people who routinely have more water pressure than our gravity fed system provides us.

I recorded in my original post about wood heated hot water that we had had some initial difficulty in adjusting the tempering valve due to its having been damaged slightly during installation.  Because the indicator plate on the black part of the valve fell off, we have no idea where the temperature of the valve is actually set.  I measured the hot water temperature at the tap this morning at 169 degrees.  That's HOT!  If we had children here, we would definitely adjust the valve to a more reasonable setting, and we may have to adjust it down as the stove is regularly kept burning at a hotter rate.

Our blog reader asked if we noticed a drop in the space heating capacity of the range because it is also heating our water.  My answer to that is that we don't know how the Margin Gem would have acted without the waterfront because it came equipped with it and you cannot fire a range with a waterfront unless the waterfront is connected to a water system.  However, here are two observations that may be helpful:

1) One thing that I have noticed about the Margin Gem that is different from the other two cookstoves that I have used is that the left side panel of the stove is always cool enough that you can touch it.  I don't know whether this is because the water jacket is on the left side of the firebox or just due to the design of the stove (note the louvers in the side panel in the picture above).  I like this feature because now my legs don't have to roast while I'm standing over those pesky dishes that have "stir constantly" in their directions. 

2) The presence of the range boiler in the kitchen adds a great deal of thermal mass to the whole set up.  When the water in the boiler is hot, you cannot comfortably lay your hand on the outside of the boiler.  If the fire is allowed to go out and little hot water is used, the boiler will radiate noticeable heat for quite some time.  When you figure in the radiant surface area of the boiler, it seems to me like any change in room heating capacity is negligible if it exists at all.

Some things that you read indicate that having a woodstove heat your domestic hot water cools the combustion in the stove sufficiently to increase creosote buildup.  While it is true that the waterjacket has creosote covering the side of it, this is normal and actually beneficial.  It is also true that coals and firewood resting against the waterfront don't seem to burn quite as hot as in the right side of the firebox sometimes.  However, as far as increased creosote in the rest of the stove or chimney, all I can say is that I haven't noticed it.  Perhaps this is due to the Margin Gem's air jet re-burn design.  At any rate, I would chalk it up to the stove being airtight and the fact that we aim for a long slow burn overnight and while we are away during the day rather than the presence of the waterfront.

Overall, we are very happy with the Margin Gem and Vaughn range boiler so far.  I wish that we'd been heating our water with wood much earlier now that we know how easy and efficient it is.

Sunday, October 14, 2012

"Pot-au-feu"

I've just finished eating one of the best suppers I've had in a very long time.  The quality of the supper was directly correlated to our use of a woodburning cookstove, so I feel it necessary to blog about it.

Since both of us are gone during the winter days, and since we had never had an airtight cookstove that would hold a fire all day or all night, we've never tried using a stock pot to make pot-au-feu.  Literally translated, "pot-au-feu" means "pot on the fire."  This traditional French dish usually involves cheaper cuts of beef, which need long cooking times to become tender, and vegetables cooked together.  The pot would be left on the fire at all times, vegetable and meat scraps would be added as they became available, the grease skimmed from the top occasionally, and a quick supper of a once-in-a-lifetime soup could be had when desired.

Now that it has gotten colder and the stove is being fired daily, I decided to try my hand at this interesting dish.  About two weeks ago, I had grilled T-bone steaks (the last from our home-grown steer).  The bones from these steaks had a little bit of meat left on them, and they formed the base of our first pot-au-feu.  I put them in the eight quart stock pot and filled it about half full of water.  We had a half of an onion in the refrigerator that was beginning to look a little tired around the edges, so I cut it up and put it into the kettle with the beef bones.

Over the course of the next several days, all manner of leftovers were put into the kettle: pieces of tomato left from chicken veggie wraps, bones from pork steaks, an odd scrap of bacon that escaped repackaging when we were dividing up the pile of it which we purchased on a bulk meat sale, and even the bones left from fried chicken. 

During the first week, we were experiencing chilly weather, so the pot stayed on the stove all of the time.  I had read somewhere that as long as the pot was brought to a brisk boil each day, the broth wouldn't spoil, and so that is what I did.  The weather last week was a bit warmer, so we were not banking the fire to last throughout the day.  I removed the kettle from the stove and refrigerated it.  This gave me the opportunity to skim the small amount of fat which congealed on the top.  I put the pot back on the stove yesterday morning, knowing that the stove would be fired all day for other cooking purposes.  In fact, that is when I put the chicken bones in.  I was a bit nervous about that, by the way.  It seemed rather strange to be putting fried chicken remains into a pot of boiling water, and I had read that you should be careful about putting poultry pieces into pot-au-feu because of the very small bones that can present a hazard.  However, I did it anyway, and you cannot imagine what a delicious aroma issued forth from the stockpot after that!

All of this brings us to this afternoon.  I strained the broth, picked the meat off the bones and returned it and the tomato and onion chunks to the broth.  The broth was horribly bland, so I seasoned it with salt and pepper, garlic salt, dried parsley, a couple of bay leaves, and a handful of dried onion flakes.  I cocked the lid of the kettle so that it could reduce for awhile.  It simmered for a about an hour, and then I emptied a baggie of leftover homemade angel hair pasta into it.

While that cooked, I whipped up some buttermilk biscuits, using a new mixing method that a friend sent to me over a year ago via e-mail.  Instead of cutting the shortening into the flour, you melt the shortening and then beat it into the cold buttermilk or milk.  The result is that the shortening is evenly distributed.  It worked splendidly.

At any rate, by the time the biscuits were done, the soup had reduced to about half of its original volume of liquid, and it was wonderful.  As I see it, the best part of the whole thing was that we had an amazing soup which cost us nothing more than a tiny bit of seasoning, and the making of the soup actually reduced our food waste.  Pot-au-feu is definitely not a dish that one would attempt with a modern stove, but it is ideally suited to the wood cookstove, and I have a hunch that we will be enjoying quite a few of these over the next few months.

Our first bowl of "pot-au-feu."

Saturday, October 6, 2012

Winterizing a Cookstove

I received a comment yesterday asking for my suggestions about what to do to protect an outdoor cookstove during the winter.  Since our weather has gotten colder, I need to get down to our summer kitchen to winterize our Riverside Bakewell.  Though the Riverside is not technically an outdoor stove, it is exposed to freezing temperatures, and snow frequently sifts into the summer kitchen via the air vents near the ceiling and lands across the stovetop.  Therefore, we have a ritual that we perform every fall to protect the cookstove from the elements.

Here is what we do:

1) Drain the reservoir and wipe it dry with a terry cloth towel.

2) Clean the stovetop with a grill brick as you can see us do to the Margin Gem a couple of posts ago in  Cleaning a Woodburning Cookstove.  We then coat the stovetop with vegetable oil.  The only exposed cast iron on the Riverside Bakewell is the cooktop.  The rest of the stove is enameled, so there is no need to protect the other surfaces.

Side Notes: This step may vary depending on the type of stove that one has.  If a stove has surfaces that are not enameled, or if it is likely that a stove needs additional protection, I would put a layer of stove black on all of the surfaces that are not otherwise protected.  After the stove black is worked into the metal and well buffed, I would apply the layer of vegetable oil.  I've used three different kinds of stove black, and my preference is certainly a semi-paste called William's Stove Polish.  If your local hardware store does not carry it, it is widely available online.  If you choose to black your cooktop, be warned: in my experience, stove black has a habit of attaching itself to things that you'd rather it didn't.  If a stove is to reside outdoors, though, skipping the stove black seems risky.

I would not coat any enameled part of a stove with oil.  If you do, you'll want to completely remove the oil from the enamel before firing the stove again, and I imagine that this will not be an easy task.

3. I then start a small fire in the stove with little sticks or corncobs.  This fire is not intended to last long or be very hot.  The intent is just to give the new layer of vegetable oil a chance to seal, and to thoroughly dry the reservoir.  Under ordinary circumstances, a stove should NEVER be fired with an empty water reservoir.

4. Once the fire is out, remove all ashes and soot from the stove.  (Don't forget that a bit of fly ash frequently lands inside the oven, too.)  When wood ash combines with water in any form, potash lye results, and this can be very corrosive to metals.

These steps are sufficient for our Riverside Bakewell.  But all situations are different.  In her book Woodstove Cookery: At Home on the Range, Jane Cooper writes the following:

"If you plan to store the stove in a garage or shed, it will also be necessary to coat the stove's metal with oil, grease or petroleum jelly--anything without salt which retards rust.  Don't, however, think of this as a way to recycle old crankcase oil or motor oil because they will do nasty things to your house when the stove is finally re-fired."

Of course, if the cookstove is going to be fired outdoors, the issue of what will happen to the burning layer of oil may be considered somewhat less of a concern.  Just remember that whatever was applied to the stove is unlikely to burn off entirely except for on the part of the cooktop that is over the center of the firebox.  Furthermore, it would certainly be folly to coat the inside of the oven with anything other than stove black and an edible oil or shortening.  Even that will have to be burned off enough that it will not impart its own flavor to whatever is being cooked in the oven once the stove is put back into regular use.

The bottom line is that moisture is the enemy of the unused cookstove, so any steps which can be taken to keep the stove dry are advisable.

If anyone reading this has something else that they would advise, please make good use of the comments field to help a fellow wood cookstove cook.

Tuesday, October 2, 2012

Answer to a "Grate" Question

New blog follower "Return to Basics" asked a question about the firebox grates in the Qualified Range via a comment on the post about cleaning a cookstove.  Here is the answer.

The grates in our Qualified Range are what are called duplex grates.  This style of grate was very popular on old style ranges, but is not so common on the modern woodburning range.  Duplex grates consist of two, two-sided grate bars which lie horizontally on the bottom of the firebox.  These two grate bars have gears called grate cogs on the front of them so that when the grate shaker is attached to the left one, both rotate about a quarter turn to shake ashes down to the ash drawer.

Truthfully, the grates from the Qualified are what I miss the most about that cookstove.  While I wouldn't trade the new Margin Gem, ash removal is more difficult with its poker grate since I was used to a couple swings of the grate shaker resulting in a completely empty firebox.

The operating instructions that came with the Qualified state the following:

"If you are using wood for fuel, turn the grates so the holes are turned up, using the grate shaker provided with your unit.  If you use coal as a fuel, turn the solid side of the grates up."

The Monarch Range which belonged to my great-great grandmother (which my grandparents still had in their possession until some band of reprobates stole it while I was in college) actually had a little sign on the front that said "wood" when its duplex grates were turned with the holes up and "coal" when the solid side was up.  From what I have seen on the Internet, many models of the Monarch Range made in the 1920's had this feature.

A picture of the firebox in the Qualified Range.
This picture is taken while standing at the front of the
range, so the drafts are on the left, and the oven is
on the right.  Here, the grates are in the position to
burn wood.

Here the grates are turned to the coal-burning position.
A picture of the front door of the firebox, which
is only accessible once the front enameled surface
door is opened. 

Here the grate shaker is attached to the grate bolt.

The Riverside Bakewell down in the summer kitchen is equipped with duplex grates also.  The solid side of them is slightly different than the solid side of the grates in the Qualified because they have small perforations to let some air up to the fire.

While I like the convenience of duplex grates because they make emptying the firebox so efficient, their main purpose was to facilitate the burning of coal.  A coal fire needs to be shaken every so often so that the ash falls away from the burned edges of the coals and oxygen is permitted to get to the inner part of the coal where combustion is then taking place.

An interesting note about the Qualified Range is that the pattern for the range has actually been owned by several different companies over the years.  I have seen pictures of Qualified Ranges that were manufactured in the 1920s or 1930s, and the similarities to the stove that I purchased nearly seventy years later are remarkable.  My Qualified was manufactured in January of 1997.  At that time Qualified Ranges were made by Hitzer Inc. in Berne, Indiana.  By 2000, Hitzer had quit making the Qualified Range.  I was told that Hitzer subcontracted the porcelain enamel work and were having difficulty finding a company who could get the enamel to stick to the steel well enough for their standards, and for this reason they halted production of the Qualified Range. 

I have the list of repair part numbers that came with my Qualified and would be happy to share part numbers if anybody needs them.  The Hitzer company is still in business and perhaps they would either carry repair parts or know where one could find them.  You can find their information at this website: www.hitzer.com.  As always, if anyone has any further questions, I welcome them and will do my best to answer.